> ## Documentation Index
> Fetch the complete documentation index at: https://docs.idemeum.com/llms.txt
> Use this file to discover all available pages before exploring further.
# Install control agent
> Install idemeum control agent on Windows or macOS.
## Single tenant installation
Here you install control agent and pair it directly with your tenant. If you need to install agent in bulk and pair with multiple tenants (MSP setting) navigate to the next section.
### Installation
Navigate to your idemeum admin portal, click `Install agent` button, then choose `Control agent` and copy the installation script for Windows.
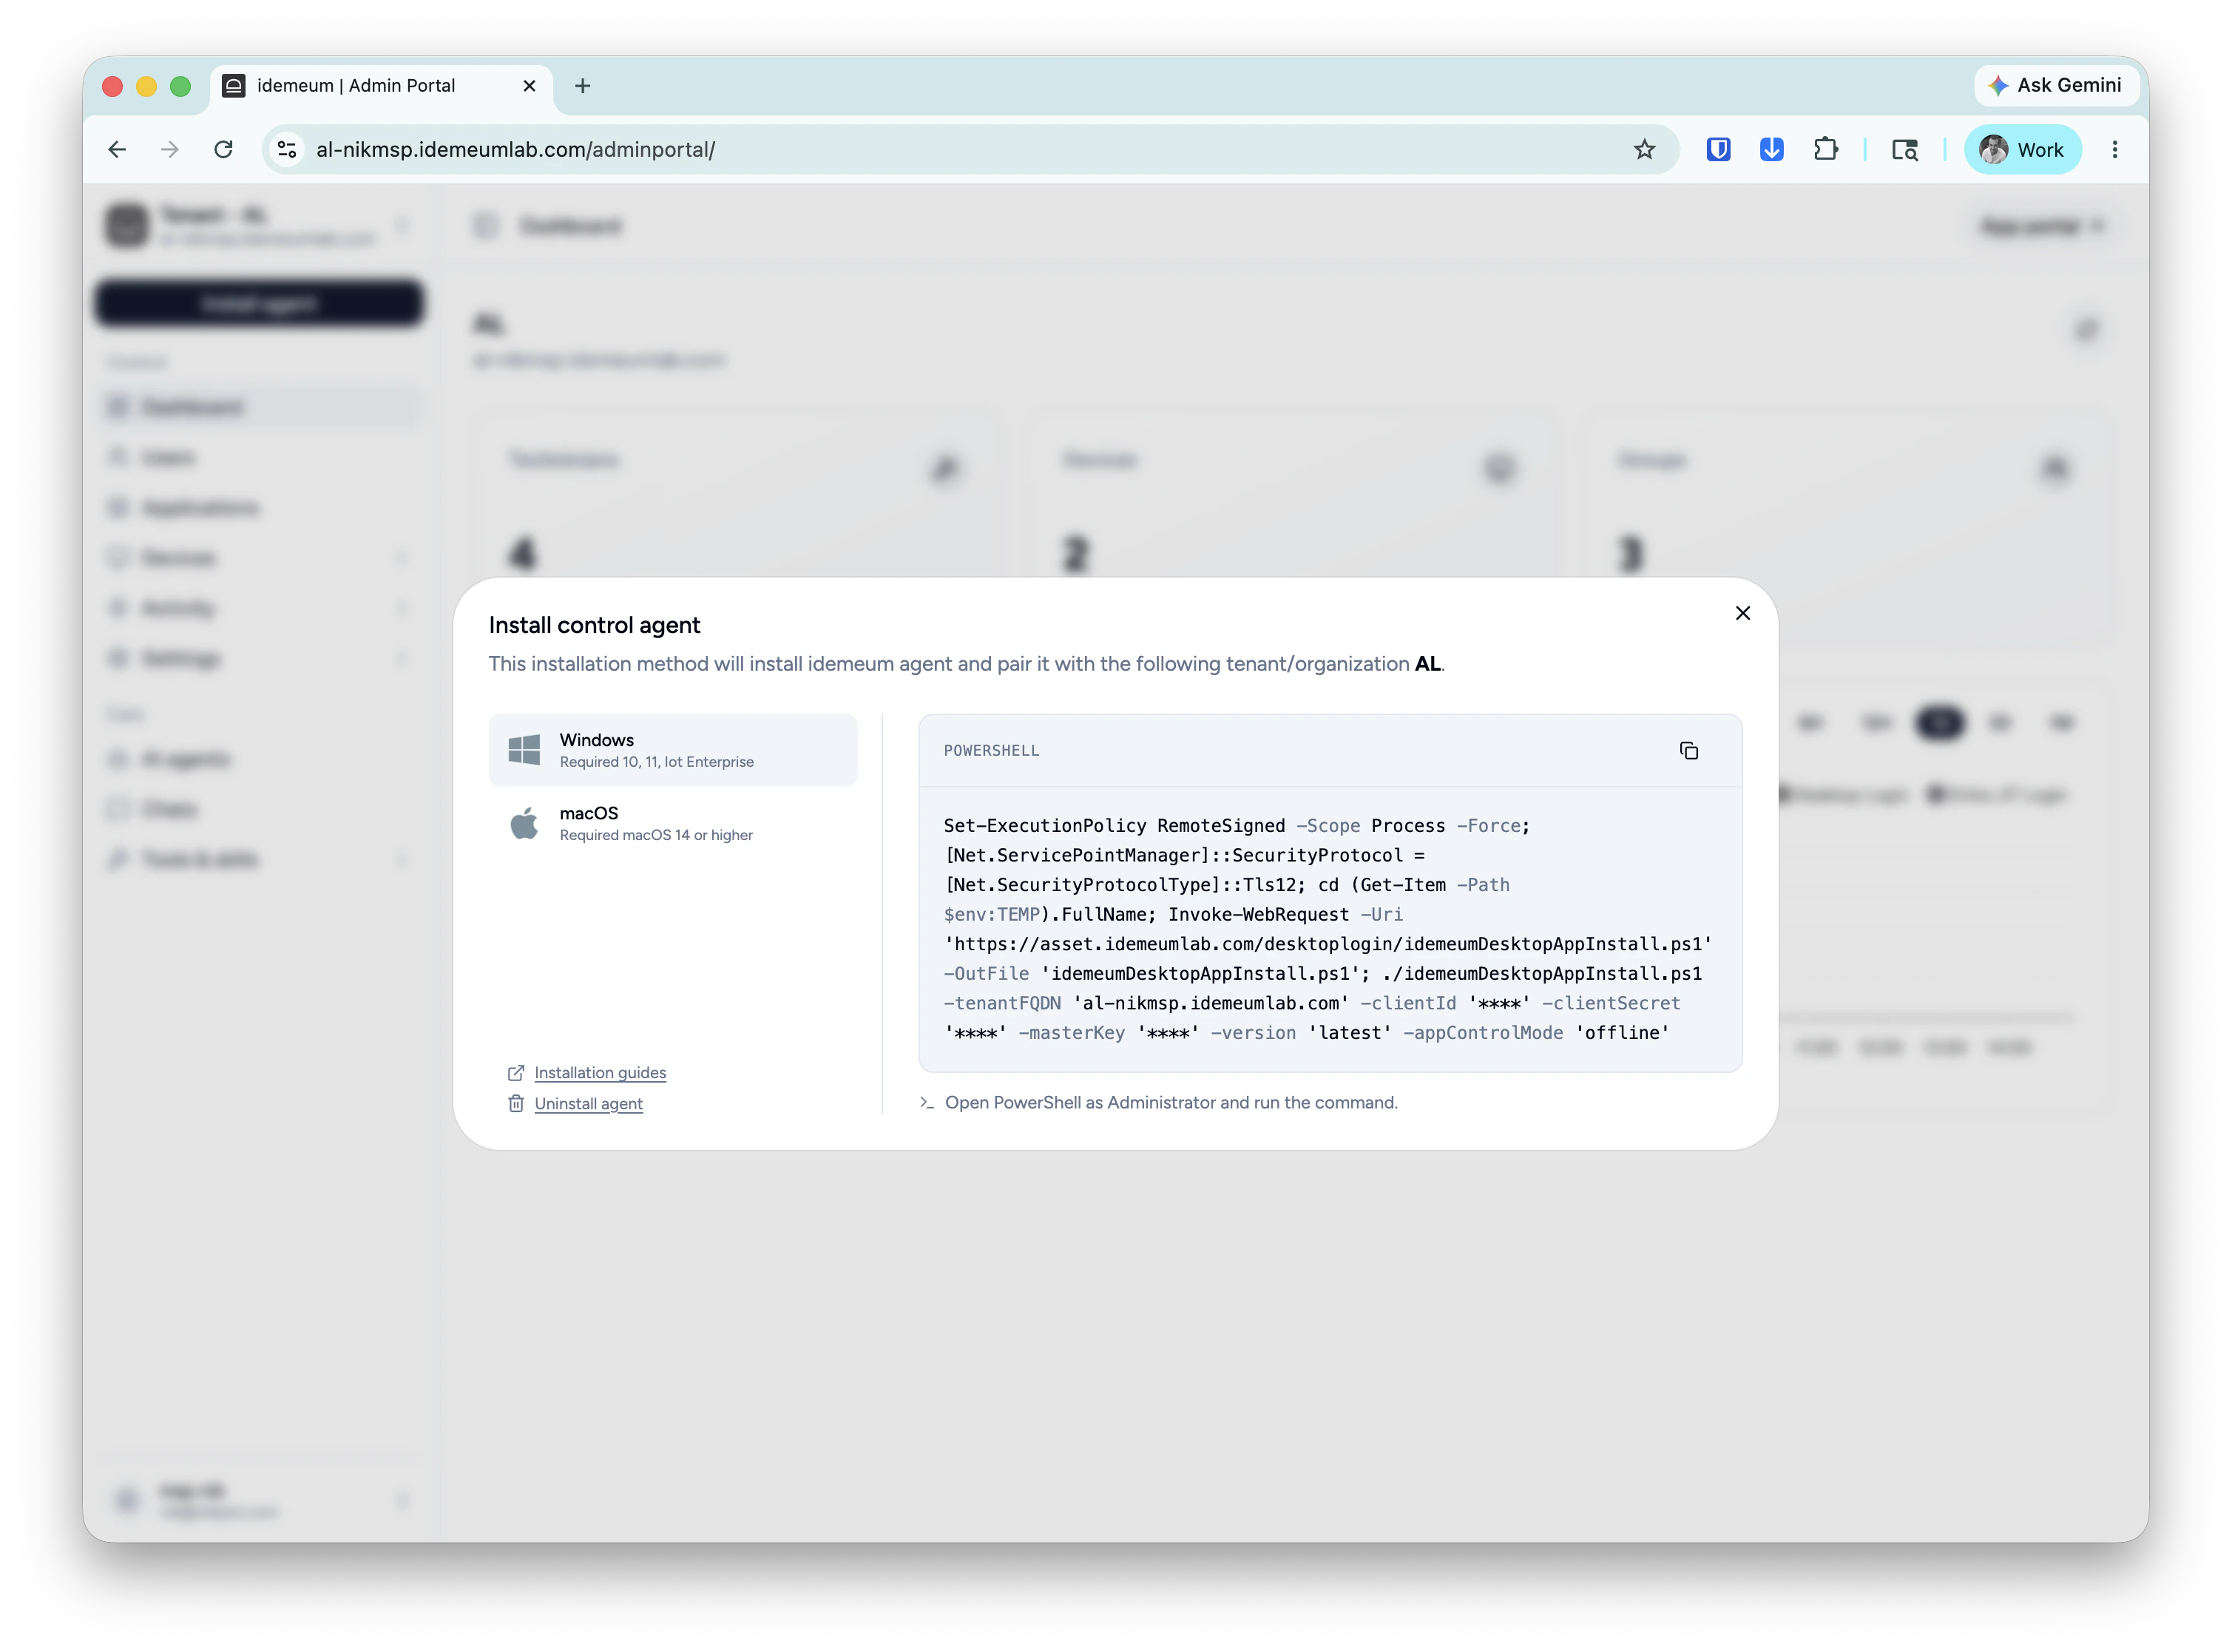 Make sure you execute the script with PowerShel Administrator privileges.
Open PowerShell and execute the installation script with Administrator privileges. Idemeum will install all required prerequisites before installing the agent. No restart is required after successful installation.
### Command-line arguments
You can pass additional command-line arguments to the installation script:
Restart is not required, however you can still trigger the restart after the successful installation by passing `true` as an option.
By default when the agent is installed it operates in `disabled` mode. You can pass the mode which you want to apply at installation time.
Pass the desktop version that you want to install. By default the latest version will be installed. You need to pass the version with '', for instance '2.5.1'.
### Installation
When installing macOS control agent you will need to enable security permissions, including Security Extension and Full Disk Access. We recommend deploying production agents with MDM profile to make sure permissions stay enabled after agent updates.
Navigate to your idemeum portal, click `Install agent`, choose `Control agent`, then select `macOS` and download profile and script.
Make sure you execute the script with PowerShel Administrator privileges.
Open PowerShell and execute the installation script with Administrator privileges. Idemeum will install all required prerequisites before installing the agent. No restart is required after successful installation.
### Command-line arguments
You can pass additional command-line arguments to the installation script:
Restart is not required, however you can still trigger the restart after the successful installation by passing `true` as an option.
By default when the agent is installed it operates in `disabled` mode. You can pass the mode which you want to apply at installation time.
Pass the desktop version that you want to install. By default the latest version will be installed. You need to pass the version with '', for instance '2.5.1'.
### Installation
When installing macOS control agent you will need to enable security permissions, including Security Extension and Full Disk Access. We recommend deploying production agents with MDM profile to make sure permissions stay enabled after agent updates.
Navigate to your idemeum portal, click `Install agent`, choose `Control agent`, then select `macOS` and download profile and script.
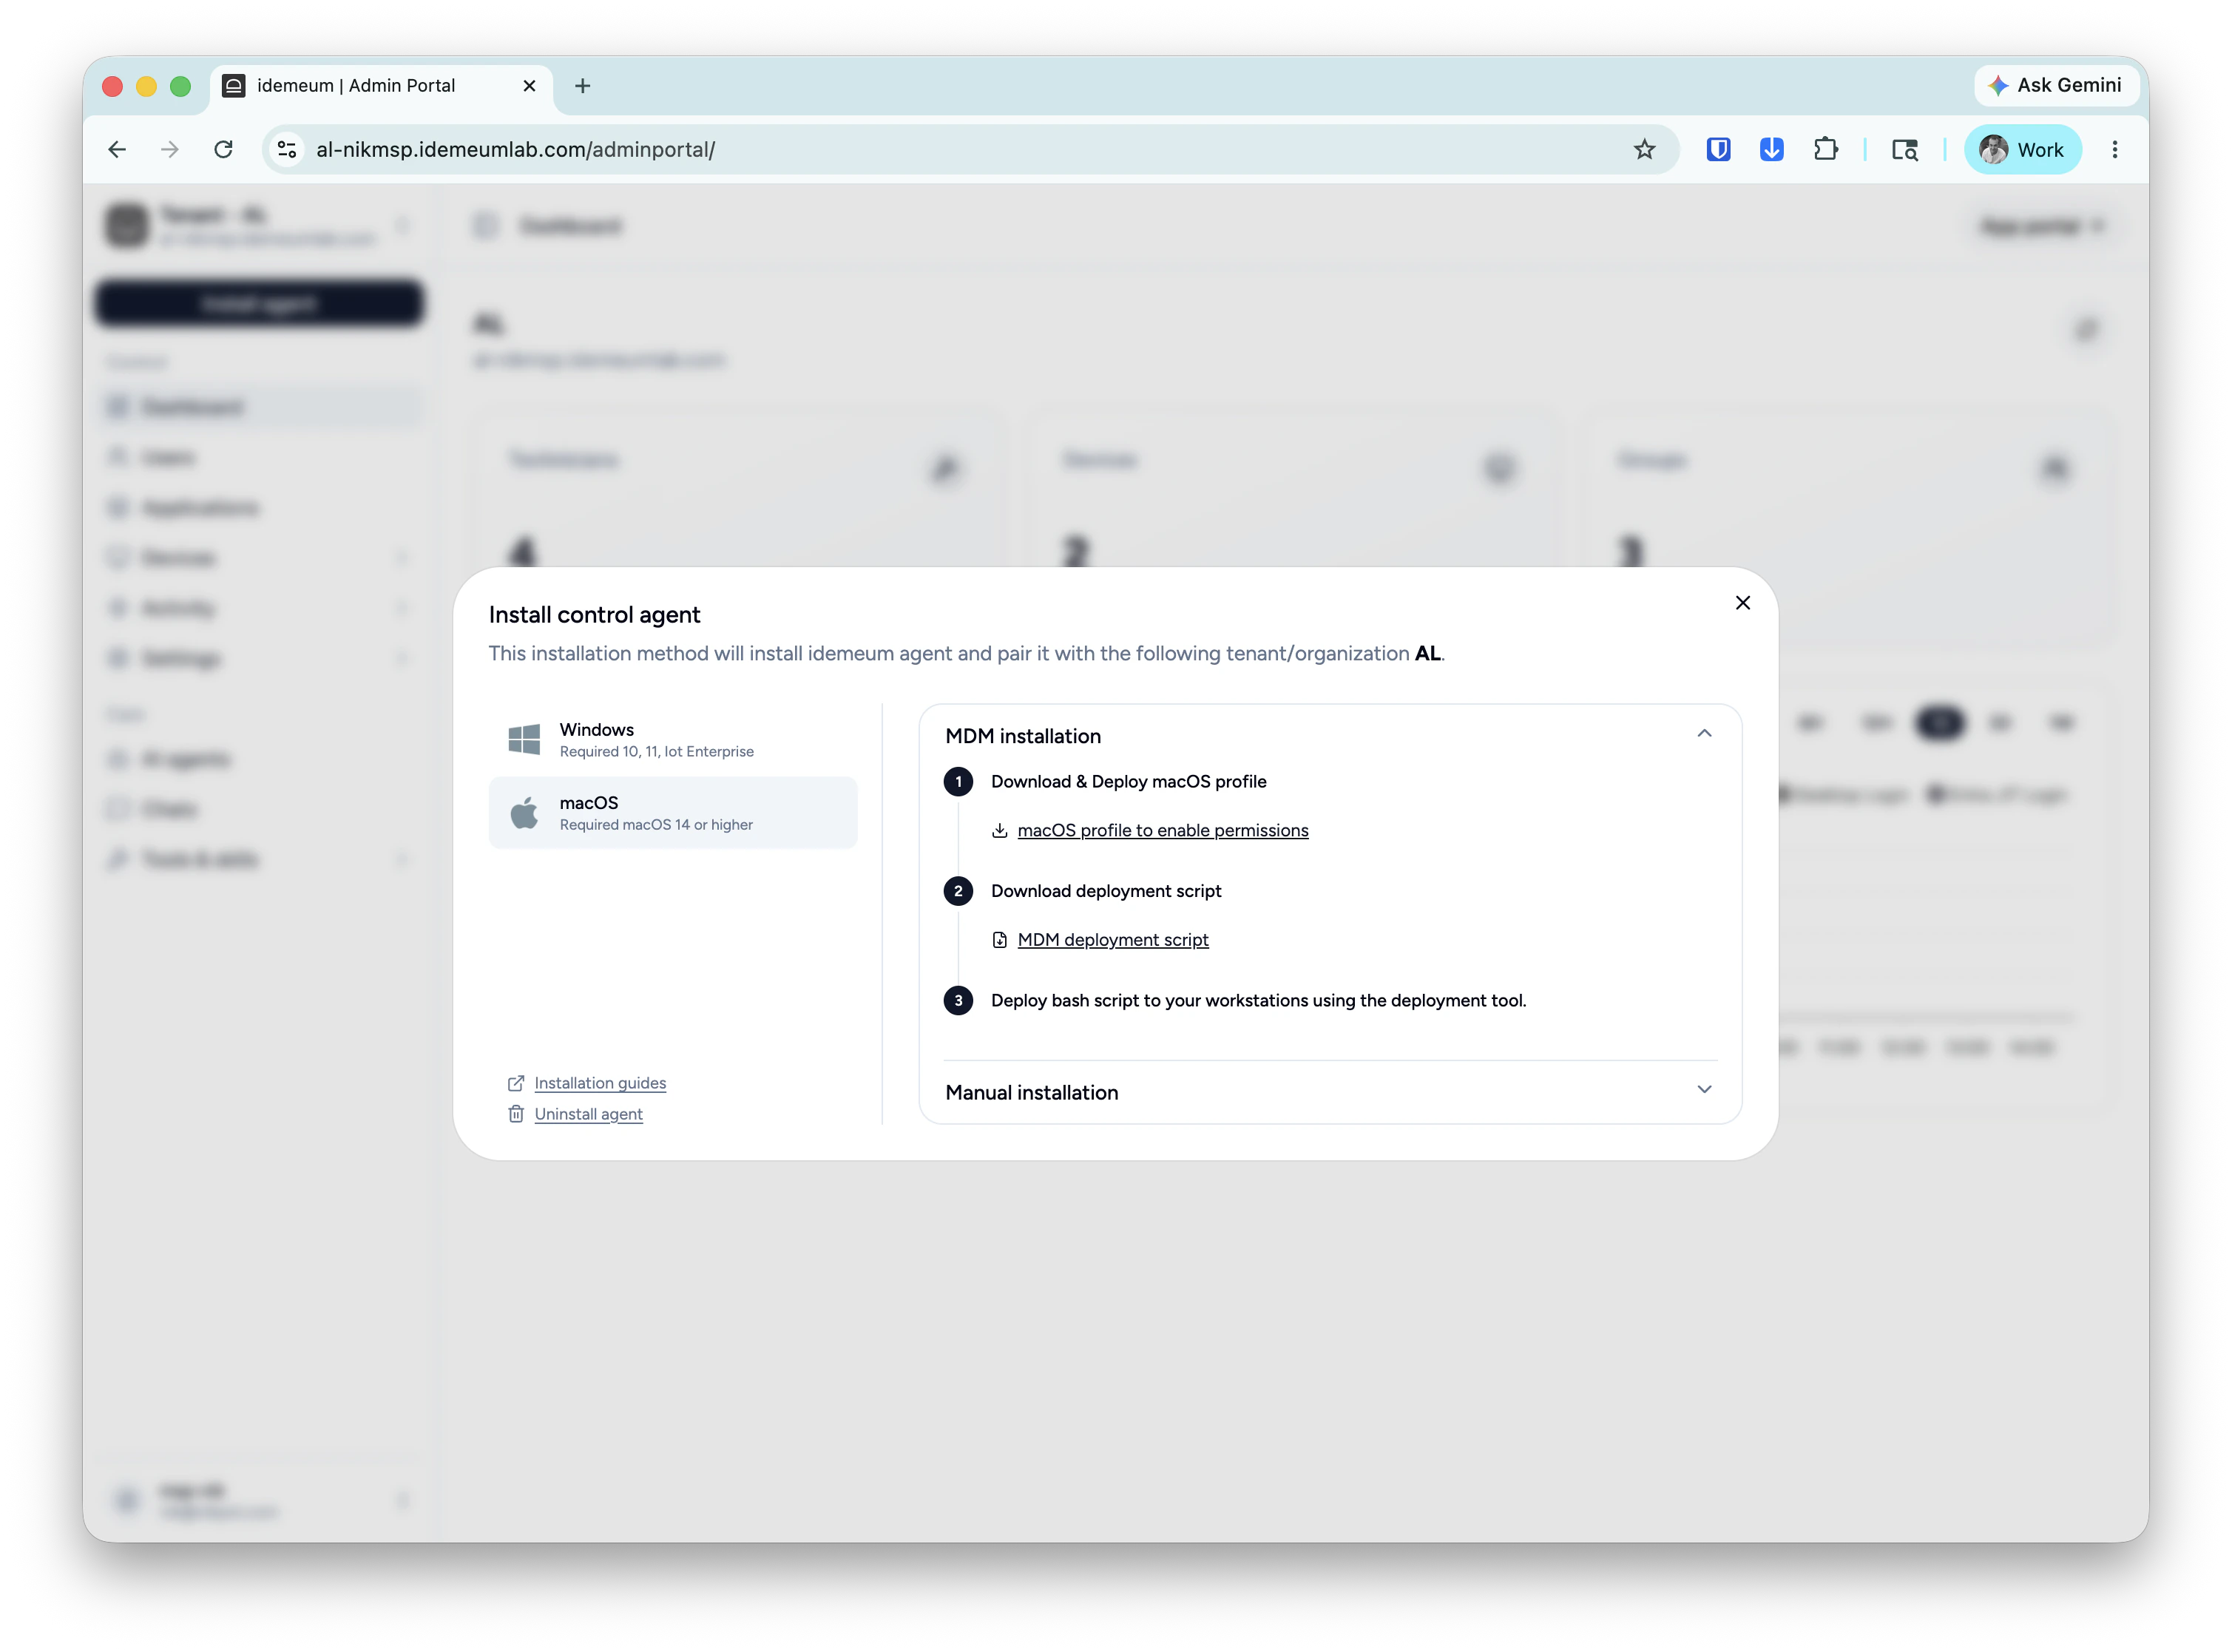 Push the idemeum profile to macOS workstations where idemeum agent will be deployed. Profile automatically enables all required settings.
Now you can deploy the idemeum script to your workstations using the deployment tool of your choice (MDM, RMM, etc.). No restart is required after installation.
### Command-line arguments
You can pass additional command-line arguments to the installation script:
By default when the agent is installed it operates in `disabled` mode. You can pass the mode which you want to apply at installation time.
## Bulk agent installation
Bulk installation helps MSPs to deploy agent across multiple tenants with a single command. Instead of obtaining installation command from a customer tenant, obtain a command from your MSP tenant instead. Then you can use this command with RMM and leverage RMM variables to dynamically pass the customer name to an installation command. Idemeum control agent will automatically create customer tenants.
Login to your MSP tenant, click `Bulk agent install` and then choose `Control agent`. Copy the installation command for Windows or download the profile and installation script for macOS.
Push the idemeum profile to macOS workstations where idemeum agent will be deployed. Profile automatically enables all required settings.
Now you can deploy the idemeum script to your workstations using the deployment tool of your choice (MDM, RMM, etc.). No restart is required after installation.
### Command-line arguments
You can pass additional command-line arguments to the installation script:
By default when the agent is installed it operates in `disabled` mode. You can pass the mode which you want to apply at installation time.
## Bulk agent installation
Bulk installation helps MSPs to deploy agent across multiple tenants with a single command. Instead of obtaining installation command from a customer tenant, obtain a command from your MSP tenant instead. Then you can use this command with RMM and leverage RMM variables to dynamically pass the customer name to an installation command. Idemeum control agent will automatically create customer tenants.
Login to your MSP tenant, click `Bulk agent install` and then choose `Control agent`. Copy the installation command for Windows or download the profile and installation script for macOS.
 Store the bulk installation command in your RMM. Make sure you leverage proper customer name variable and pass it to the installation script `-customerName` input variable.
Check our [integration](/integrations) page to explore the examples of how to deploy idemeum agent with various RMMs.
Store the bulk installation command in your RMM. Make sure you leverage proper customer name variable and pass it to the installation script `-customerName` input variable.
Check our [integration](/integrations) page to explore the examples of how to deploy idemeum agent with various RMMs.