> ## Documentation Index
> Fetch the complete documentation index at: https://docs.idemeum.com/llms.txt
> Use this file to discover all available pages before exploring further.
# Quickstart - Endpoint Privilege Management
> Set up elevation control on Windows and macOS.
## What is Endpoint Privilege Management?
Endpoint Privilege Management (EPM) is all about implementing least privilege security on your Windows and macOS workstations. It is a cloud solution that allows you to remove local admin rights on your workstations to protect your organization. A user without local admin rights can’t make changes to system folders, kill processes, remove security software, and more. This makes your organization more secure, but the weakness is that users still need admin rights from time to time to install, update, or use business software. With idemeum EPM you can apply rules to automatically elevate certain apps or system actions without giving users permanent admin permissions.
Full documentation section for EPM.
## Get started with EPM
In this guide we will install idemeum agent, enable EPM, and test the elevation approval flow.
Sign up for free idemeum IT or MSP tenant on our website → [idemeum.com](https://idemeum.com)
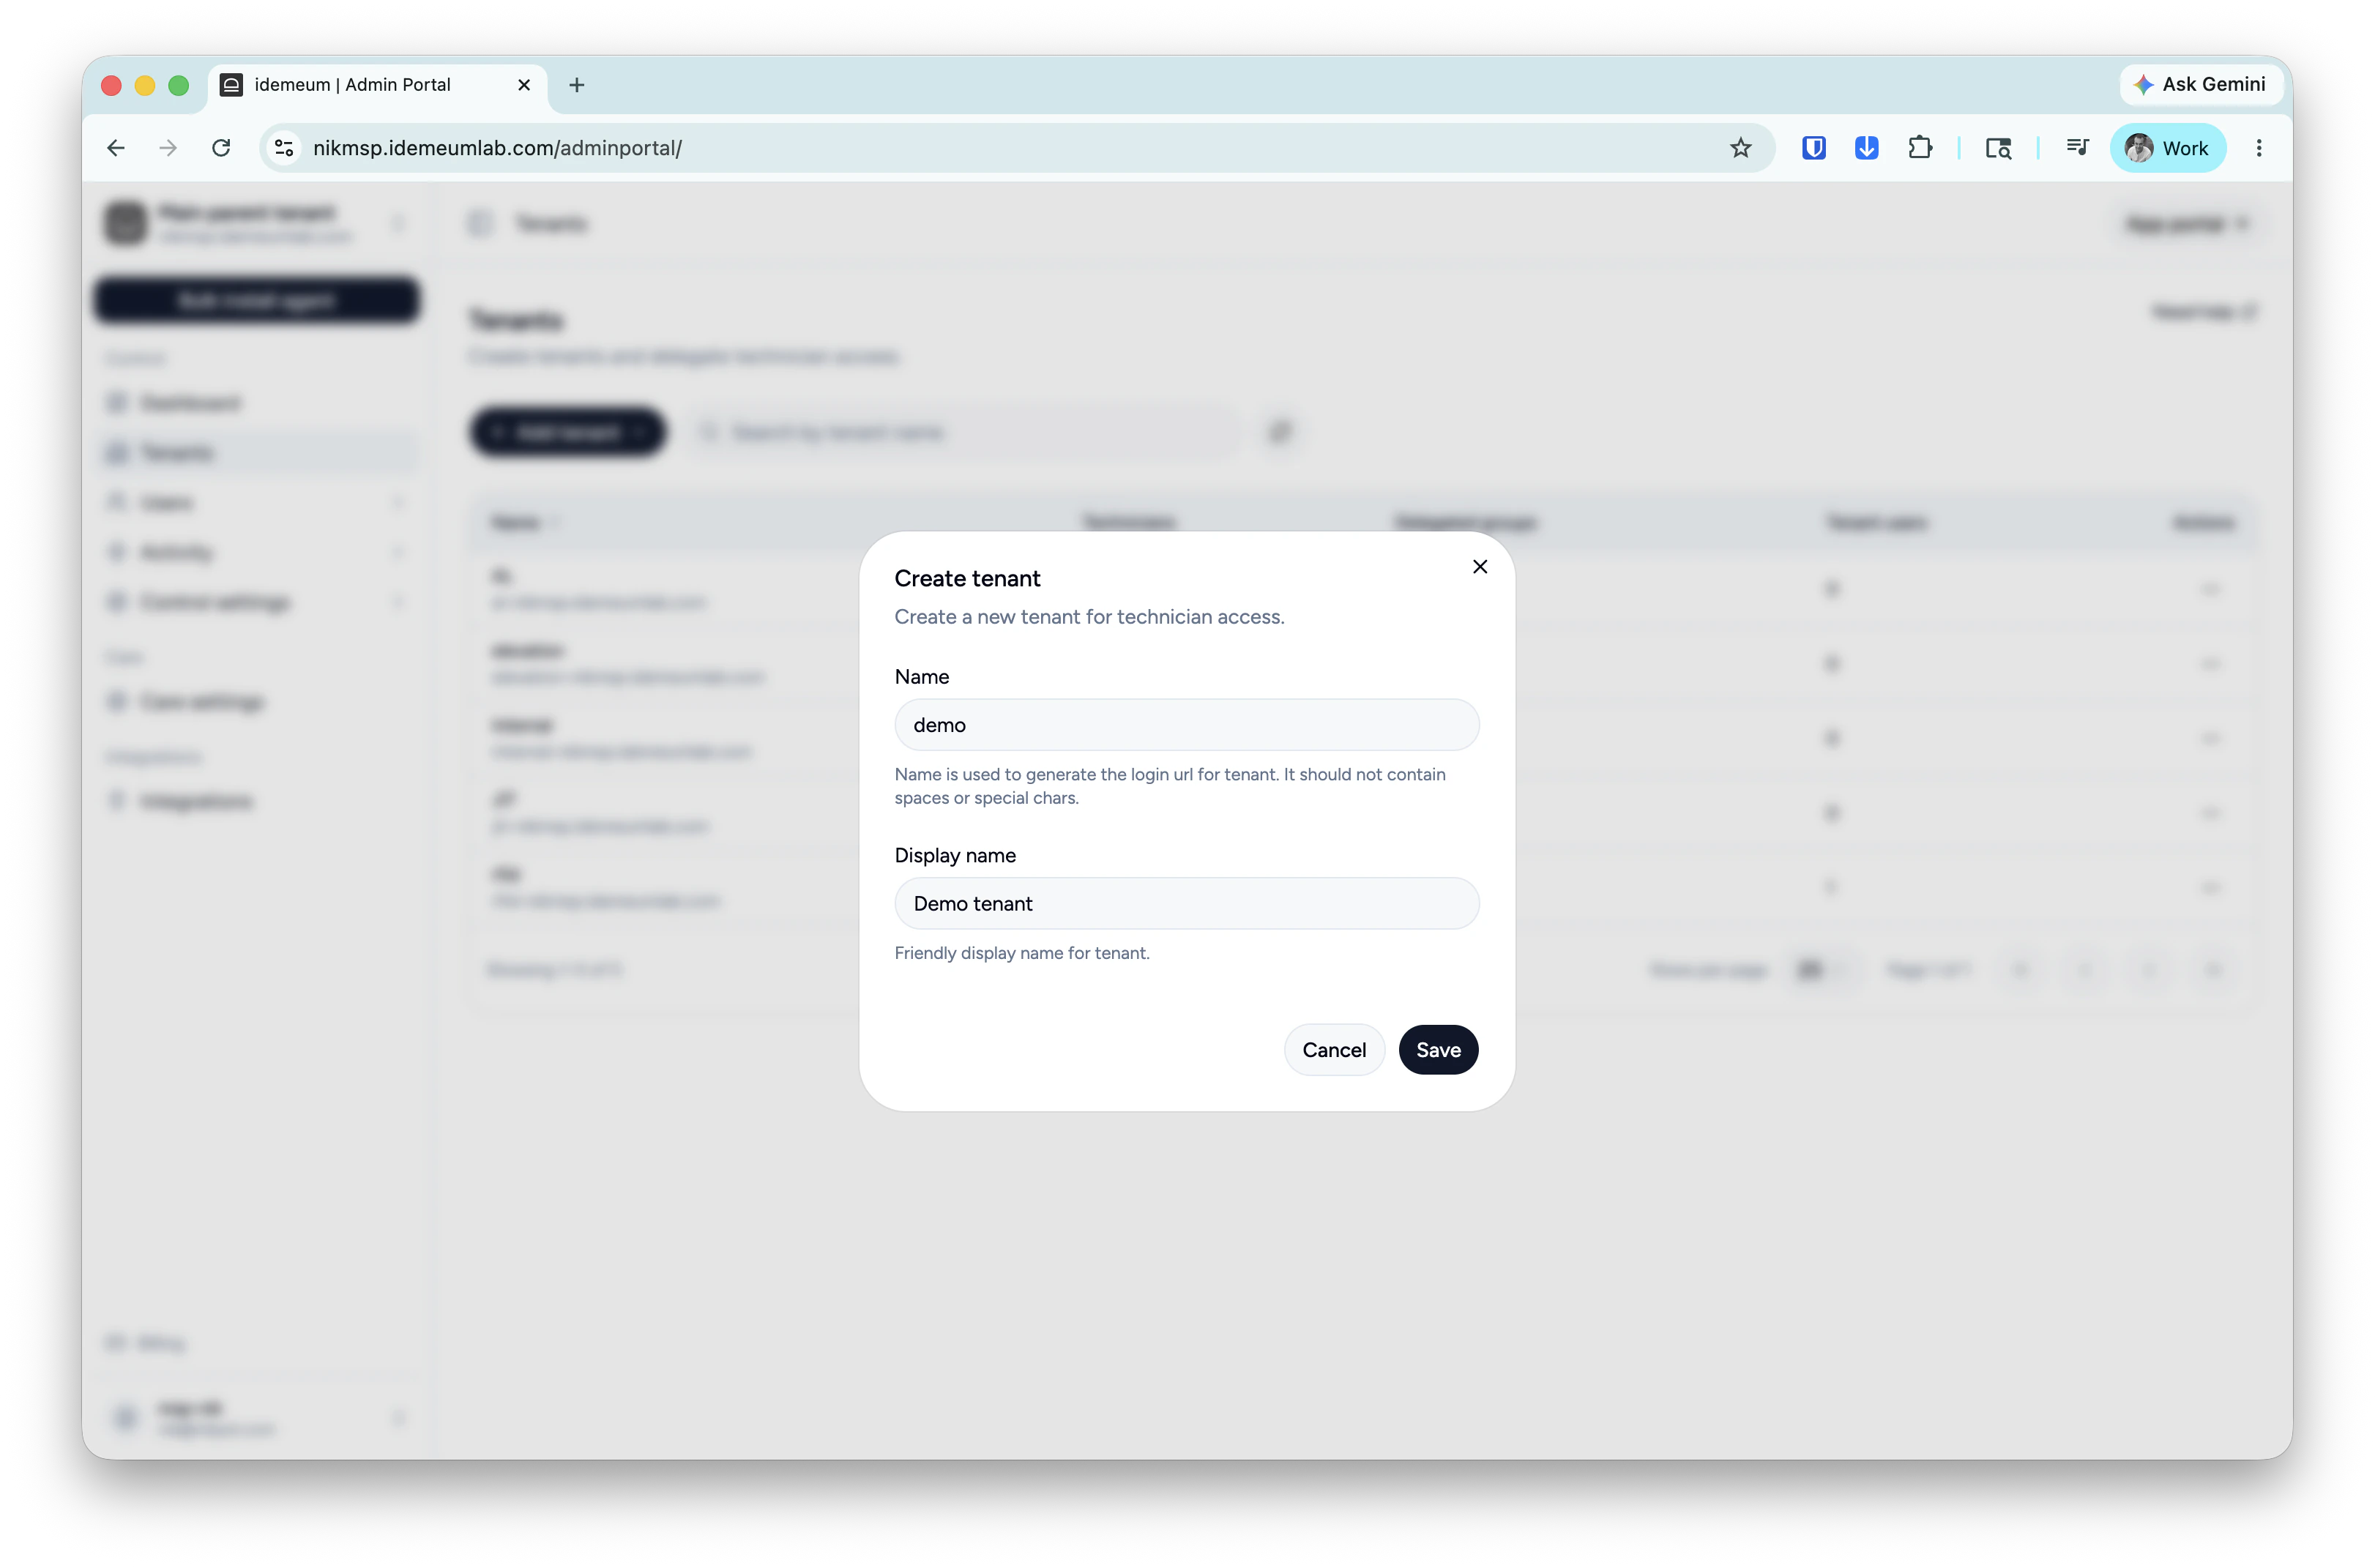
If you are an MSP, please create a child tenant / organization.
* Login to your MSP admin portal
* Navigate to `Tenants` → click `Add tenant` and choose manually
* Provide subdomain and display names and save the configuration
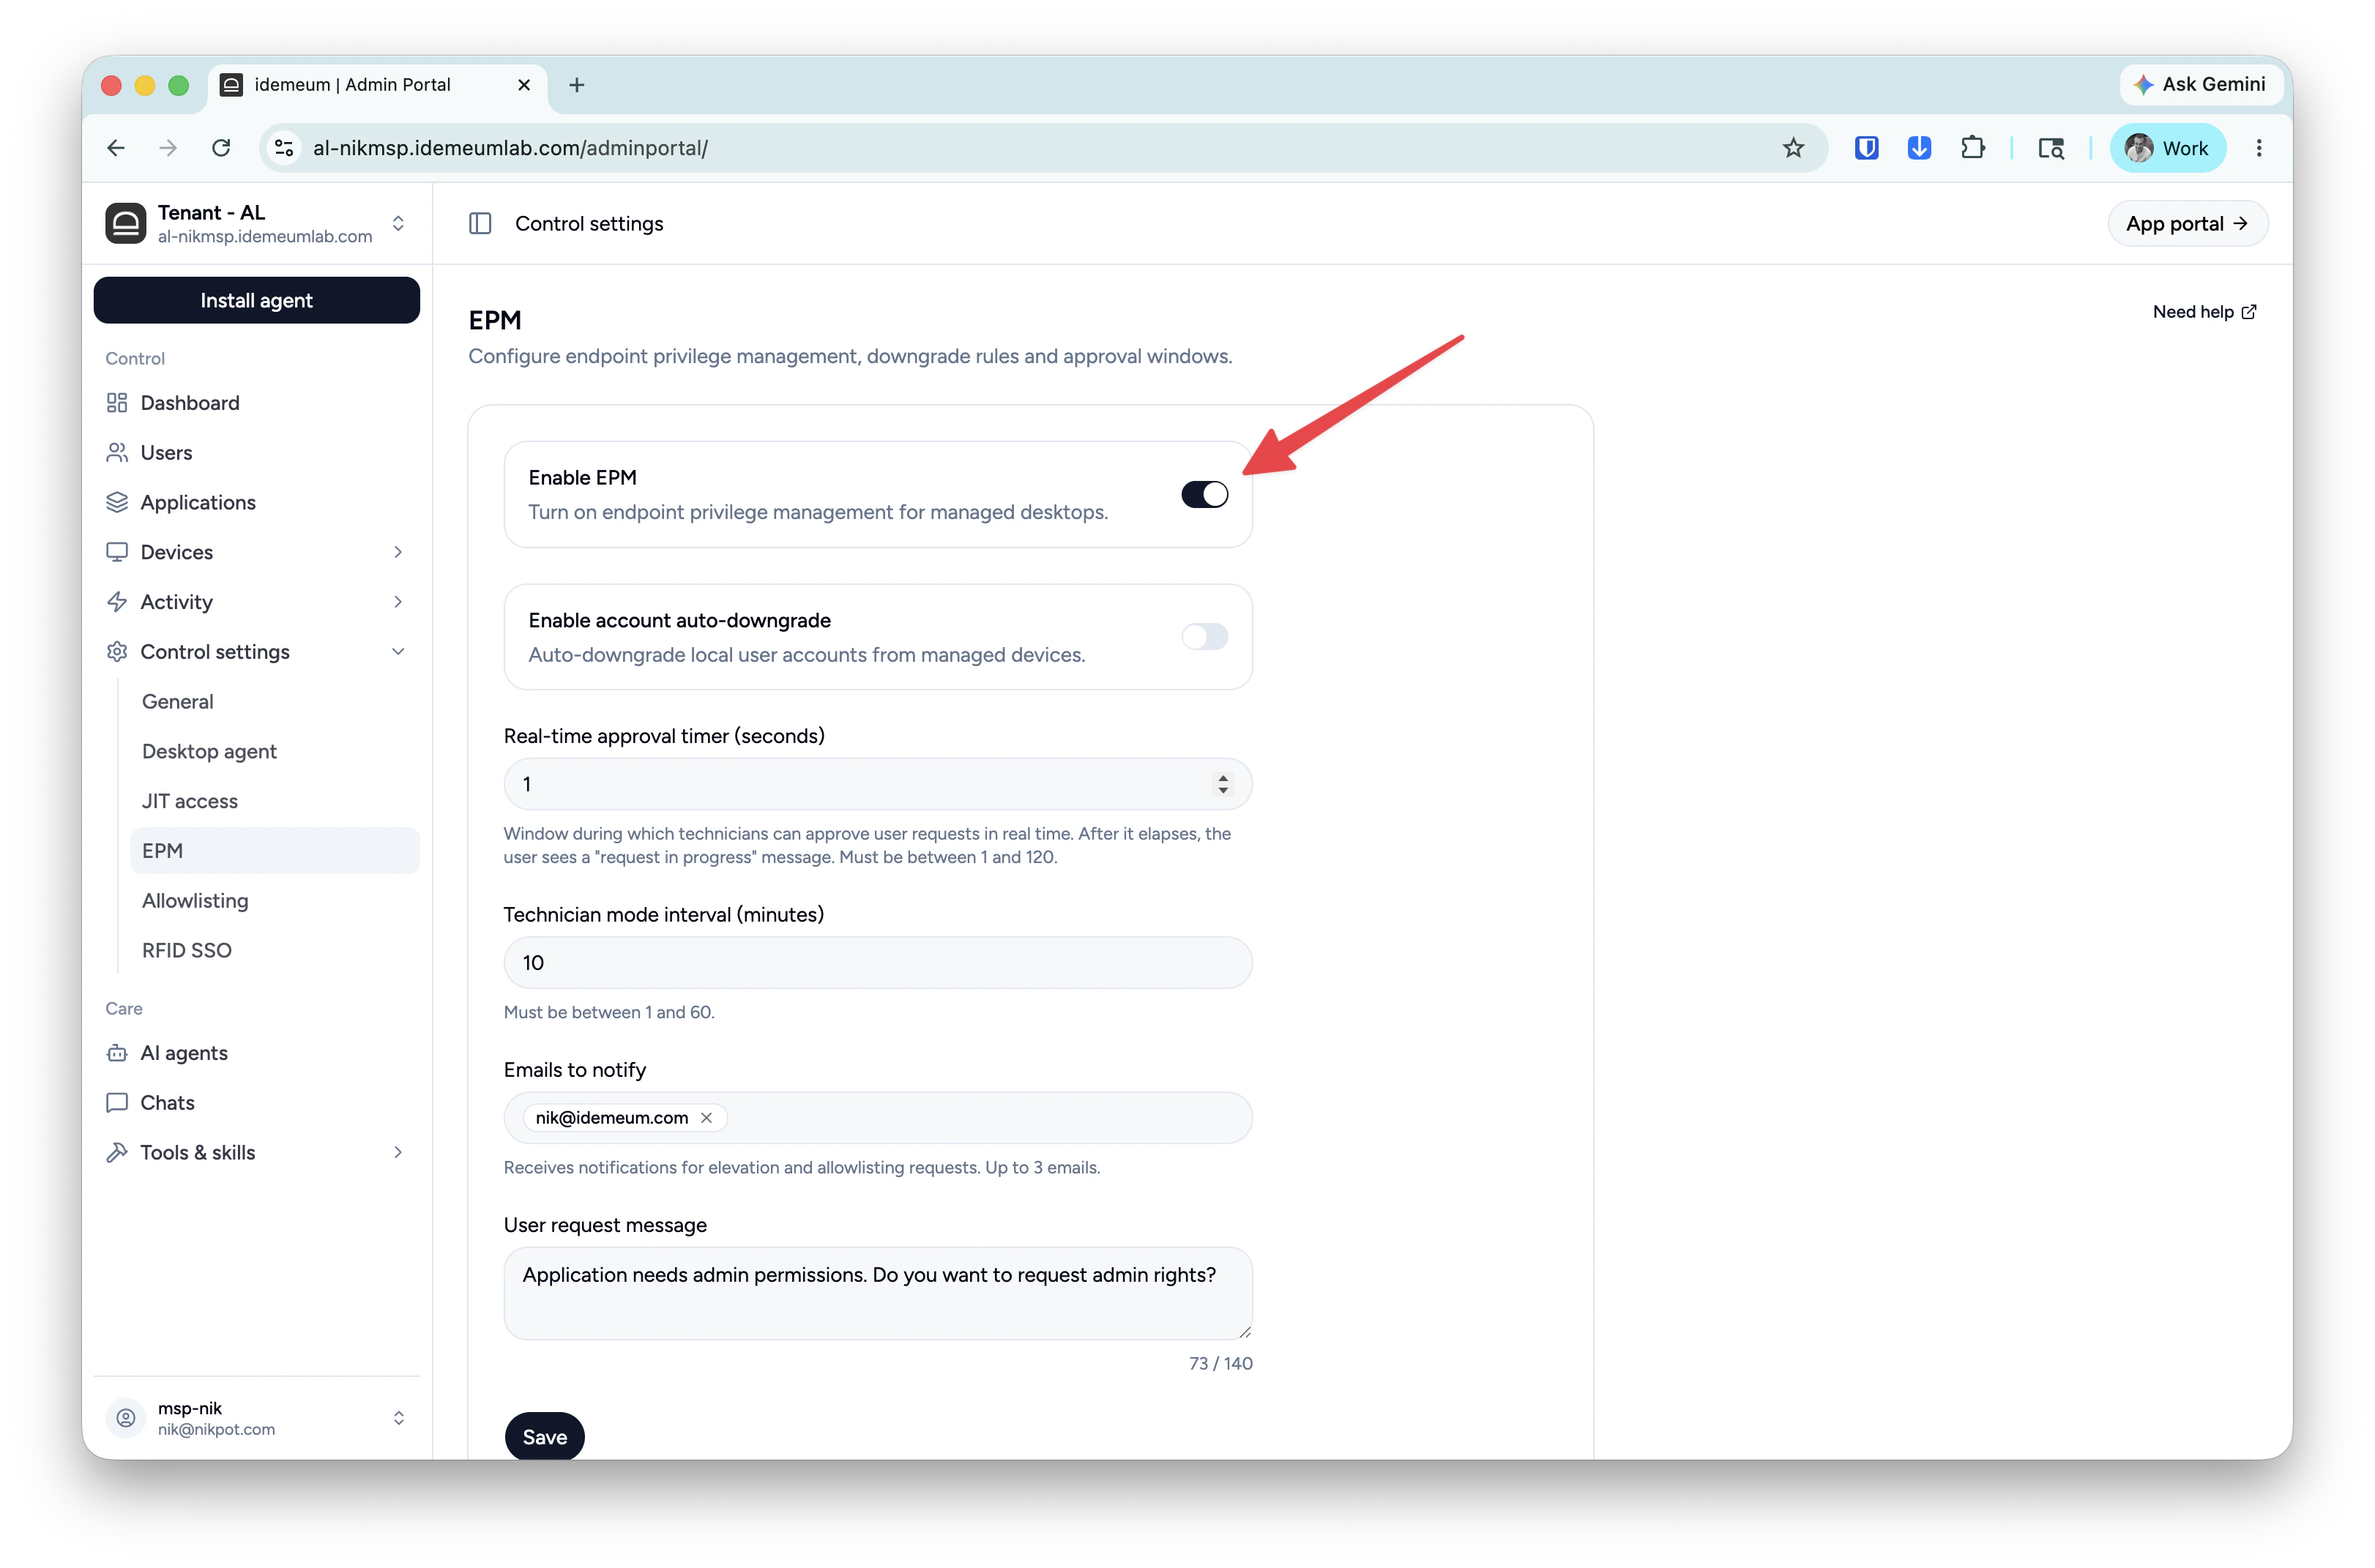
 * Navigate to your idemeum tenant admin portal
* Click `Control settings` → `EPM`
* Make sure EPM is enabled for your tenant
* Navigate to your idemeum tenant admin portal
* Click `Control settings` → `EPM`
* Make sure EPM is enabled for your tenant
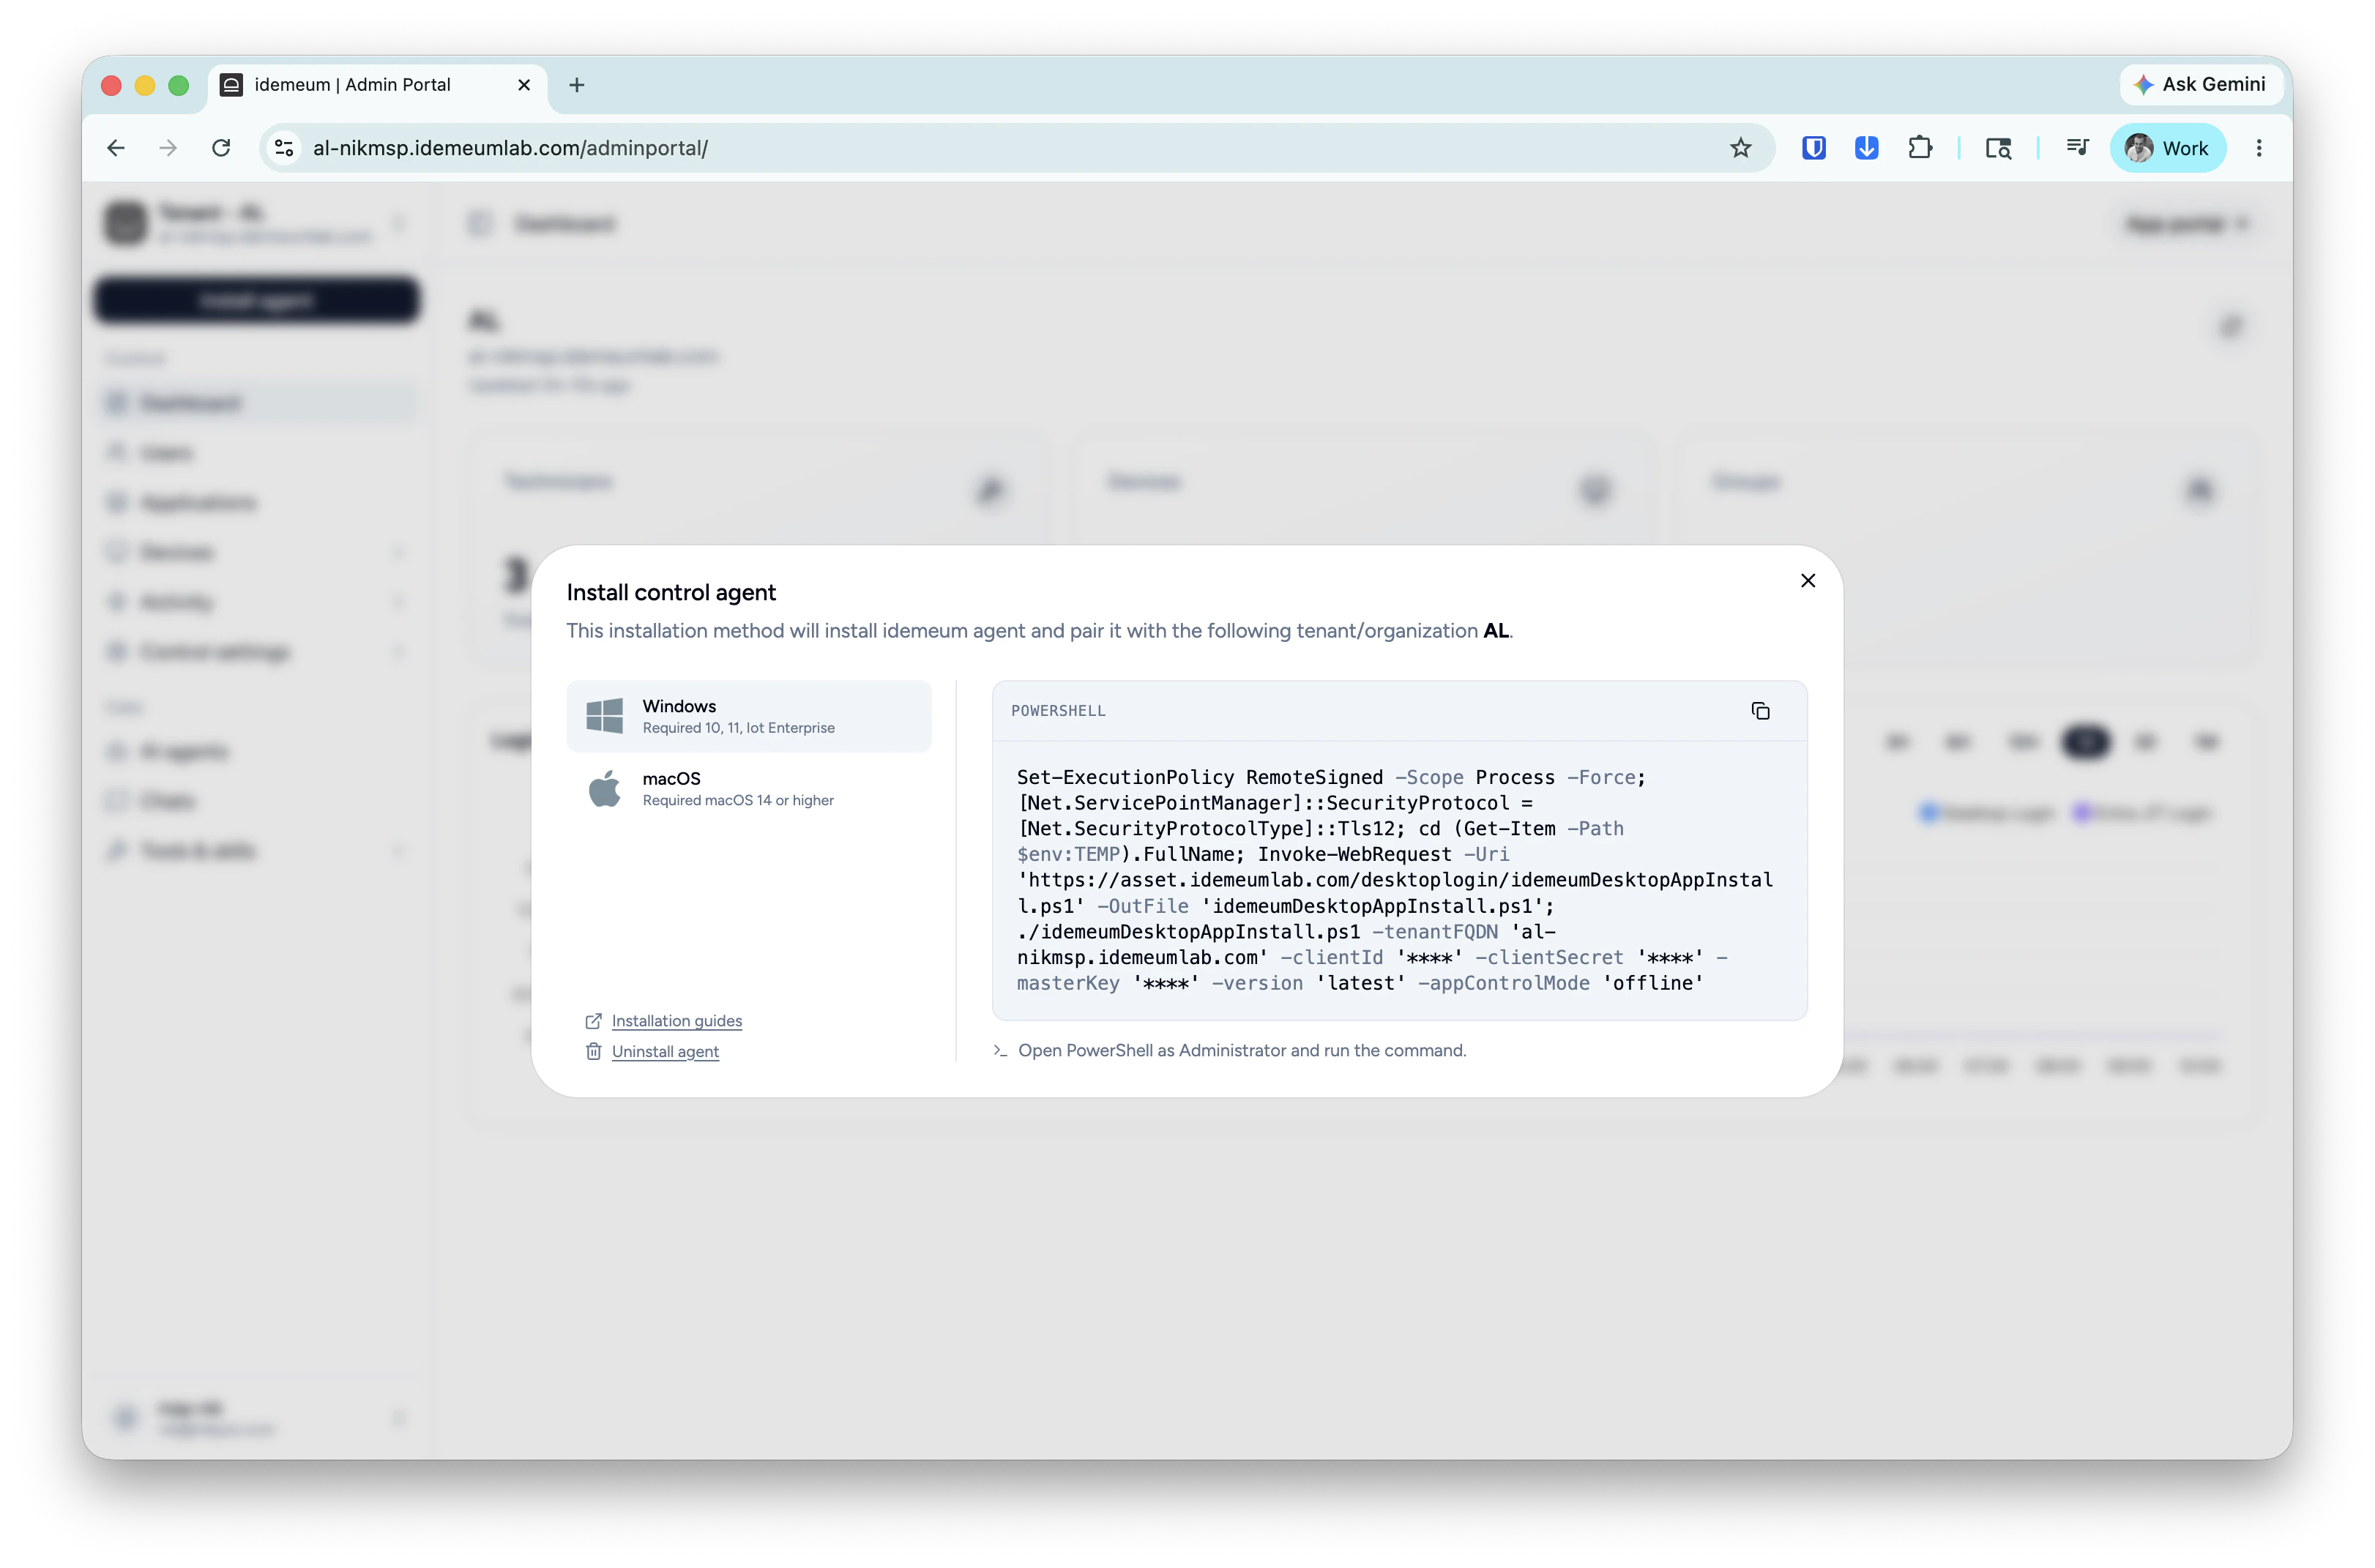
 macOS agent deployment requires privacy and security permissions so it is recommended to deploy the agent with an MDM profile.
Click on the `Install agent` → choose `Control agent` and copy the installation command for Windows or macOS.
macOS agent deployment requires privacy and security permissions so it is recommended to deploy the agent with an MDM profile.
Click on the `Install agent` → choose `Control agent` and copy the installation command for Windows or macOS.
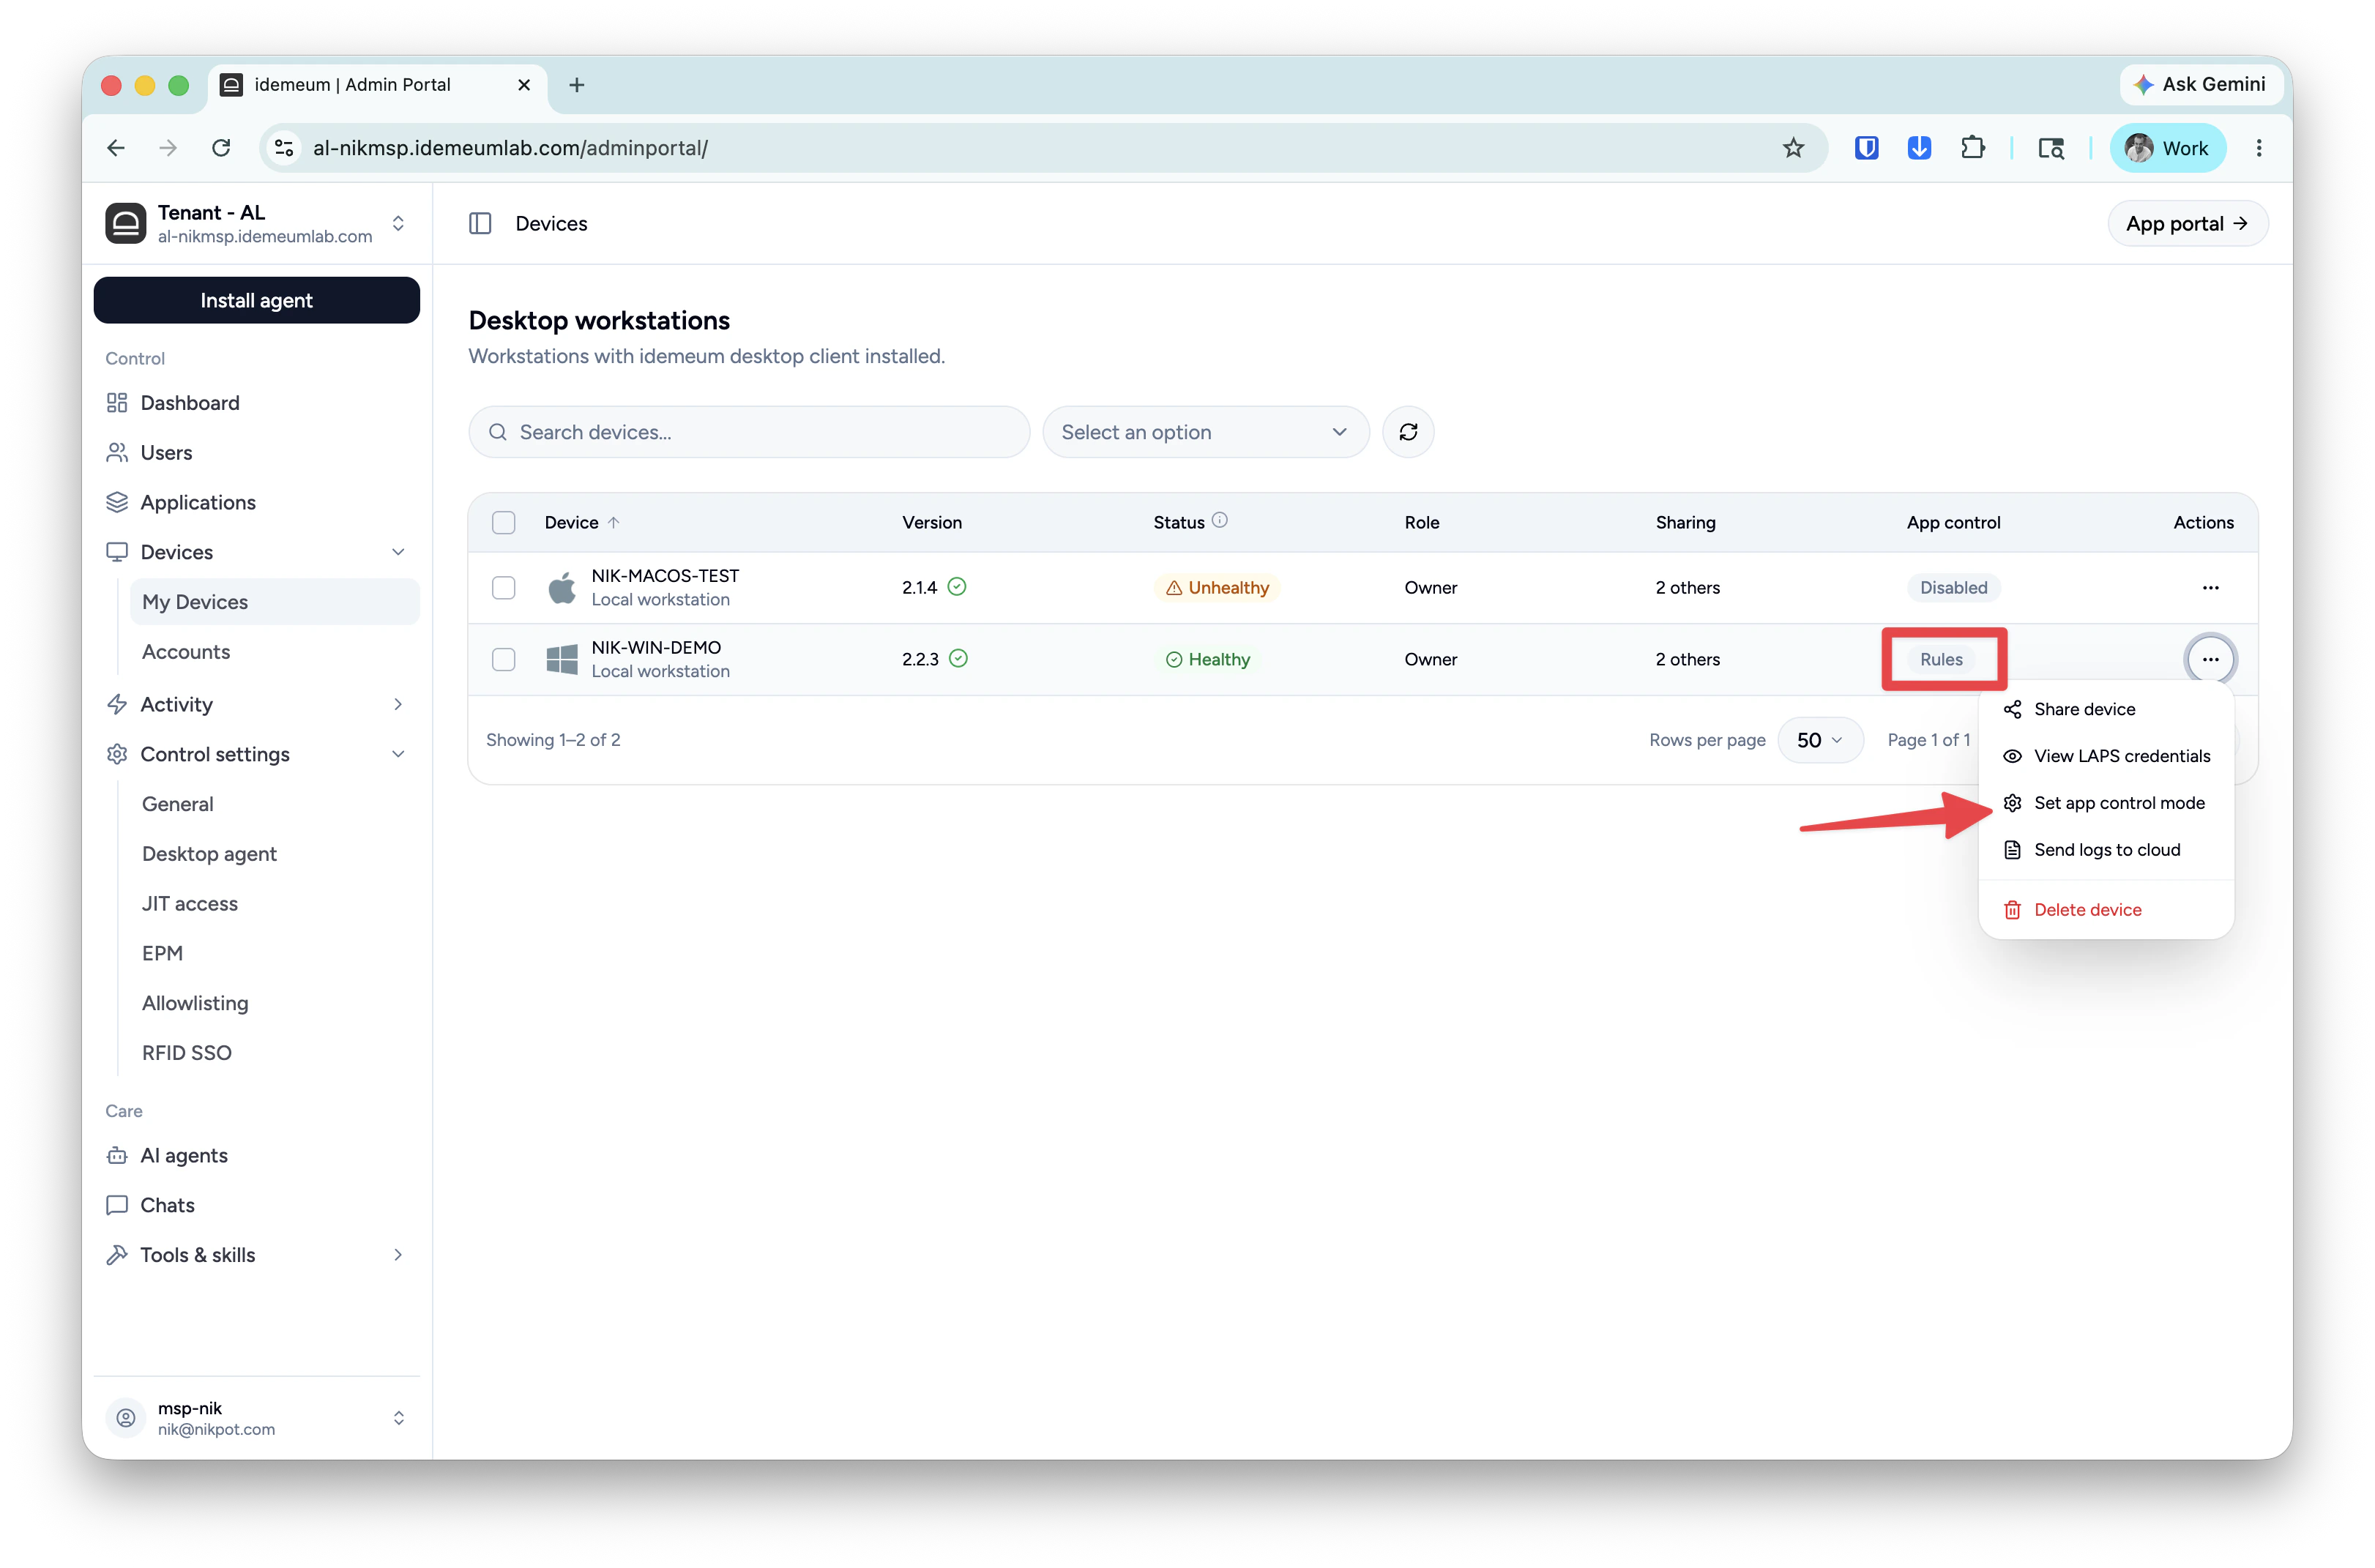
 Once the agent is installed it will appear in the `Devices` table and the default mode for elevation will be turned off. Click on `...` and turn the elevation mode to `Rules`.
 Make sure you login to your workstation with a `standard` account to test elevation flow.
* Login to your workstation with a standard account
* Launch some application the requires admin privileges
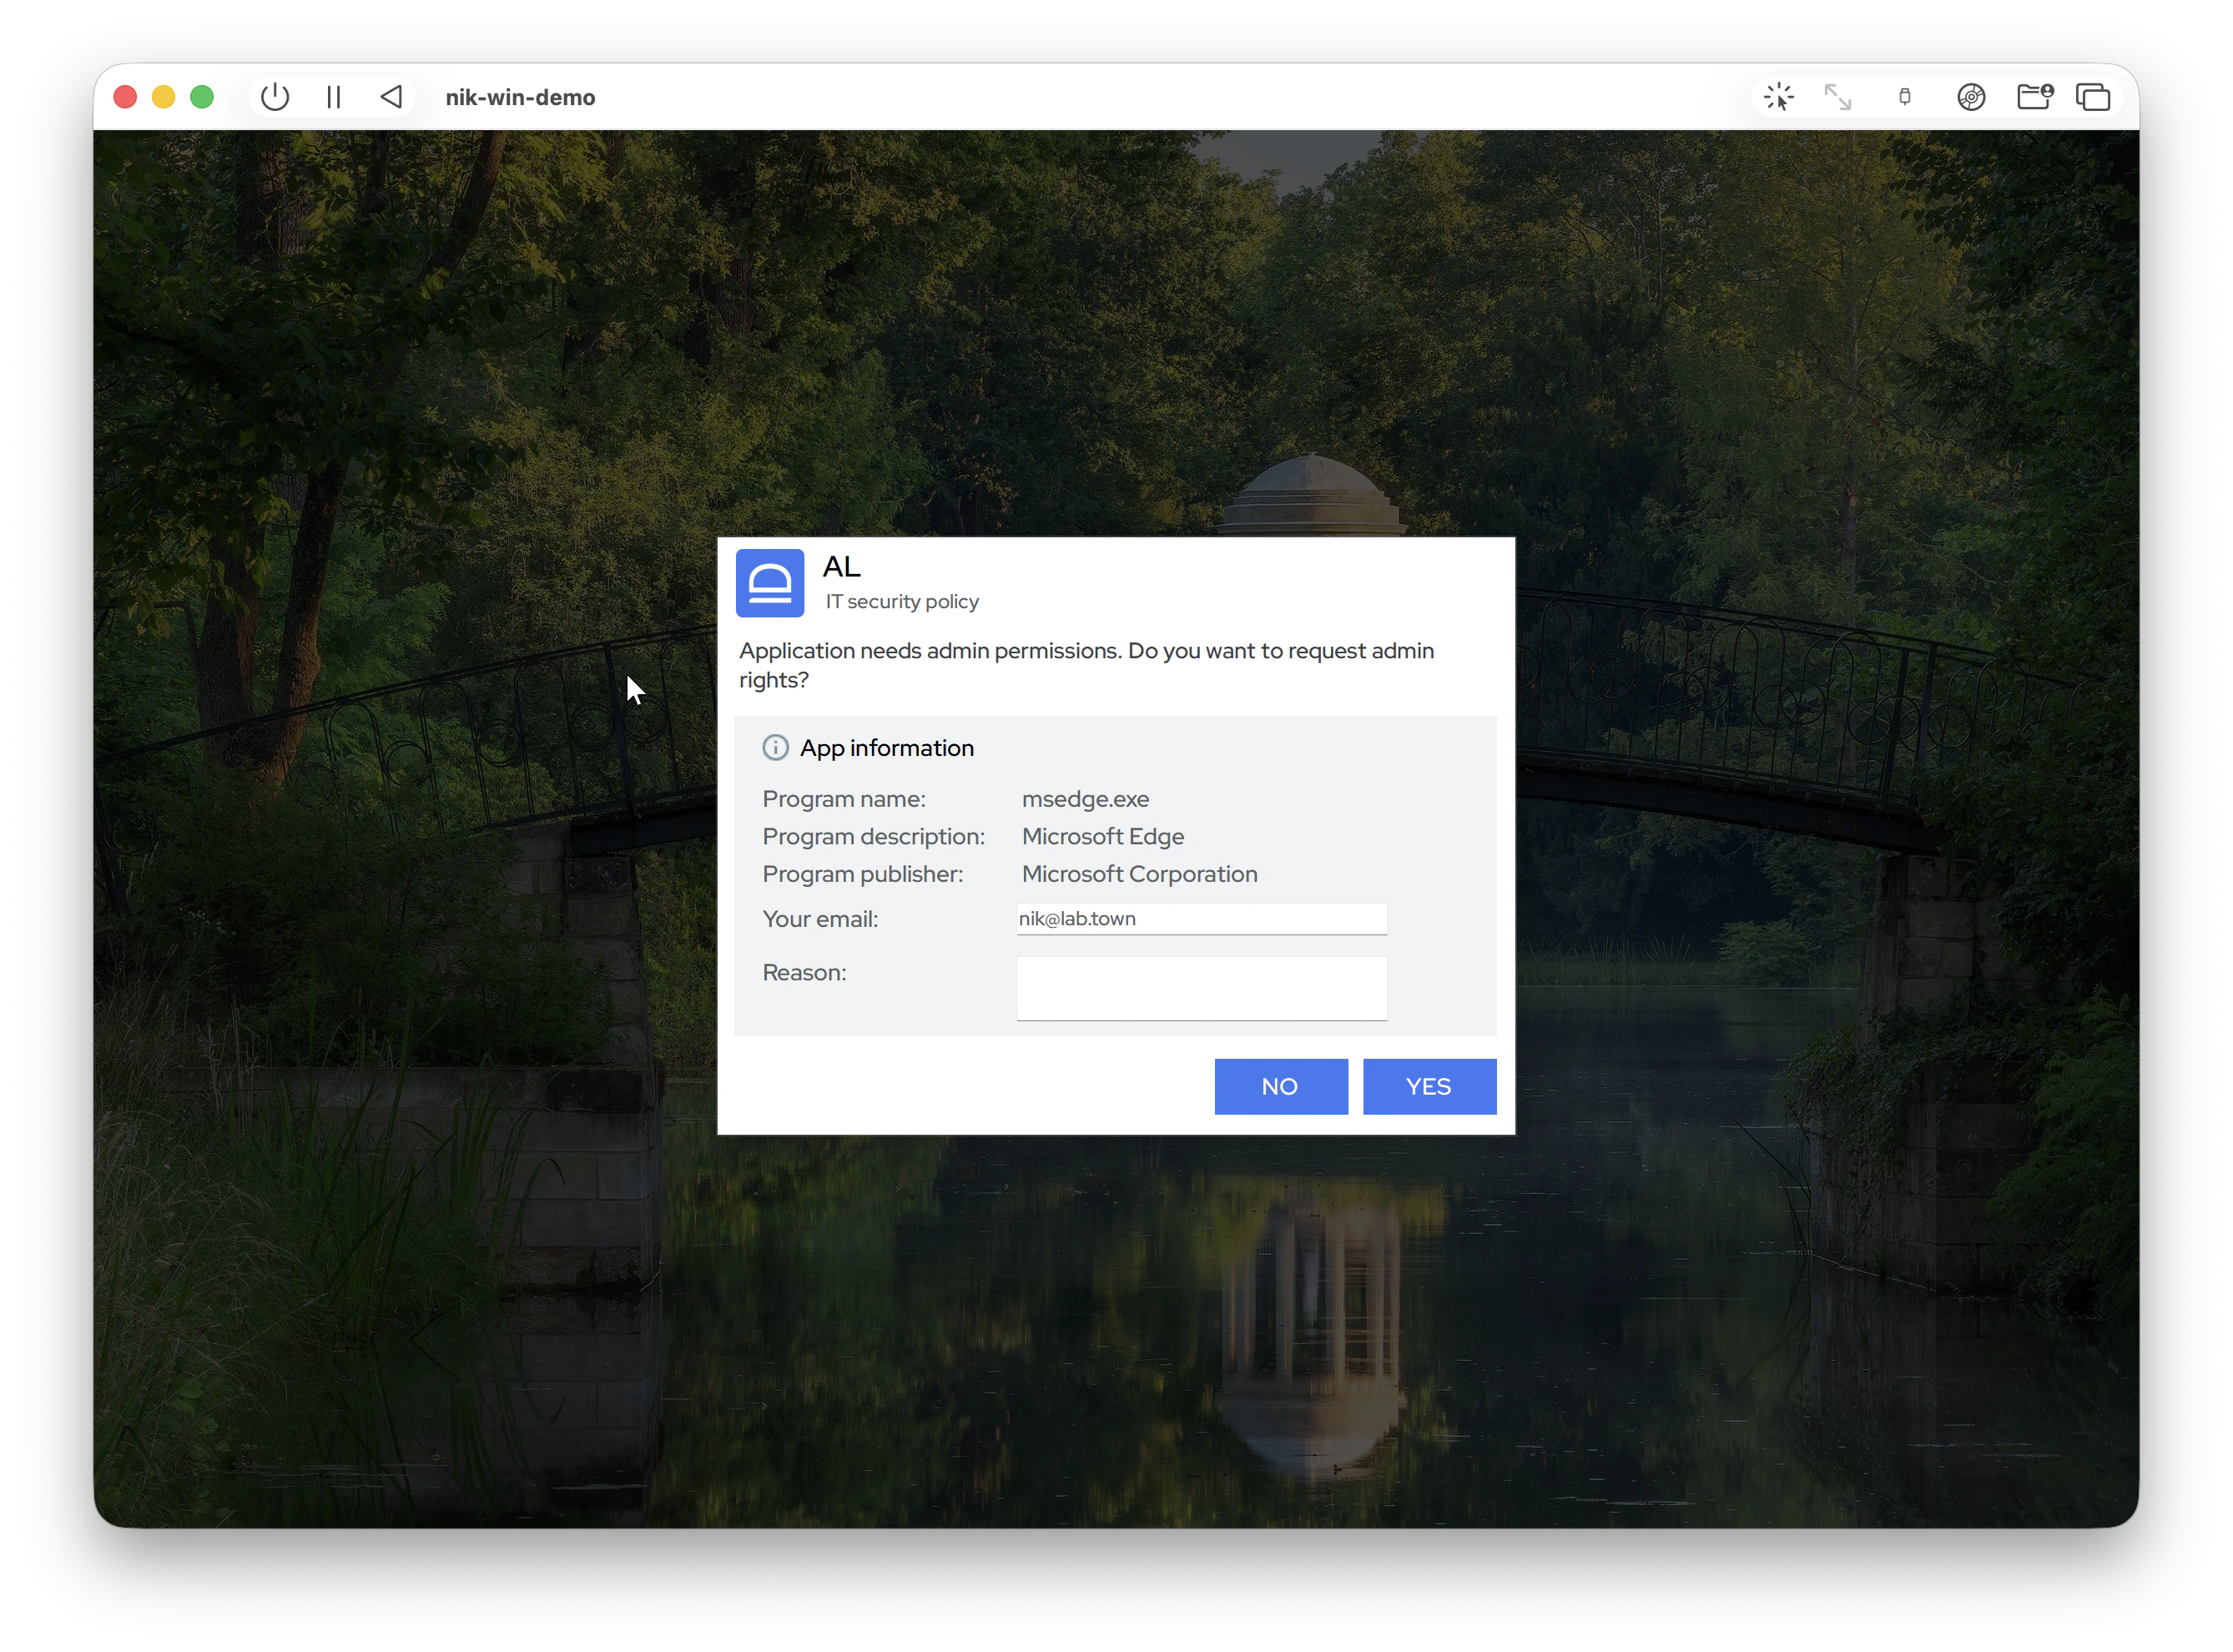
* You will see the idemeum request window. When there are no rules present, the default behavior is to offer the request option to the user.
Make sure you login to your workstation with a `standard` account to test elevation flow.
* Login to your workstation with a standard account
* Launch some application the requires admin privileges
* You will see the idemeum request window. When there are no rules present, the default behavior is to offer the request option to the user.
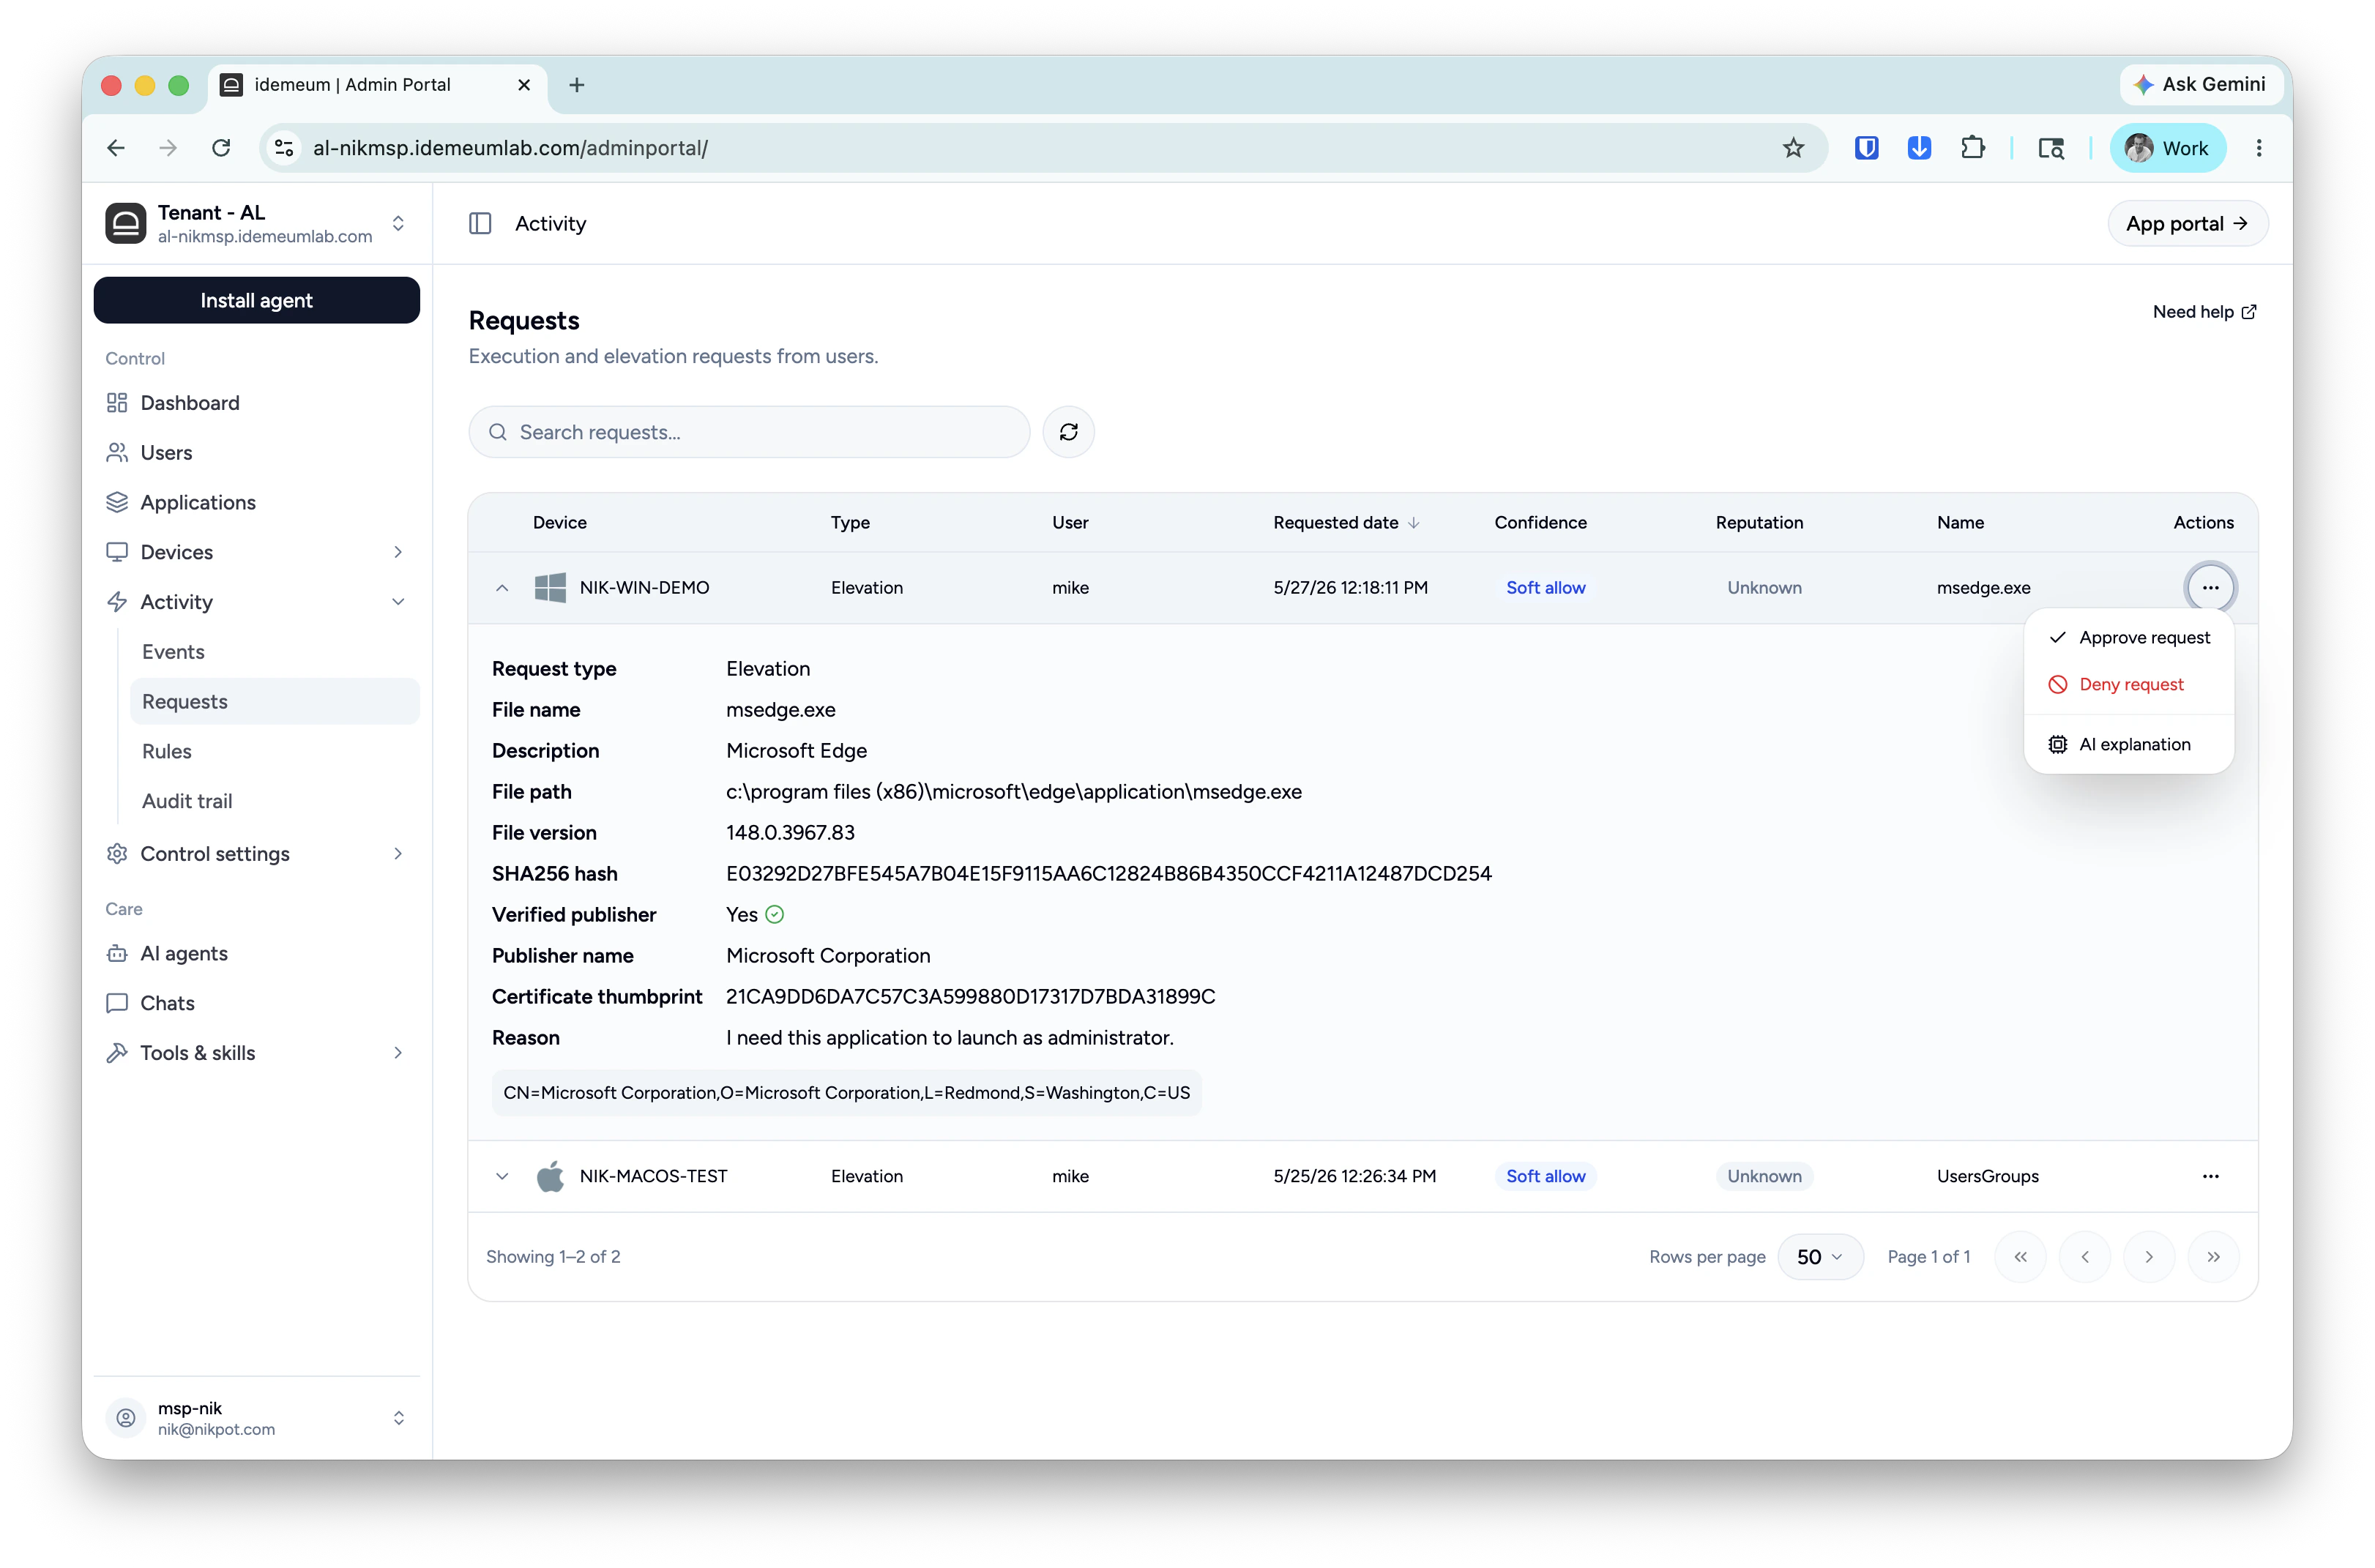
 * In idemeum portal navigate to `Activity` → `Requests` and approve the elevation request
 * You can now relaunch the application on your workstation, and it will be automatically elevated.
If you want to create rules to automatically elevate or deny applications, please follow the steps [here](https://docs.idemeum.com/epm/elevation-rules).
Endpoint Privilege Management has many more features that we can cover in this guide. Please consult our [documentation](https://docs.idemeum.com/endpoint-privilege-management-overview) to learn about all features EPM has to offer.
* You can now relaunch the application on your workstation, and it will be automatically elevated.
If you want to create rules to automatically elevate or deny applications, please follow the steps [here](https://docs.idemeum.com/epm/elevation-rules).
Endpoint Privilege Management has many more features that we can cover in this guide. Please consult our [documentation](https://docs.idemeum.com/endpoint-privilege-management-overview) to learn about all features EPM has to offer.