> ## Documentation Index
> Fetch the complete documentation index at: https://docs.idemeum.com/llms.txt
> Use this file to discover all available pages before exploring further.
# Level RMM
> Control agent deployment with Level RMM.
In this guide we will deploy idemeum control agent with Level RMM. We will take a unified script that takes `customer name` as an input variable. And when deploying to a workstation or a set of workstations in Level, we will be prompted to enter the customer name. If the customer organization does not exist in idemeum, it will be automatically created.
## **Obtain unified install script**
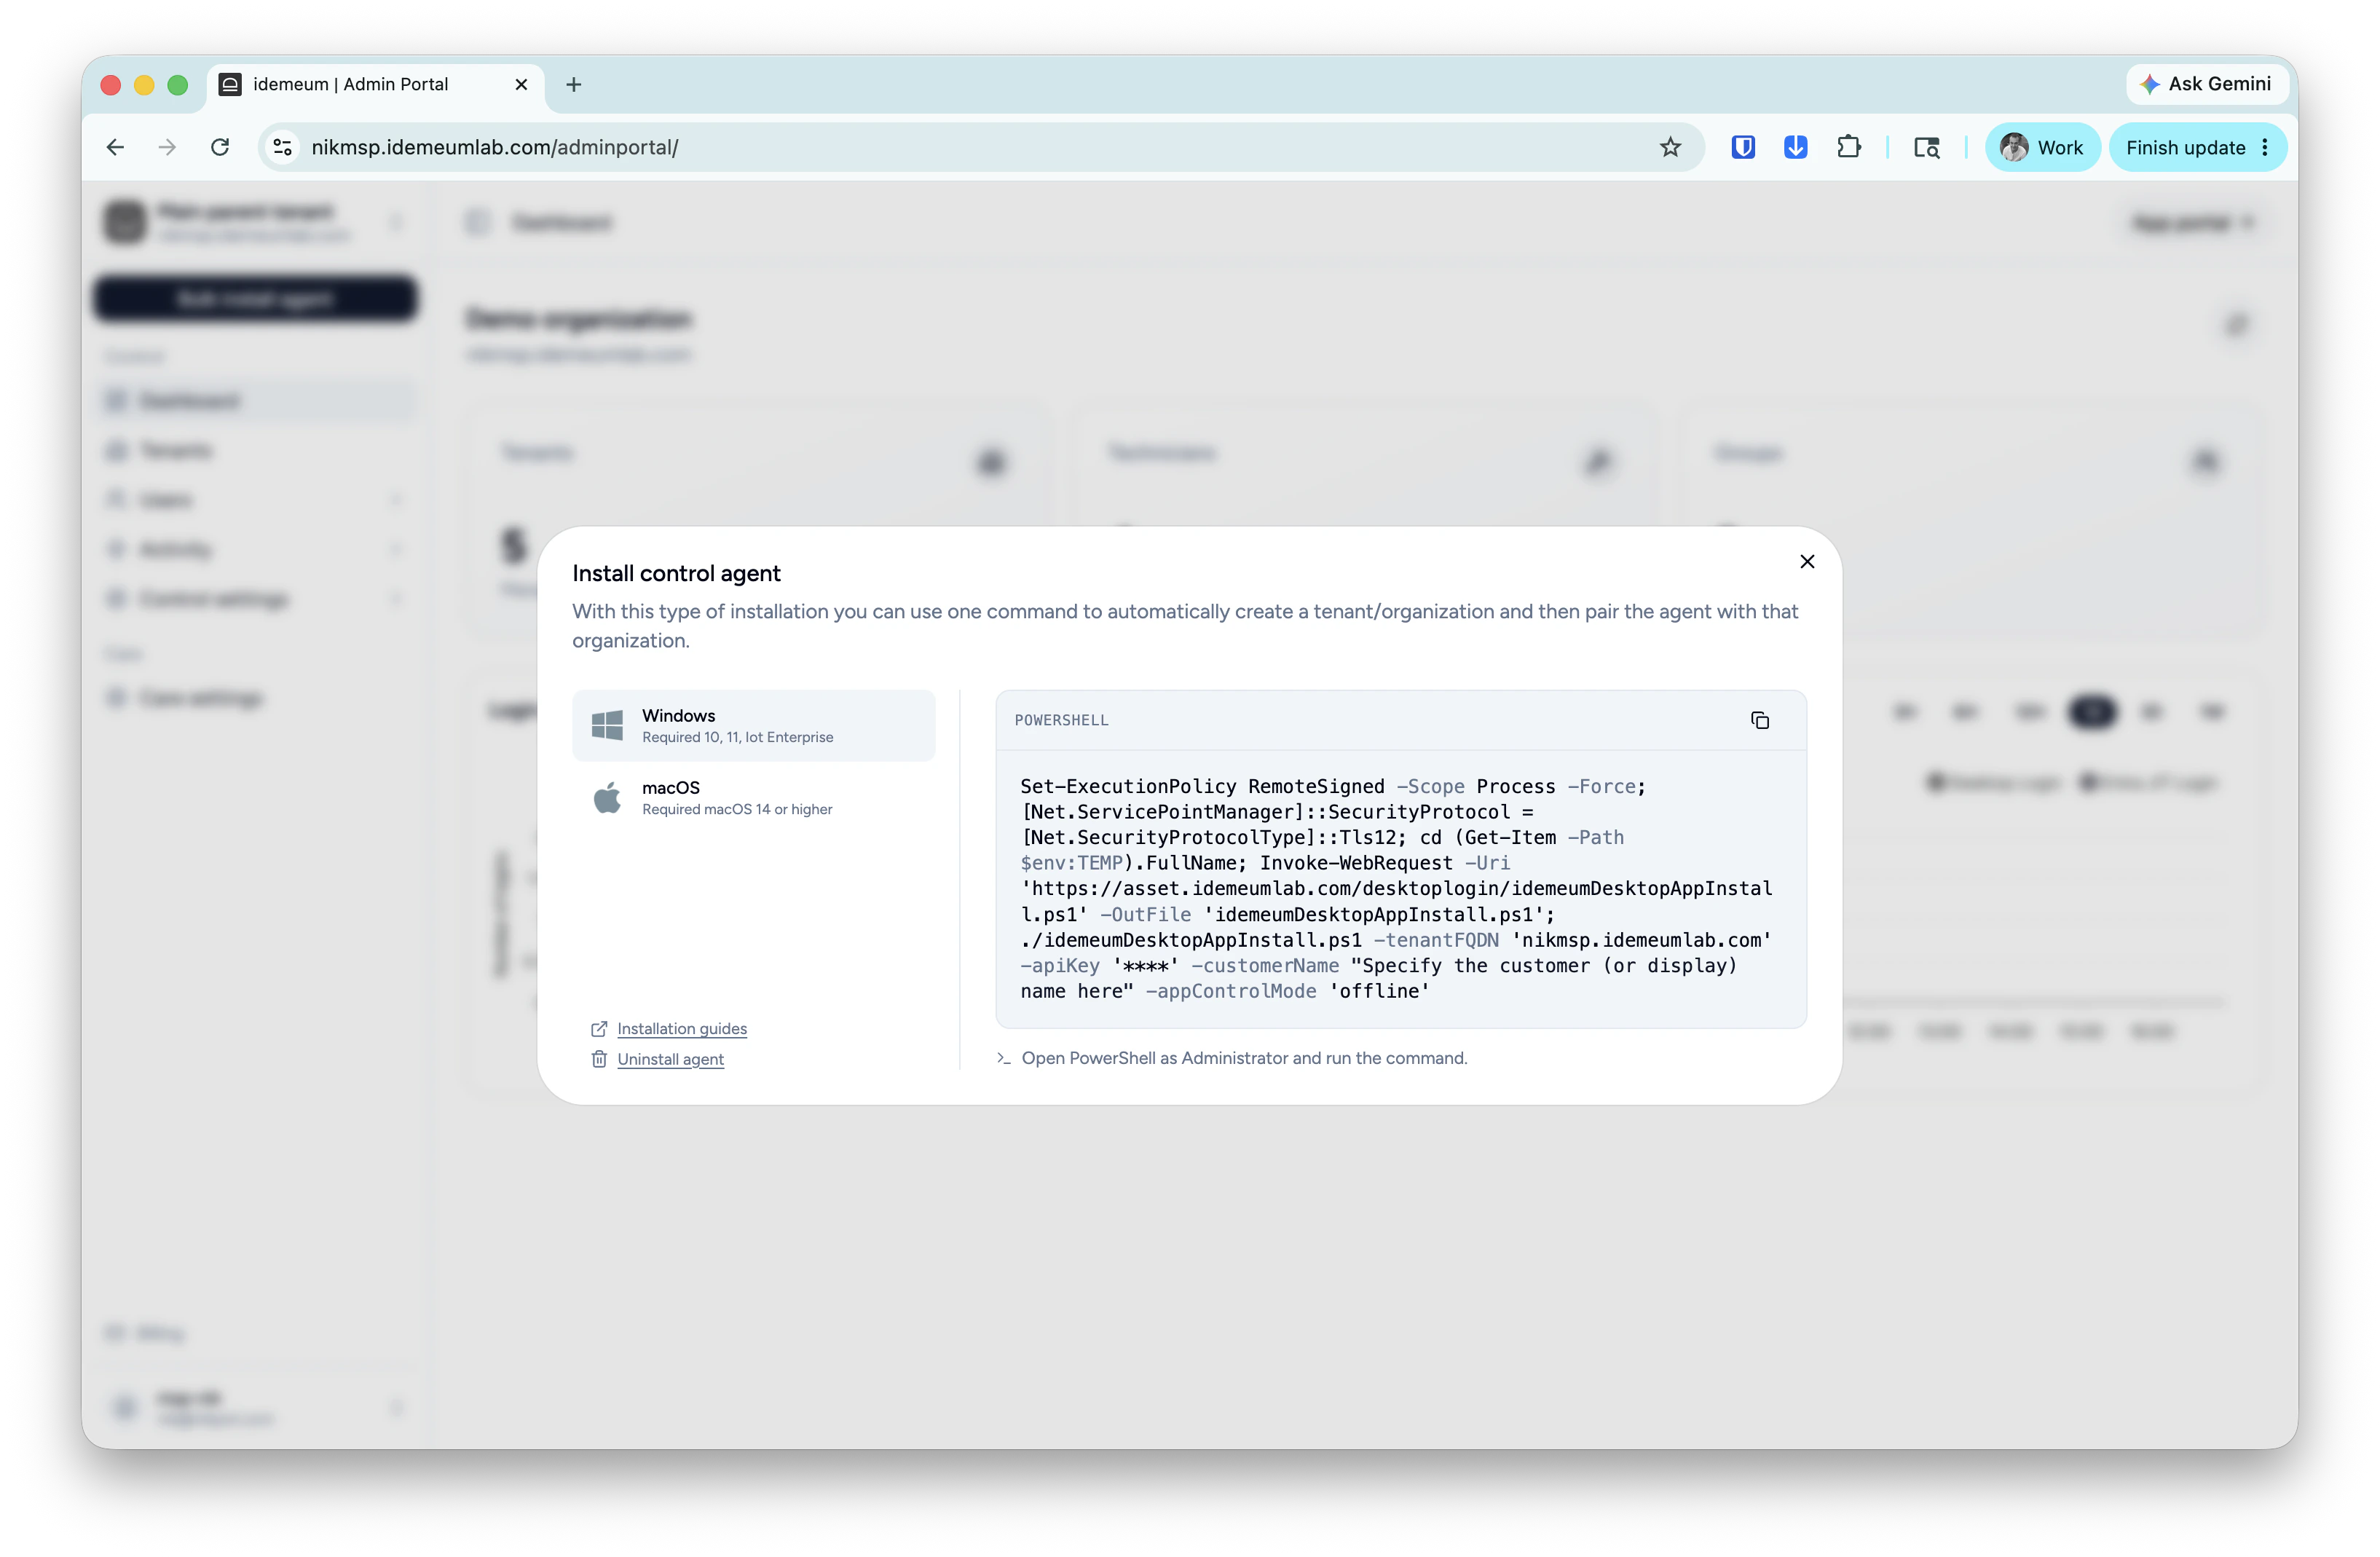
* Navigate to the admin portal of your `Main MSP dashboard`
* Click on the `Bulk install agent` then choose `Control agent`
* Choose the operating system and copy the unified install script command
* Save this command somewhere as we will need to use it in Level
 ## **Create installation script**
There are several ways you can deploy scripts in Level - you can use automations, you can define custom variables and take them as an input, etc. We will simply create a script with an input variable, and when this script is deployed, we will be prompted to provide the customer name that needs to be used in idemeum.
* Access your Level dashboard
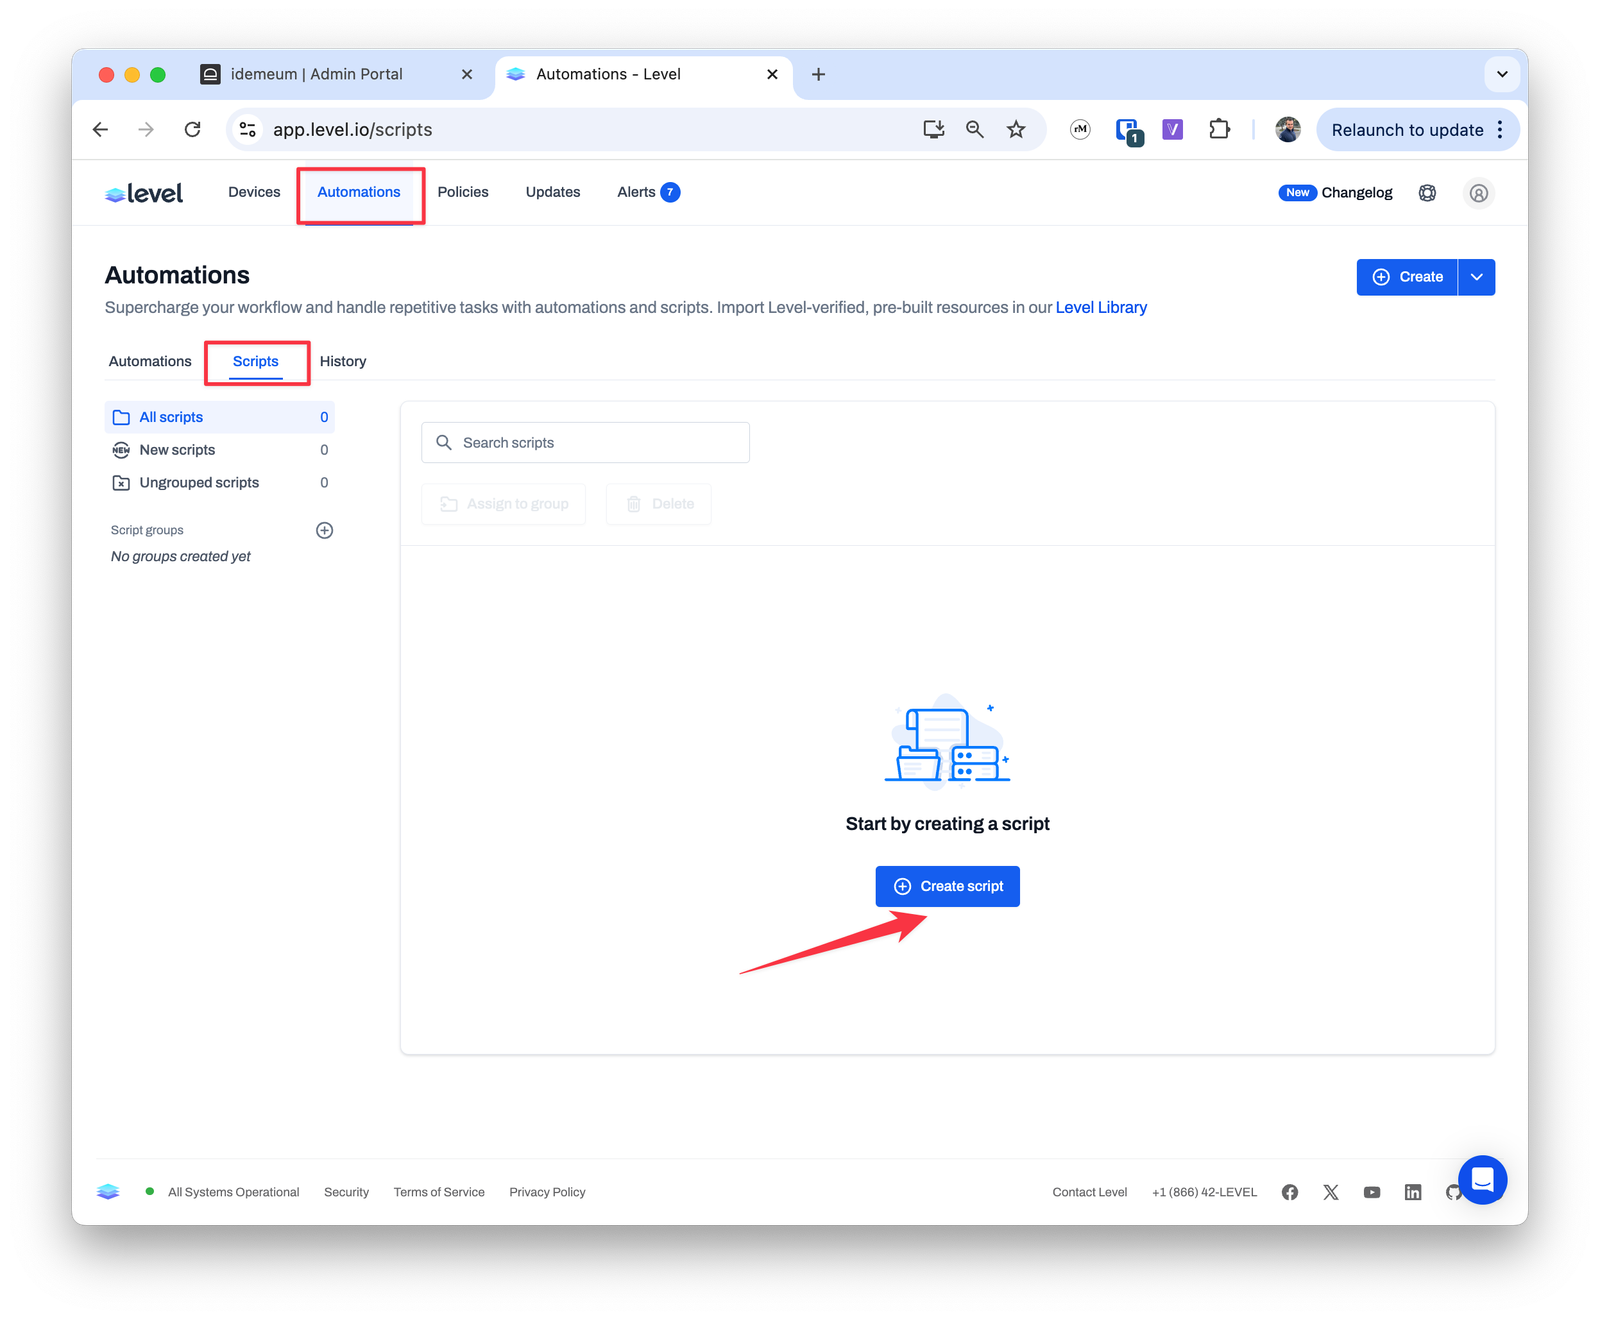
* Navigate to `Automations` → `Scripts` → `Create script`
## **Create installation script**
There are several ways you can deploy scripts in Level - you can use automations, you can define custom variables and take them as an input, etc. We will simply create a script with an input variable, and when this script is deployed, we will be prompted to provide the customer name that needs to be used in idemeum.
* Access your Level dashboard
* Navigate to `Automations` → `Scripts` → `Create script`
 * Enter the name for your script
* First we will create an input variable. Click on the `Variables` submenu and then `Add new variable`
* Enter the name for your script
* First we will create an input variable. Click on the `Variables` submenu and then `Add new variable`
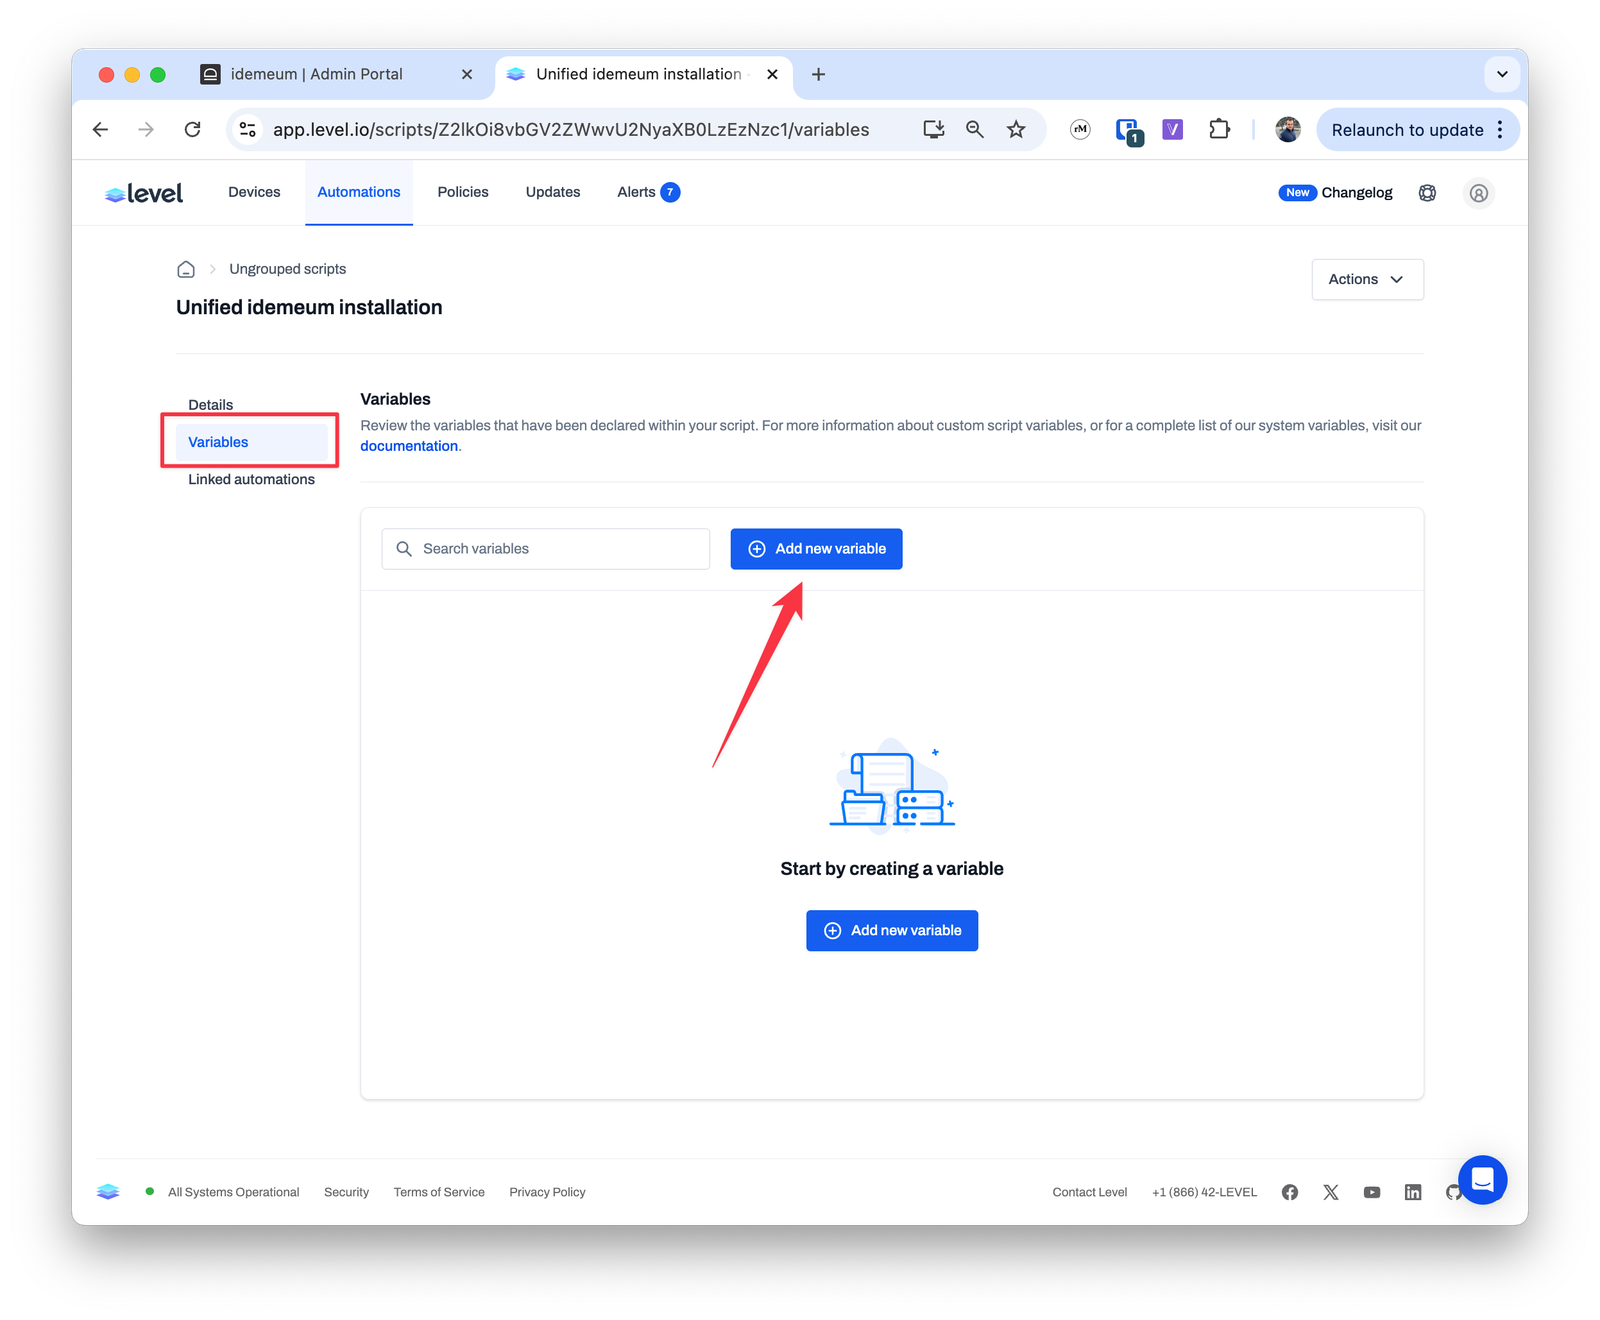 * Provide the variable name and keep the default value empty
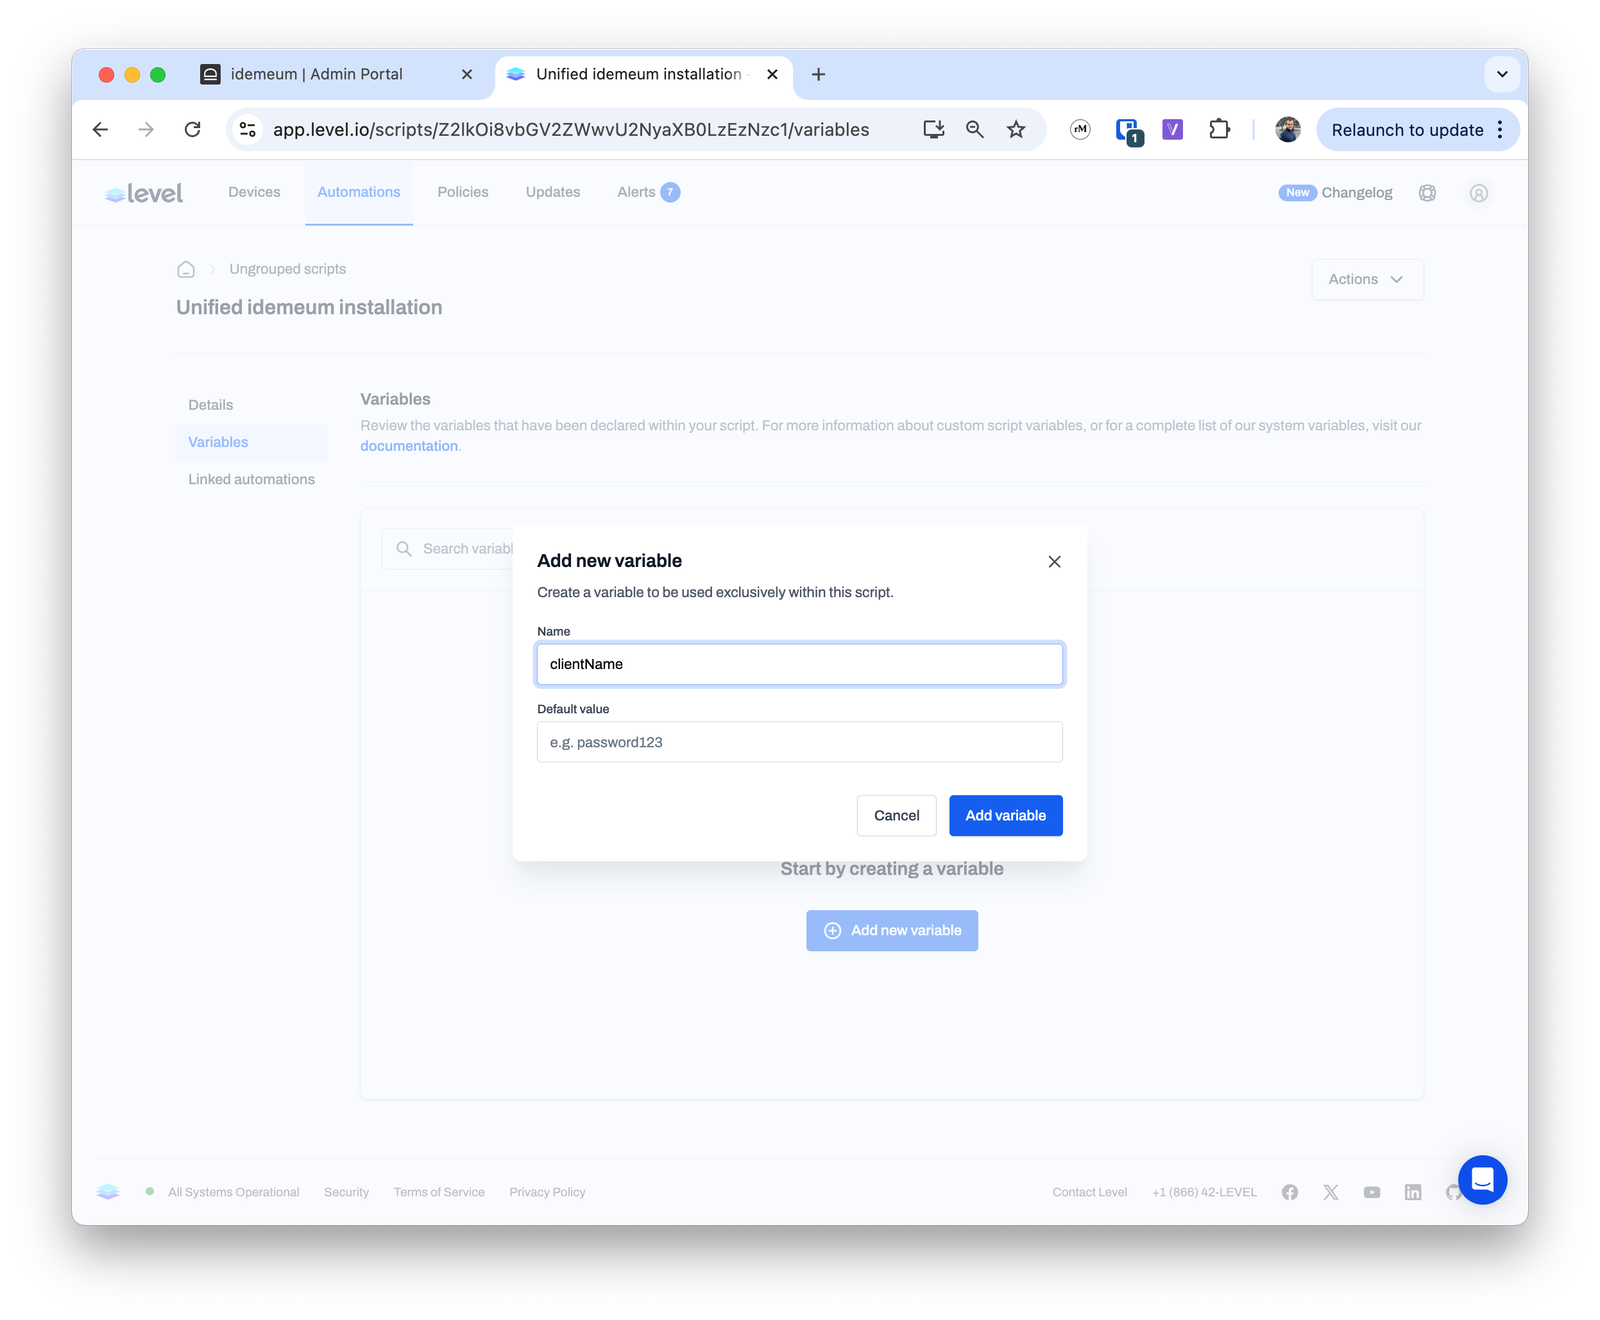 * Add variable
* Now go back to the script configuration submenu `Details`
* Paste the unified installation command that you obtained in the previous step
* Choose `Powershell` for Windows and run script as `Local system`
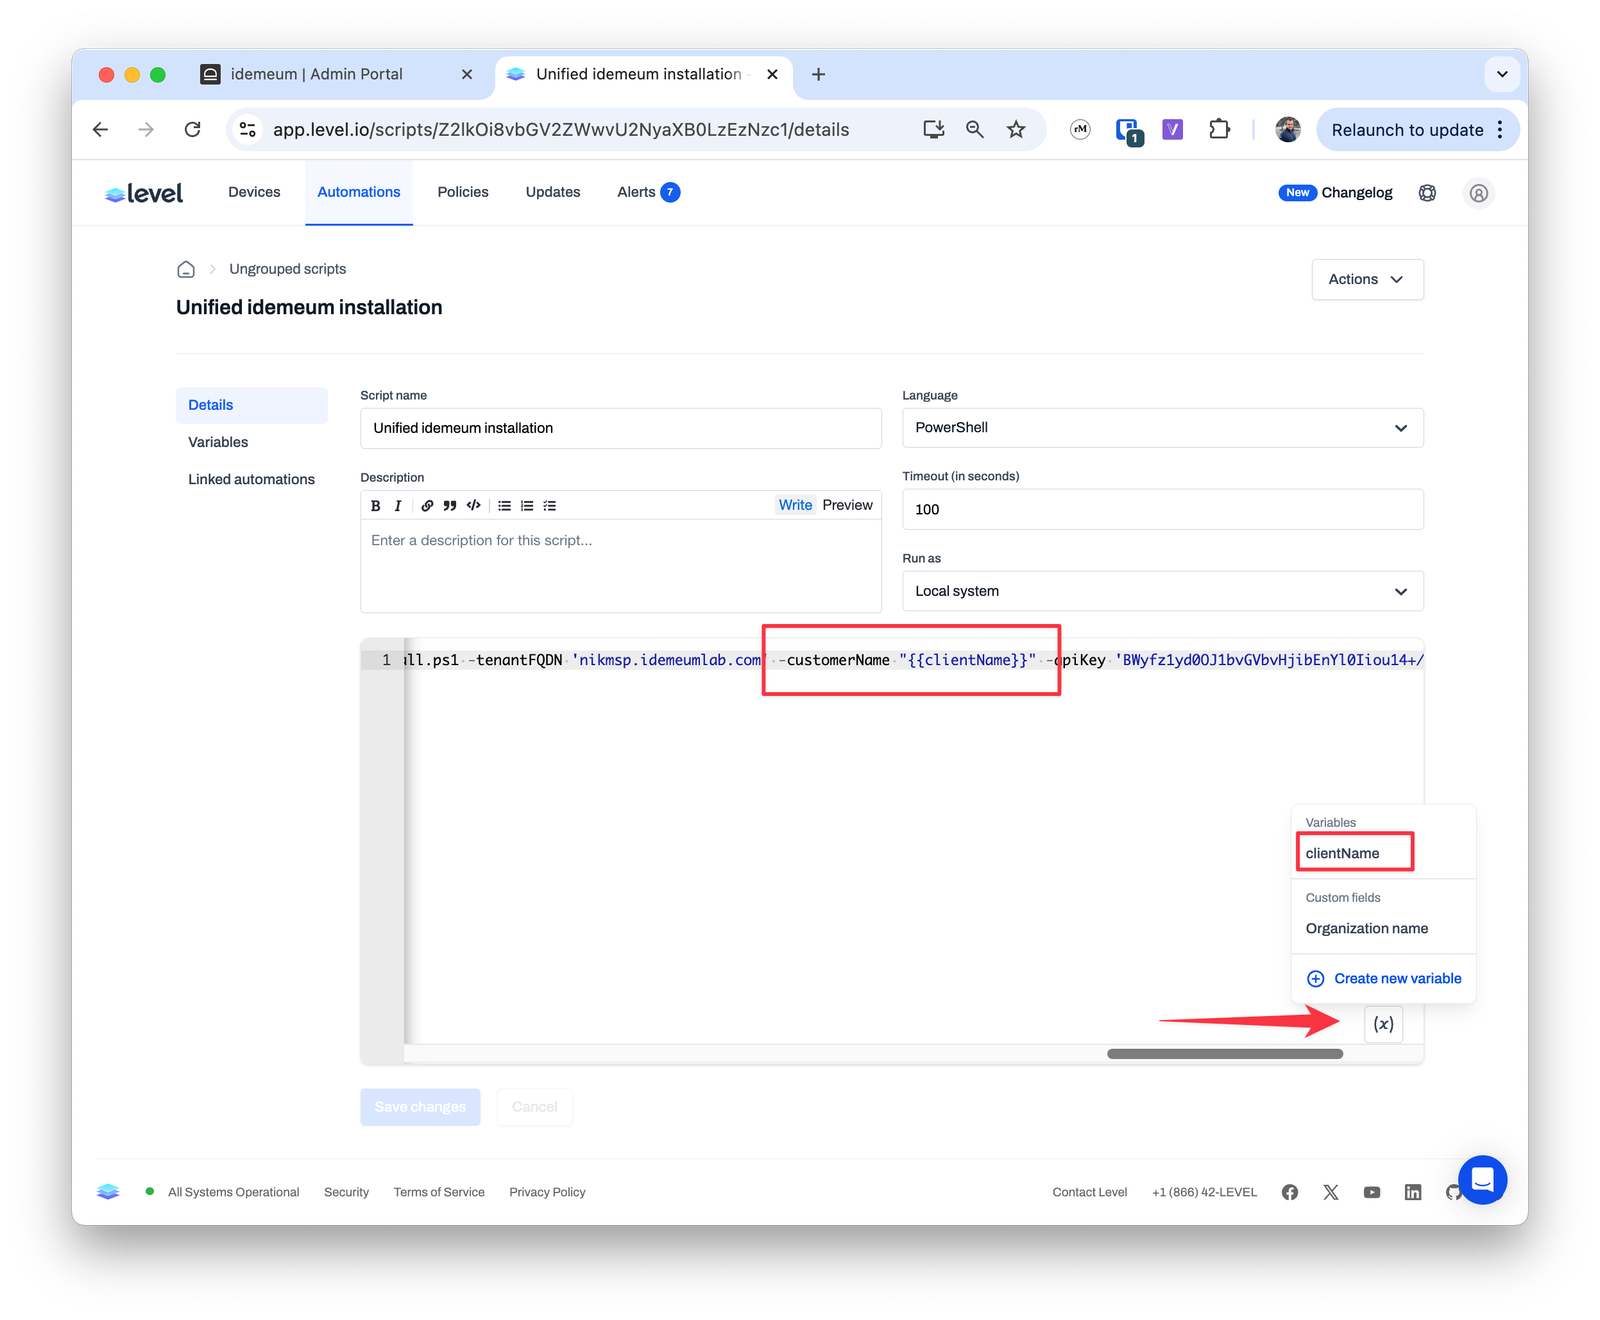
* Scroll down to the `-customerName` attribute and reference the input variable in `""` quotes. To reference the variable we created you can click on the variables button at the bottom right.
Make sure the variable is passed in double quotes.
* Add variable
* Now go back to the script configuration submenu `Details`
* Paste the unified installation command that you obtained in the previous step
* Choose `Powershell` for Windows and run script as `Local system`
* Scroll down to the `-customerName` attribute and reference the input variable in `""` quotes. To reference the variable we created you can click on the variables button at the bottom right.
Make sure the variable is passed in double quotes.
 * Save the configuration
## **Deploy script**
You can deploy script to workstations manually, or deploy to all workstations with a certain tag. Here we will deploy to one workstation for demonstration purposes.
* Navigate to the workstation that you need to deploy idemeum to
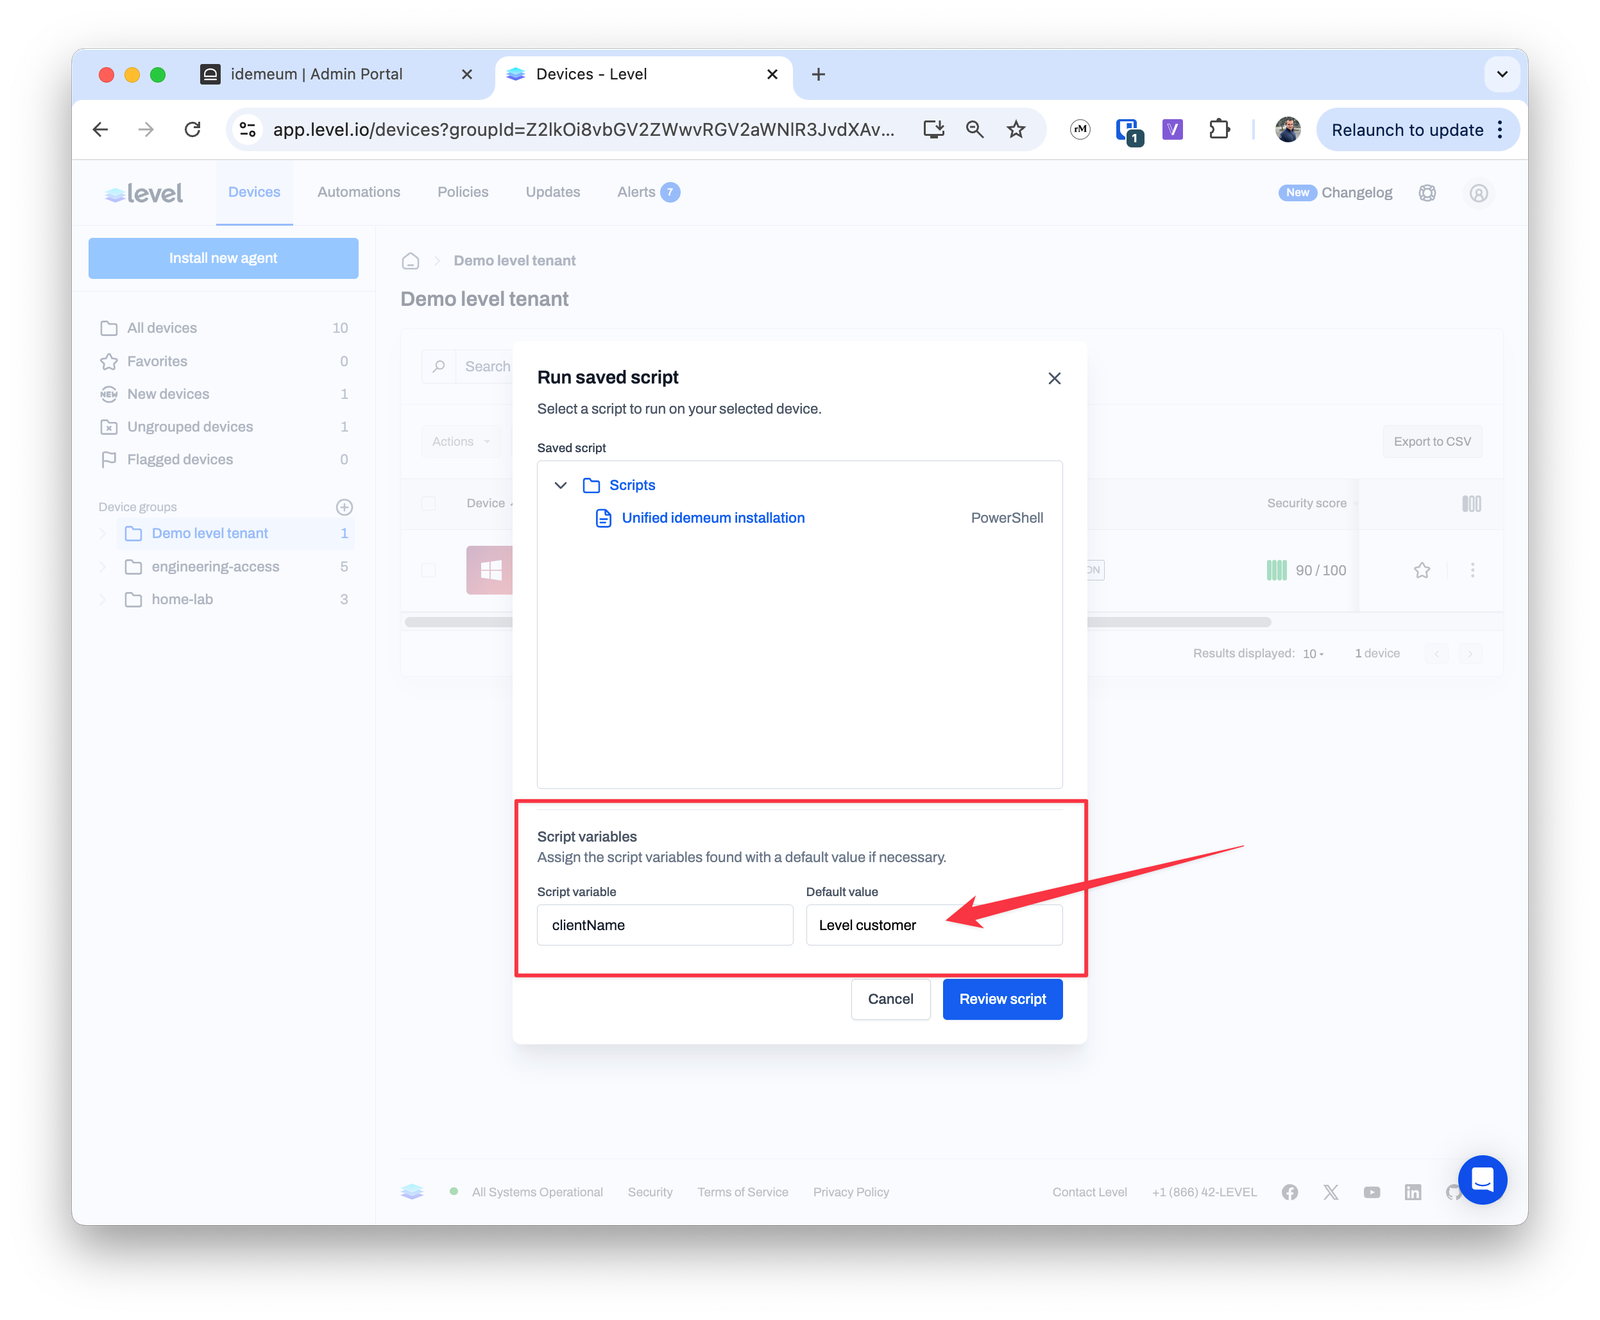
* Click on `...` and choose `Run saved script`
* Choose idemeum deployment script
* Now you can input the customer name that you want to associate idemeum agent with. If customer does not exist in idemeum, it will be automatically created.
* Save the configuration
## **Deploy script**
You can deploy script to workstations manually, or deploy to all workstations with a certain tag. Here we will deploy to one workstation for demonstration purposes.
* Navigate to the workstation that you need to deploy idemeum to
* Click on `...` and choose `Run saved script`
* Choose idemeum deployment script
* Now you can input the customer name that you want to associate idemeum agent with. If customer does not exist in idemeum, it will be automatically created.