Ninja One - idemeum integration
Unified idemeum agent deployment with NinjaOne RMM
— Nik Pot
Overview
In this guide we will take a look at how you can simply deploy idemeum agent to all your Ninja managed workstations with a unified deployment script. We will take one command and leverage Ninja variable $env:NINJA_ORGANIZATION_NAME to automatically pass the customer name to idemeum script. If customer does not exist in idemeum, it will be automatically created and the agent will be associated with that customer.
Obtain unified install script
- Navigate to the admin portal of your
Main MSP dashboard - Click on the
Install new agent button - Choose the operating system and copy the unified install script command
- Save this command somewhere as we will need to use it in Ninja

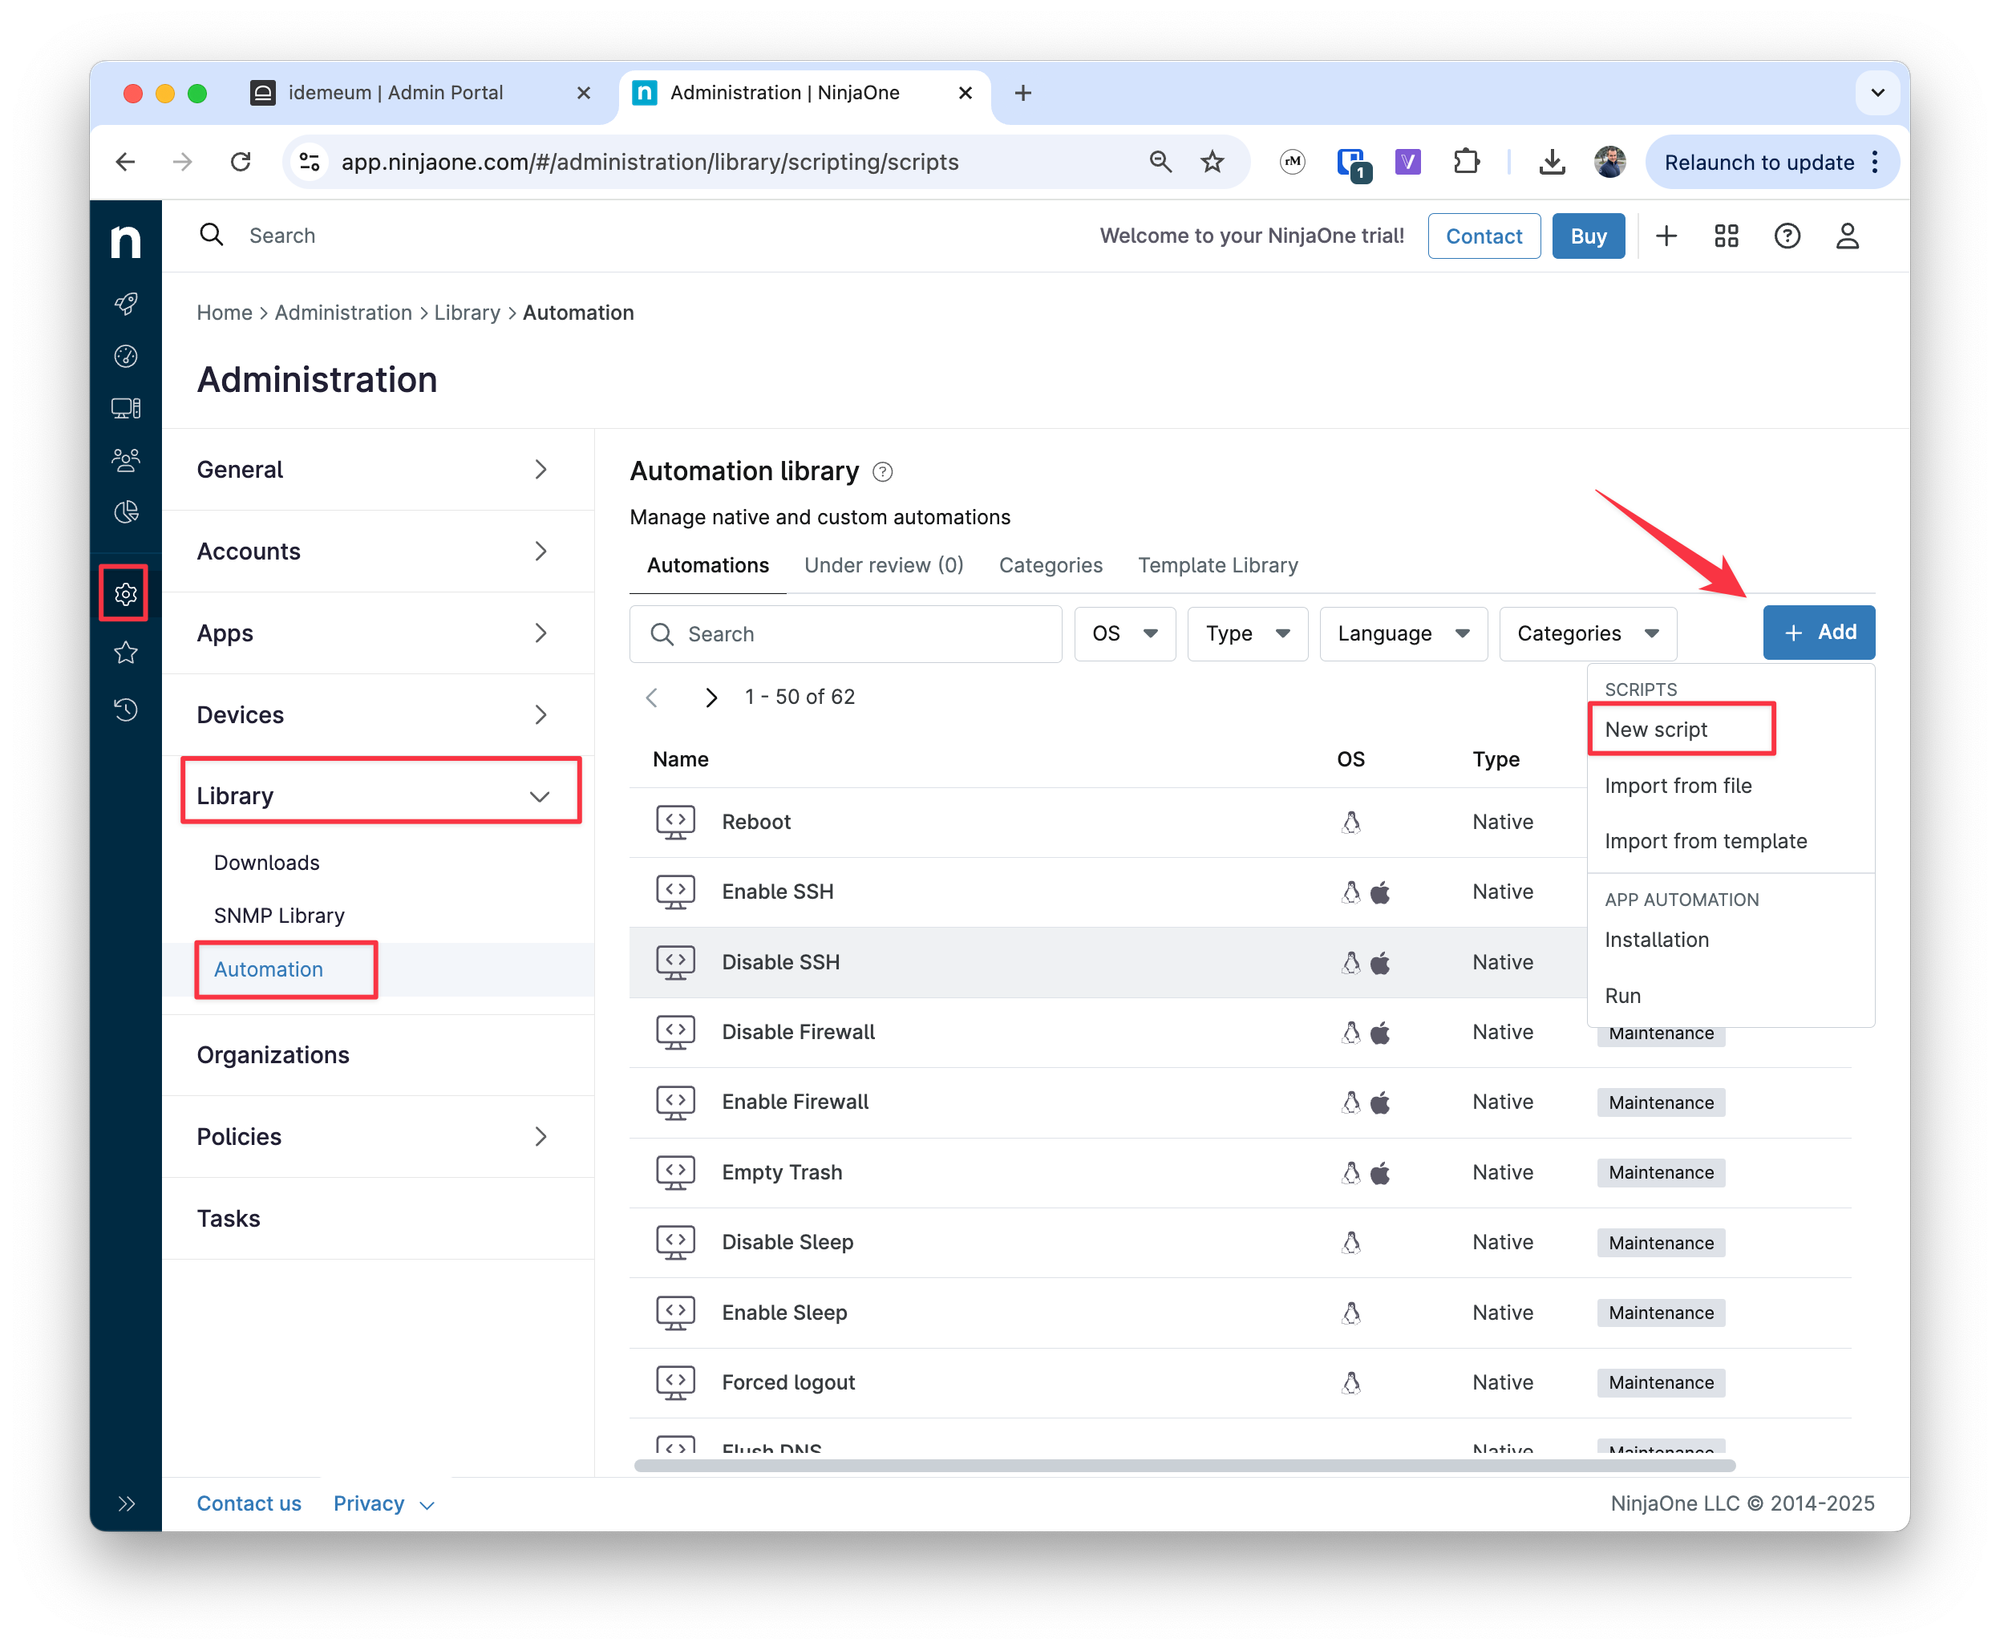
Create installation script in Ninja
- Access your Ninja management dashboard
- Navigate to
Administration→Library→Automation - Click
Addand then chooseNew script
- Provide the script name to use
- Choose
Powershellfor Windows installation - For operating system choose
Windows - Architecture
Alland run asSystem - Paste the installation command that you obtained in the previous step into the script editor window
- Scroll to the
-customerNameattribute in the command and paste the$env:NINJA_ORGANIZATION_NAMEvalue inside"". This way we will automatically pass the customer name into installation script.
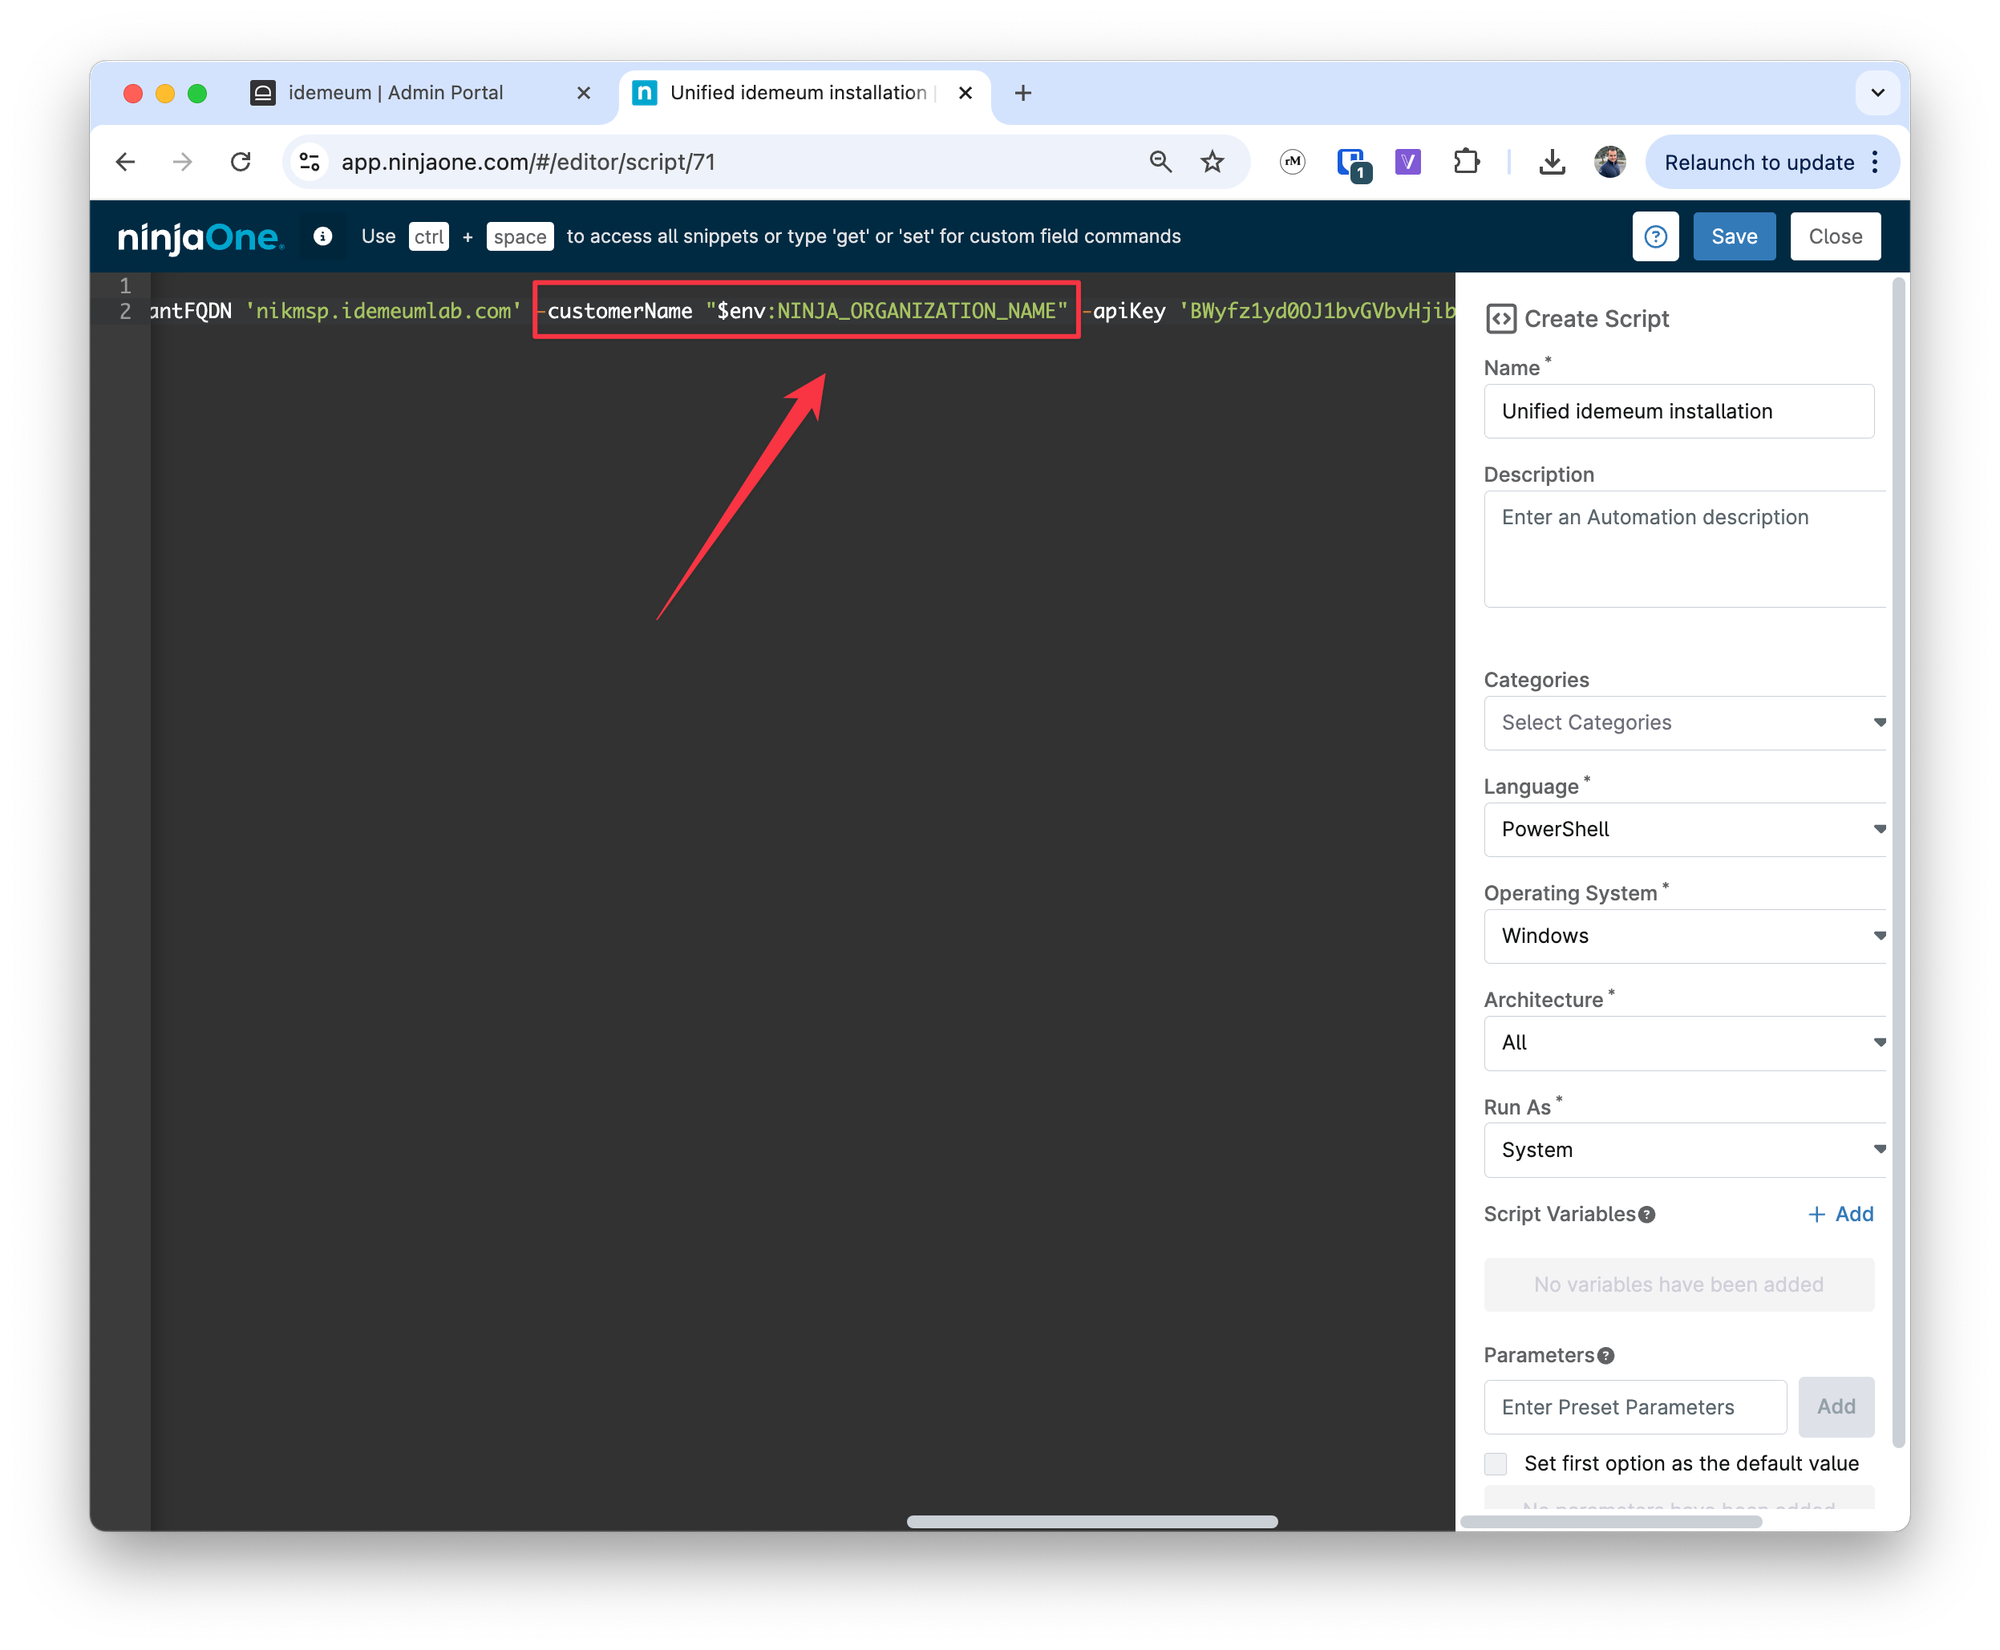
- Save the script configuration
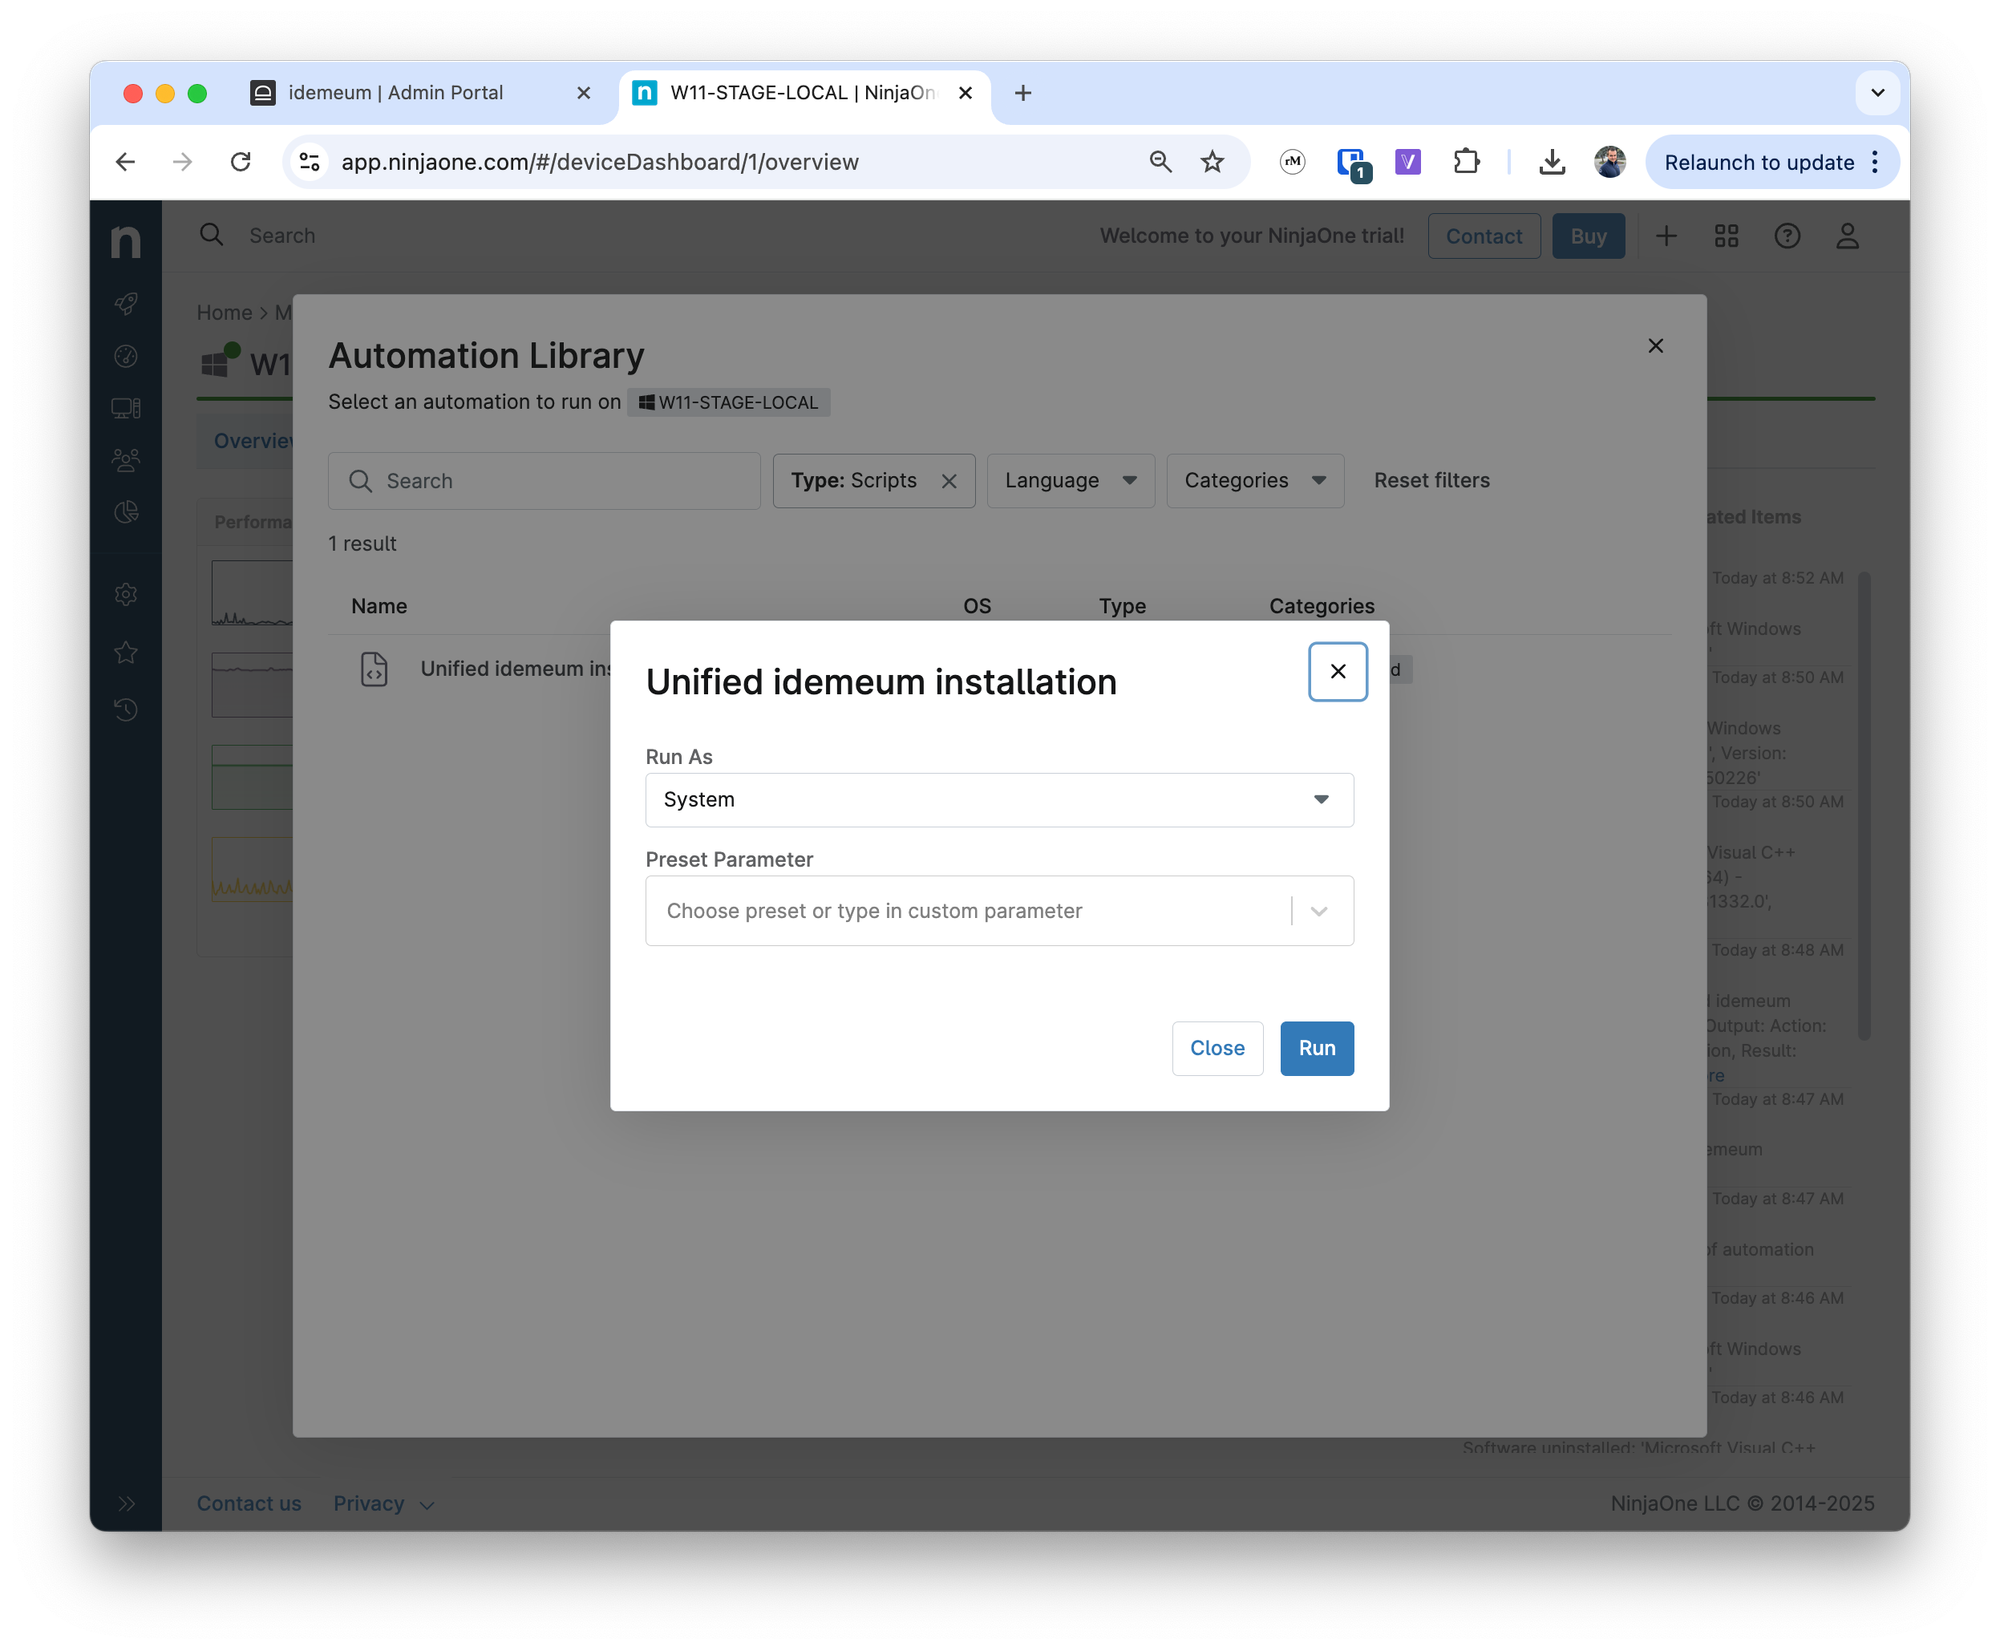
Deploy script
Now you can deploy script to a set of workstations. The customer name will be passed automatically. If the organization exists in idemeum, idemeum agent will be paired with that organization, if not, then new customer will be created automatically in idemeum.
- Locate the workstation where you would like to deploy idemeum
- Choose
Run automation→Scriptand choose idemeum script that we created in the previous step - Confirm the execution of the script