Clinic admin role
Assign a clinic admin role to a user to allow managing user group membership.
Summary
In this post we will take a look at how you can assign Clinic admin role to a user, so that the user can manage user group memberships.
For instance, you have a float that needs to be assigned to user group every morning. And based on that group assignment, a float needs to login to a workstation with a specific shared user account. Clinic admin can manage the user group membership in the idemeum admin portal.
- User can be assigned to only one group managed by clinic admin (Say there are 2 groups,
group Aandgroup B, when the user is assigned togroup A, we automatically remove him fromgroup B. This only applies to groups that are managed by clinic admins.) - Clinic admins can select for how long the user will be assigned to a group. After specified time interval, the user will be automatically removed from the group.
Configuration
Create groups for clinic admins
You will need to create groups that clinic admin user will manage. Today we support groups with direct user assignment. Say we want to create two groups that clinic admins will manage - team1 and team2.
- Navigate to your idemeum admin portal
- Access
Groupsmenu and chooseAdd group - Provide a group name, click on
+button and chooseuserfrom the dropdown and assign at least one user for the group
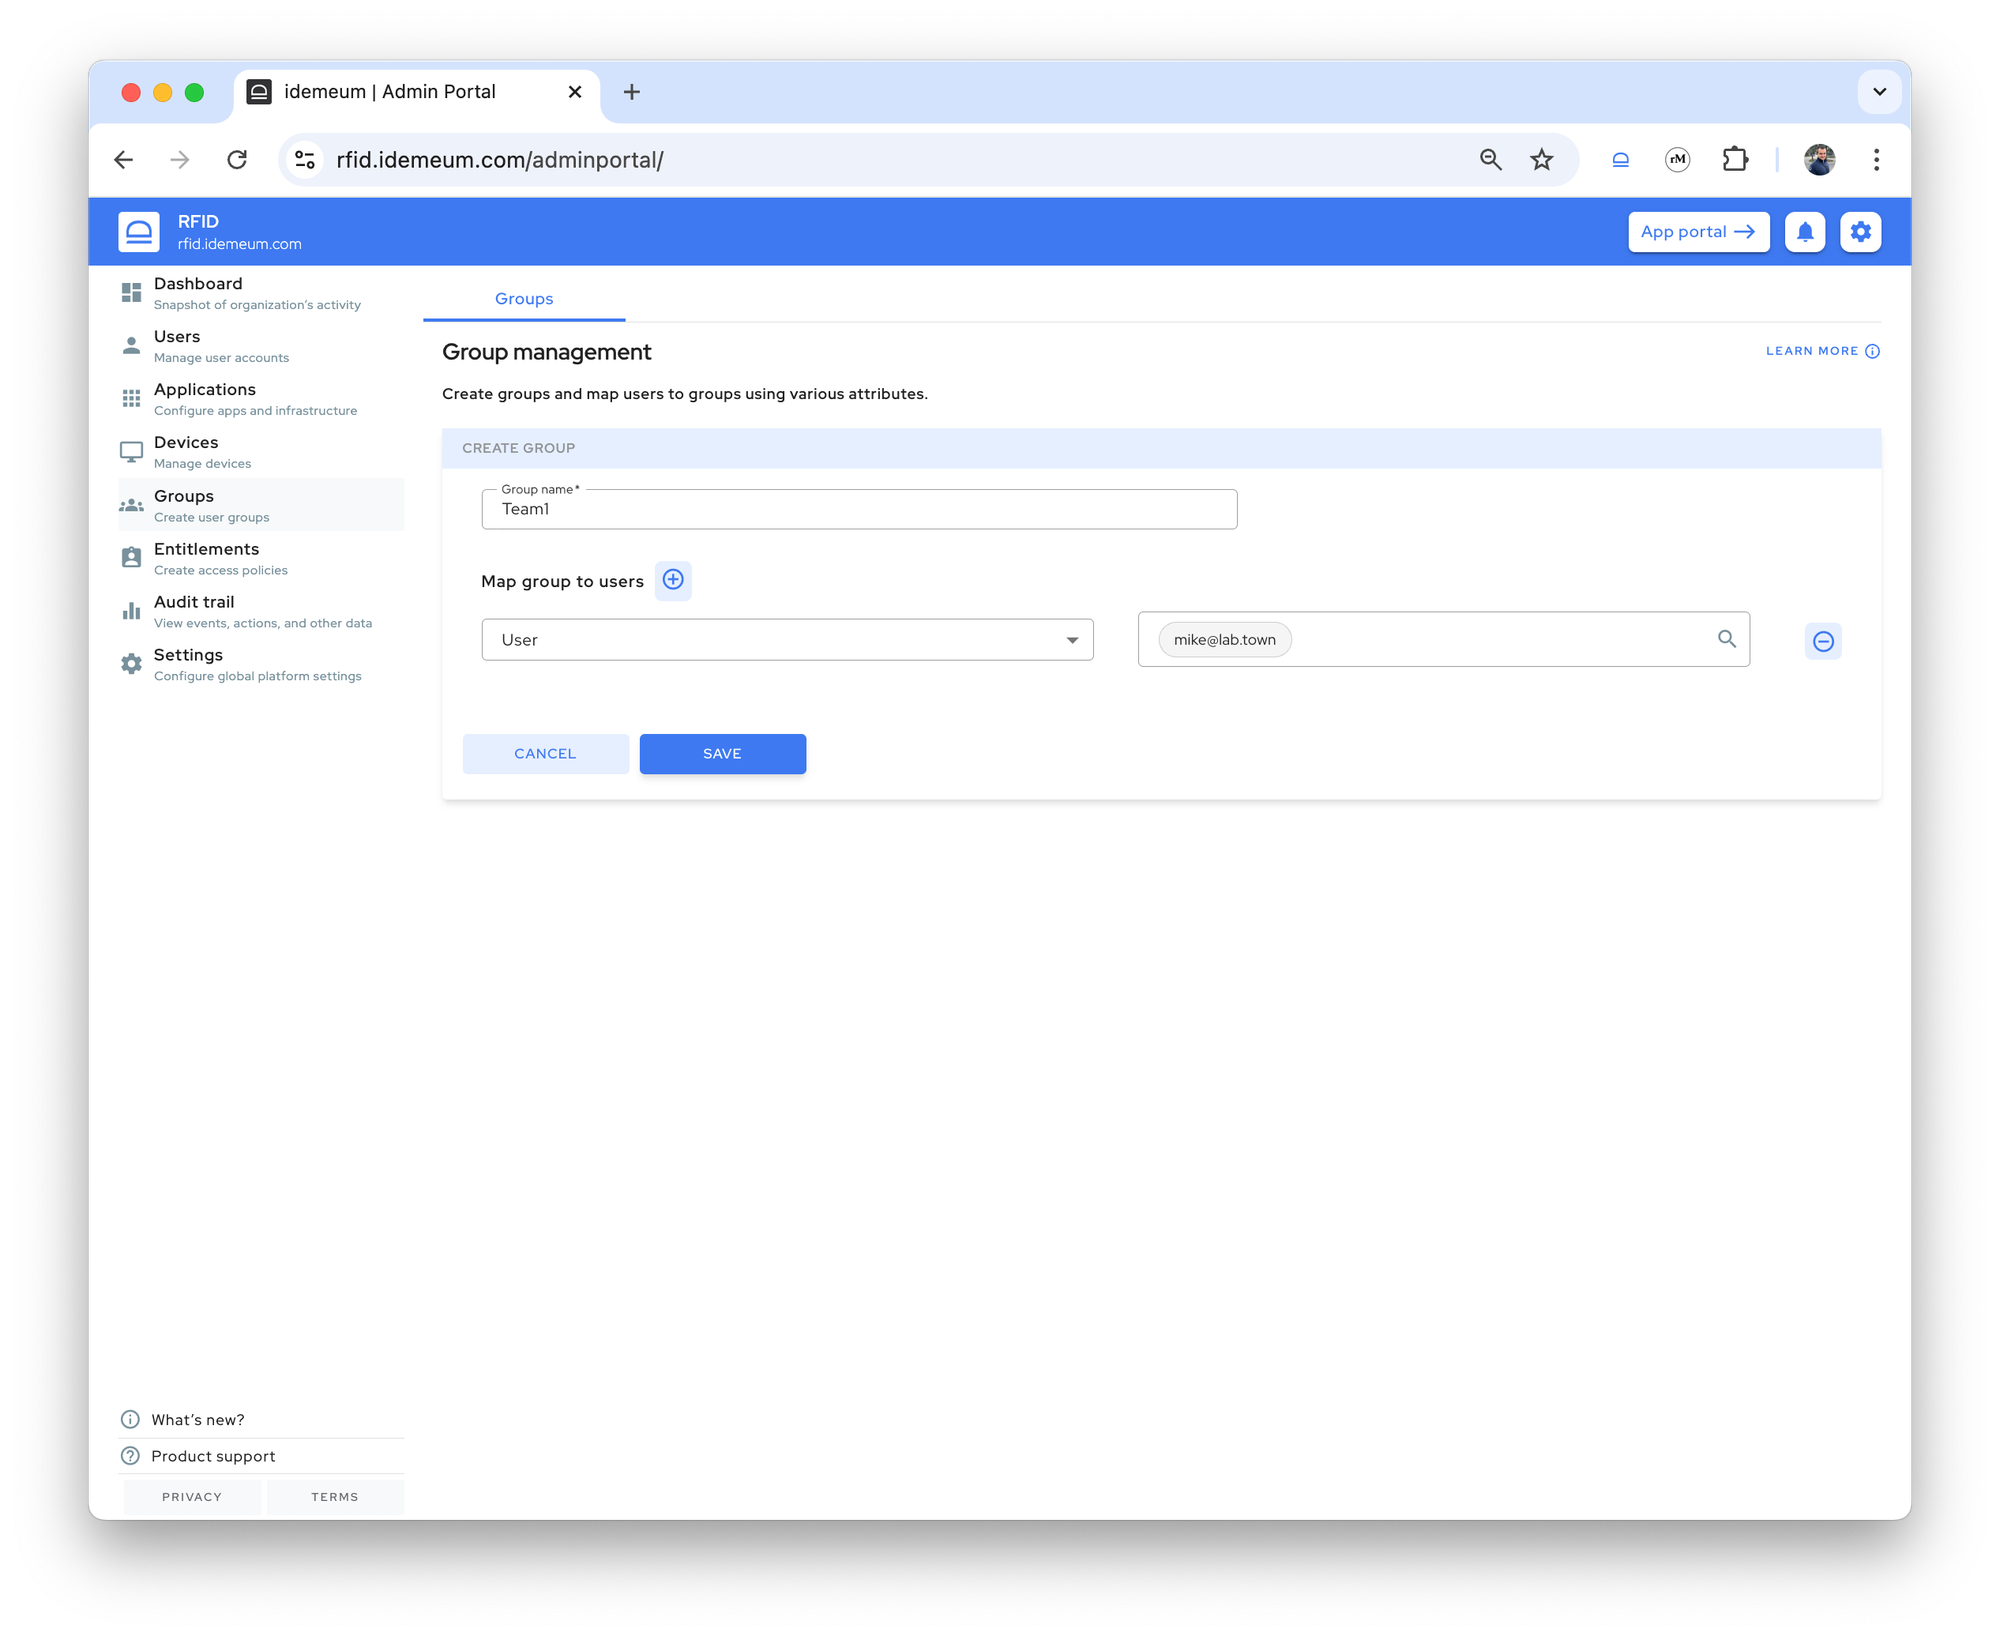
- You can now save the group
Onboard clinic admin user
Now you need to onboard a clinic admin user with the mobile application and assign a clinic admin role.
- Navigate to your idemeum admin portal and access
Users→User management - Create a user record and specify an email address
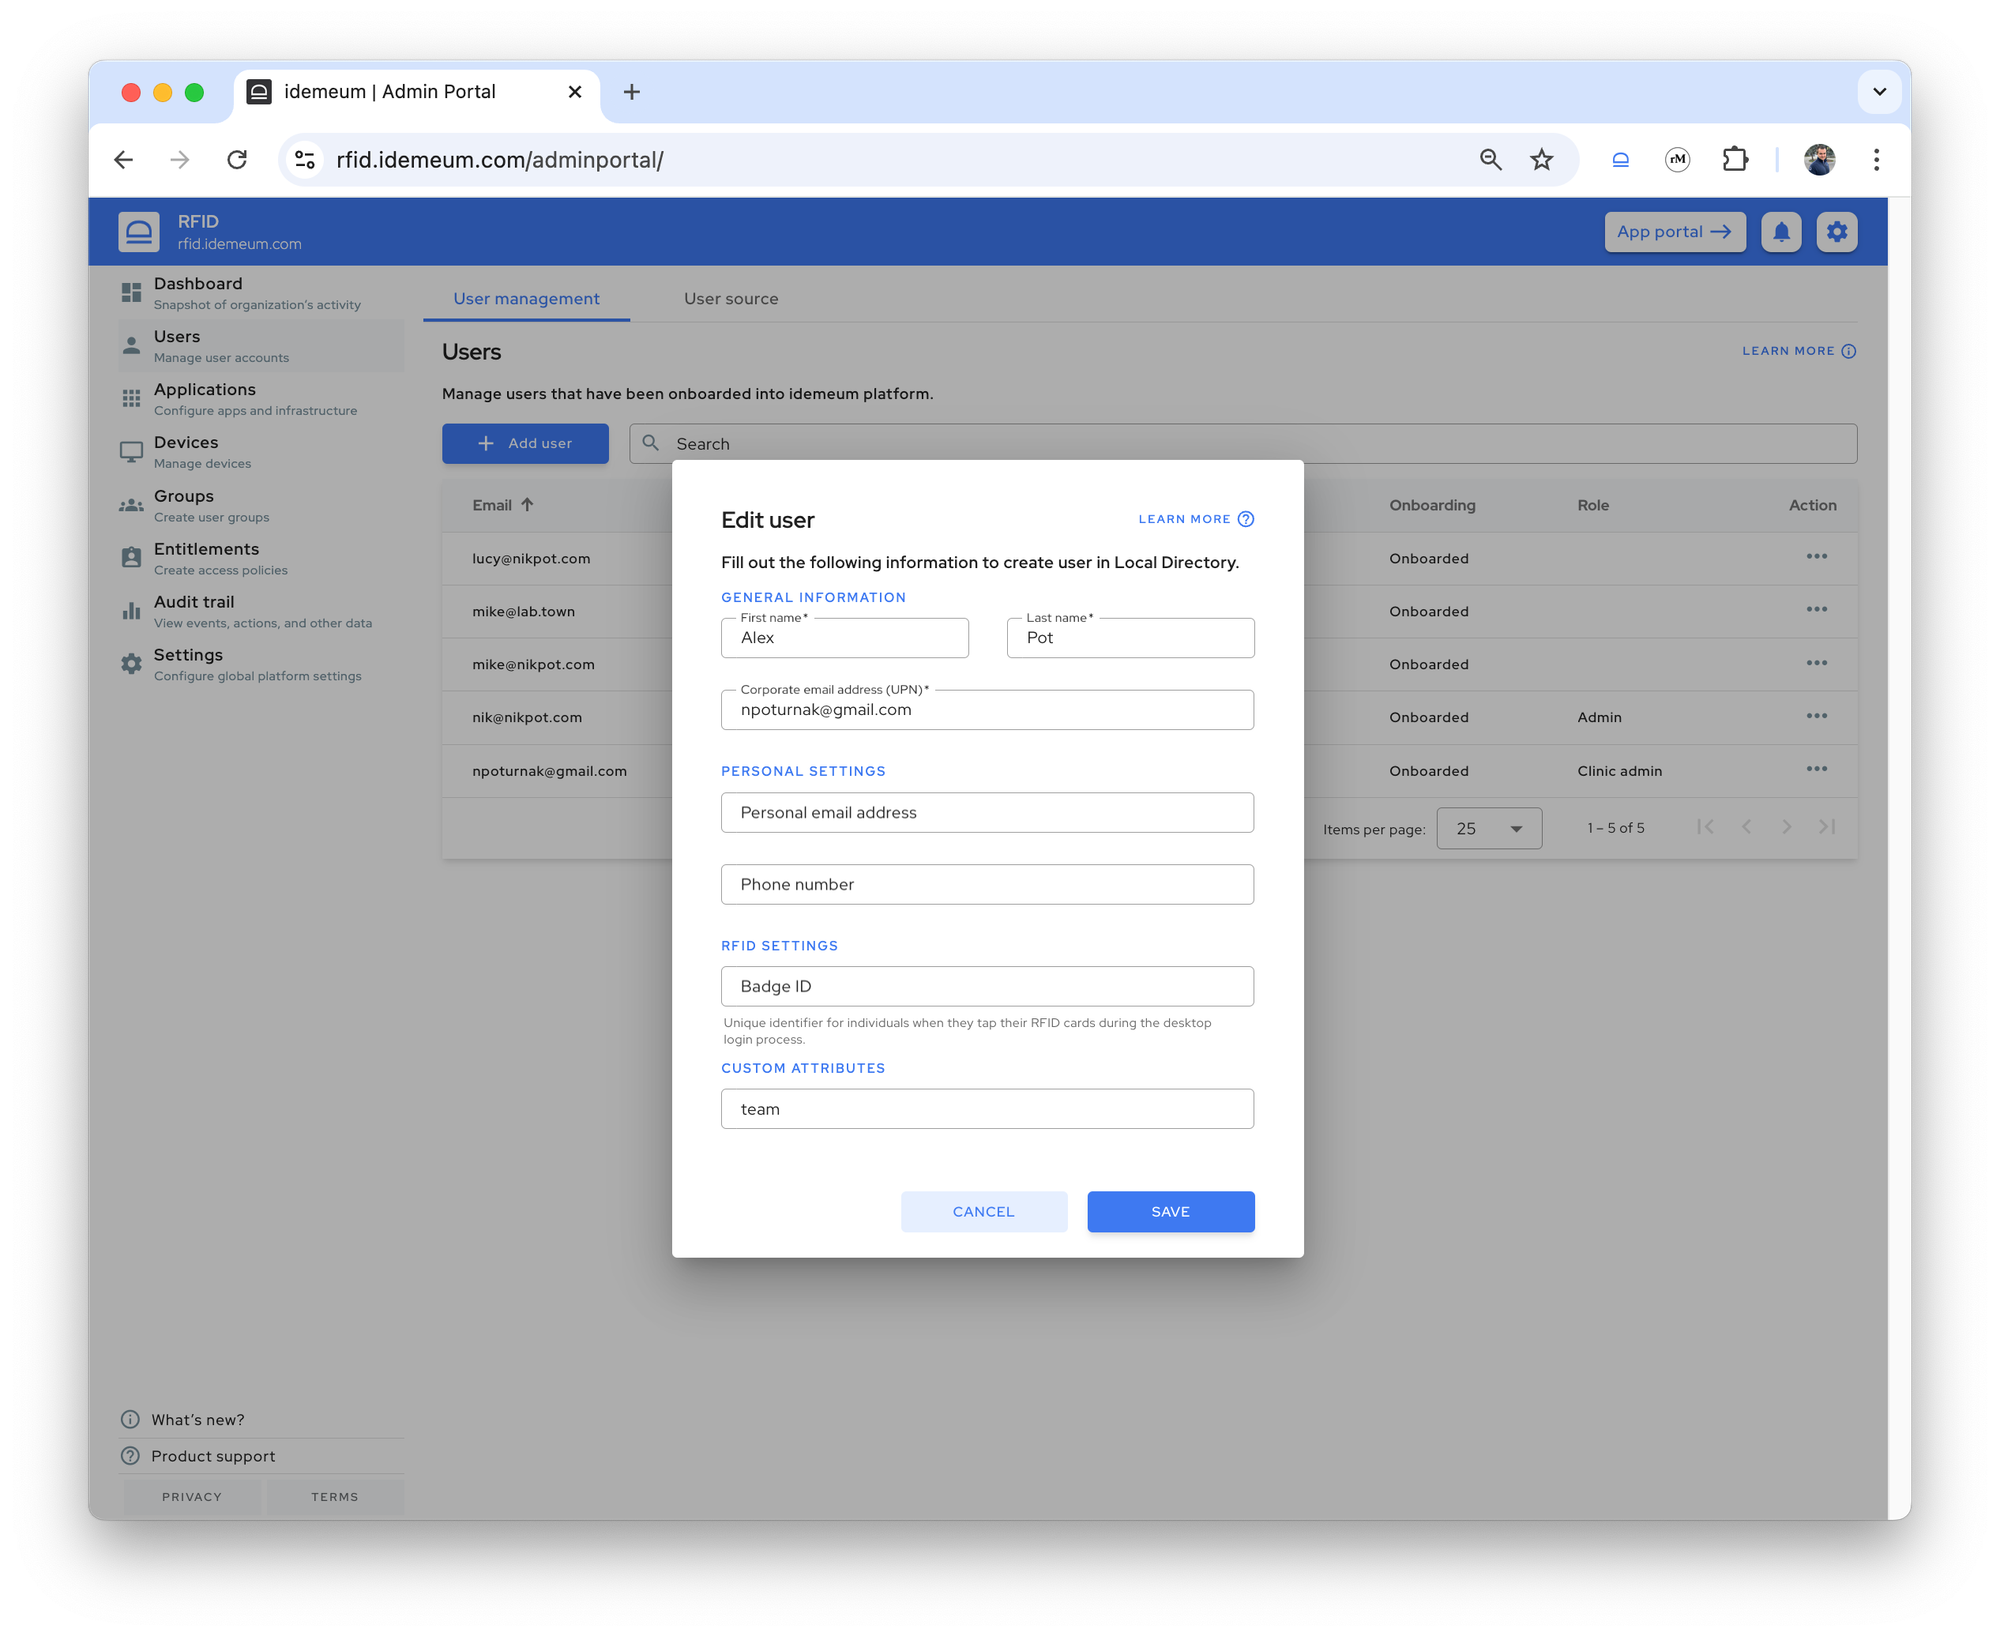
- User then installs idemeum mobile application, verifies the email address in the mobile application, navigates to idemeum portal, scans the QR-code and onboards
- As a next step you need to assign the
clinic adminrole. Access the user record, click on...and chooseAssign clinic admin
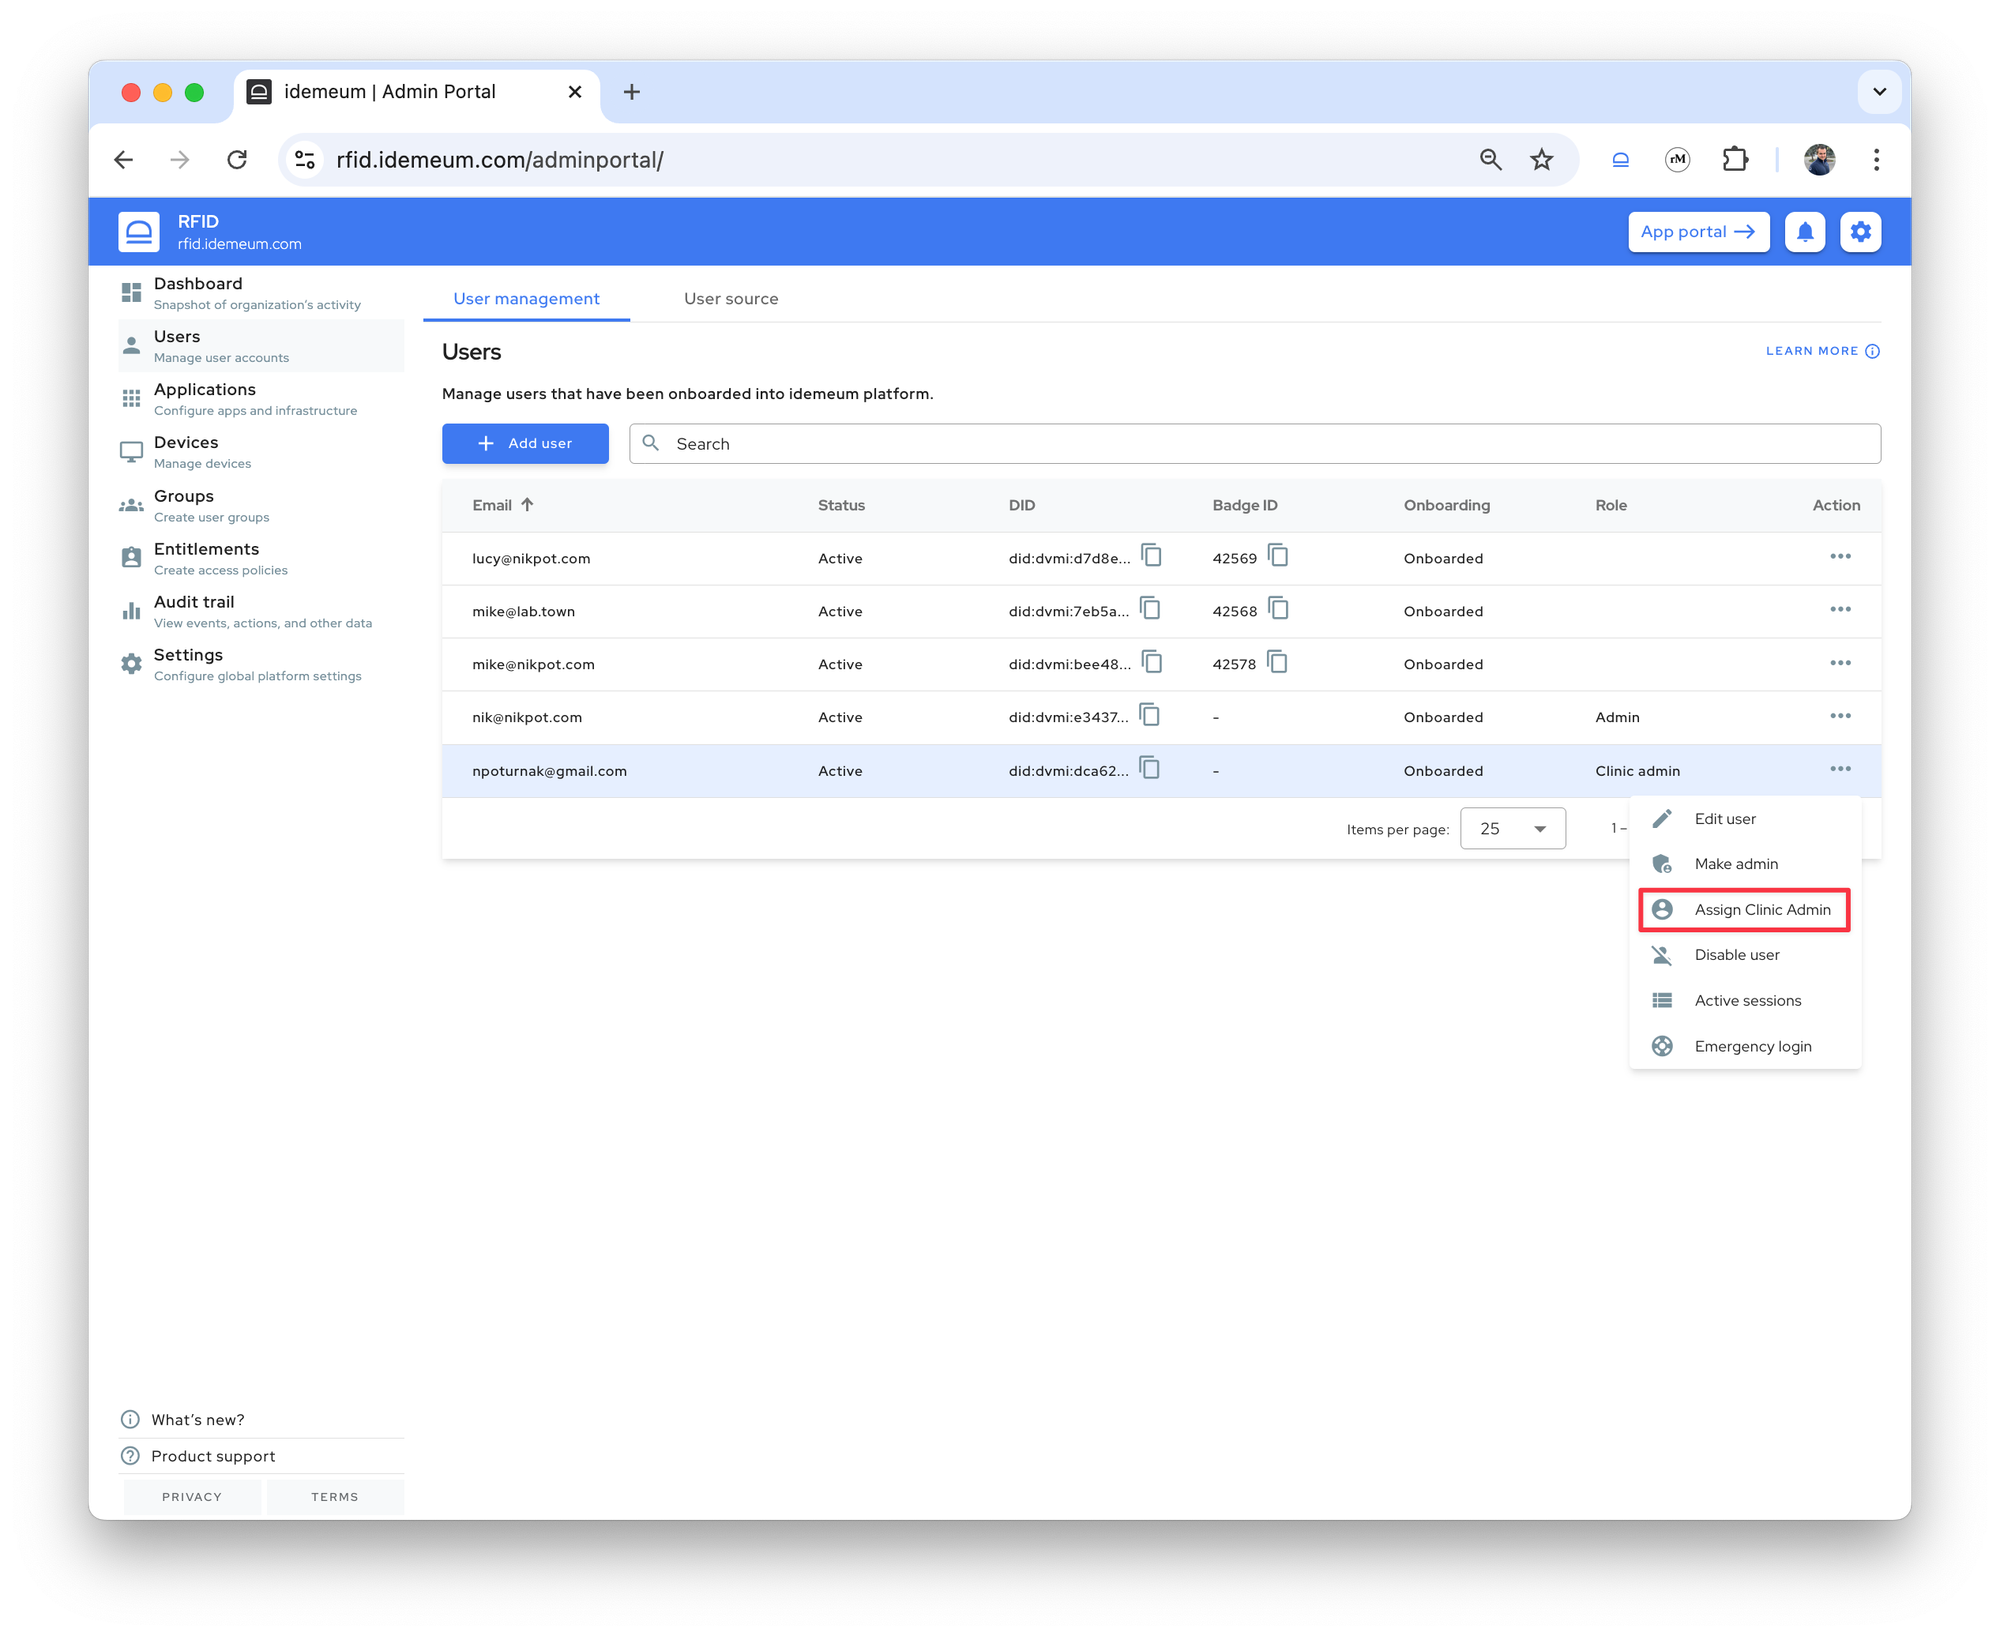
- Now you need to choose what groups clinic admin will be allowed to manage. Since we created two groups in the step above, we will choose those groups.
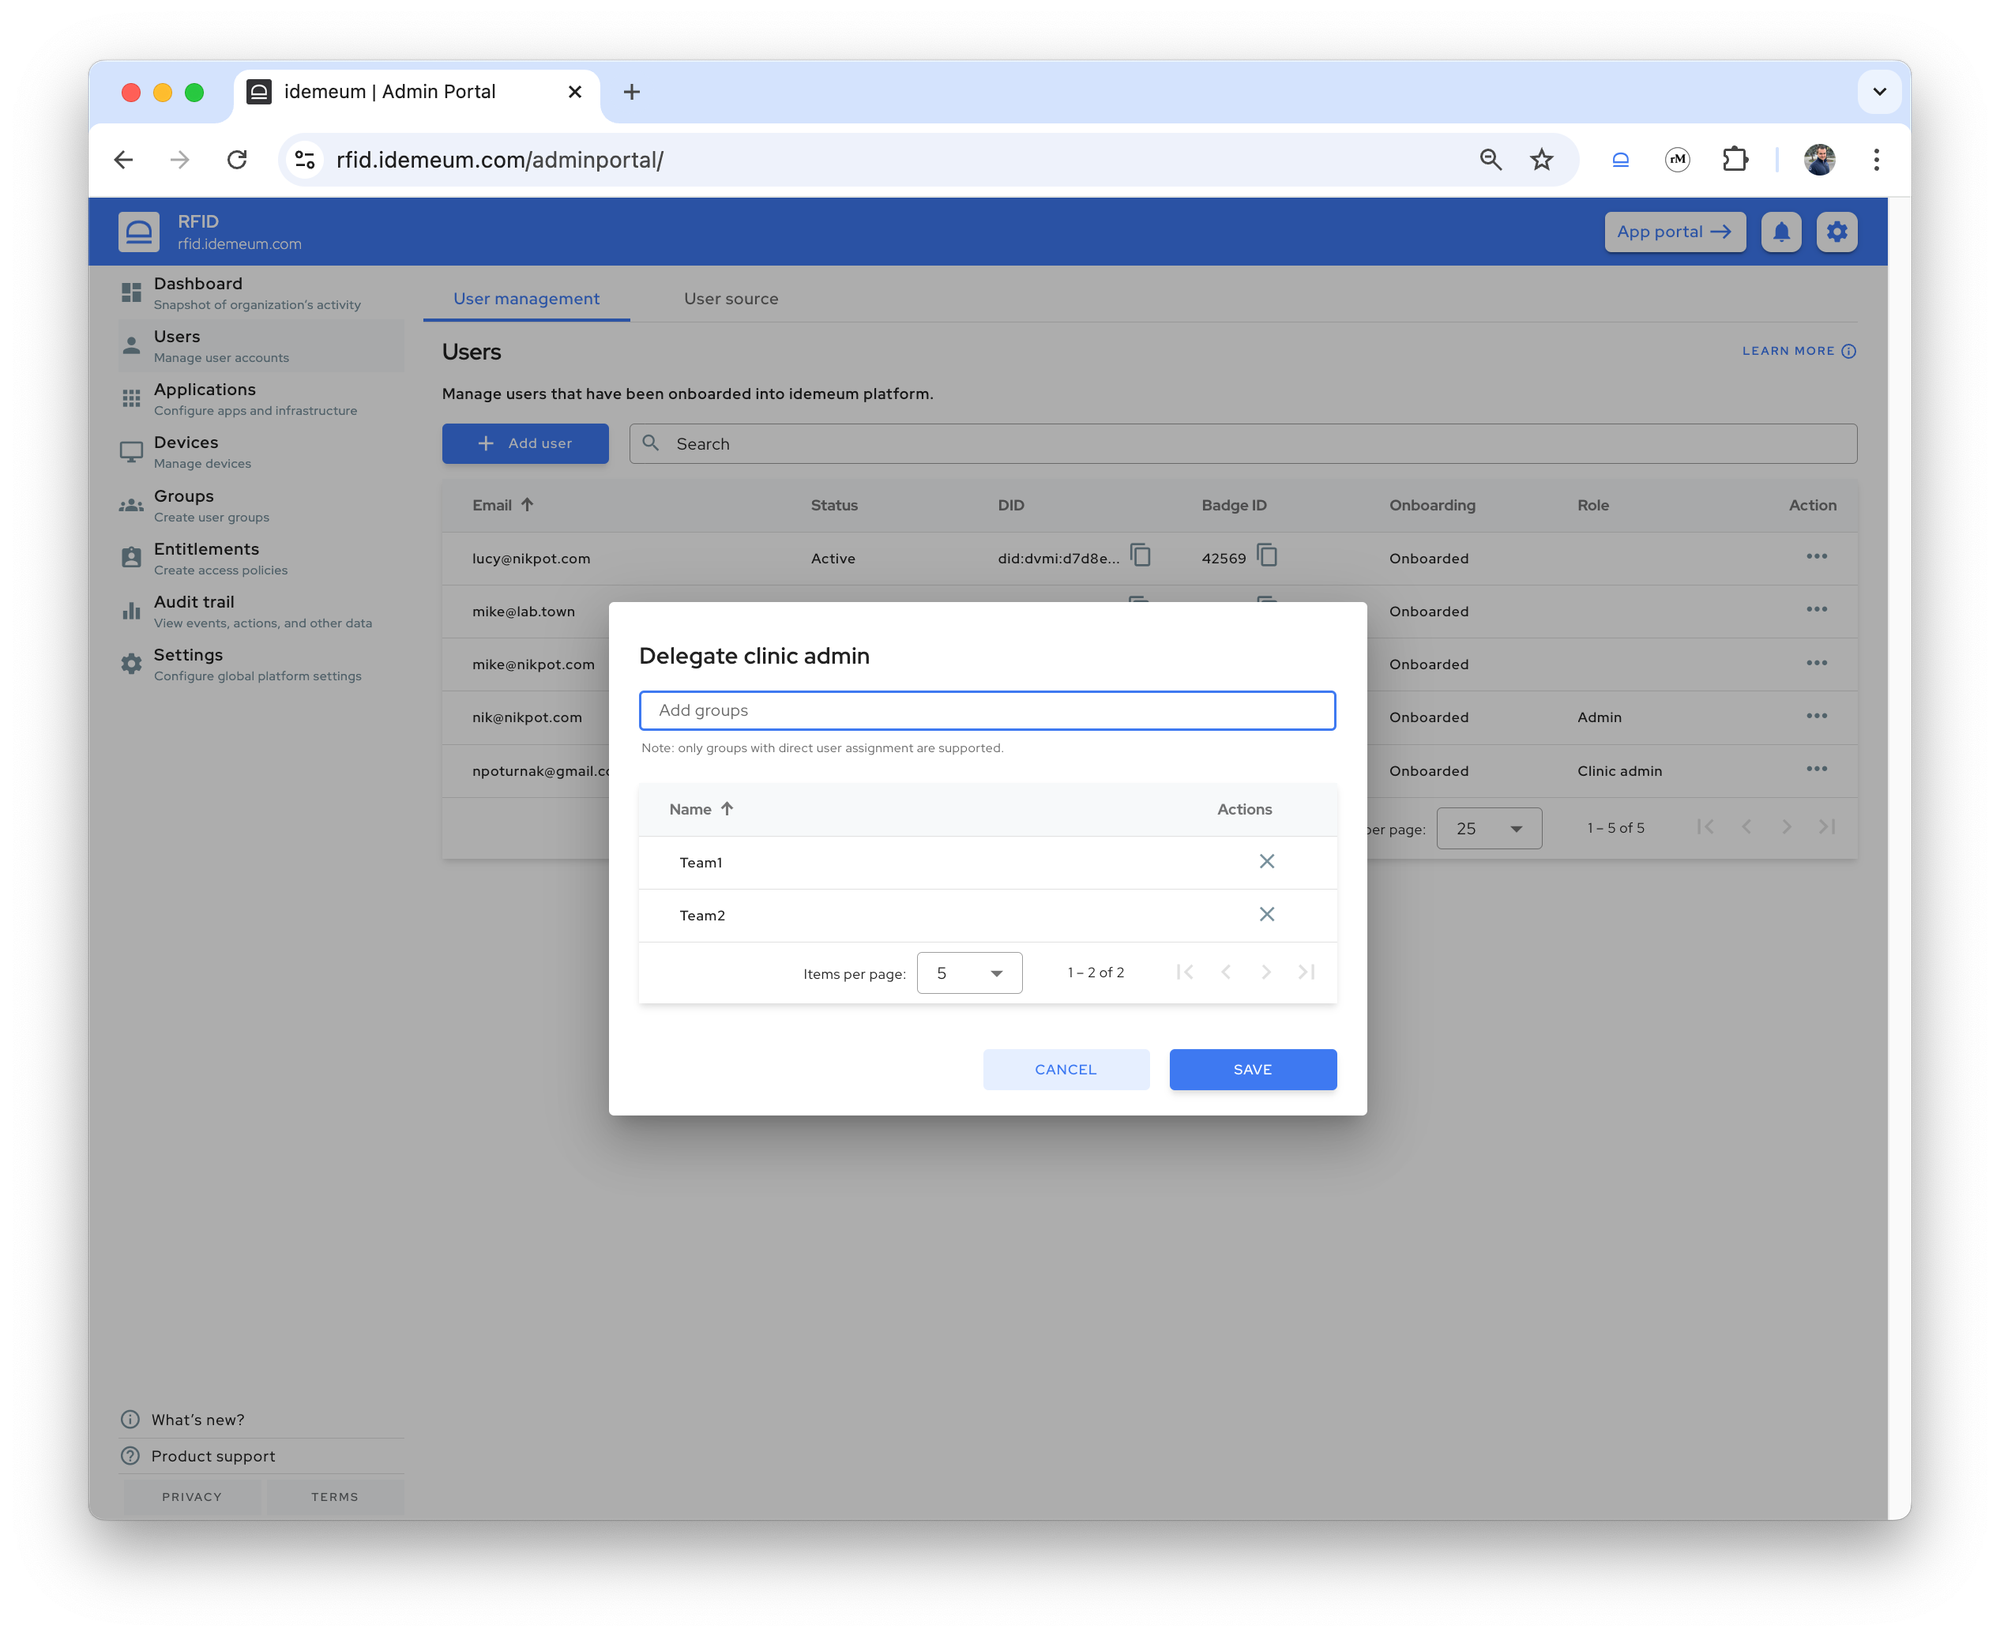
- You can now save the configuration
Assign groups to desktops
In this step we will assign these groups to desktops so that members of these groups access workstation with designated shared accounts.
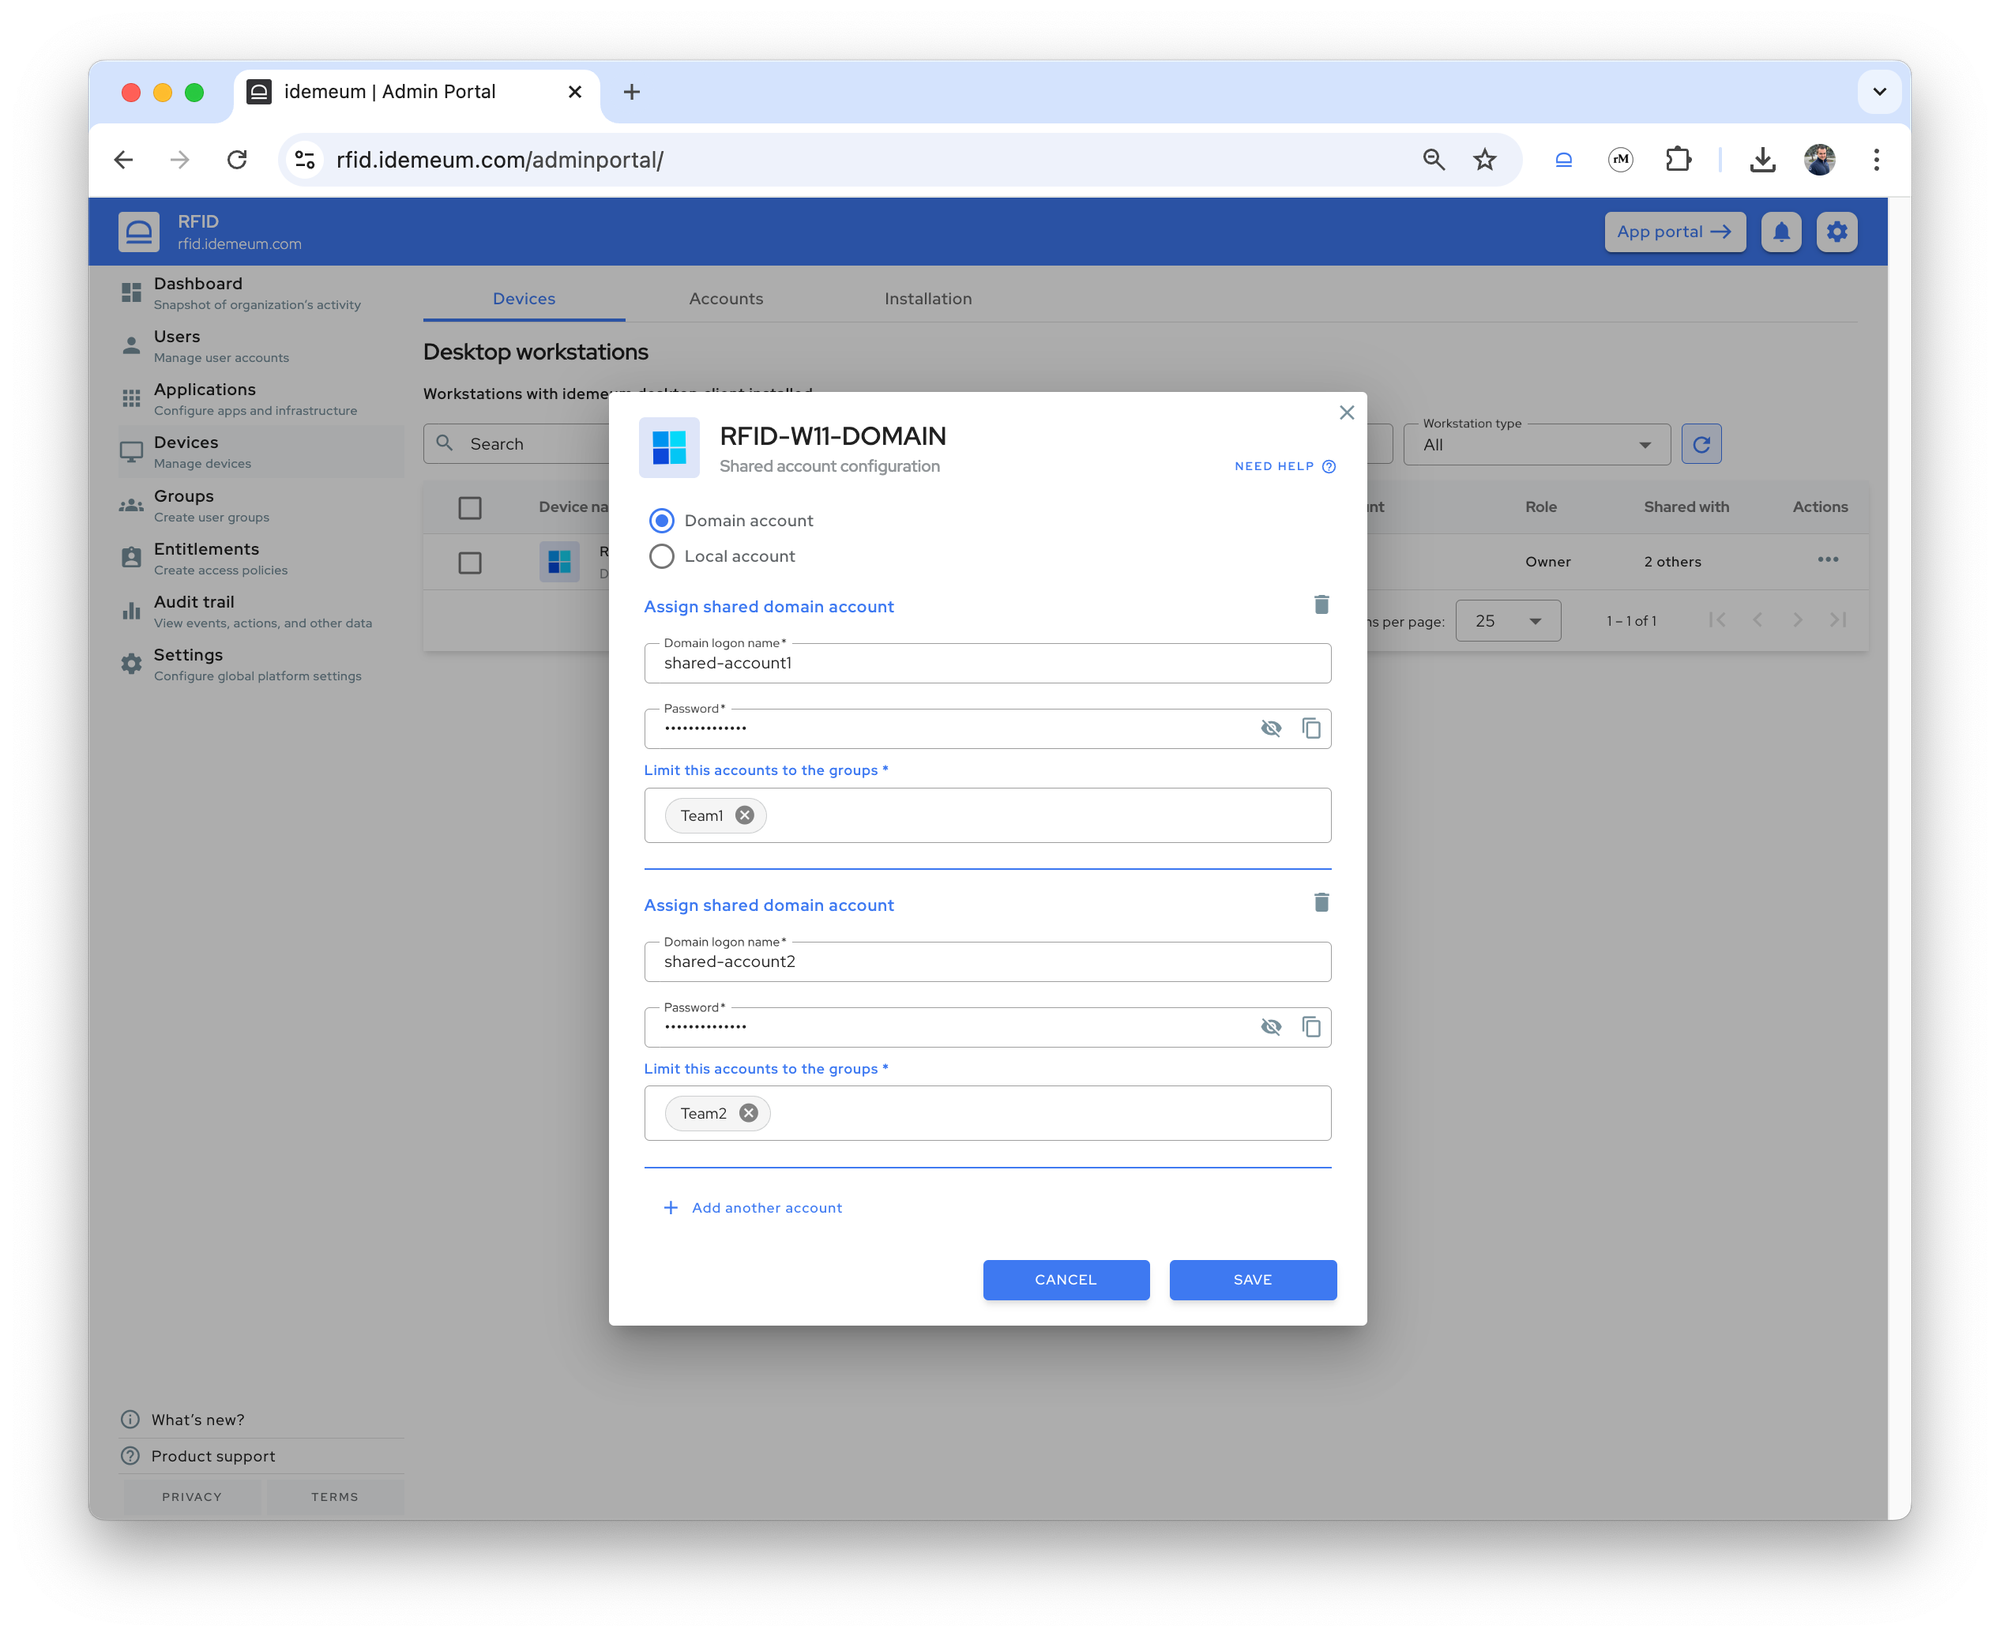
For instance, members of the group team1 will login to workstations with a shared account shared-account1, while members of the group team2 will login to workstations with a shared account shared-account2.
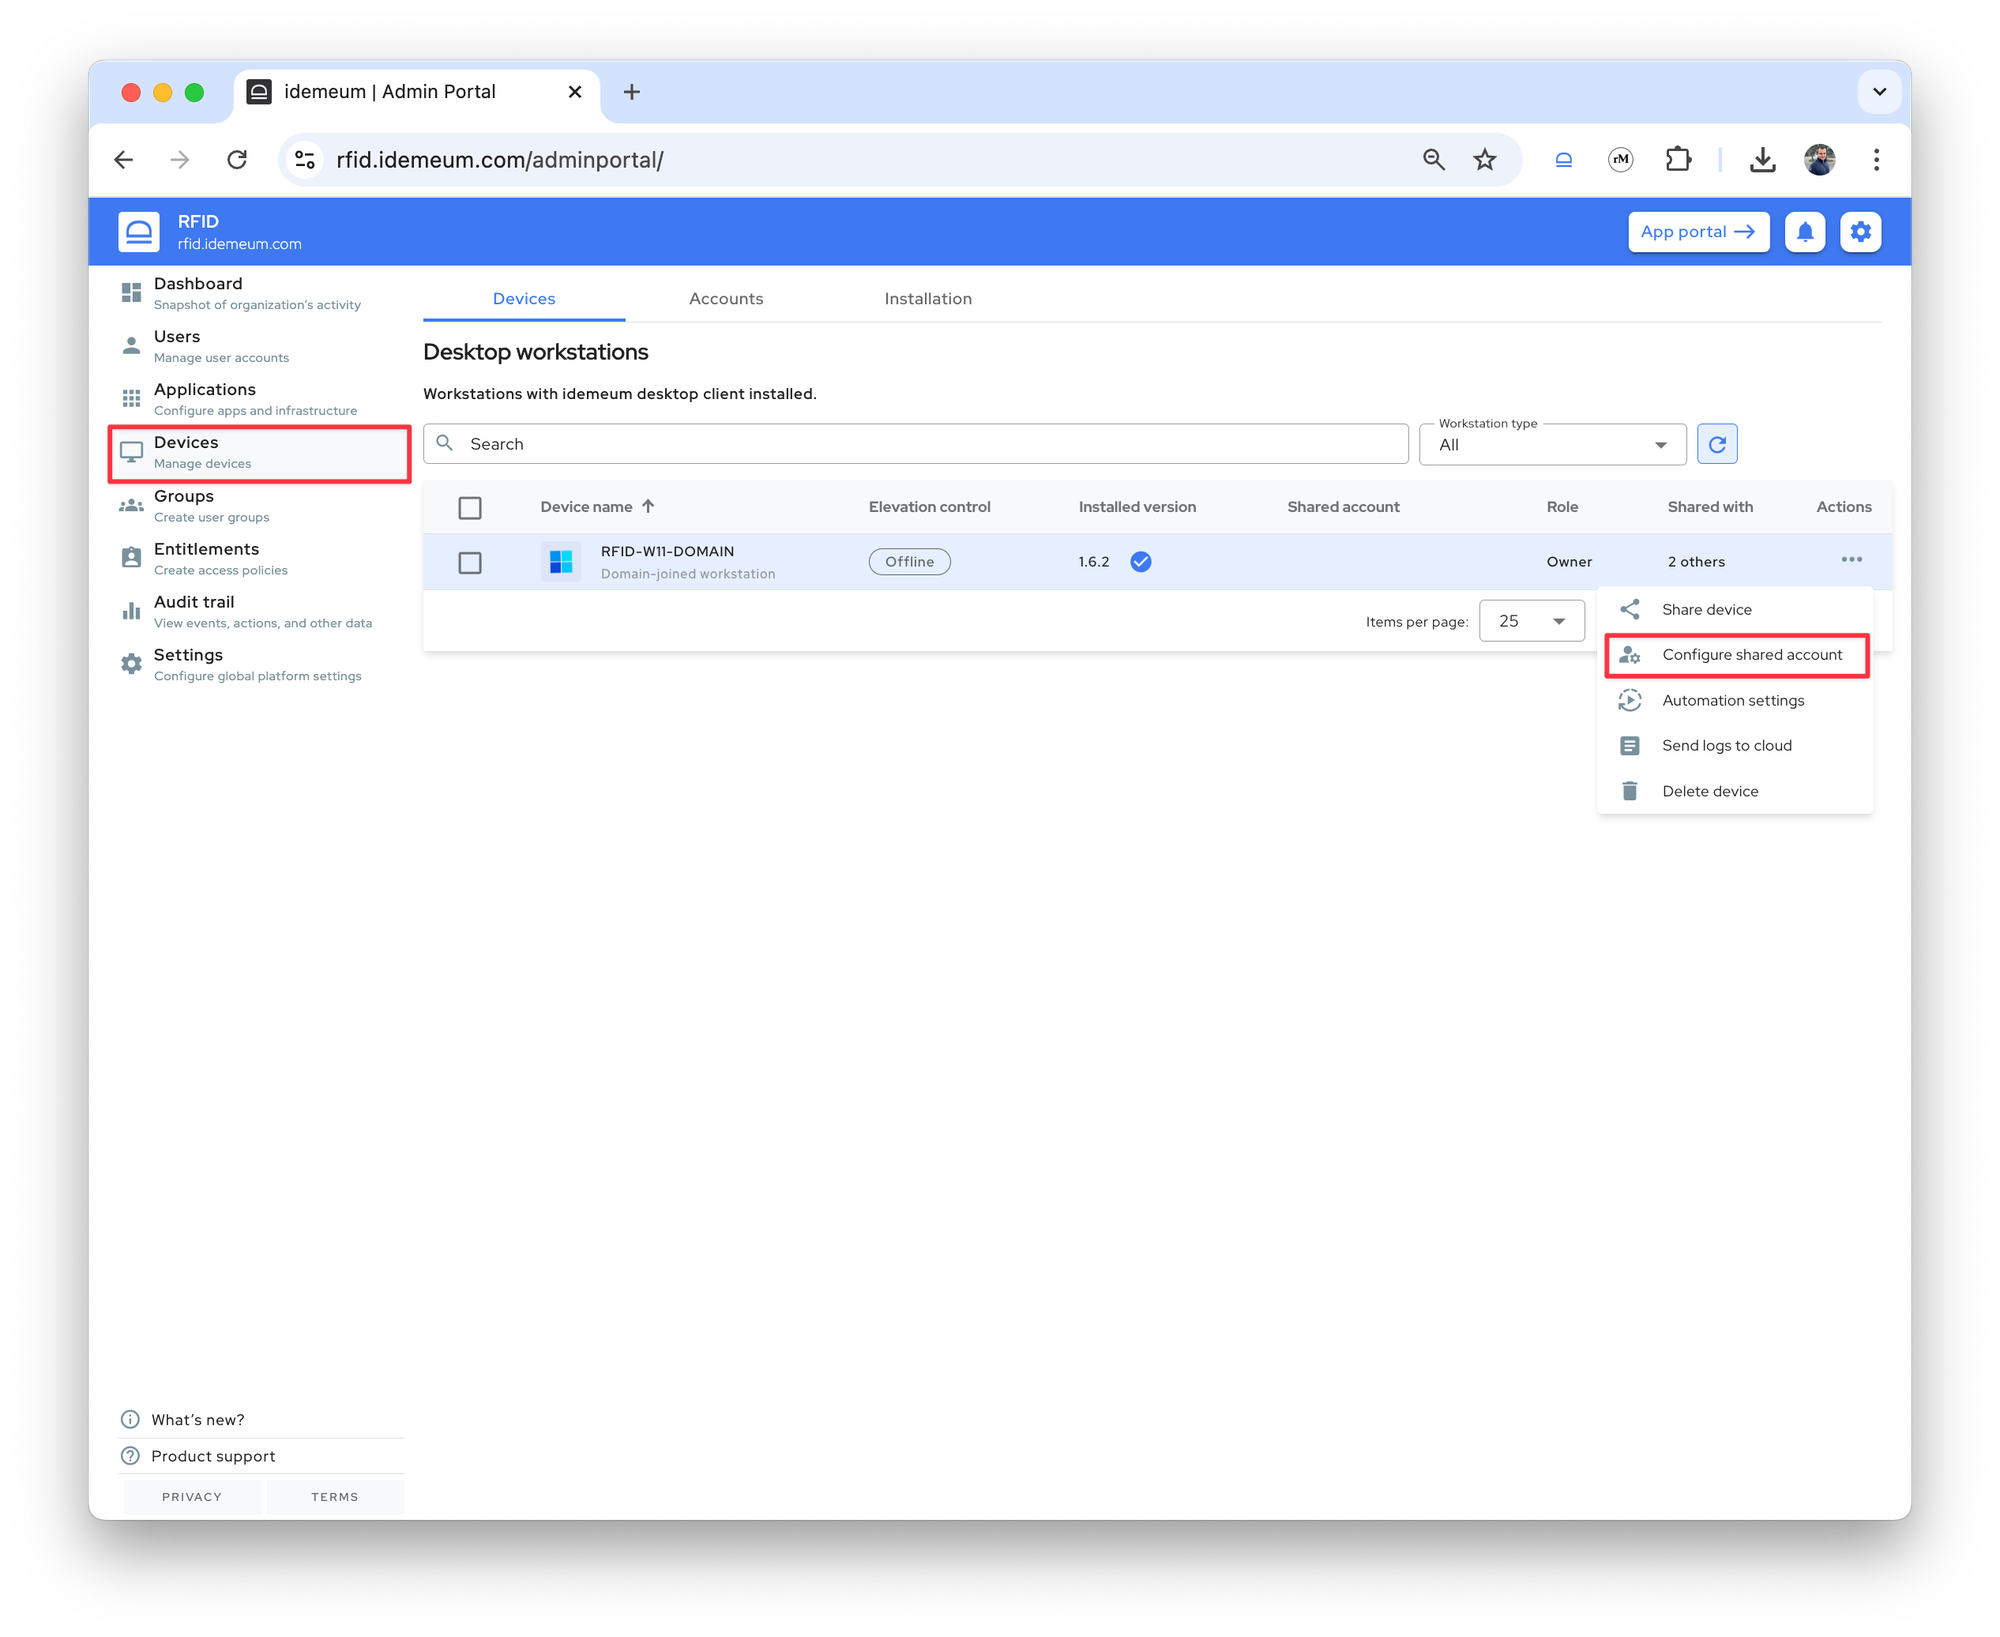
- Access your idemeum admin portal and navigate to
Devices - Find the device where you will want to assign groups and shared accounts and choose
Configure shared account
- Provide the shared account username / password and choose what groups users need to belong to in order to login with the designated shared account
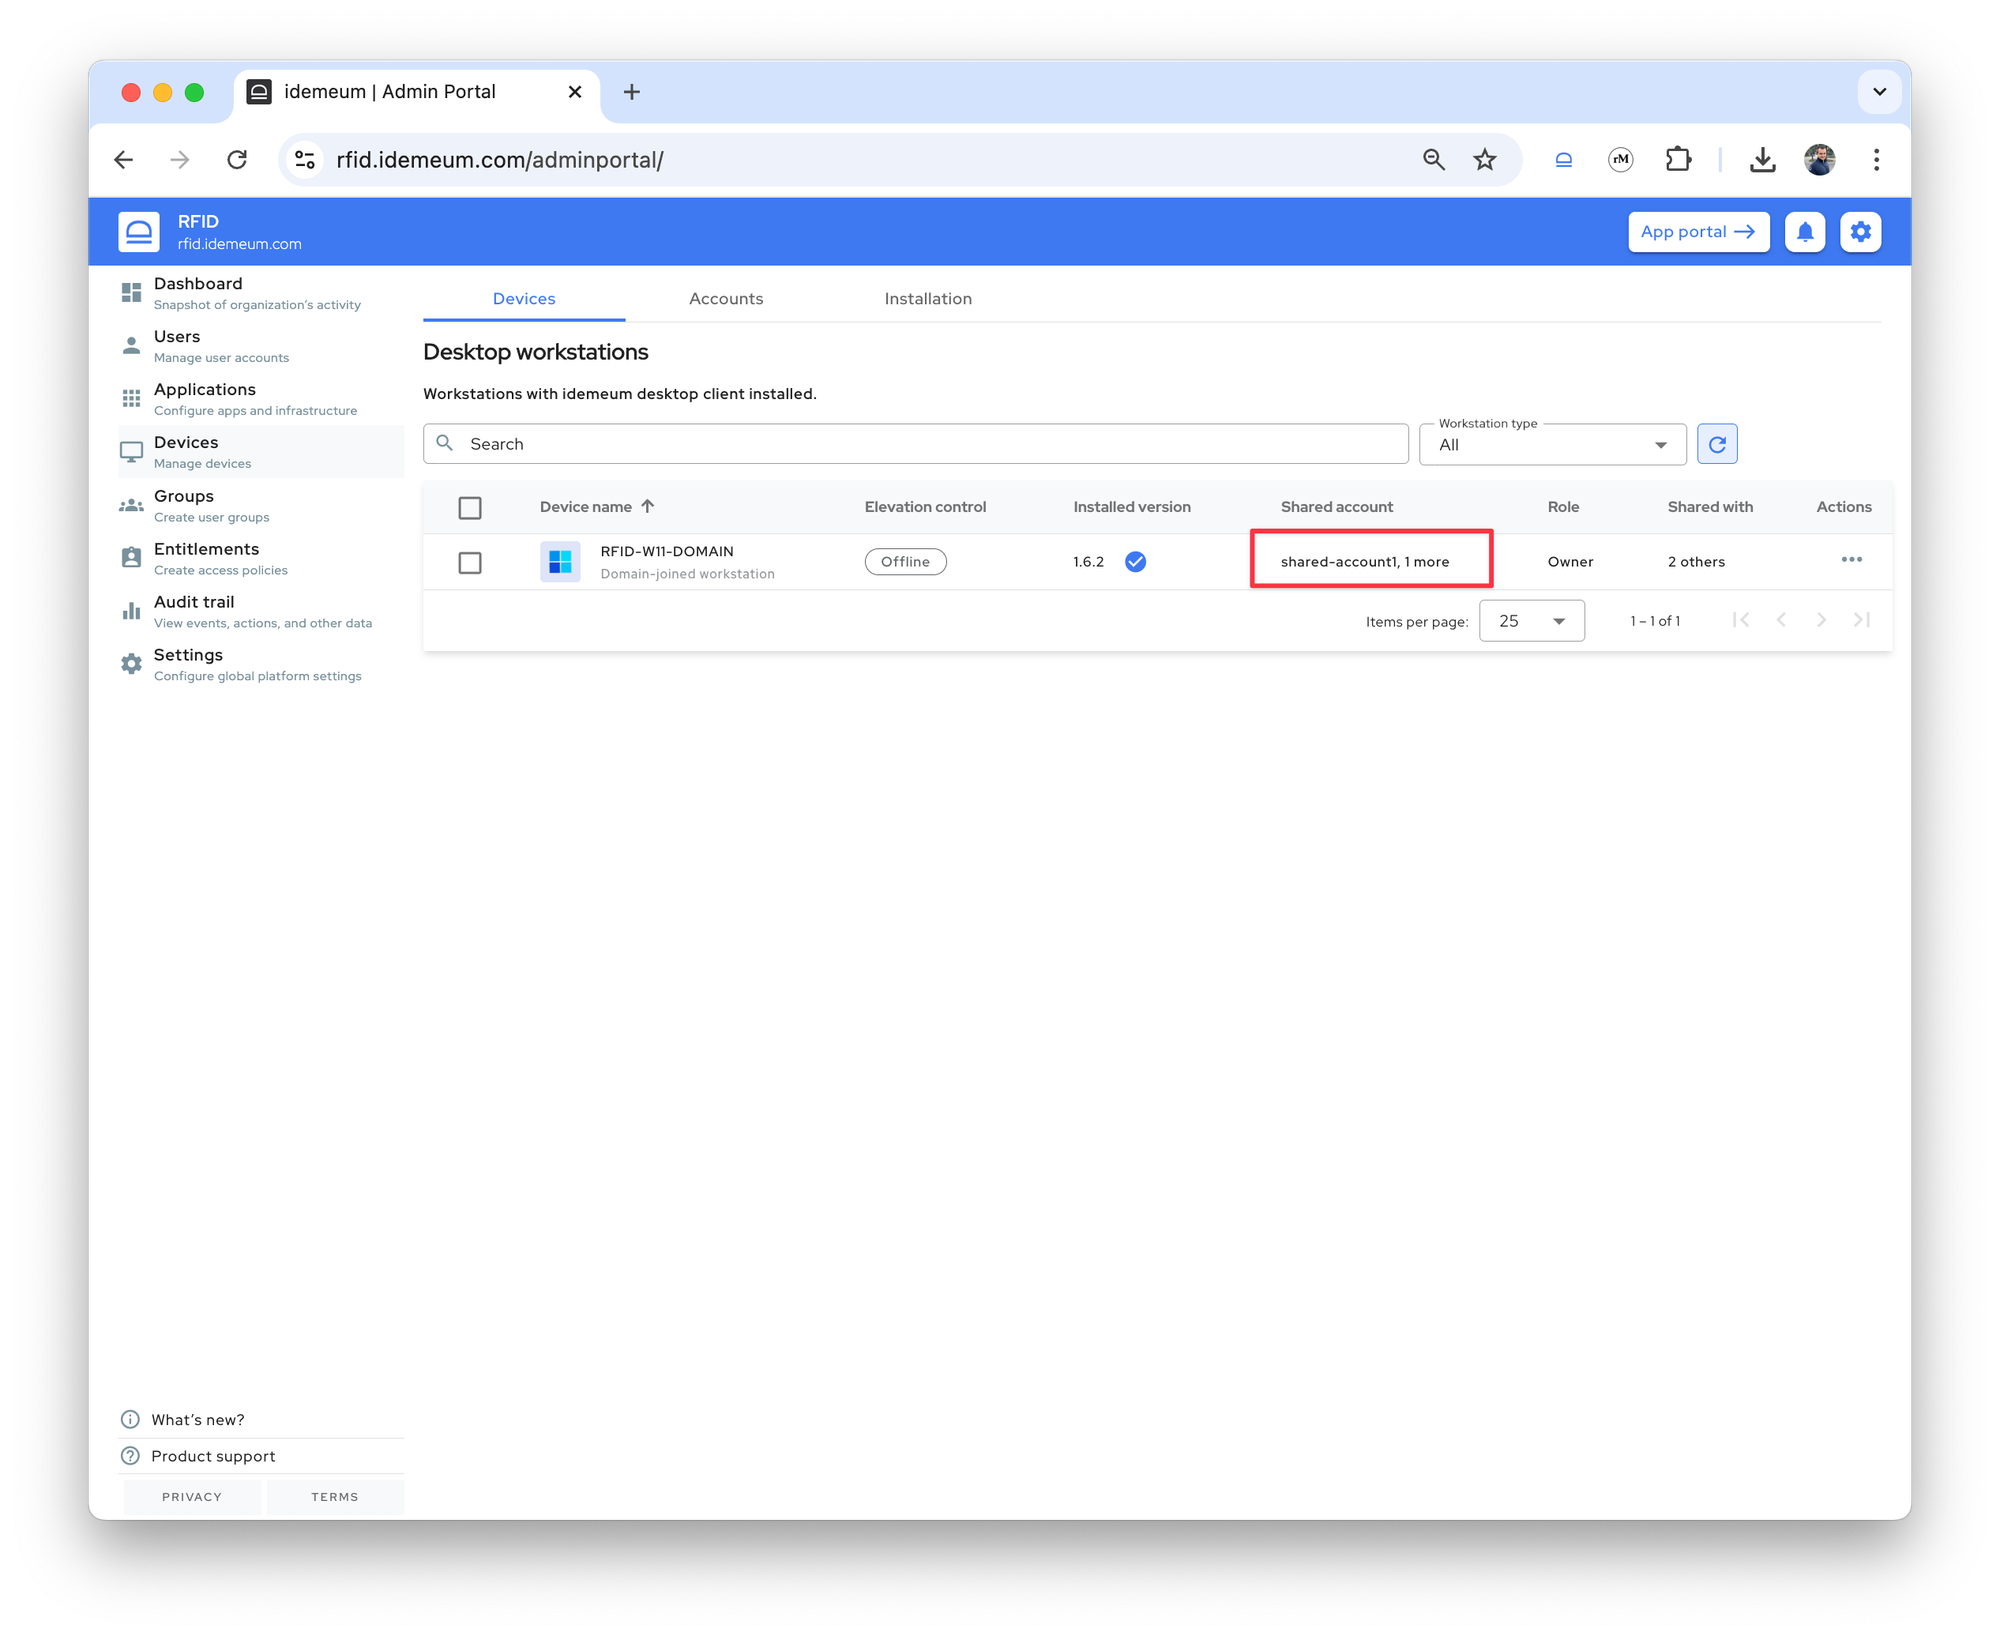
- Save the configuration
Clinic admin group management
Now we will see how clinic admins can manage the group membership.
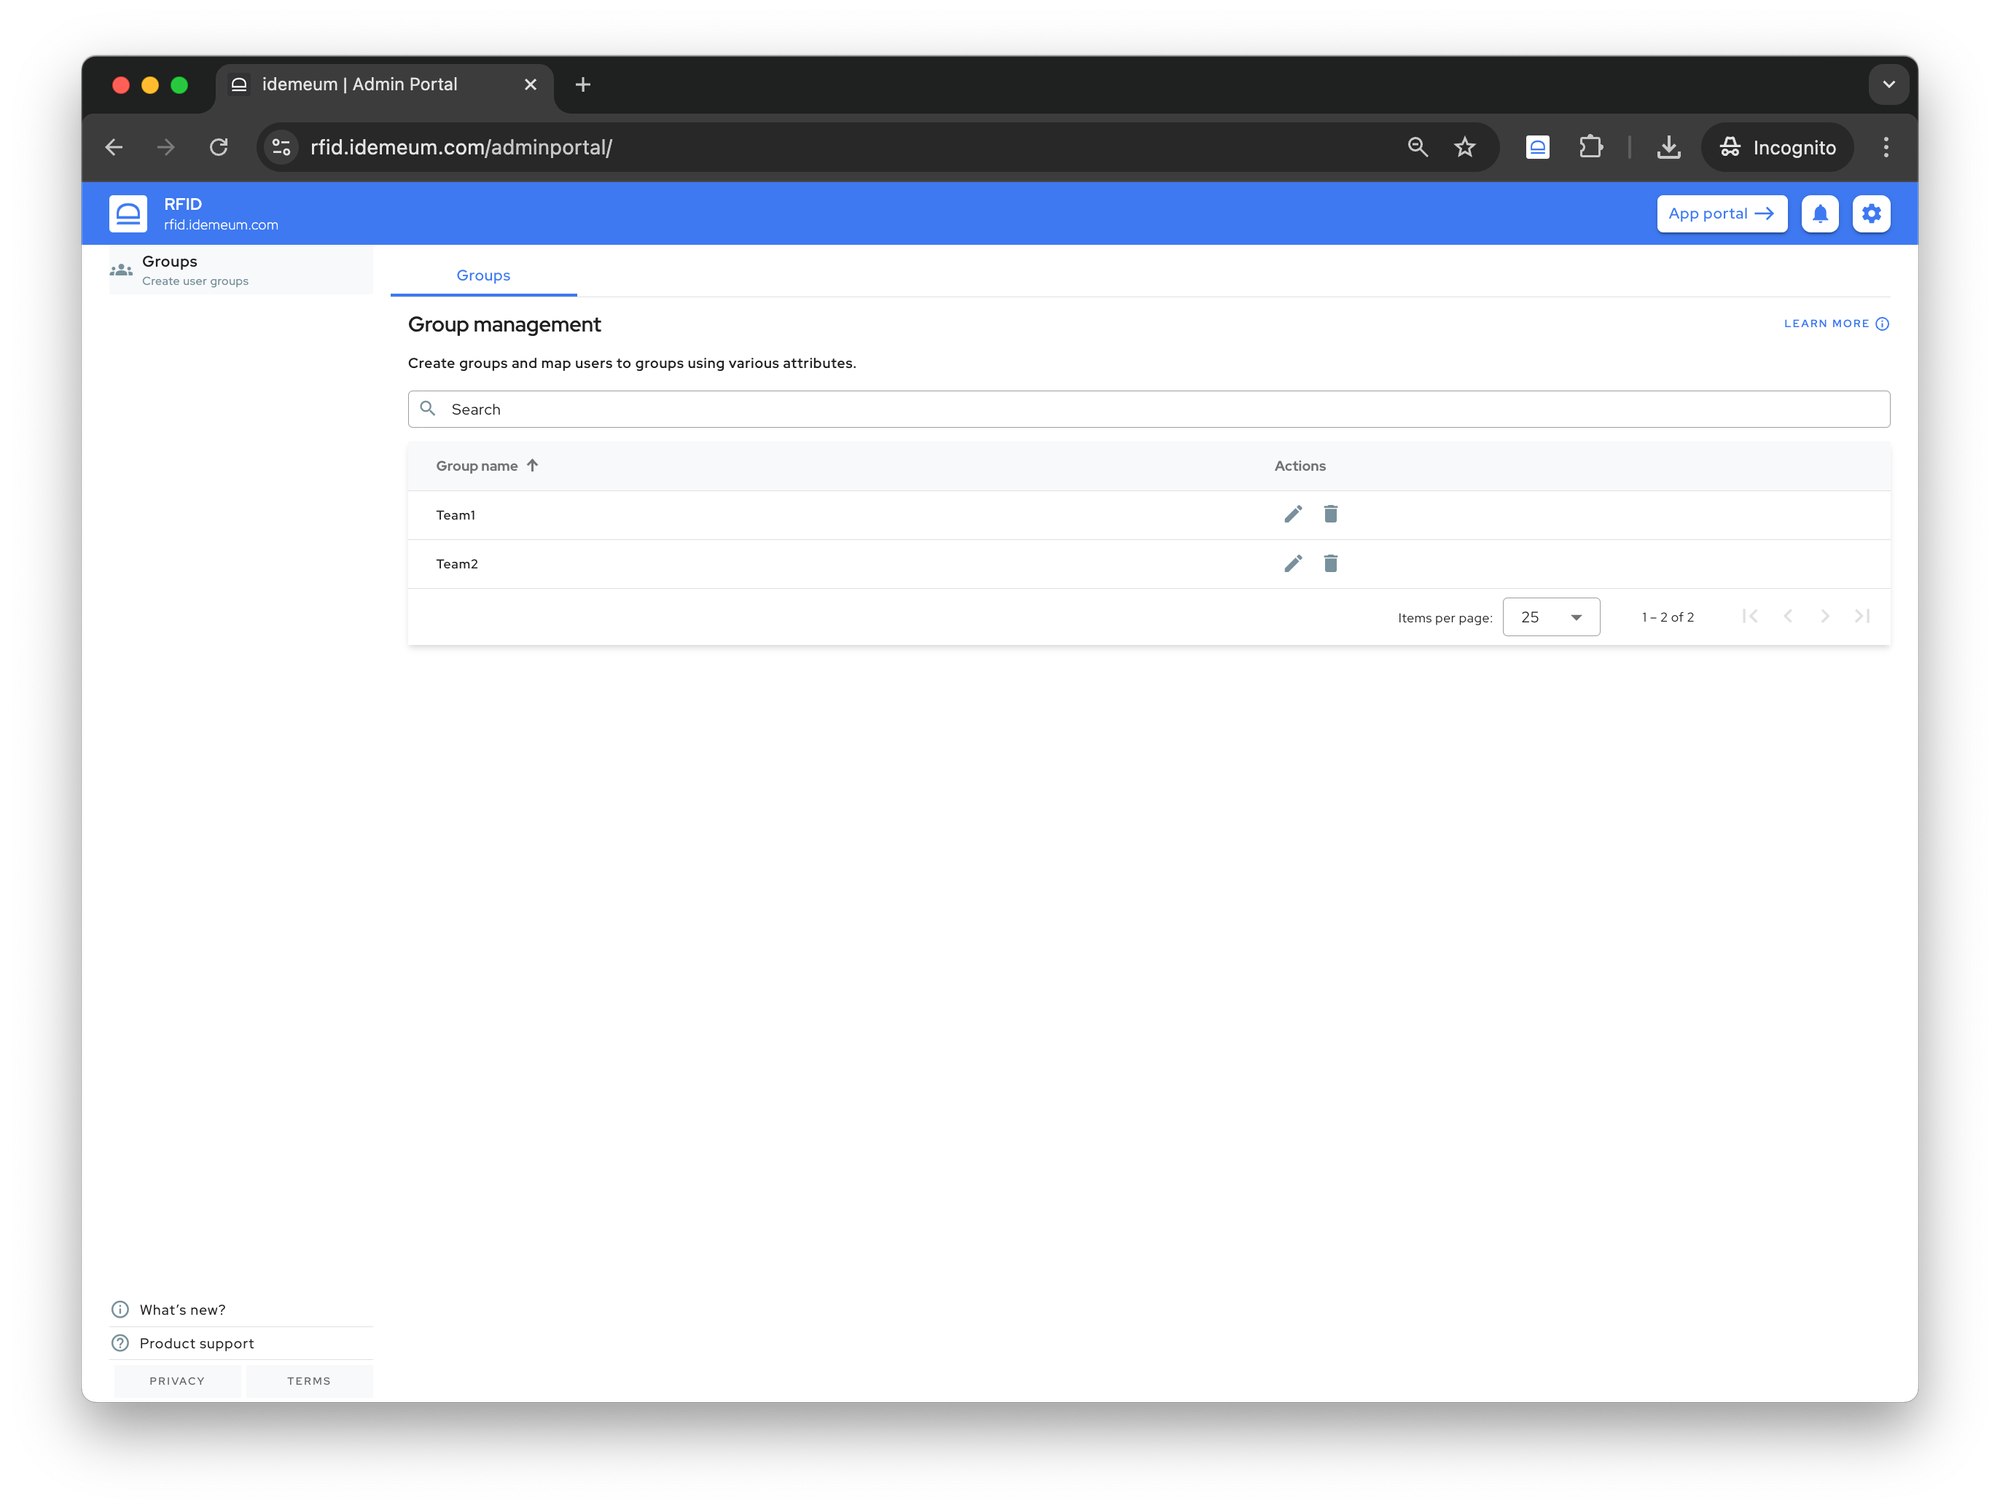
- Clinic admin logs into the idemeum portal. The only option that the clinic admin will see is the group management
- Let's say clinic admin needs to assign user
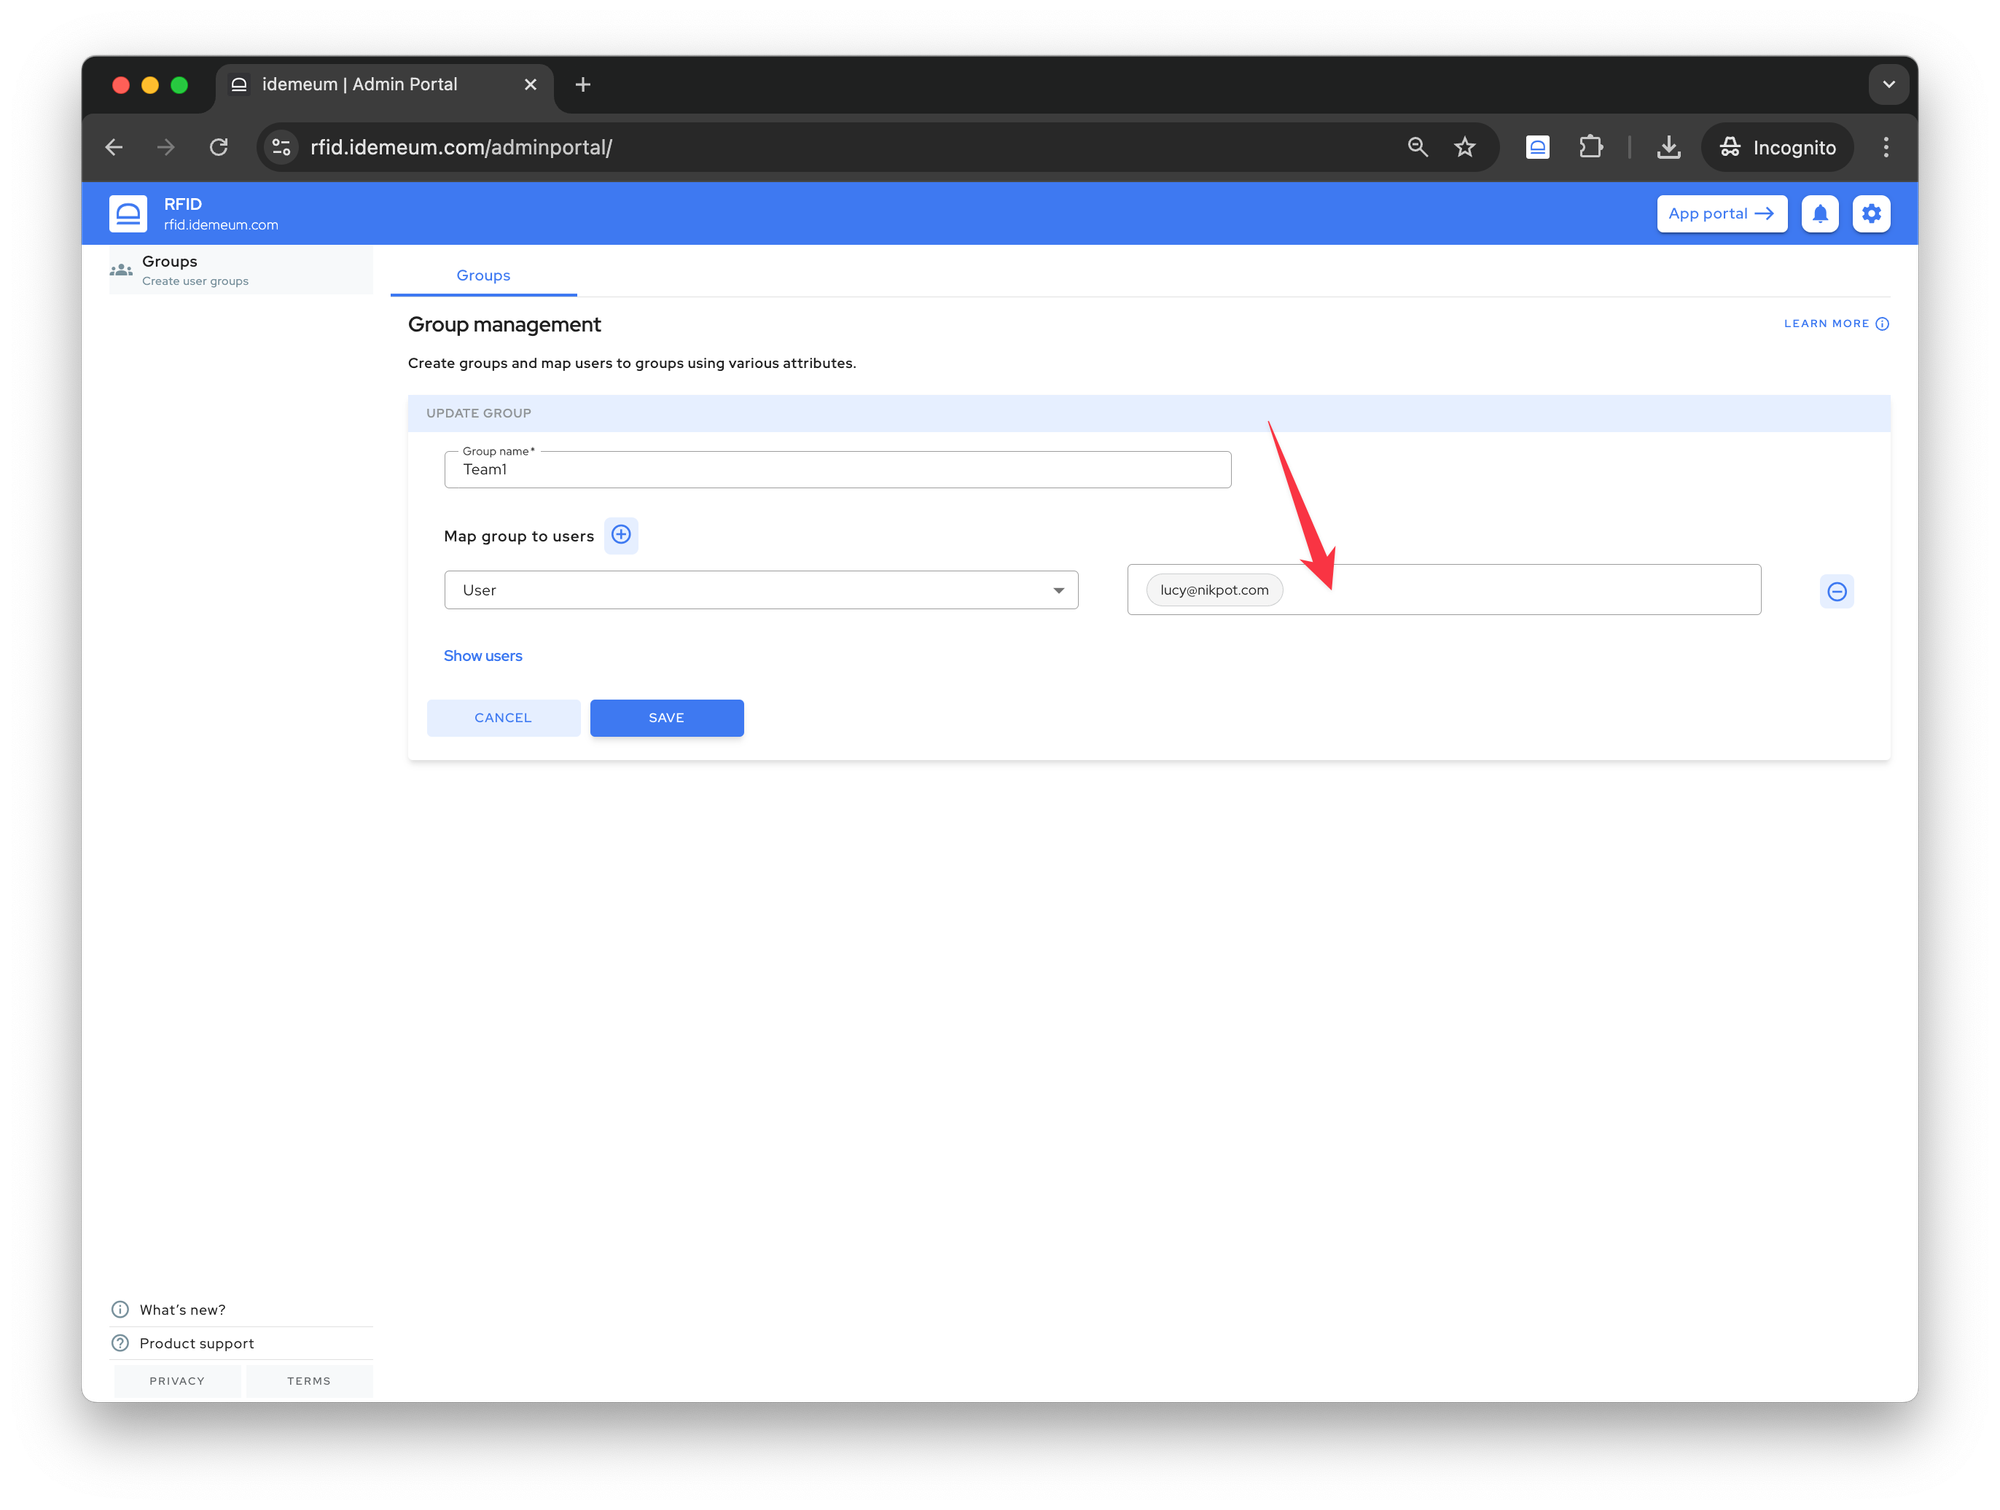
miketo groupteam. Click on edit group and then click on the area to add the user record.
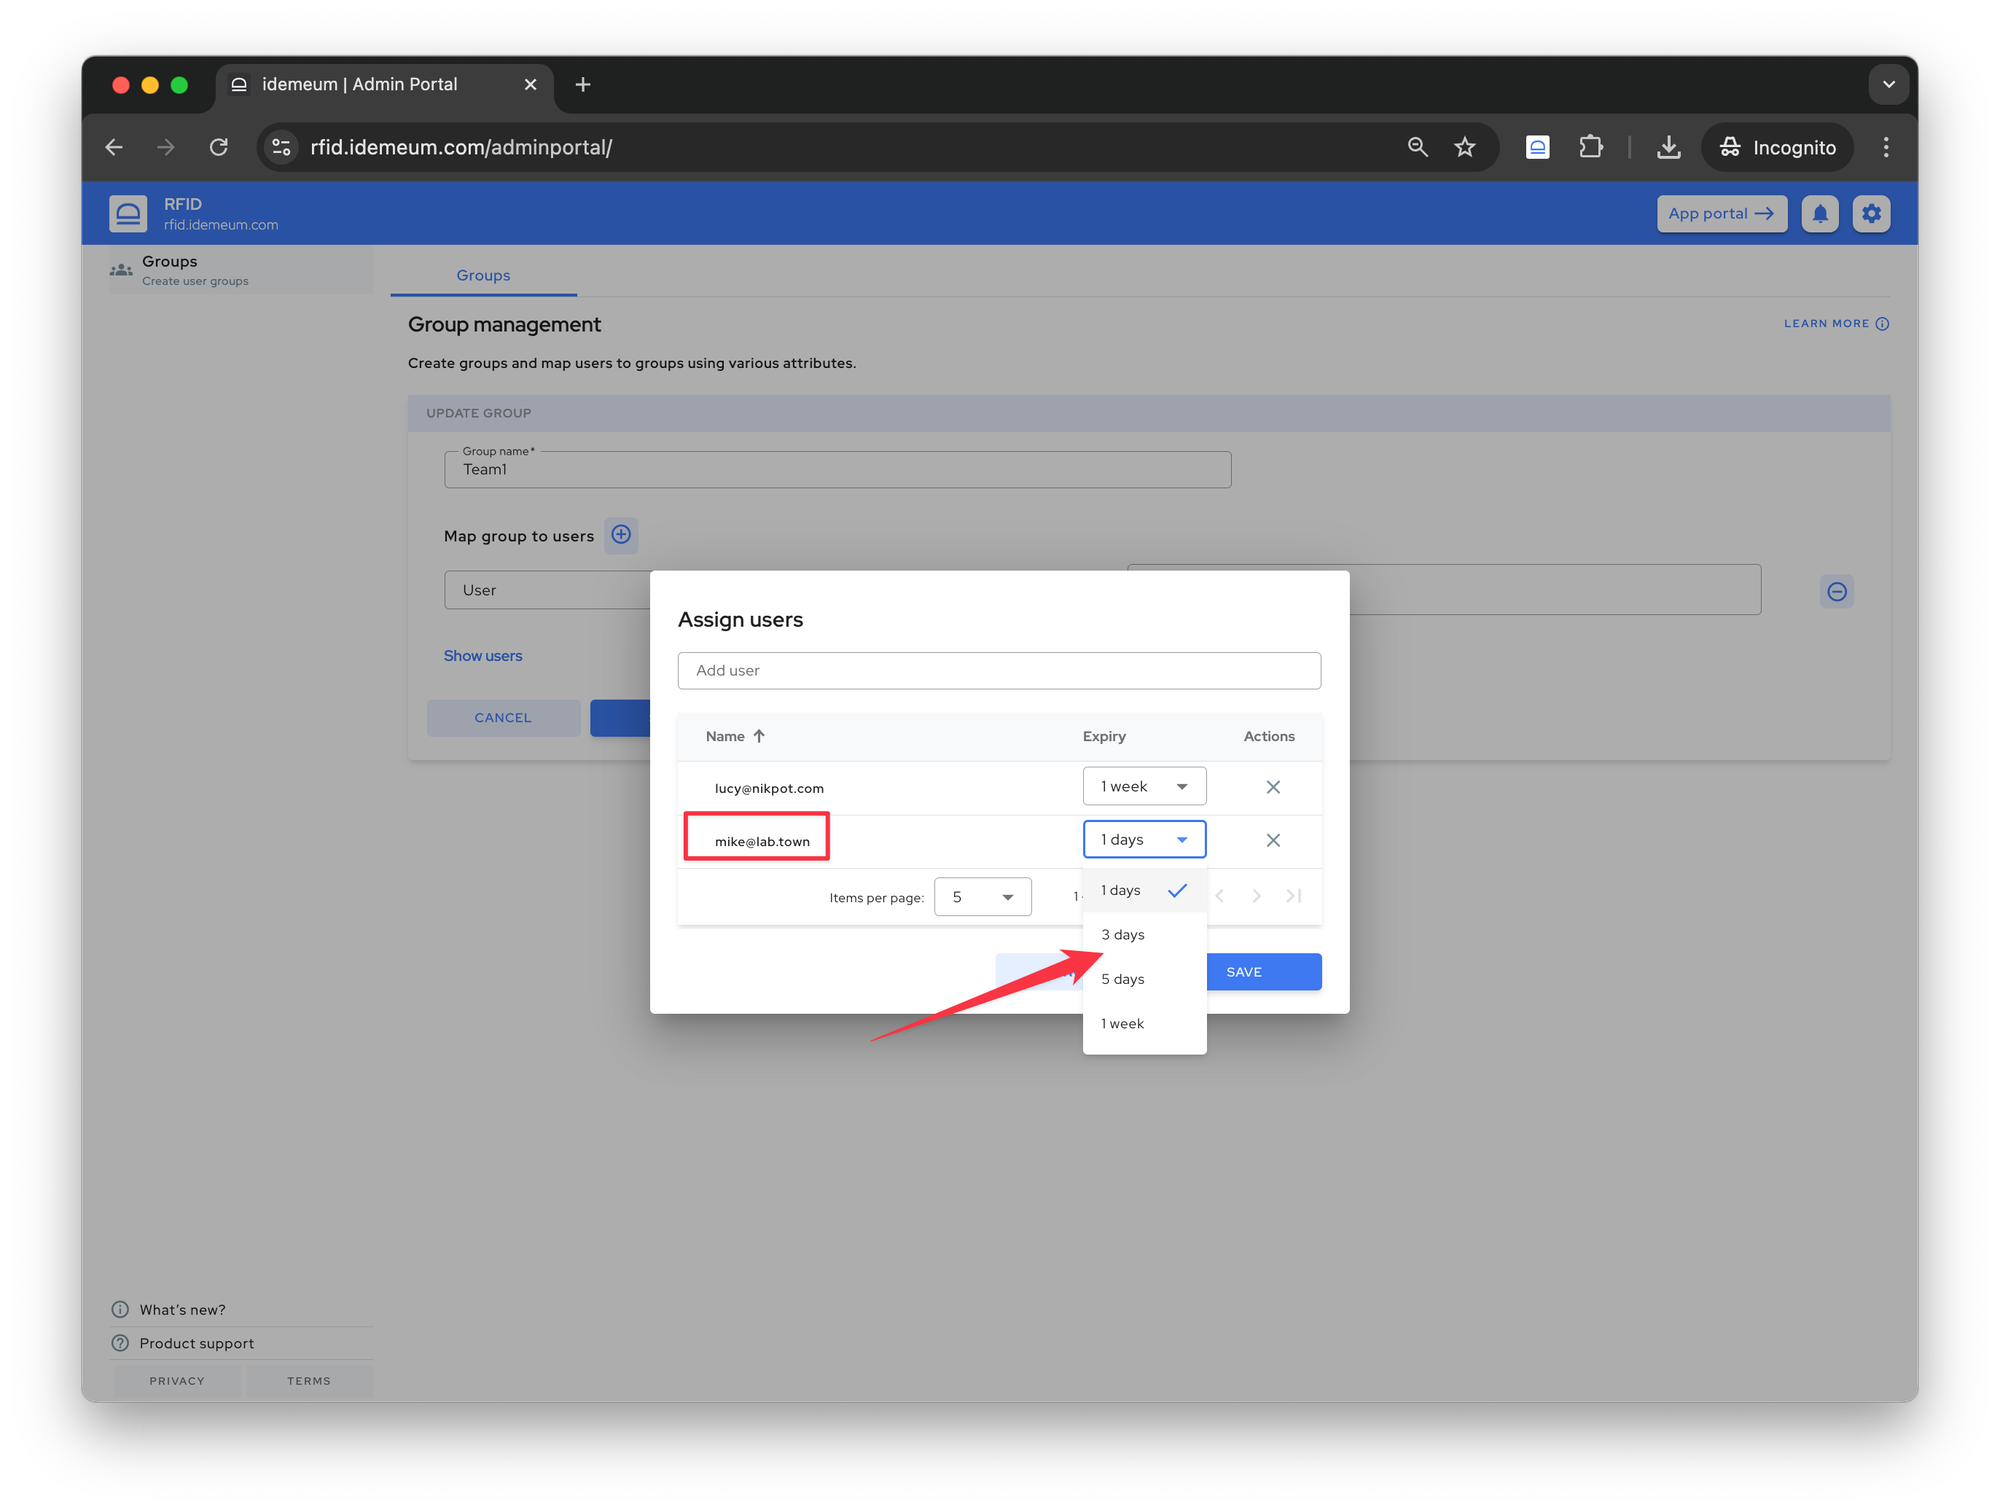
- Now choose the username from the dropdown list and choose the duration during which the user will be part of this group
- Save the configuration