How to configure RDP client for auto-fill
Overview
In this guide we will take a look at how to best configure RDP connection for credential auto-fill. We will create a connection shortcut that will not display any security prompts to the user and will not store any usernames or passwords.
1. Create RDP shortcut
- Open Microsoft Remote Desktop client
- Enter the remote desktop domain name or IP address
- Click on
Show options - Make sure
Allow to save credentialsis disabled
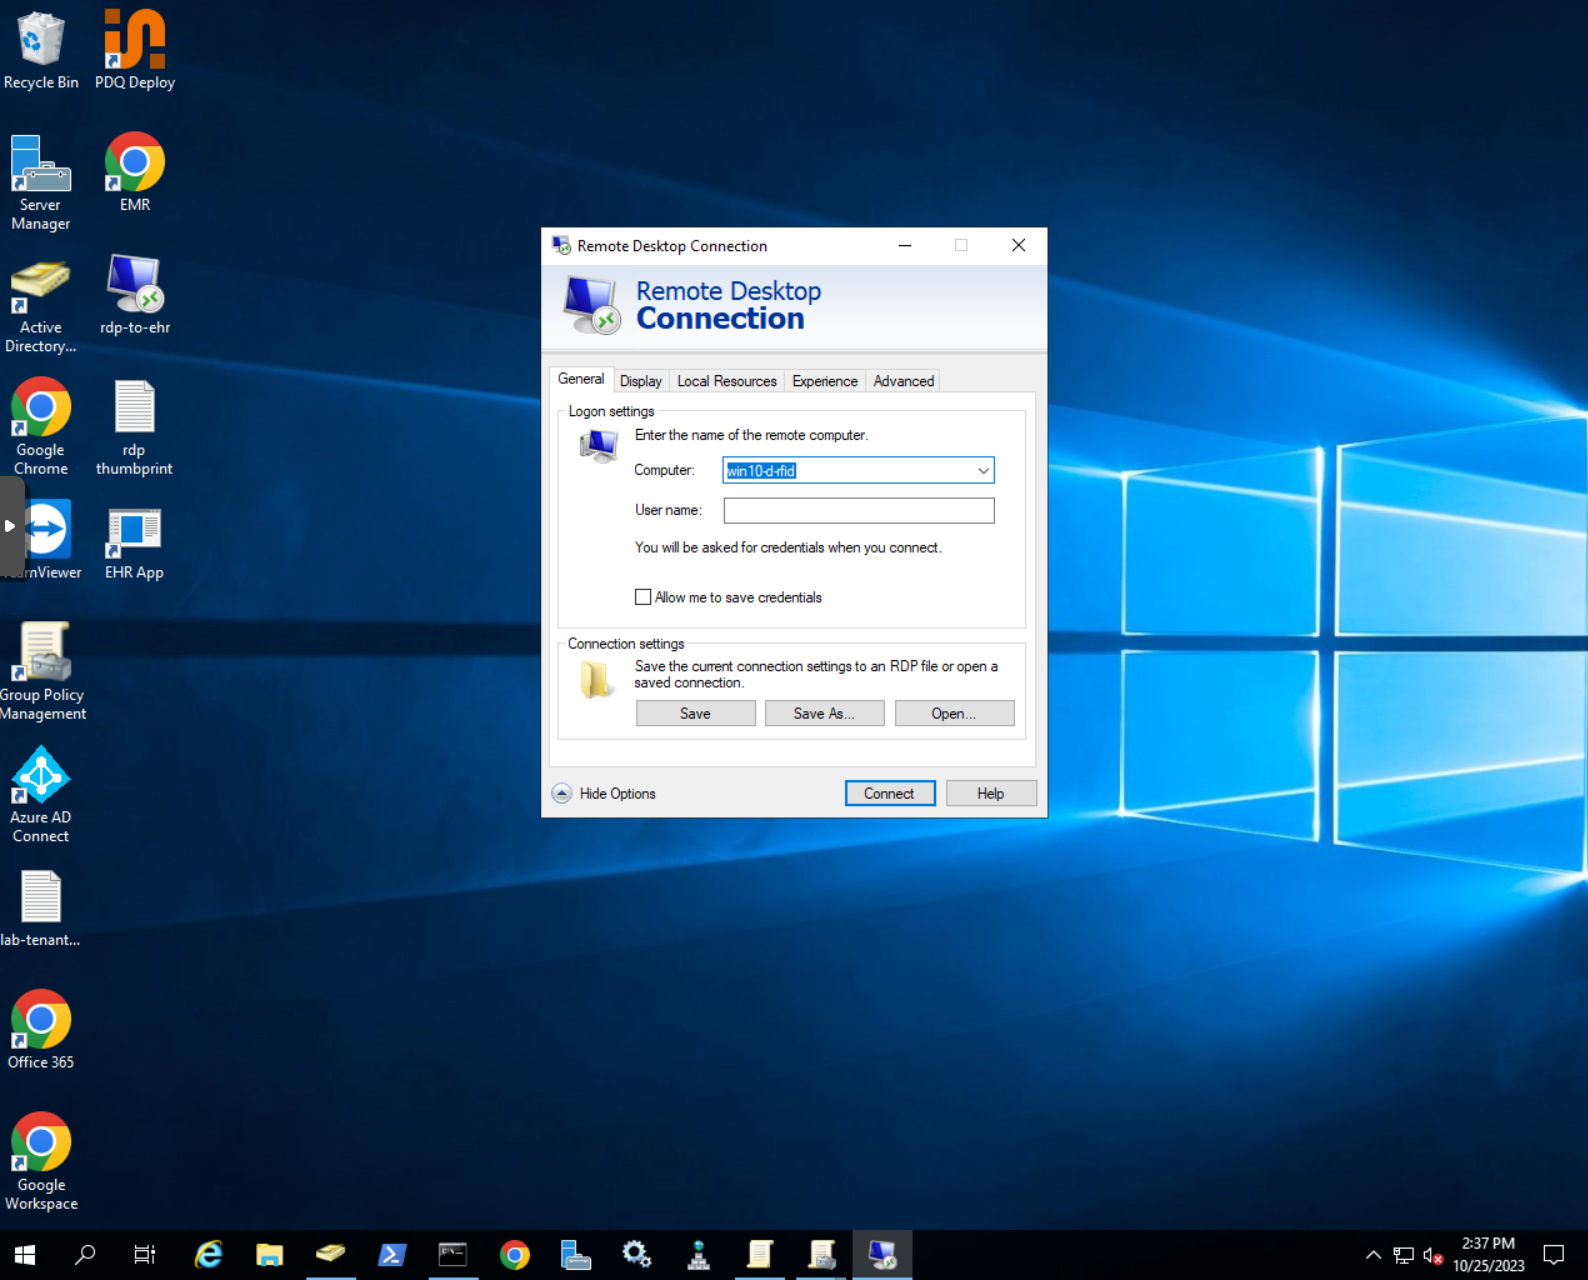
- Click
Save asand save the RDP connection to a desired location by giving it a name
2. Enable RDP connection public mode
By default Windows will attempt to save the last username for RDP connection. In order to prevent that, we will need to enable the public mode for RDP connection.
- Right click on the RDP connection that you created and choose the option to edit it with the notepad
- Add
public mode:i:1anywhere in the file to enable public mode
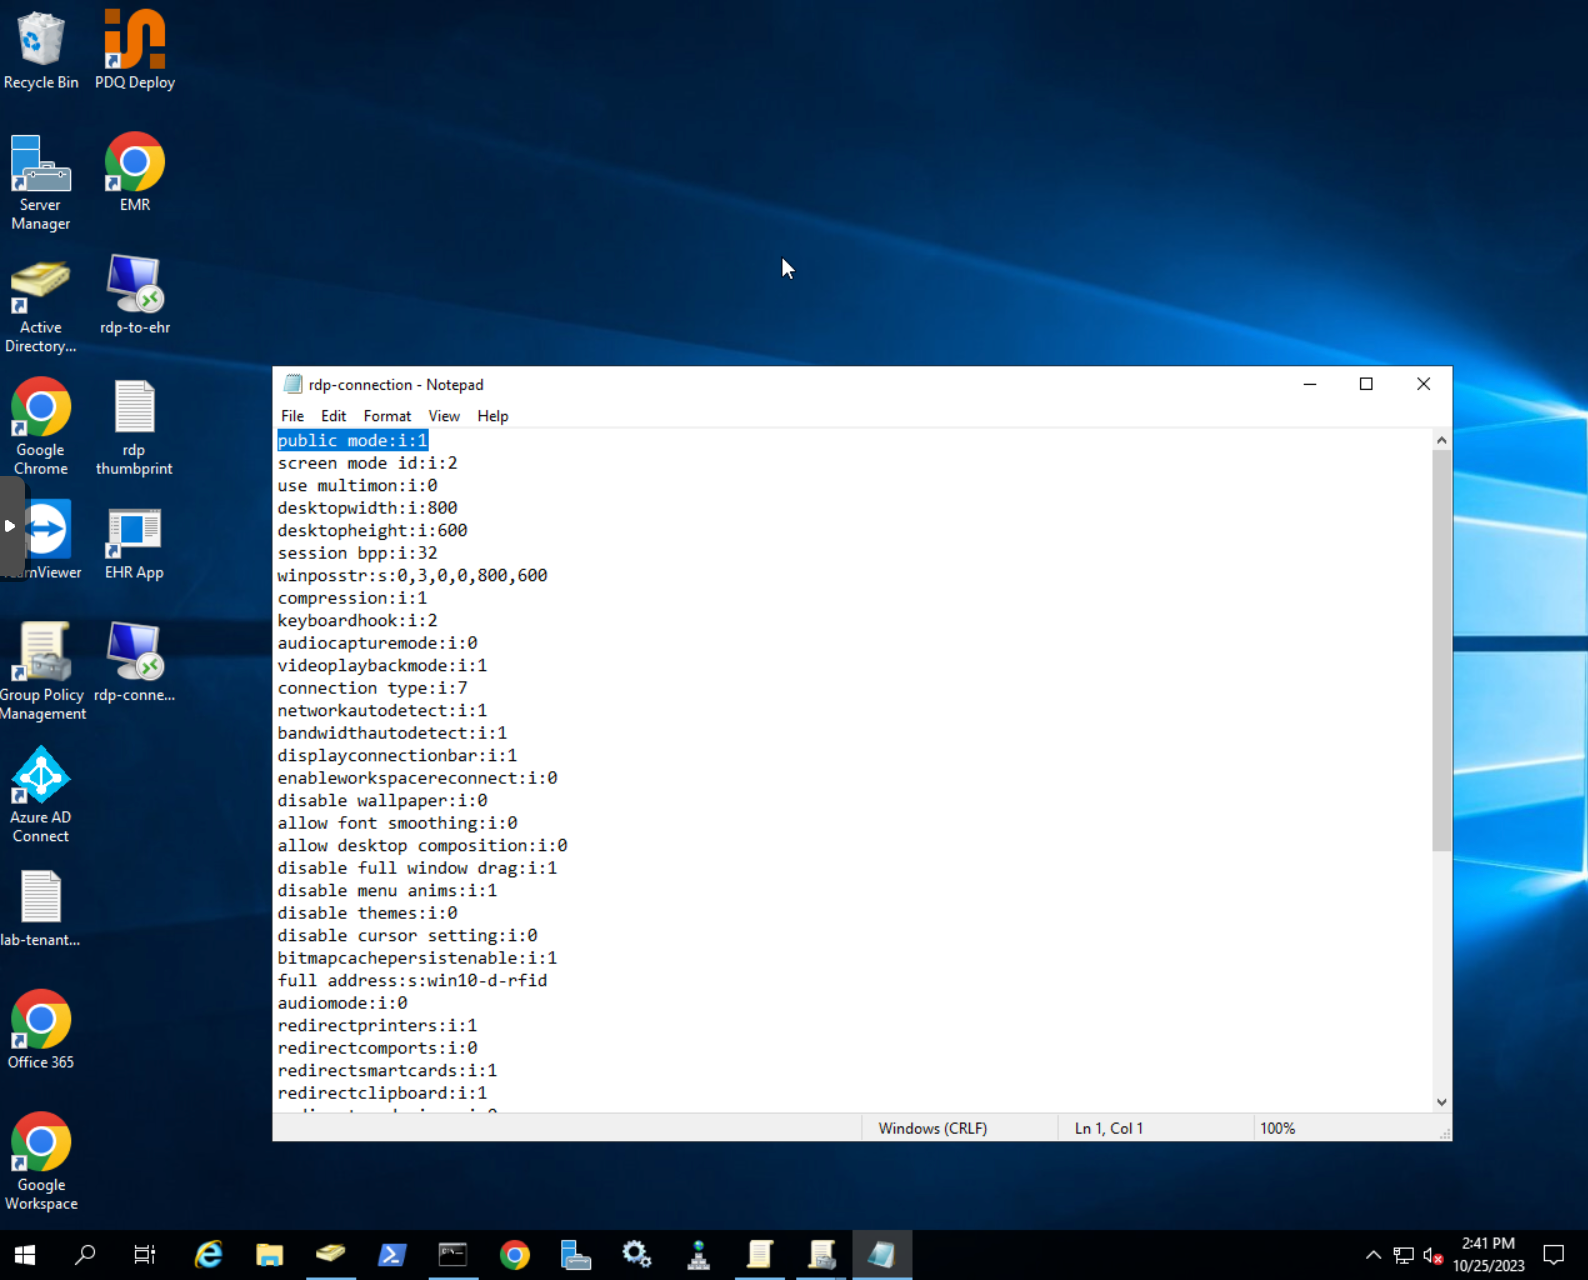
- Save the configuration
3. Sign RDP connection with a certificate
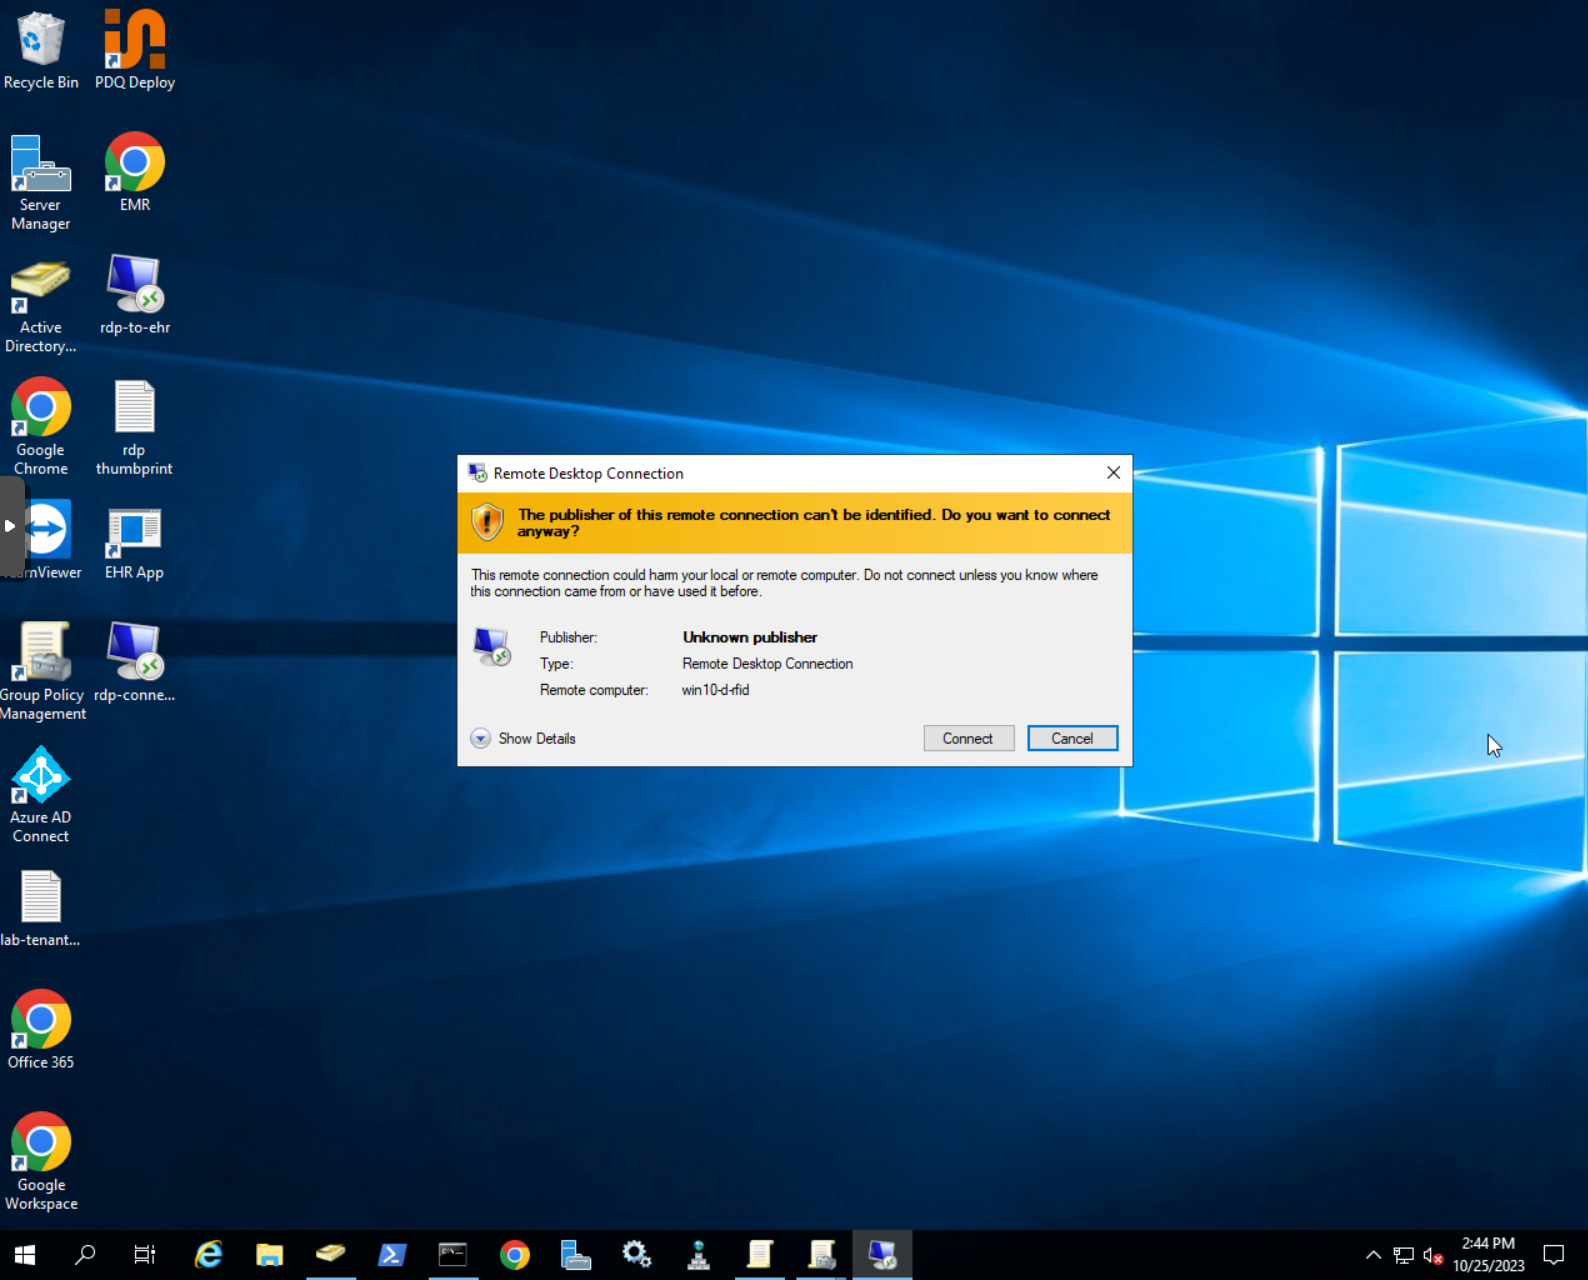
If you launch the RDP connection you will get the prompt that the publisher can not be verified. In order to remove that prompt we need to sign the RDP connection with a trusted certificate.
Sign RDP connection with RDPSign.exe
- Choose the certificate that you will use to sign the connection. You can use self-signed certificate or any issued domain certificate.
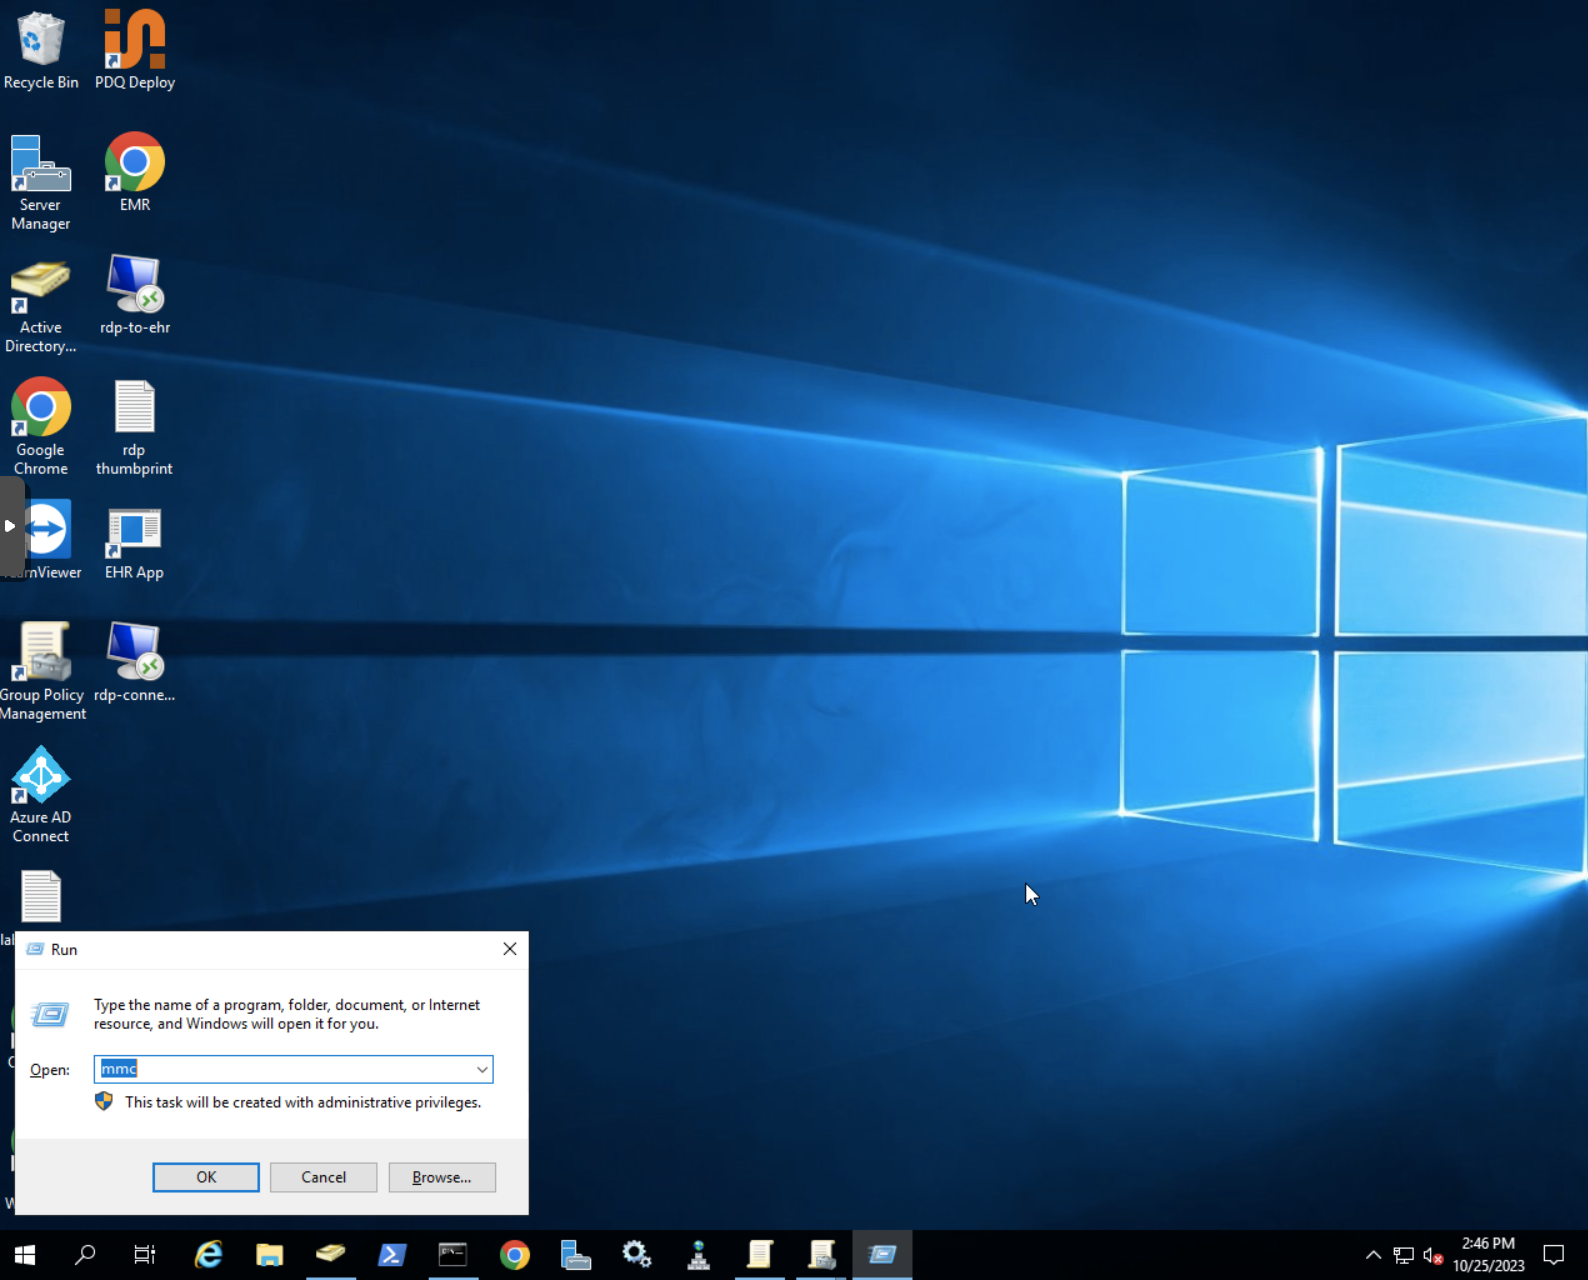
- Access
Runapplication and typemmcto access management console
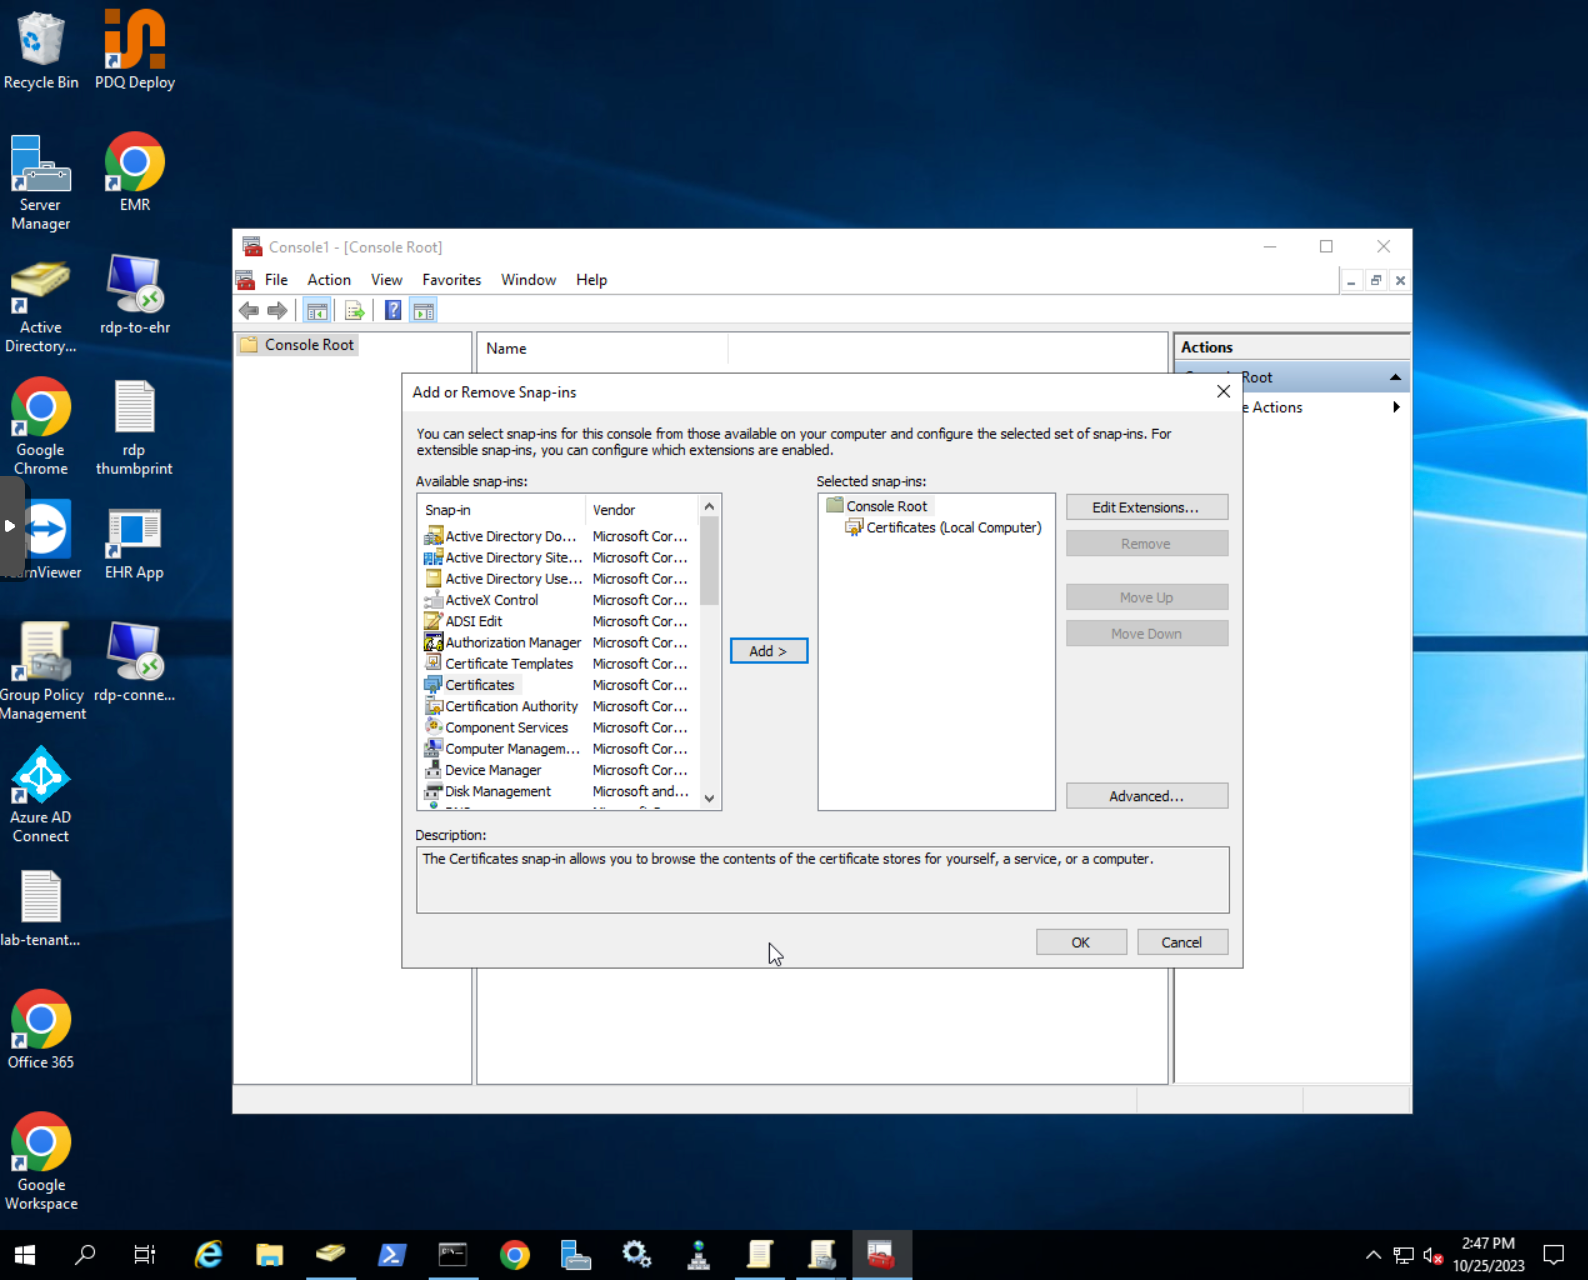
- Add
Certificatessnap-in to access certificates. When prompter chooseComputer accountand thenLocal computer
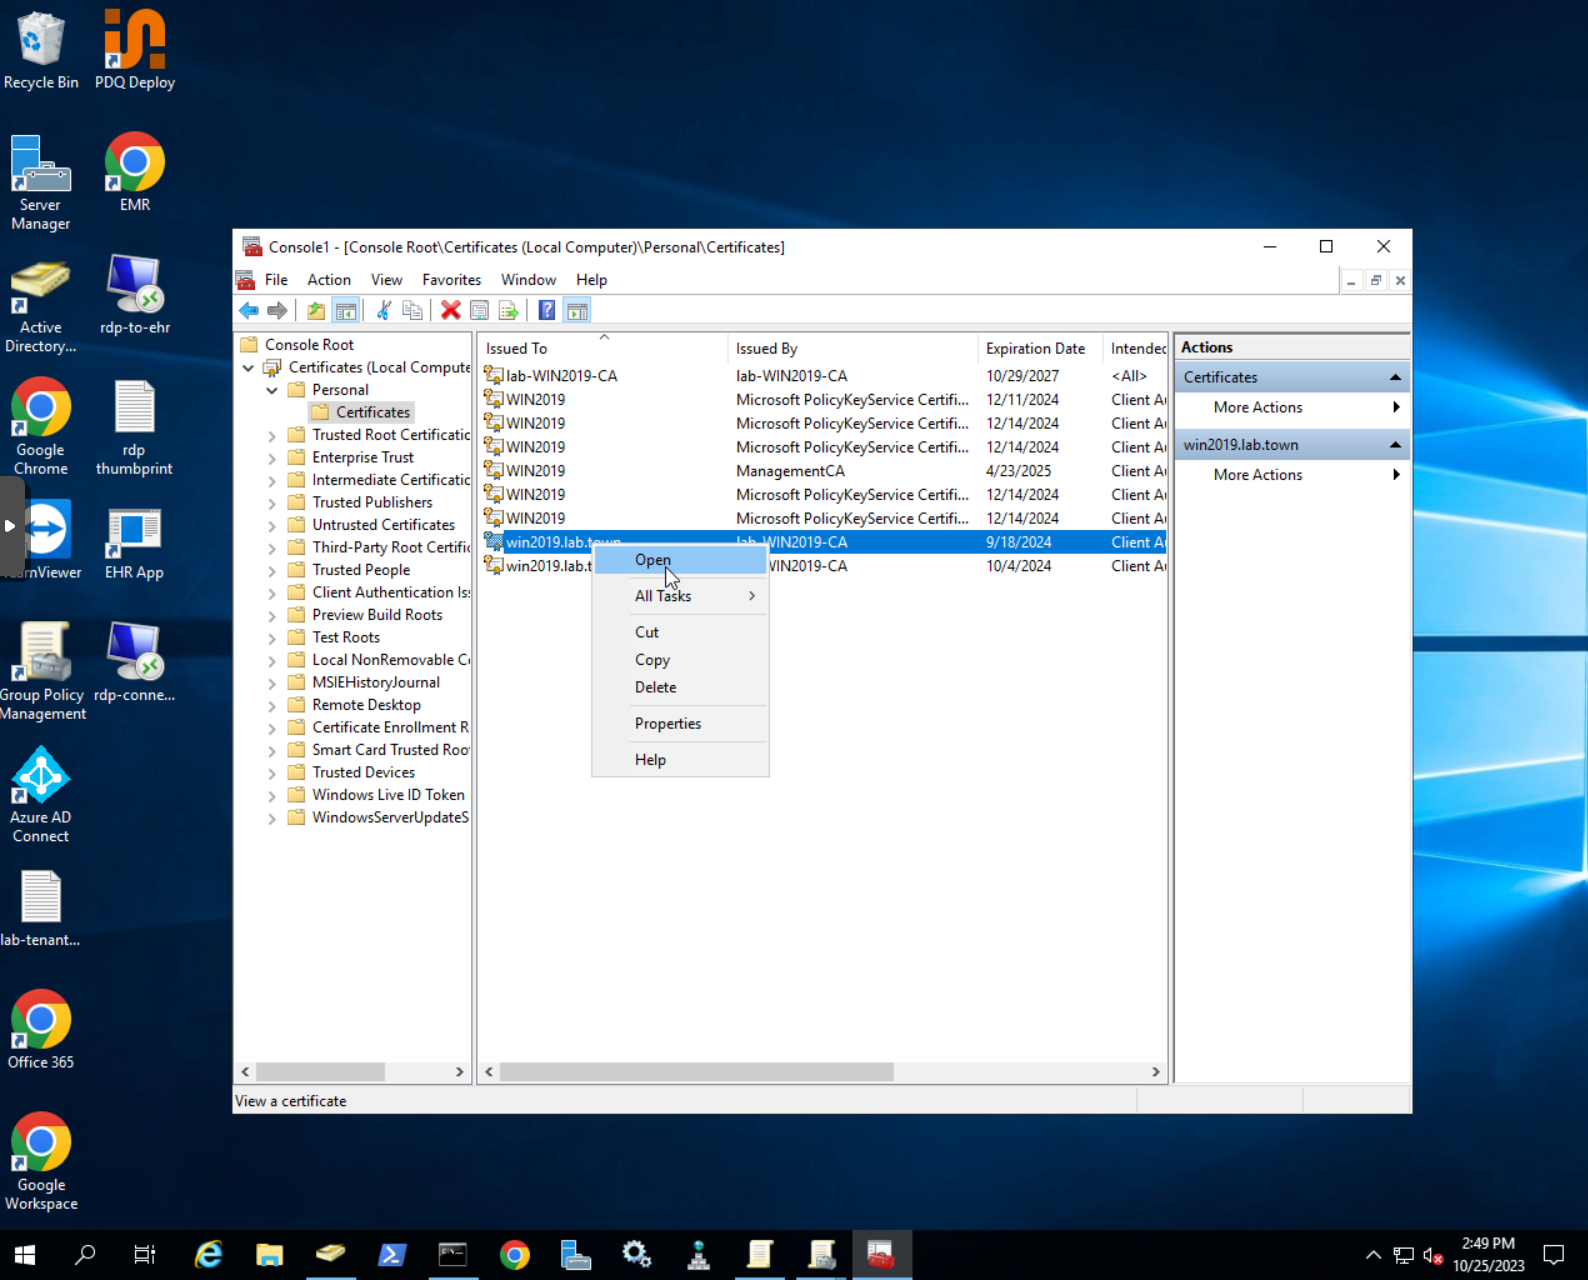
- Choose the certificate that you want to use, right-click and choose
Open
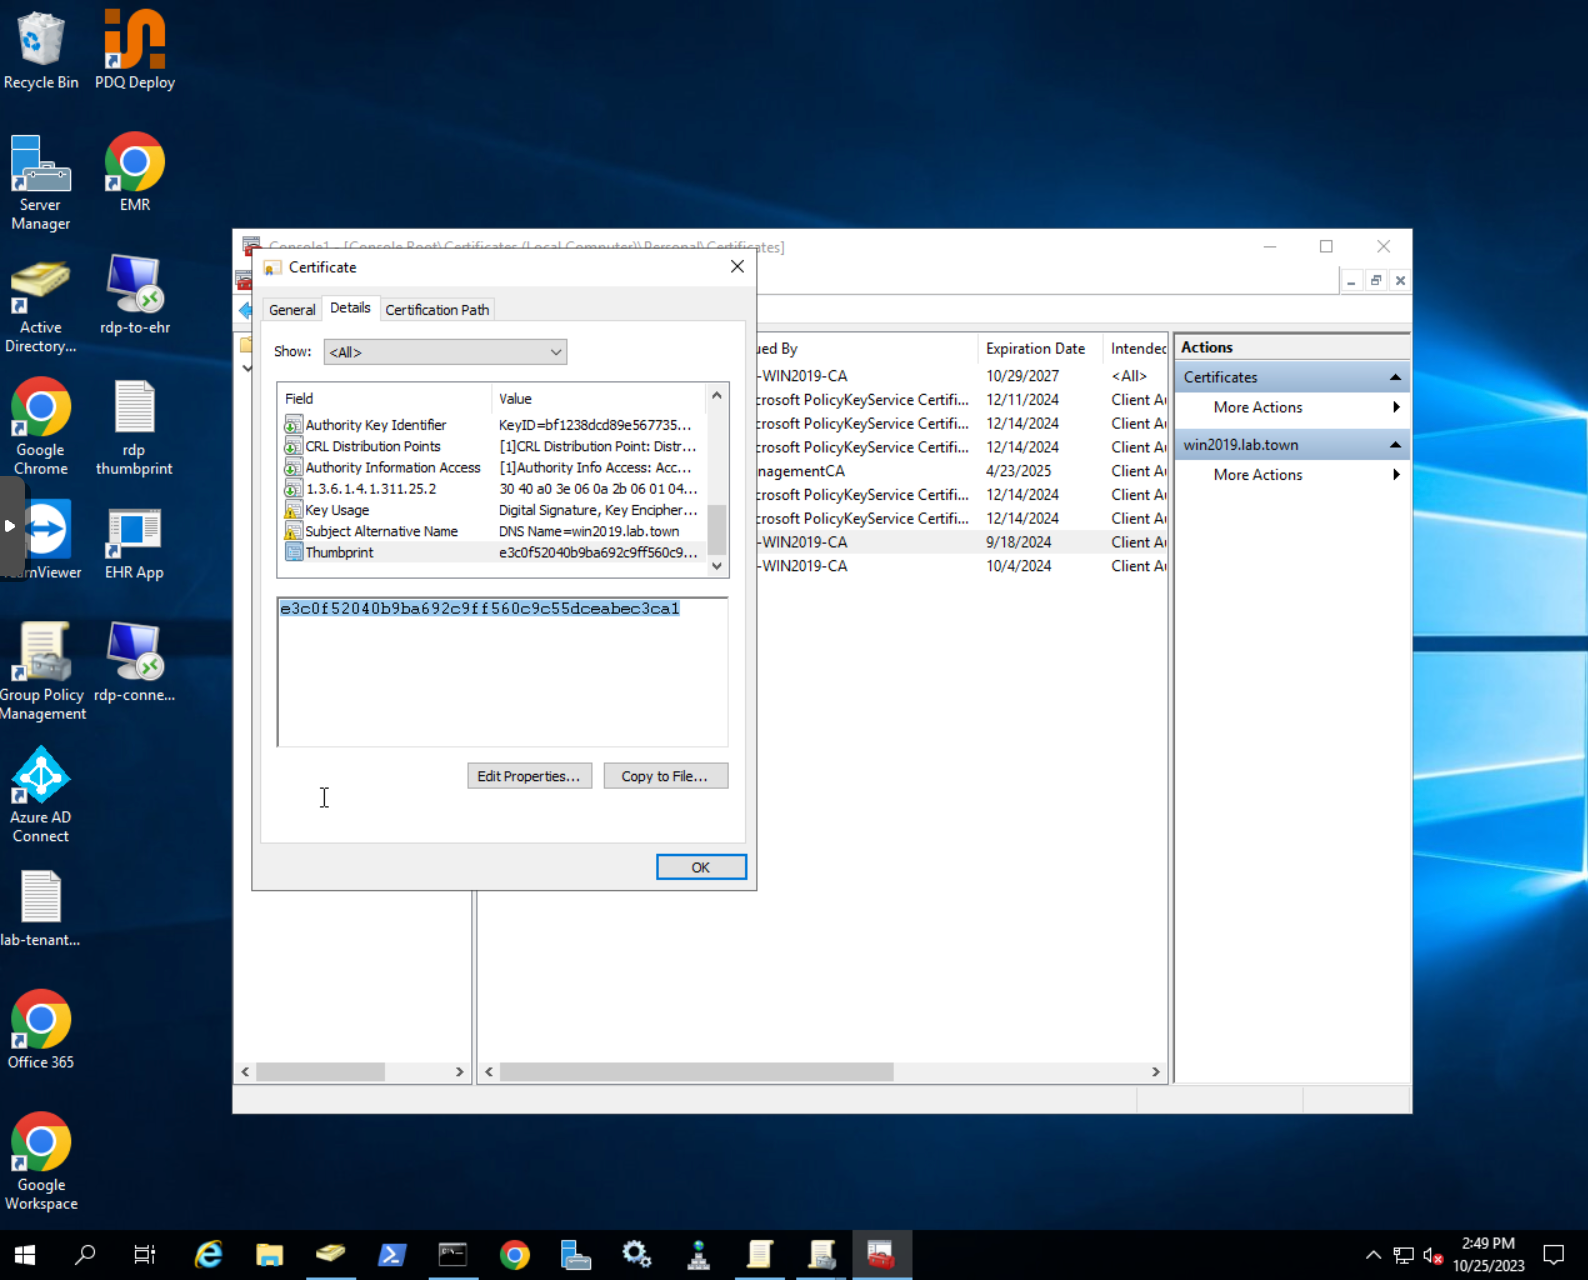
- Navigate to
Details, scroll down toThumbprintand copy the certificate thumbprint
- Open command prompt and navigate to the folder where you have created the RDP connection
- Execute the following command to sign the RDP connection with the chosen certificate
# command to sign RDP connection with RDPSign.exe
rdpsign /sha256 <your certificate fingerprint> <rdp file name>

# for example we executed the following command
rdpsign /sha256 e3c0f52040b9ba692c9ff560c9c55dceabec3ca1 rdp-connection.rdp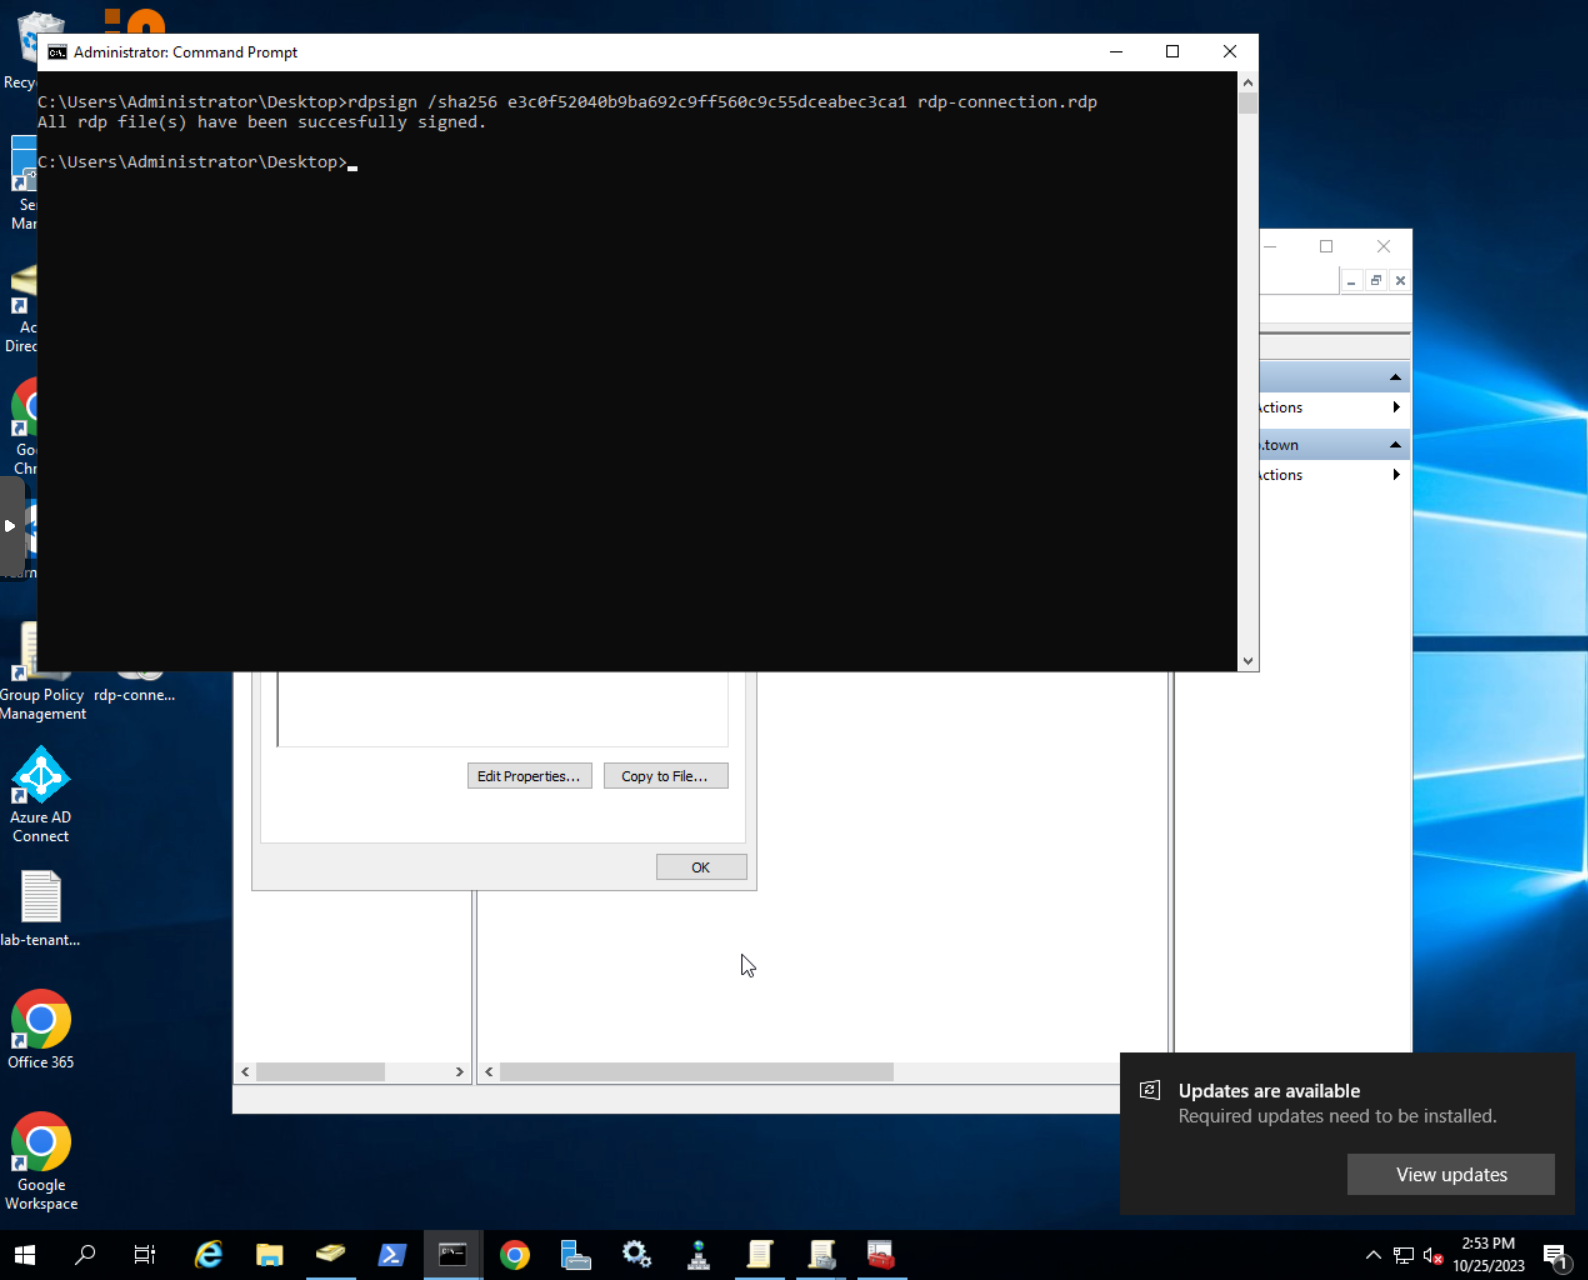
- Upon success you will get a confirmation message in the command prompt
Import certificate to the target machines
Now you need to import the certificate to the machines where RDP client is going to be used. For example, if you signed RDP connection with a domain certificate, all domain workstation will have that certificate trusted and imported. If you used self-signed certificate, you need to export the certificate and import it to all machines where the RDP connection will be used.
Leverage this guide from Microsoft to learn more about certificate import.
Create a policy to trust the publisher
Once the RDP connection is signed, Windows will be able to see the publisher of this connection. The last step is to make sure that workstations where the RDP connection is used trust this publisher.
We will create a GPO to trust the pubsliher. If you are using the local workstations, you can leverage the local policy editor to perform this configuration.
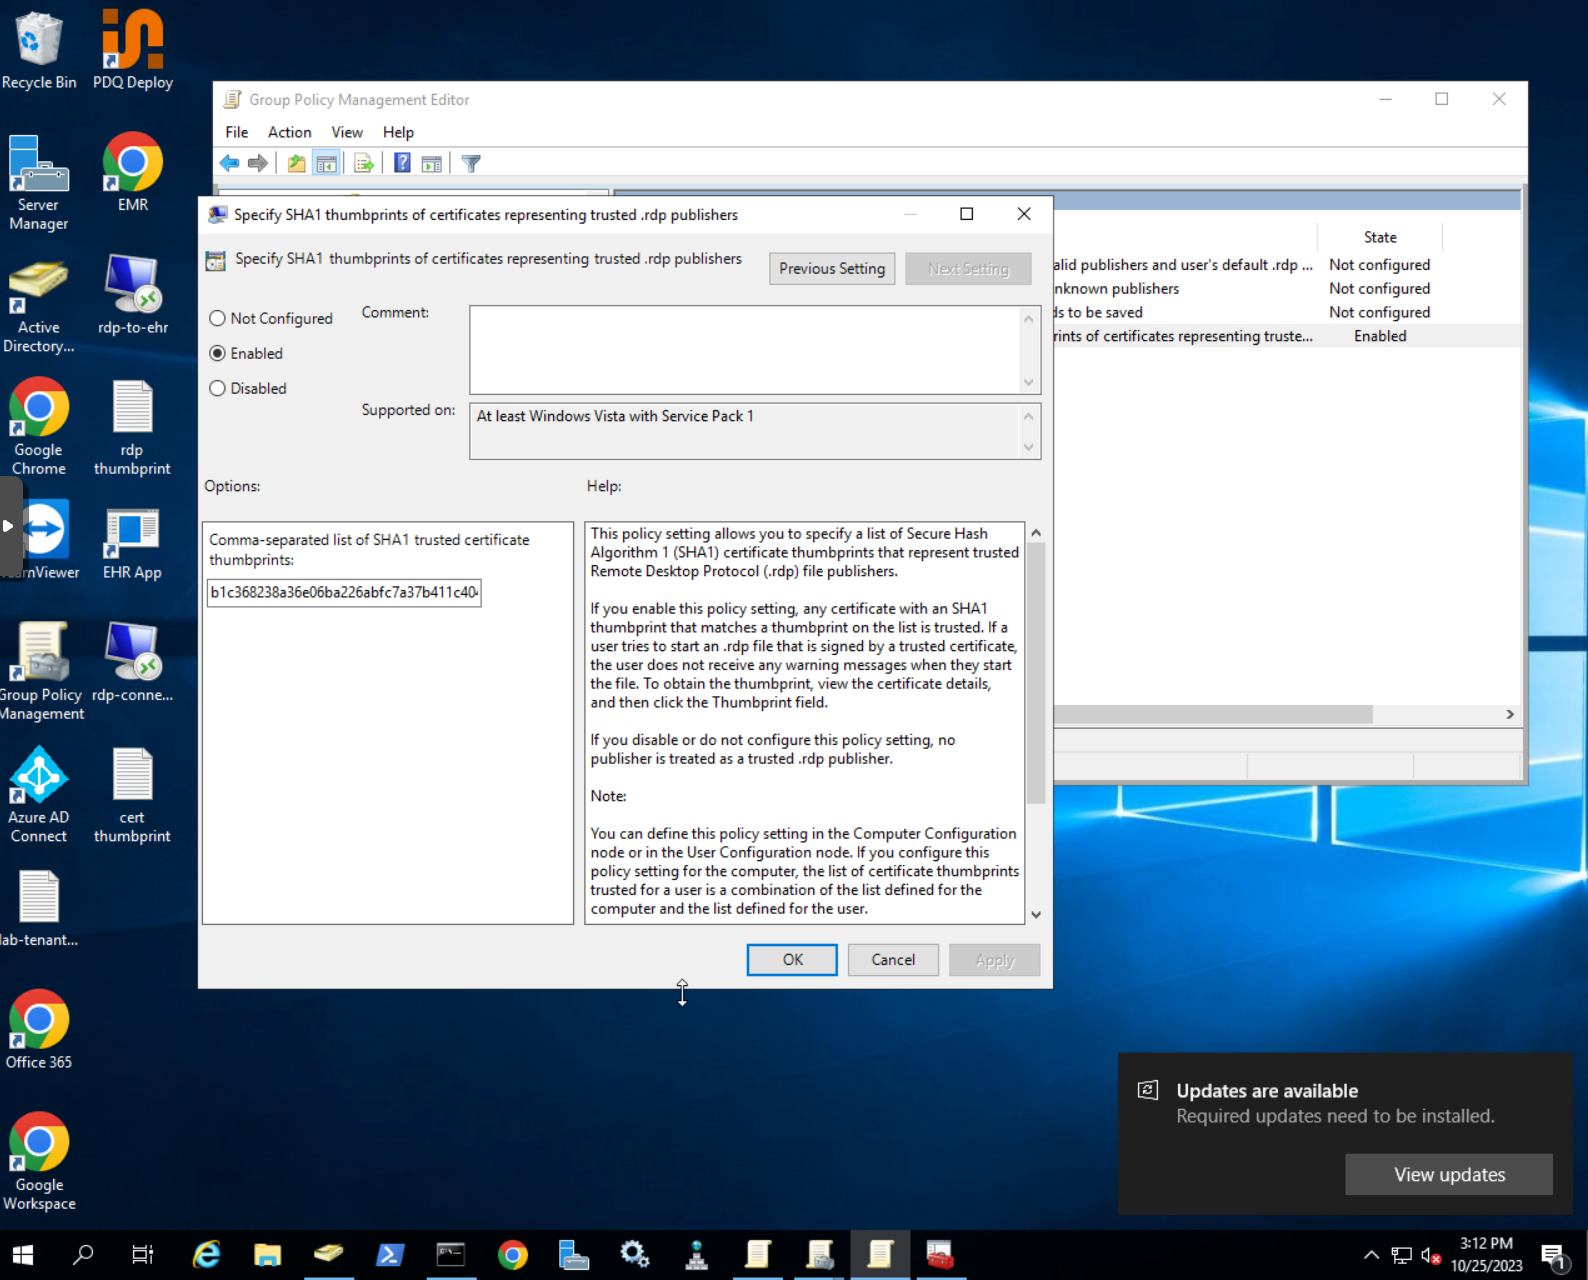
- Open Group Policy Management Editor
- Navigate to the following location
User configuration→Policies→Administrative templates→Windows components→Remote desktop services→Remote desktop connection client→Specify SHA1 thumbprint of certificates representing trusted rdp. publishers
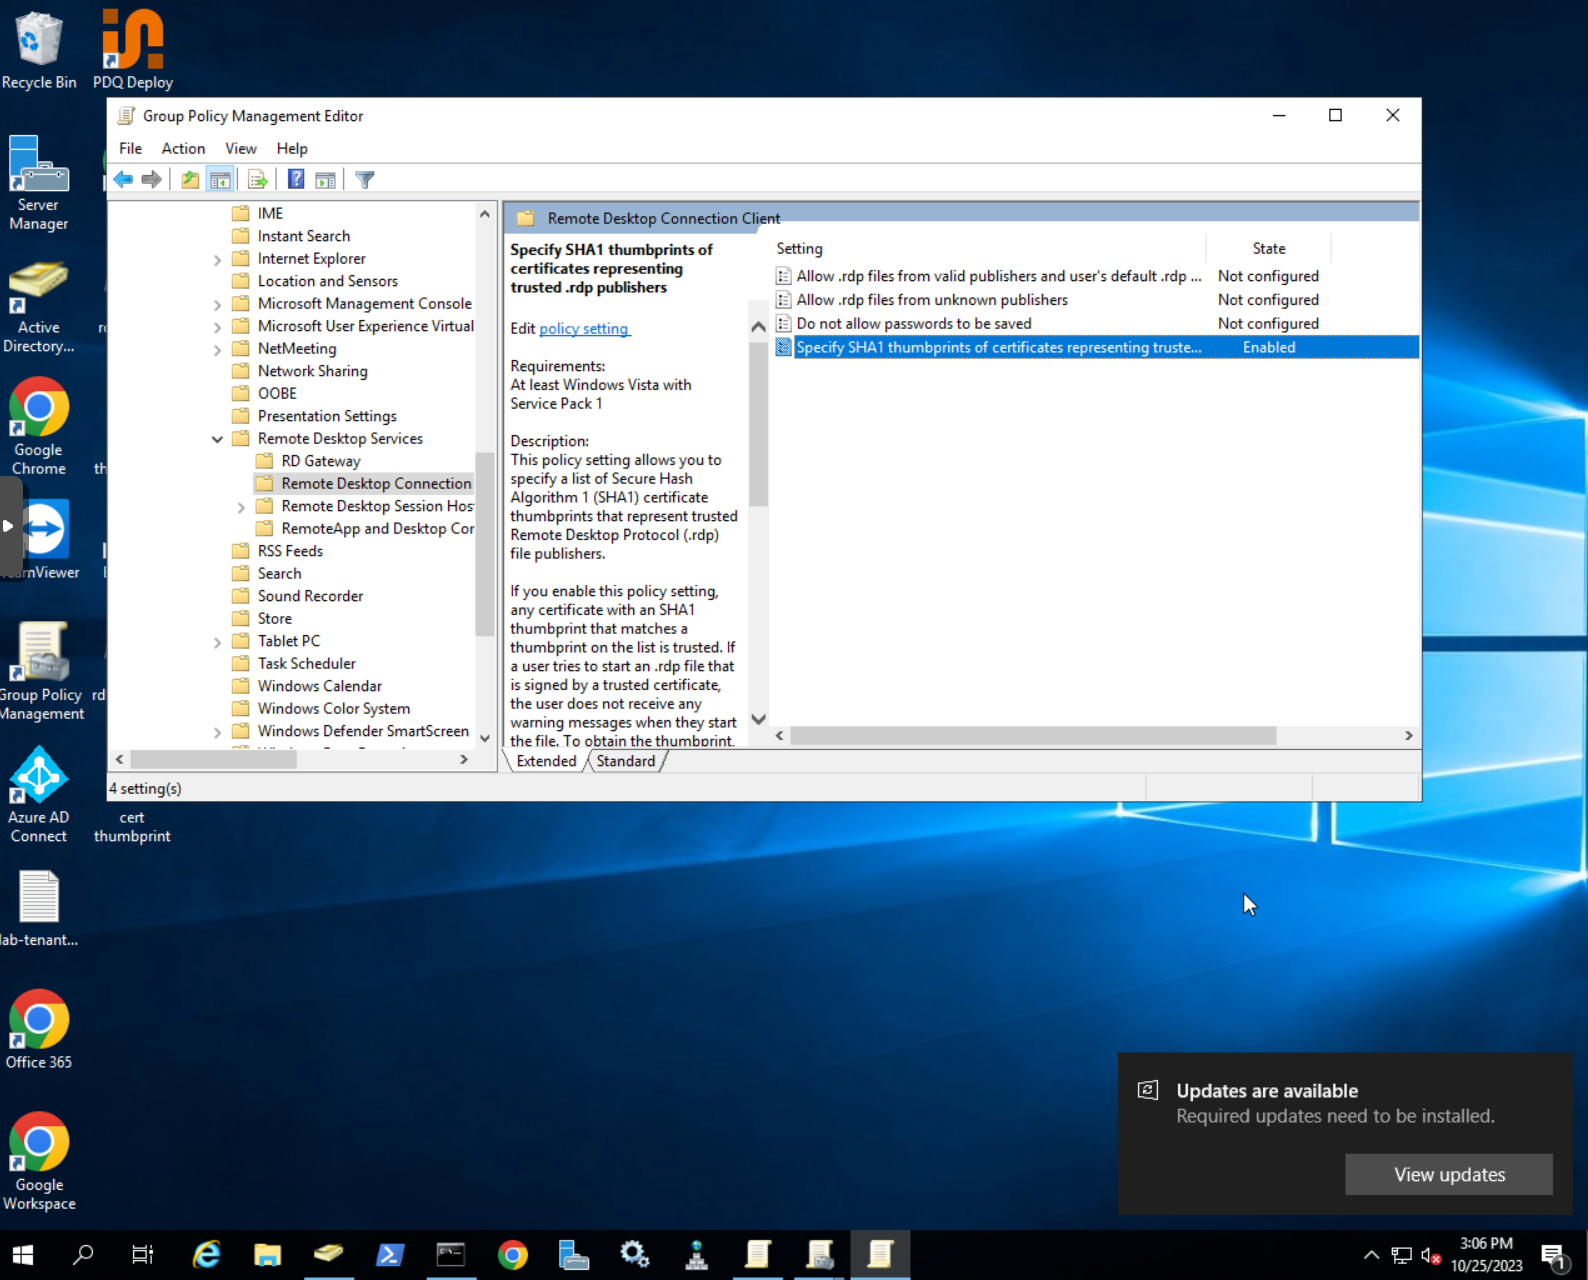
- Add the fingerprint of your certificate and save the configuration