Quick-start - Passwordless MFA for domain Windows workstations
In this guide we will set up idemeum Passwordless MFA for domain-joined Windows workstations. Your customers will be able to access workstations without passwords leveraging mobile biometrics.

Sign up for idemeum MSP tenant
If you have not created your idemeum cloud tenant yet, please follow the steps below to create a trial tenant for your organization.

Enable cloud directory for your MSP tenant
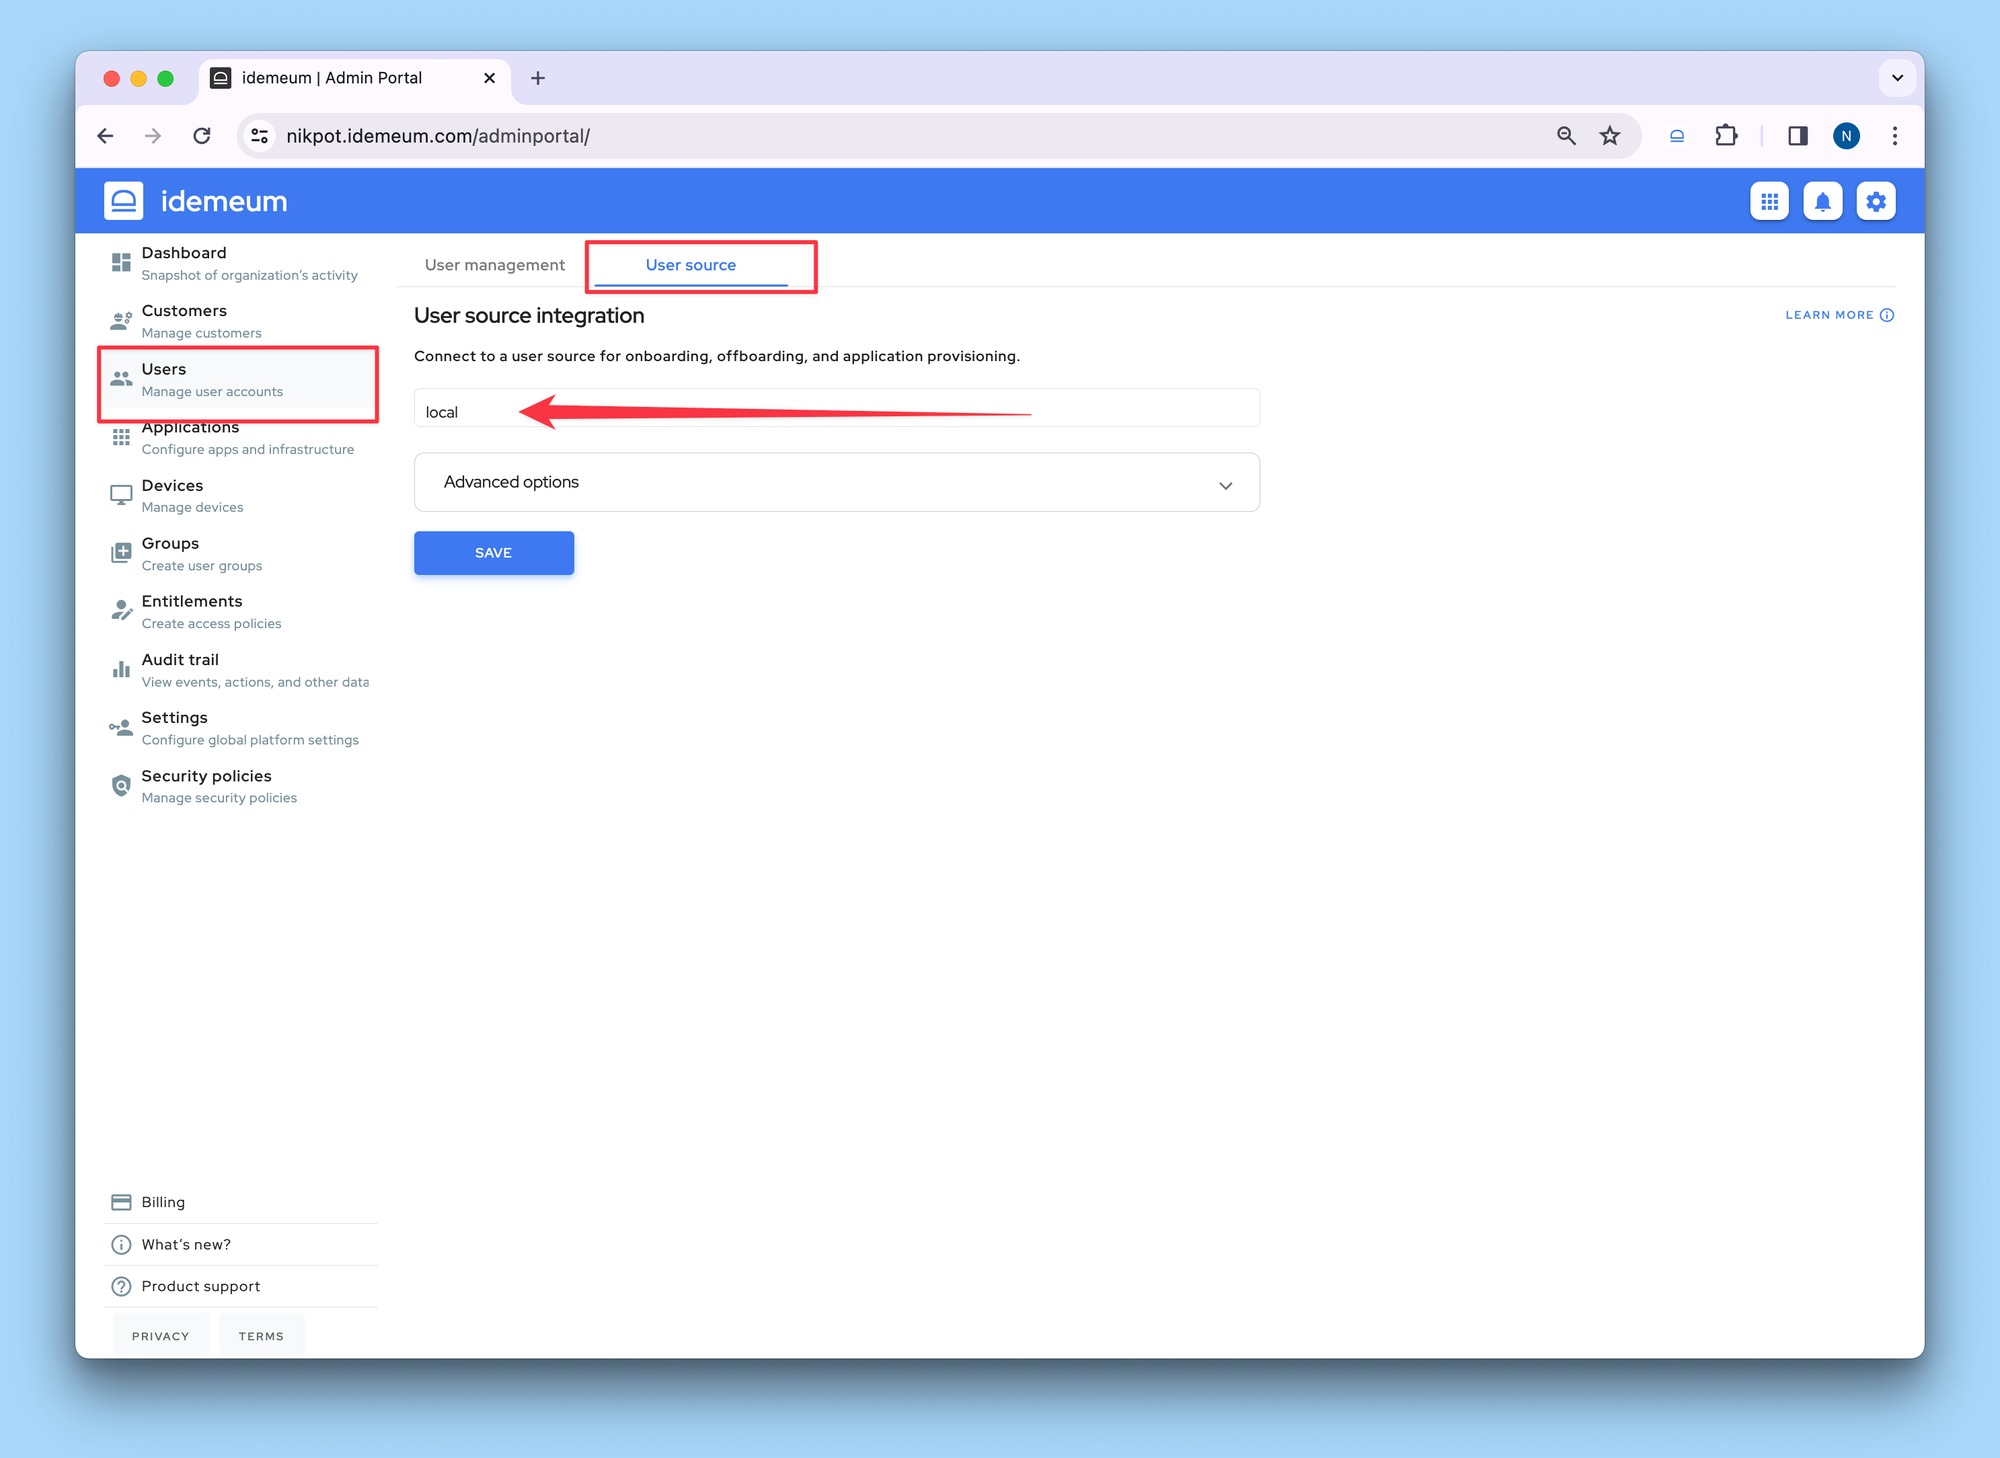
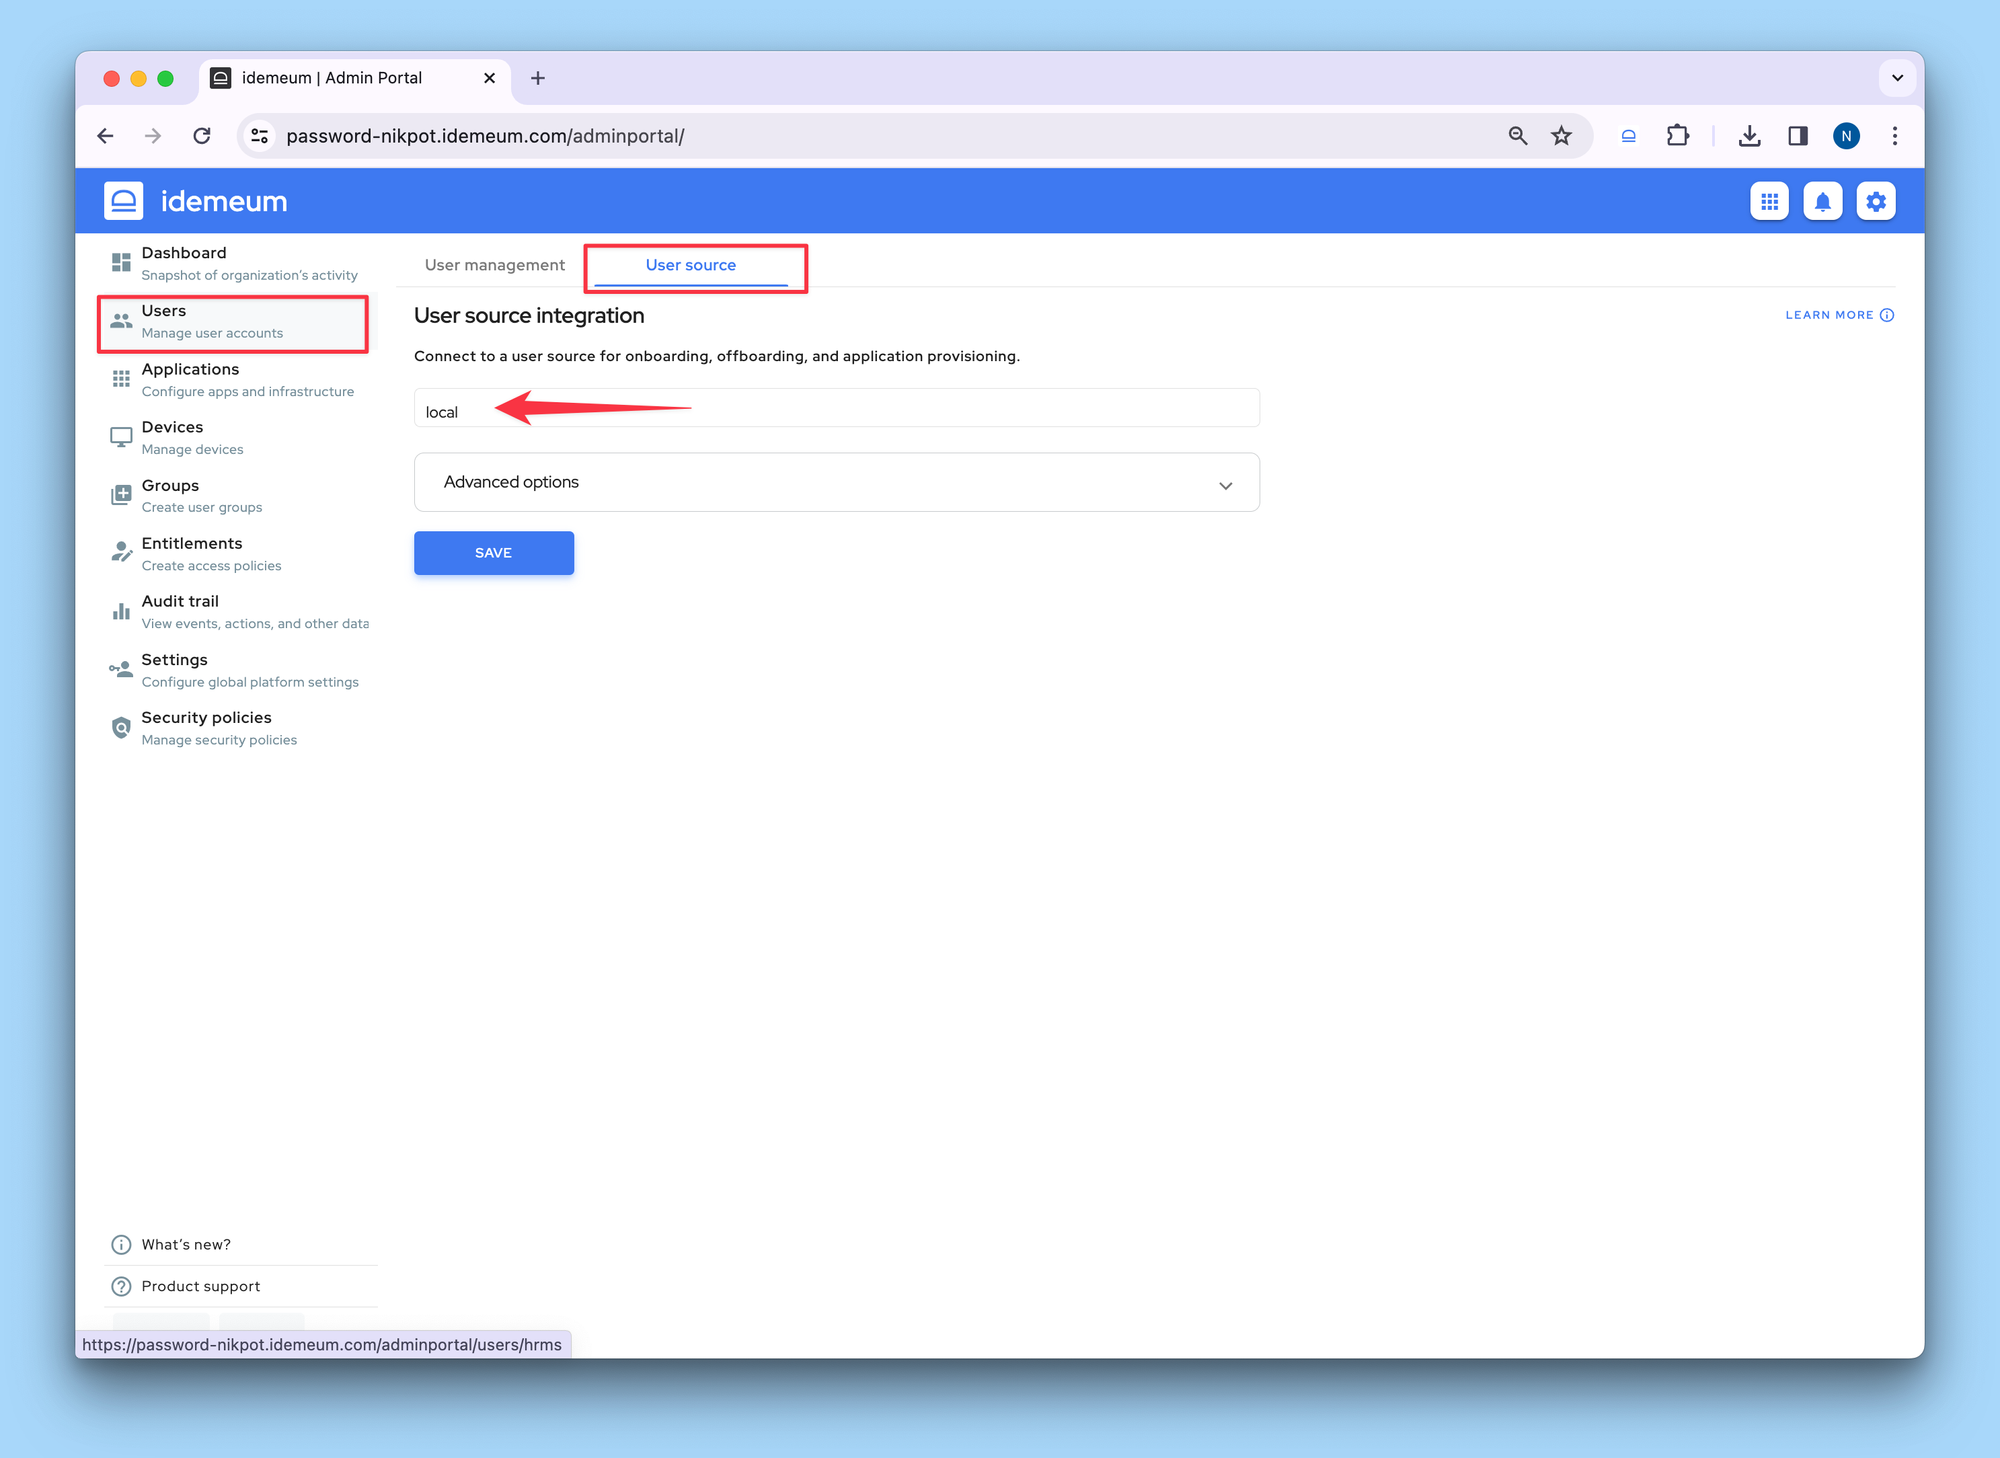
To manage identities of your MSP technicians we will leverage idemeum local directory. To enable local directory:
- Navigate to
https://<your-msp-domain>.idemeum.com/adminportal - Access
Users→User sourceand chooseLocal Savethe configuration
Create accounts for your technicians
Now you can add your technicians to your tenant local directory. Once onboarded they will be able to login to your MSP tenant and also customer tenants with a mobile device.
- Navigate to your MSP tenant admin portal at
https://<your-msp-domain>.idemeum.com/adminportal - Access
Users→User managementand clickAdd user - Enter the email address that the user will verify in the mobile application to be onboarded into your tenant, and save the user record
Create a customer tenant that you will manage
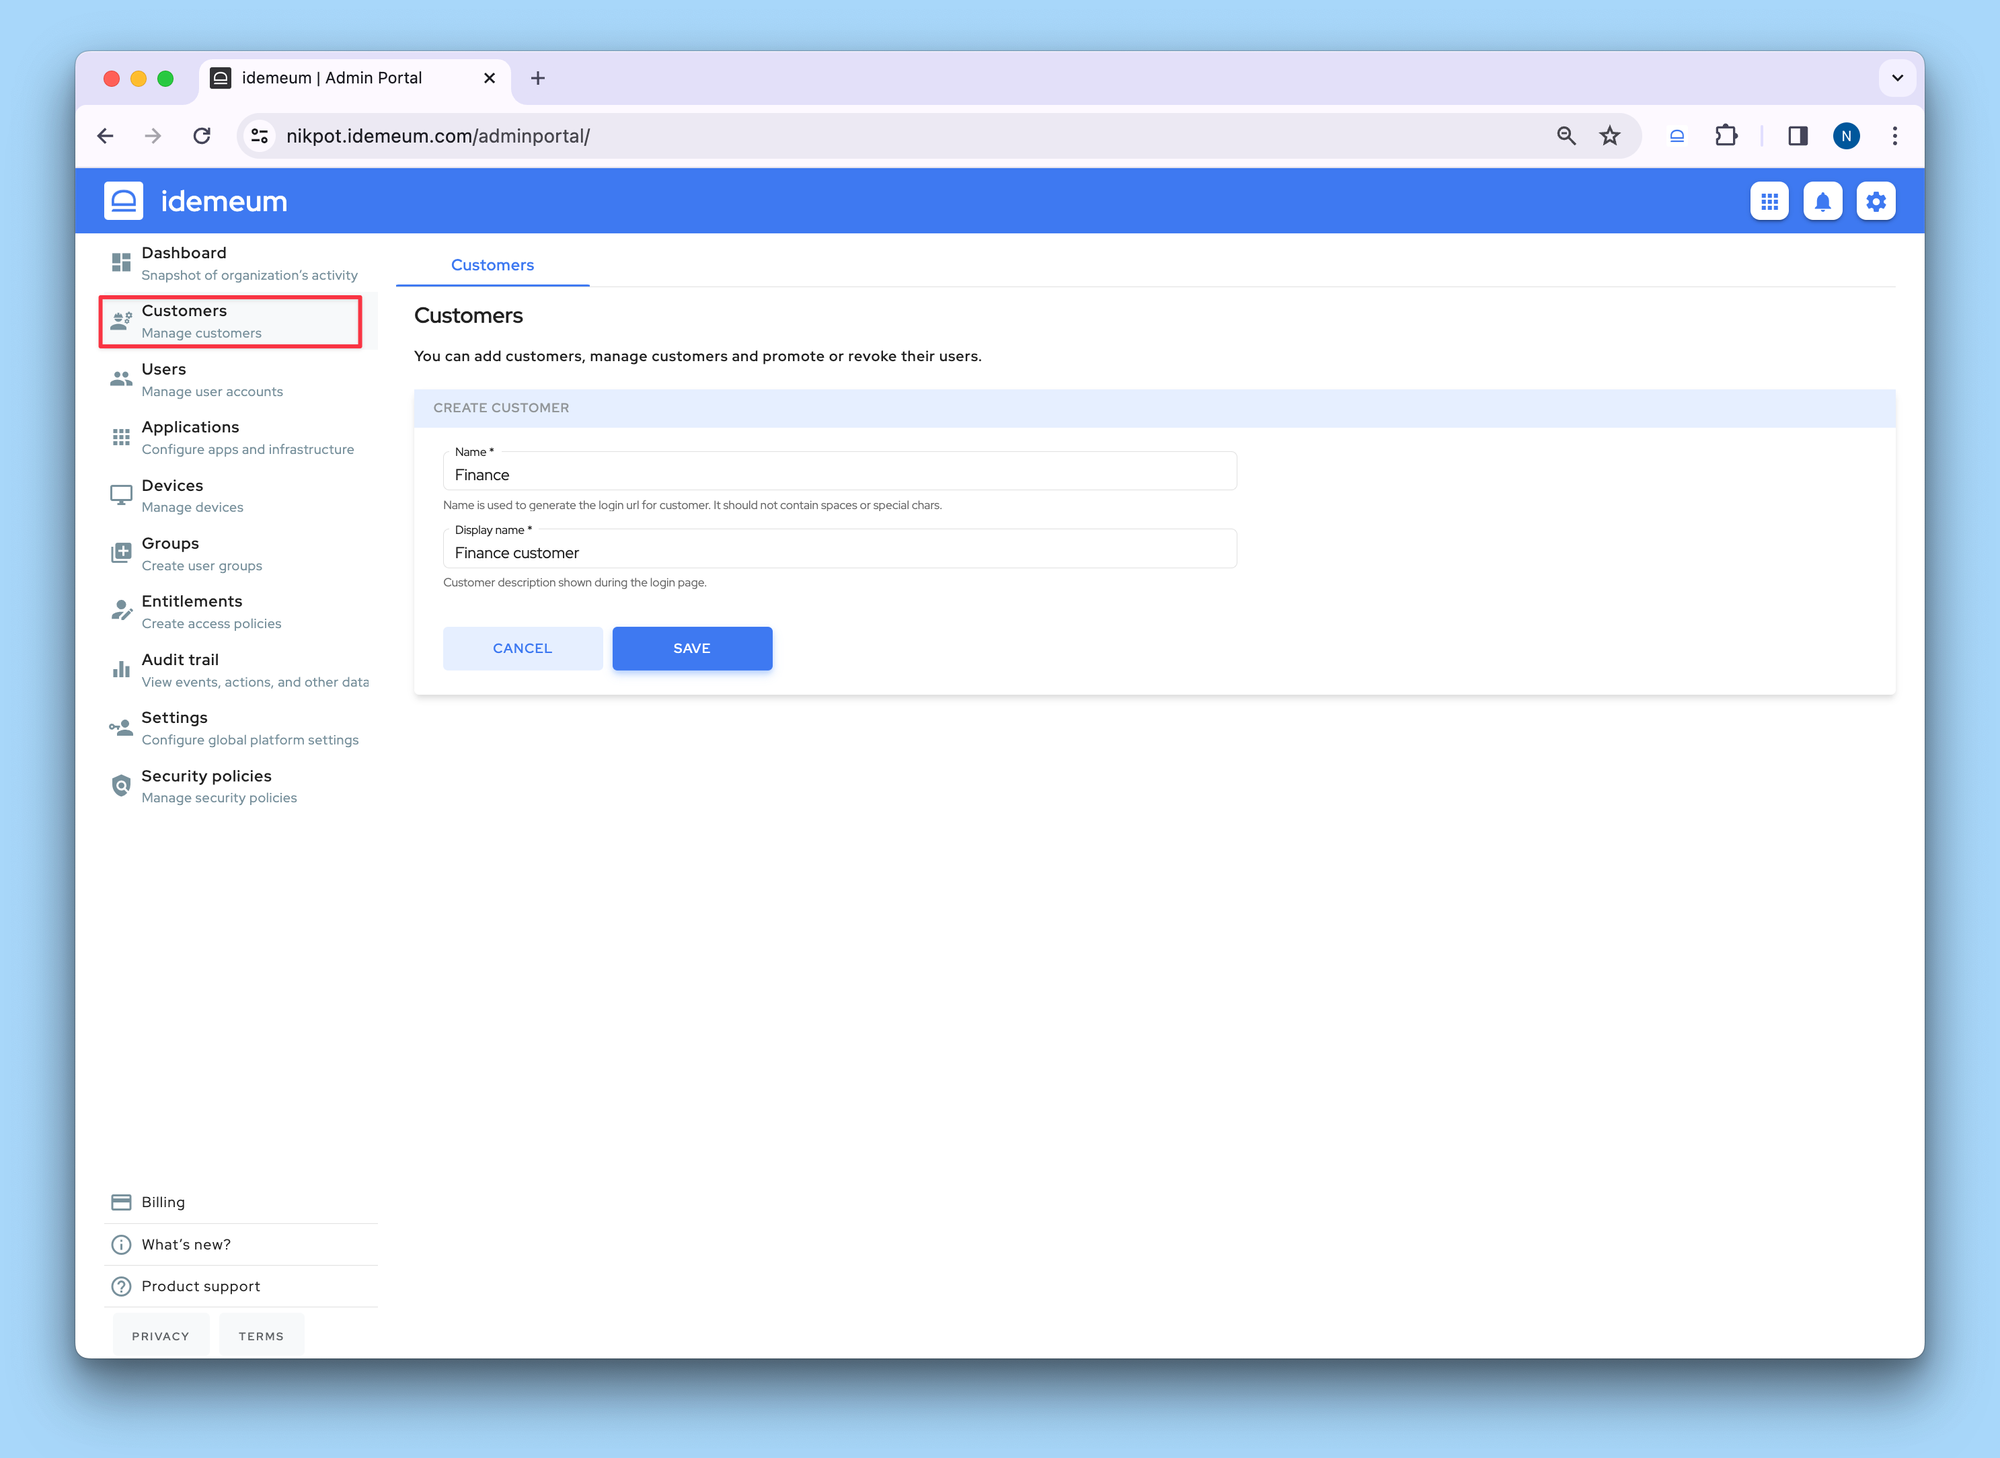
idemeum offers Multi-Tenant MSP Portal to manage all your customer tenants from a single dashboard. To create a tenant for your customer:
- Navigate to your MSP tenant admin portal at
https://your-domain.idemeum.com/adminportal - Access
Customerson the left and clickCreate customer - Enter
Name(will be used to create a subdomain for your MSP tenant, for examplecustomer-<your MSP domain>.idemeum.com) andDisplay name(will be used as a display name / title for your customer tenant)
Once the customer tenant is created, you can navigate to its URL and login with a mobile device. More on how to access customer tenants below.

Delegate technician access to customer tenant
You have two options:
- You can make every technician an
Adminin your MSP tenant and as a result, technicians will have access to all created customers tenants by default. - You do not assign an
Adminrole to a technician, but delegate access to each customer tenant directly.
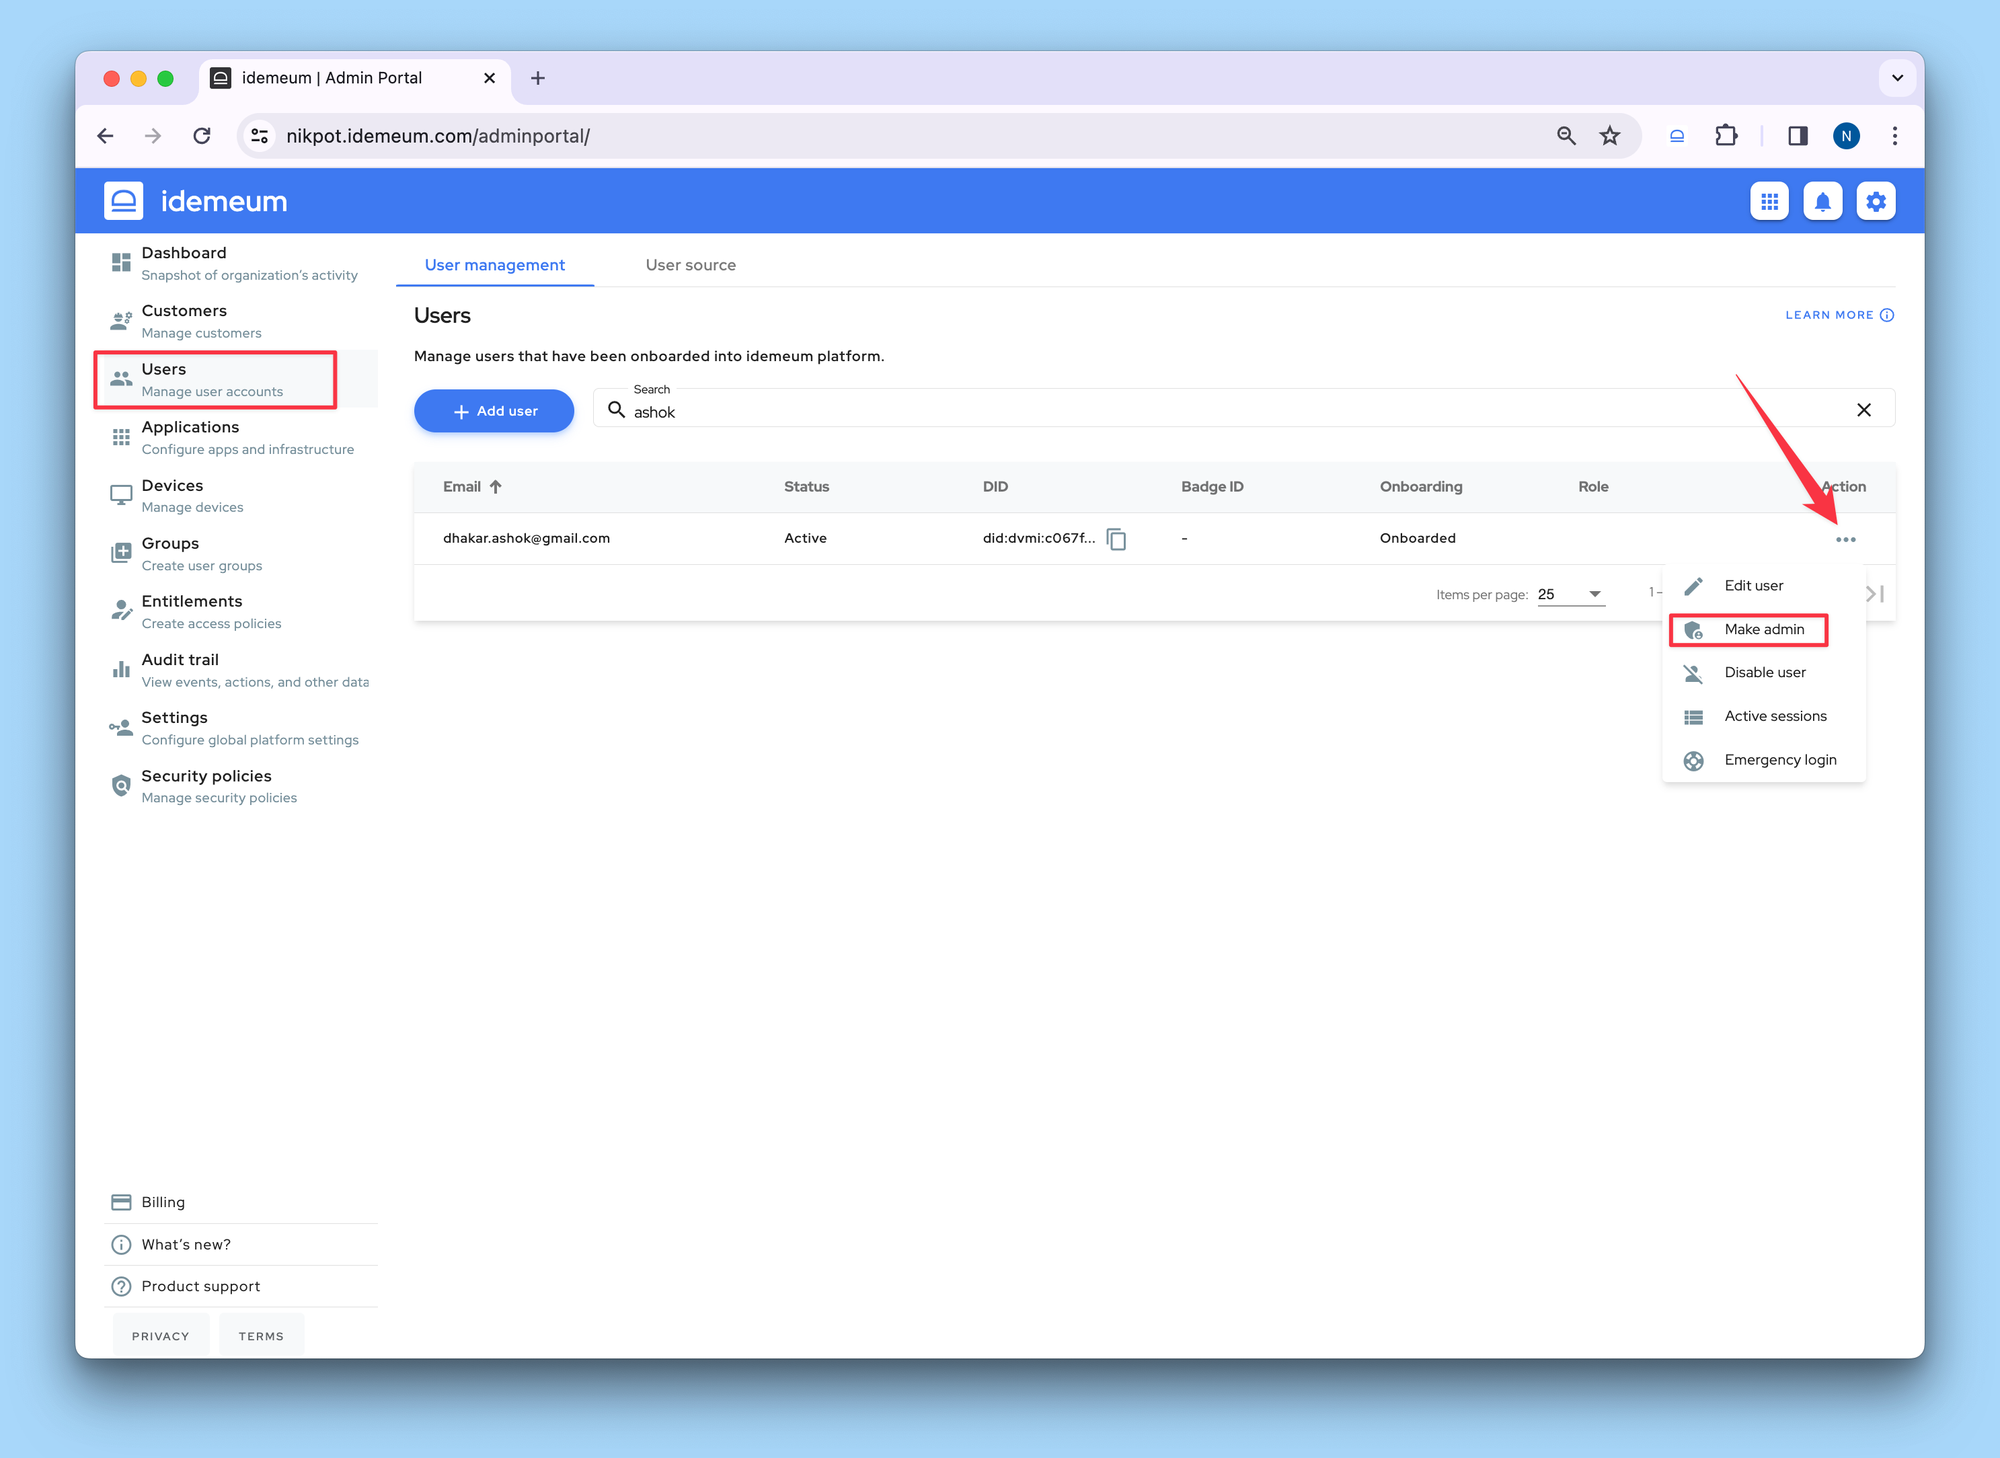
To assign an Admin role to a technician, please follow these steps.
- Navigate to your MSP tenant admin portal at
https://<your-msp-domain>.idemeum.com/adminportal - Access
Users - Find the user record, click on
...and then chooseMake admin
To delegate access to each customer tenant directly, please follow these steps.
Configure customer tenant
Now we will configure customer tenant for authentication leveraging Passwordless MFA.
- Access your customer tenant with a mobile device. You can directly navigate to a customer tenant URL at
customer-<your msp domain>.idemeum.comor navigate to your MSP postal,Customerssection and click on the link from there. You will need to login with your mobile device.
Enable cloud directory for customer tenant
- Navigate to your customer tenant admin dashboard and enable cloud directory
- Access
Users→User sourceand chooseLocal Savethe configuration
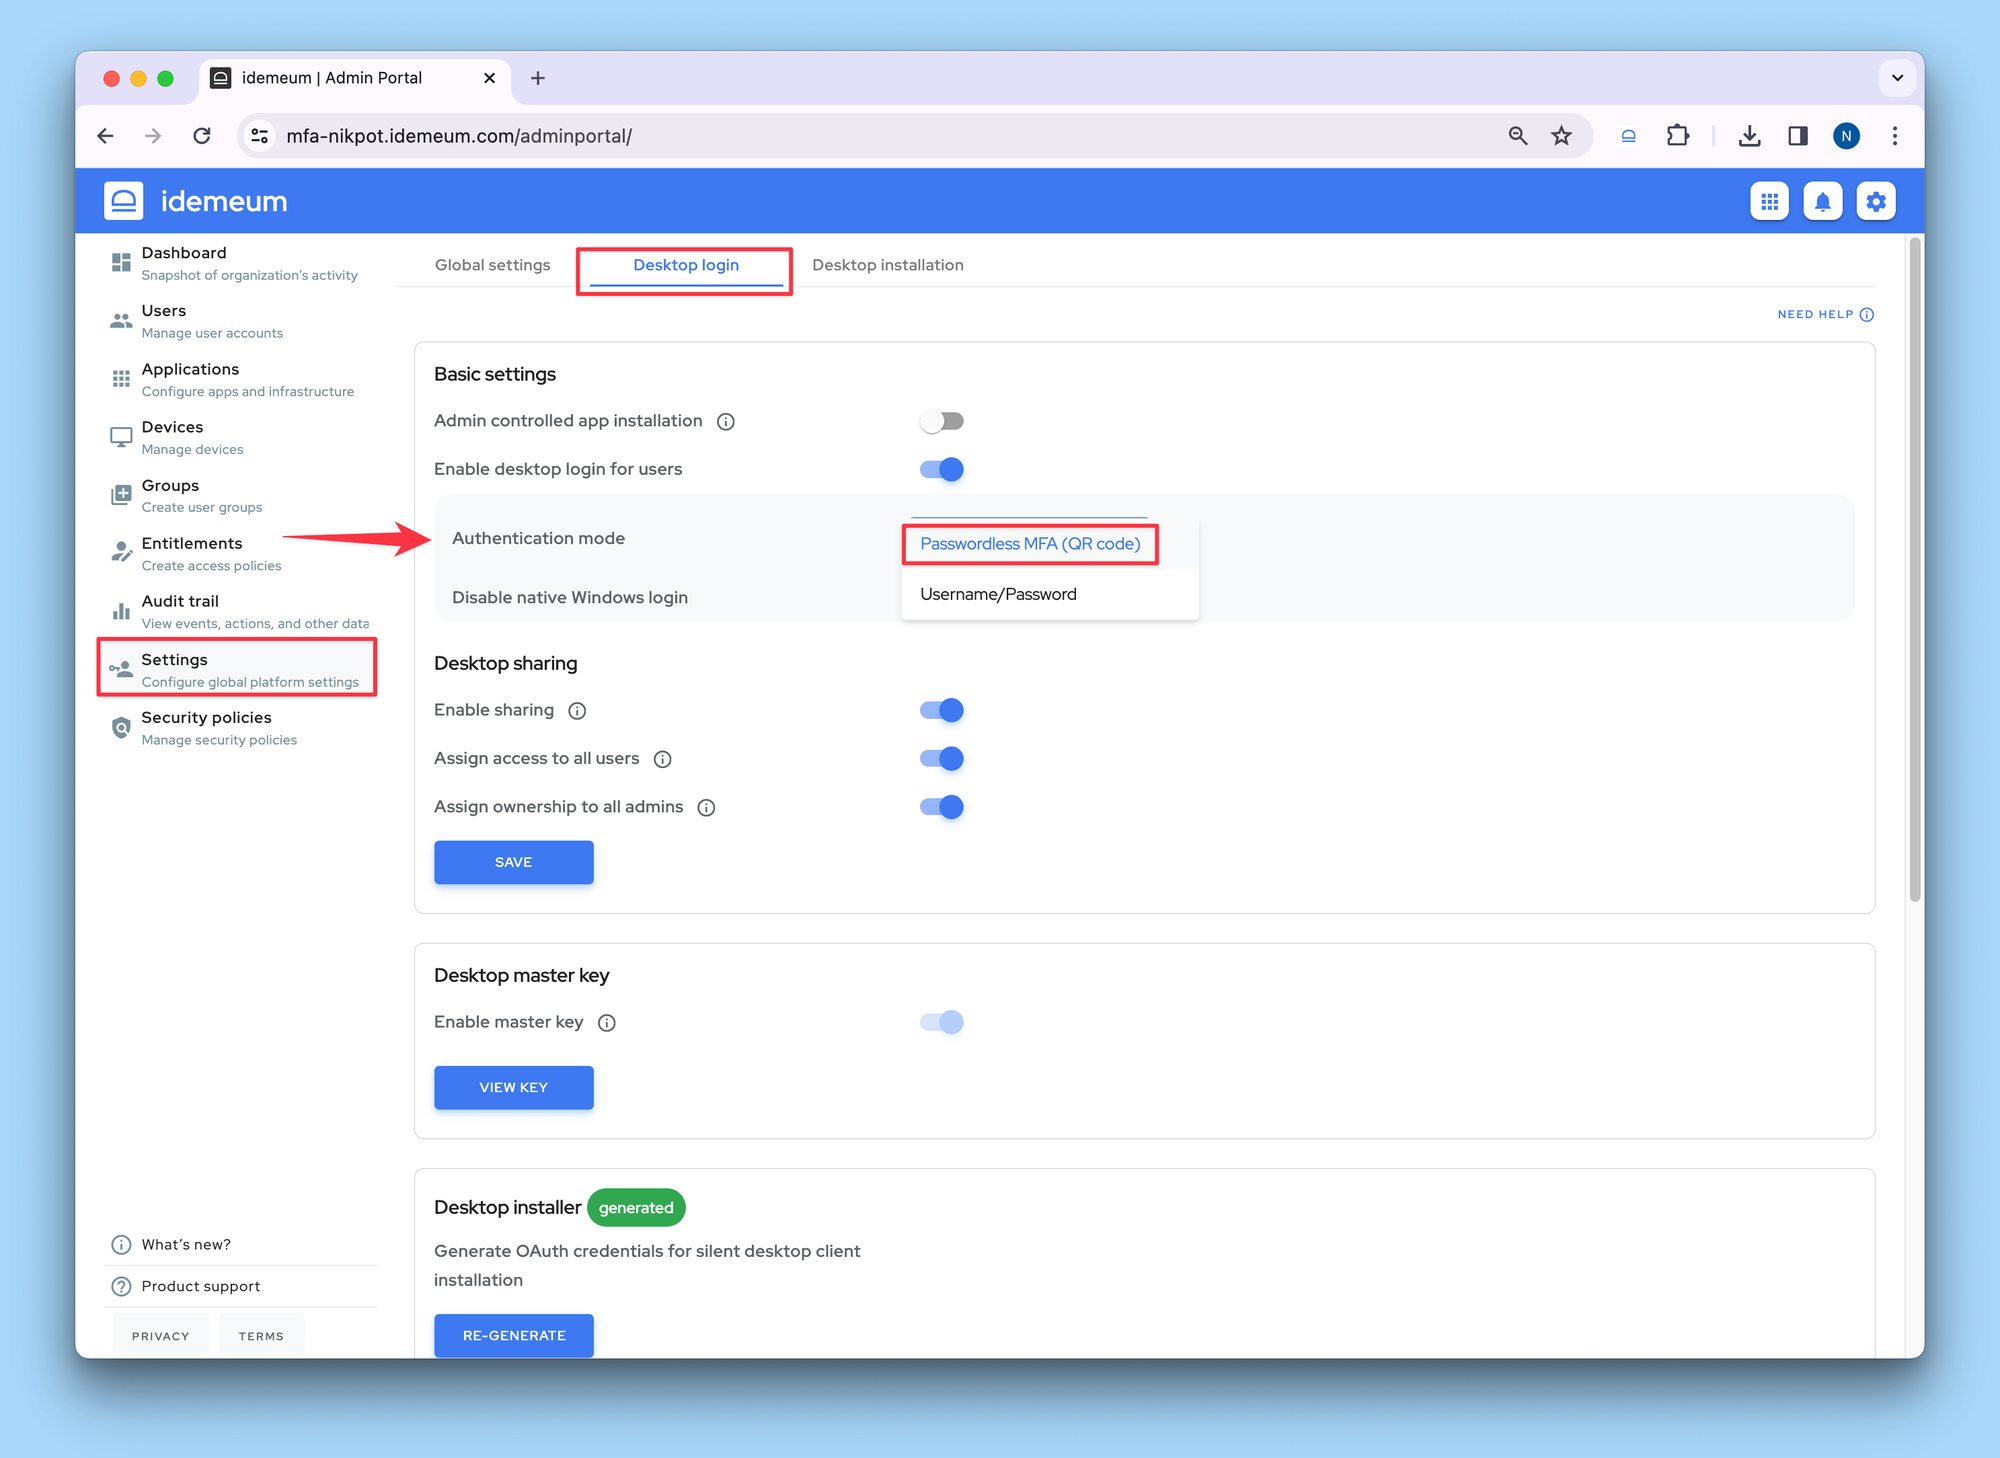
Enable user authentication with Passwordless MFA
- Navigate to
Settingsand thenDesktop login - Click
Enable desktop login for users - Then choose
Passwordless MFAfrom the drop down list - Click
Save
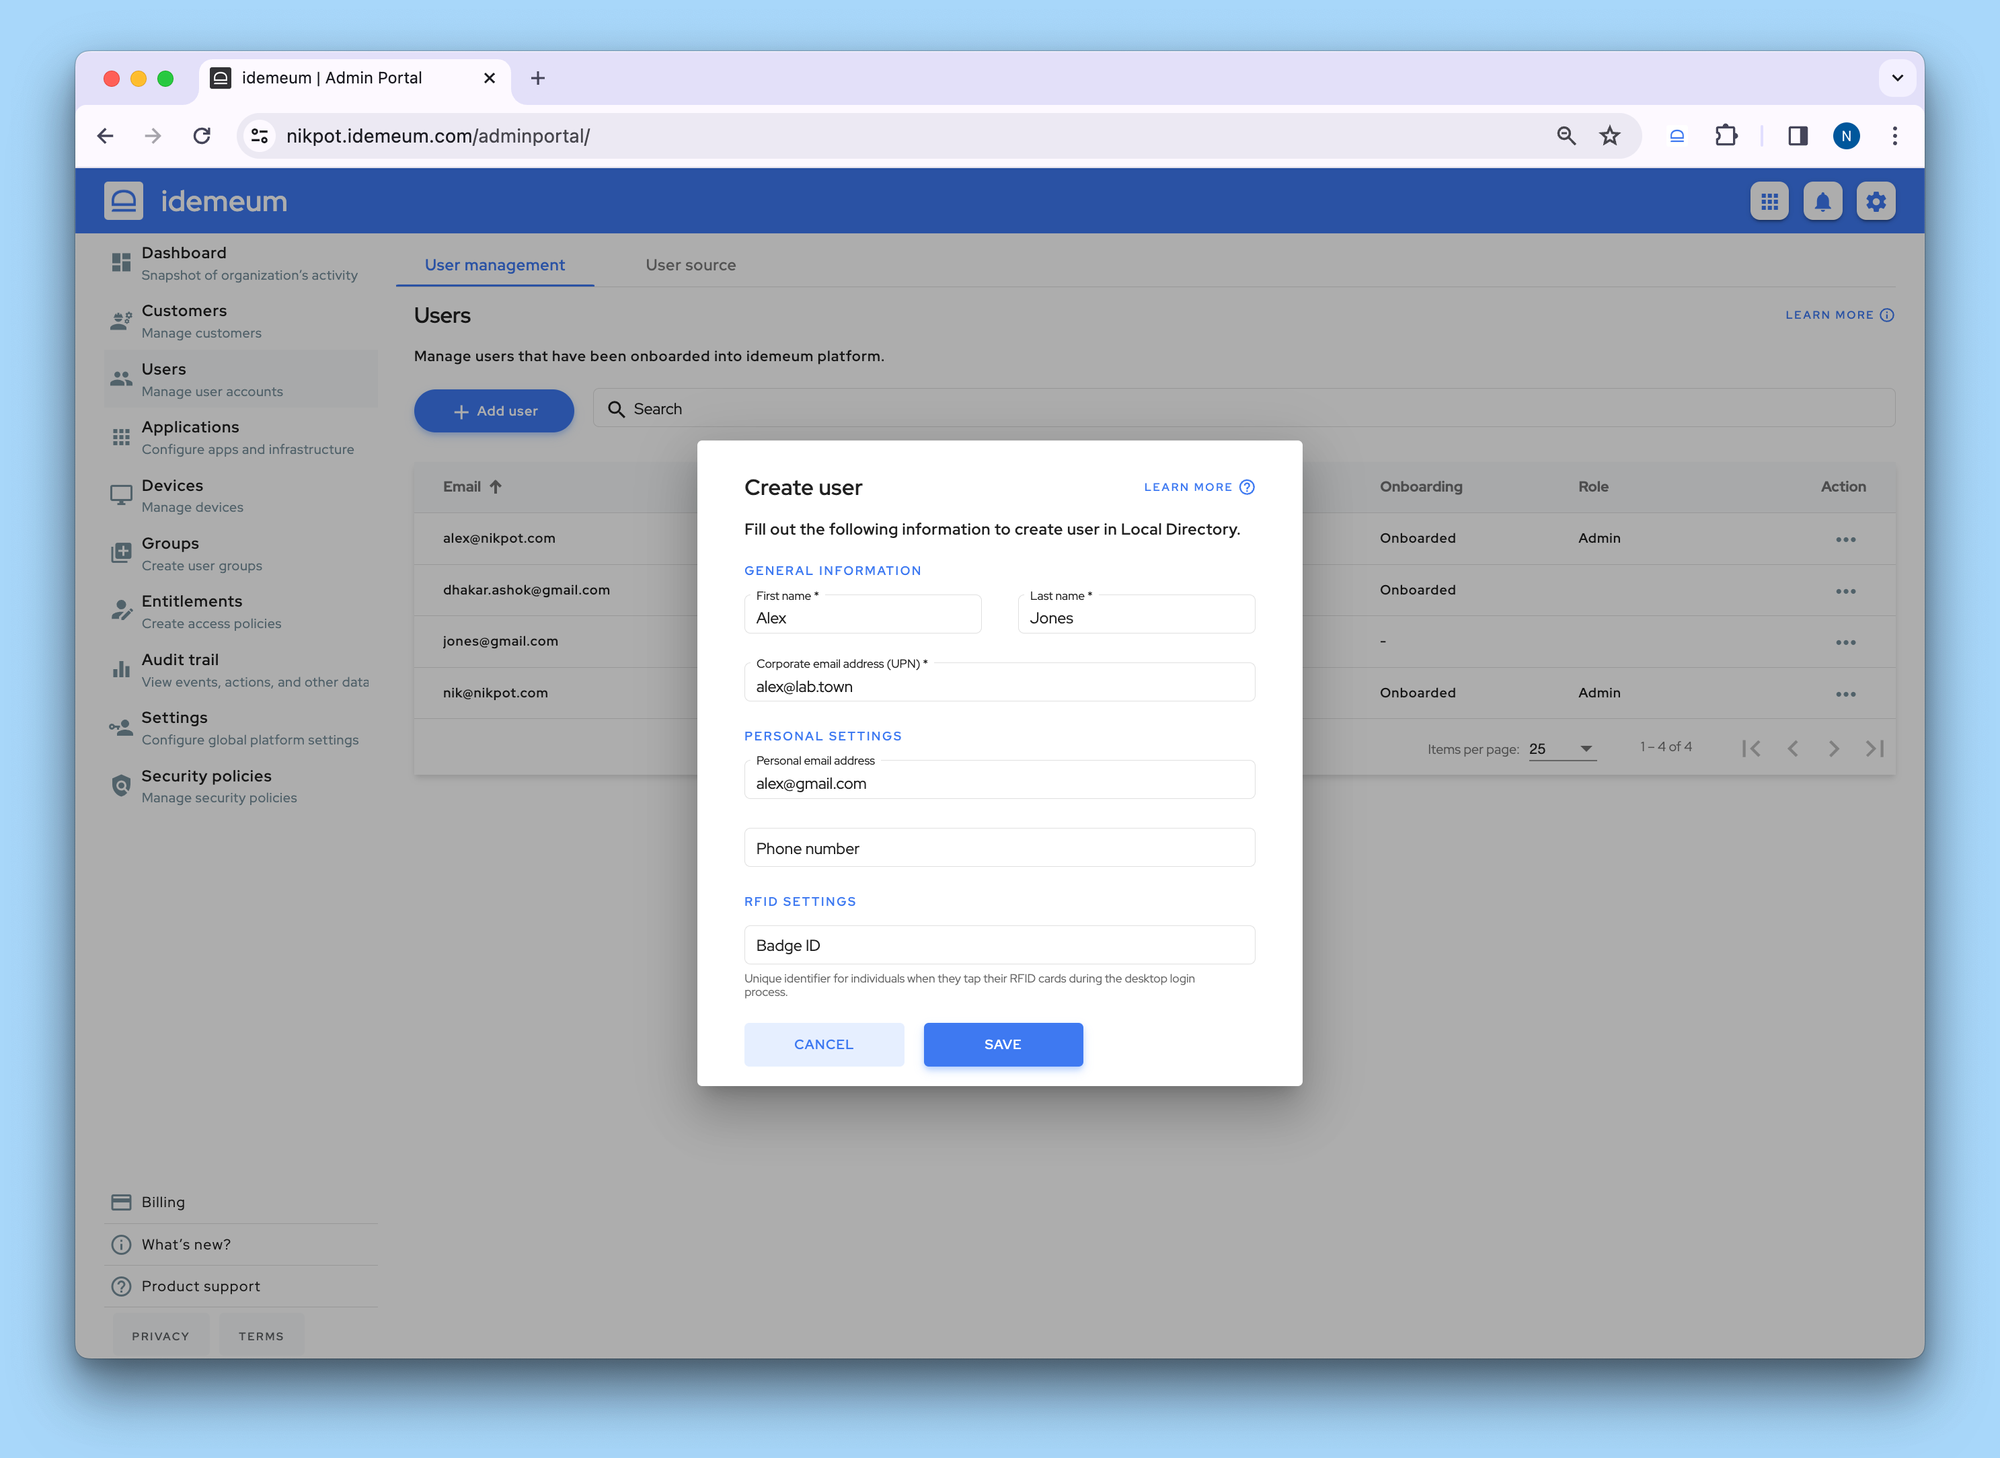
Create your customer users
Now you will create users for your customers so that they can onboard with a mobile device. For example, here I create a new user record for Mike:
- Provide
First nameandLast name - Enter
Company email address / UPN
- idemeum username and password will be automatically populated. For domain-joined computers you should not care about these values as they are used for local workstations.
- Optionally enter the
Personal email address

Set up desktop client branding
You can configure the look and feel for the desktop client by configuring background, logo, and text for your users. You can follow the guide below.

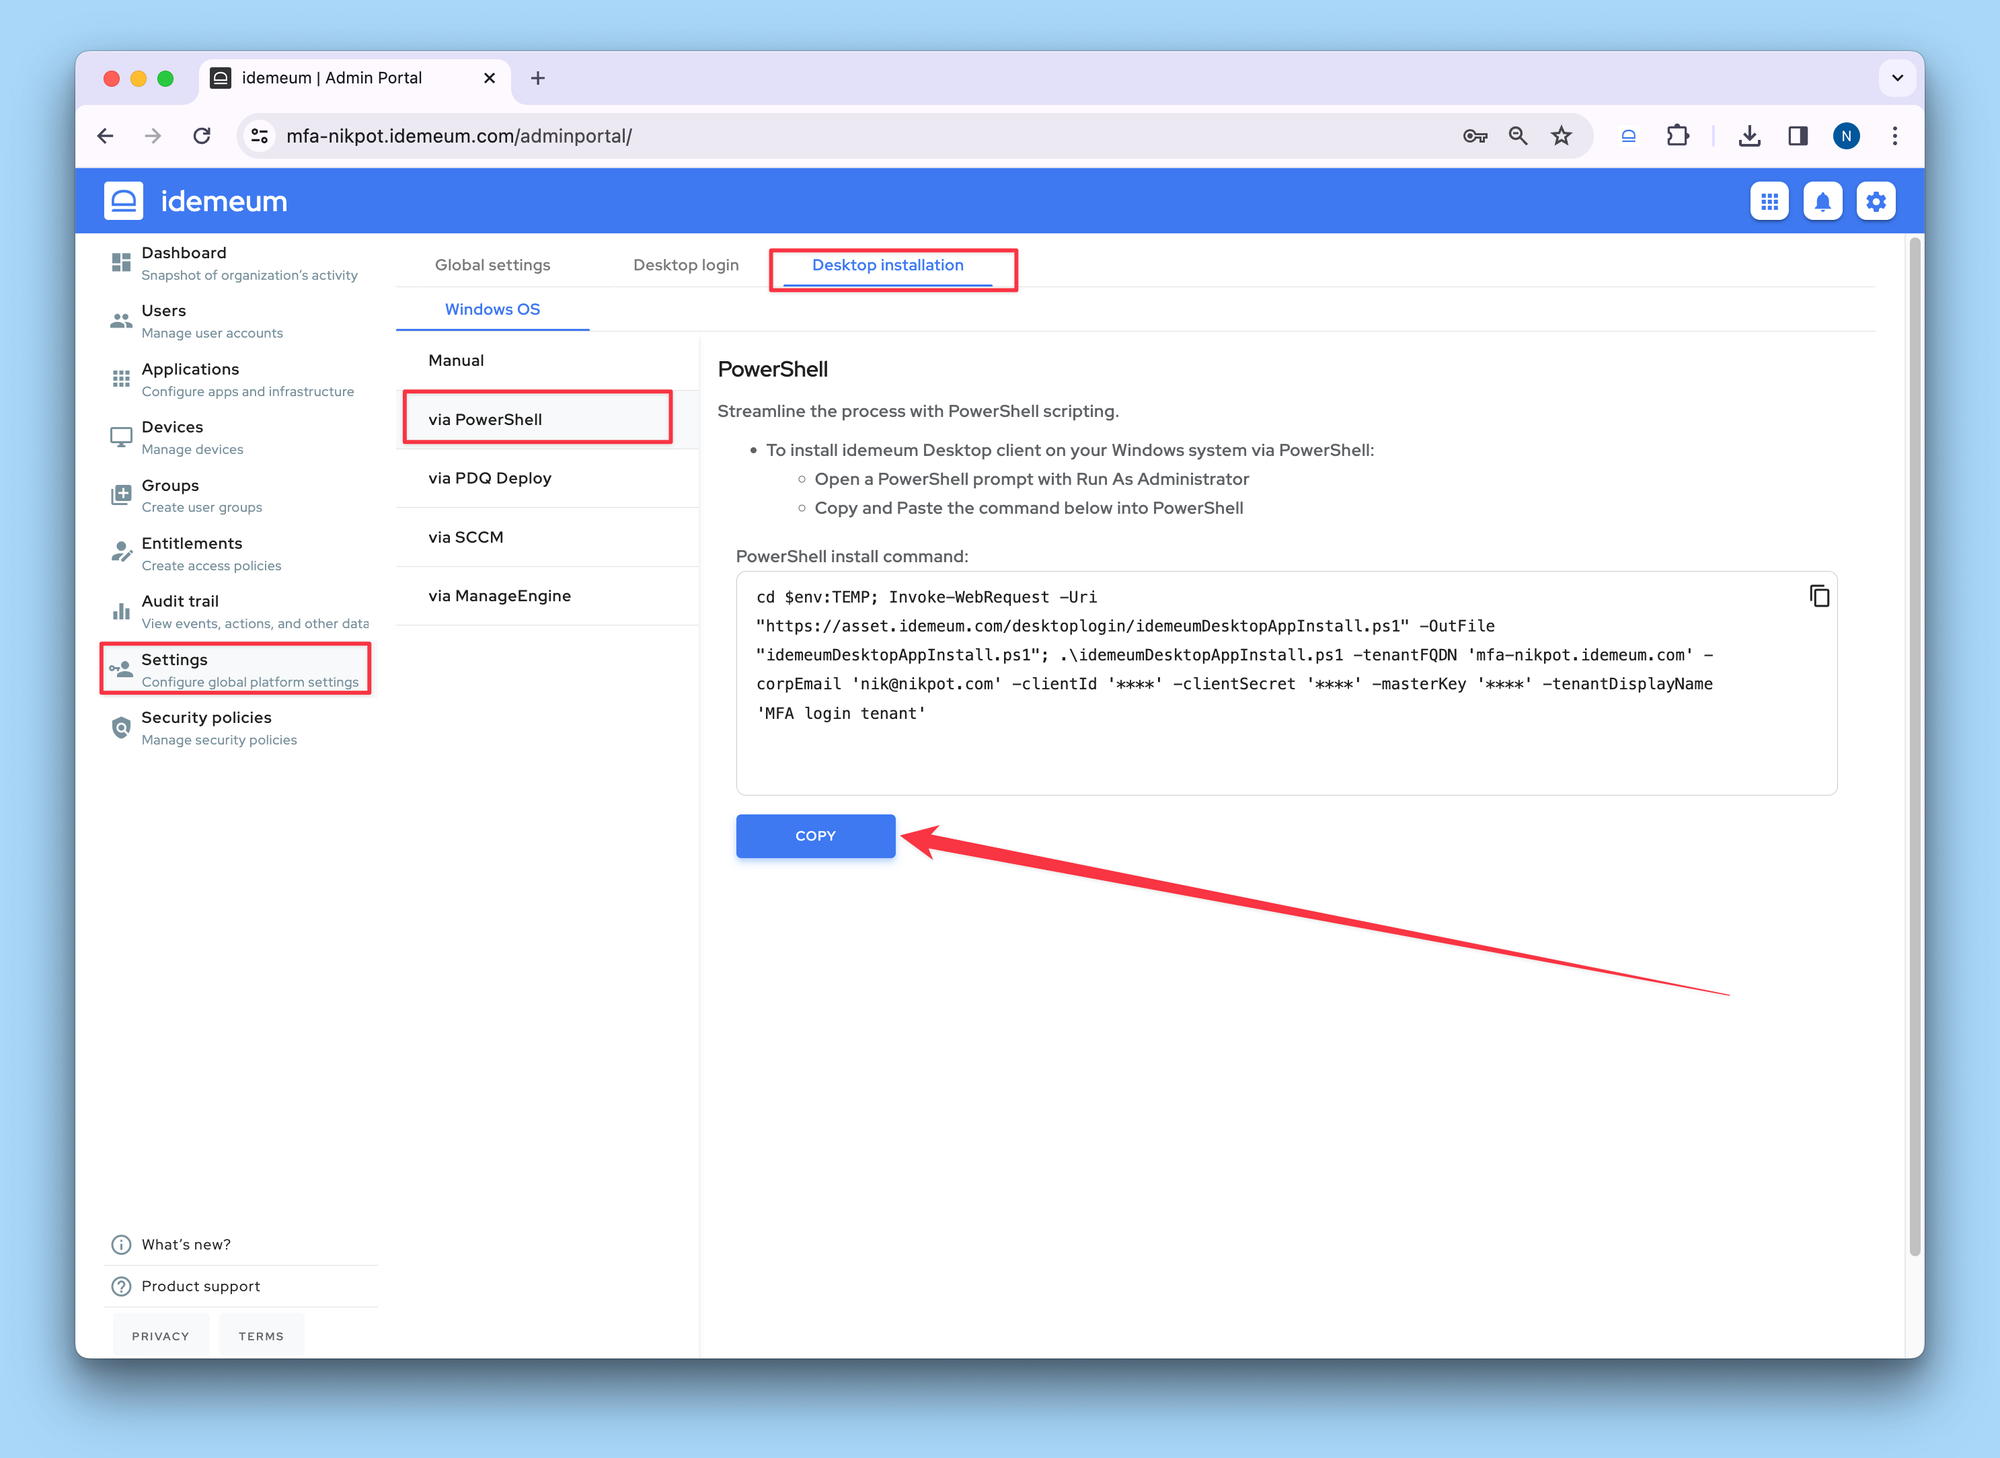
Install idemeum desktop application
Now you can install idemeum desktop application to a customer workstation. There are various installation methods, but the easiest option is to leverage PowerShell installation.
- Navigate to your customer tenant admin dashboard
- Access
Settings->Desktop installation - Navigate to PowerShell section and copy the PowerShell command
- You can now use this command to execute on the target workstation and perform the silent installation
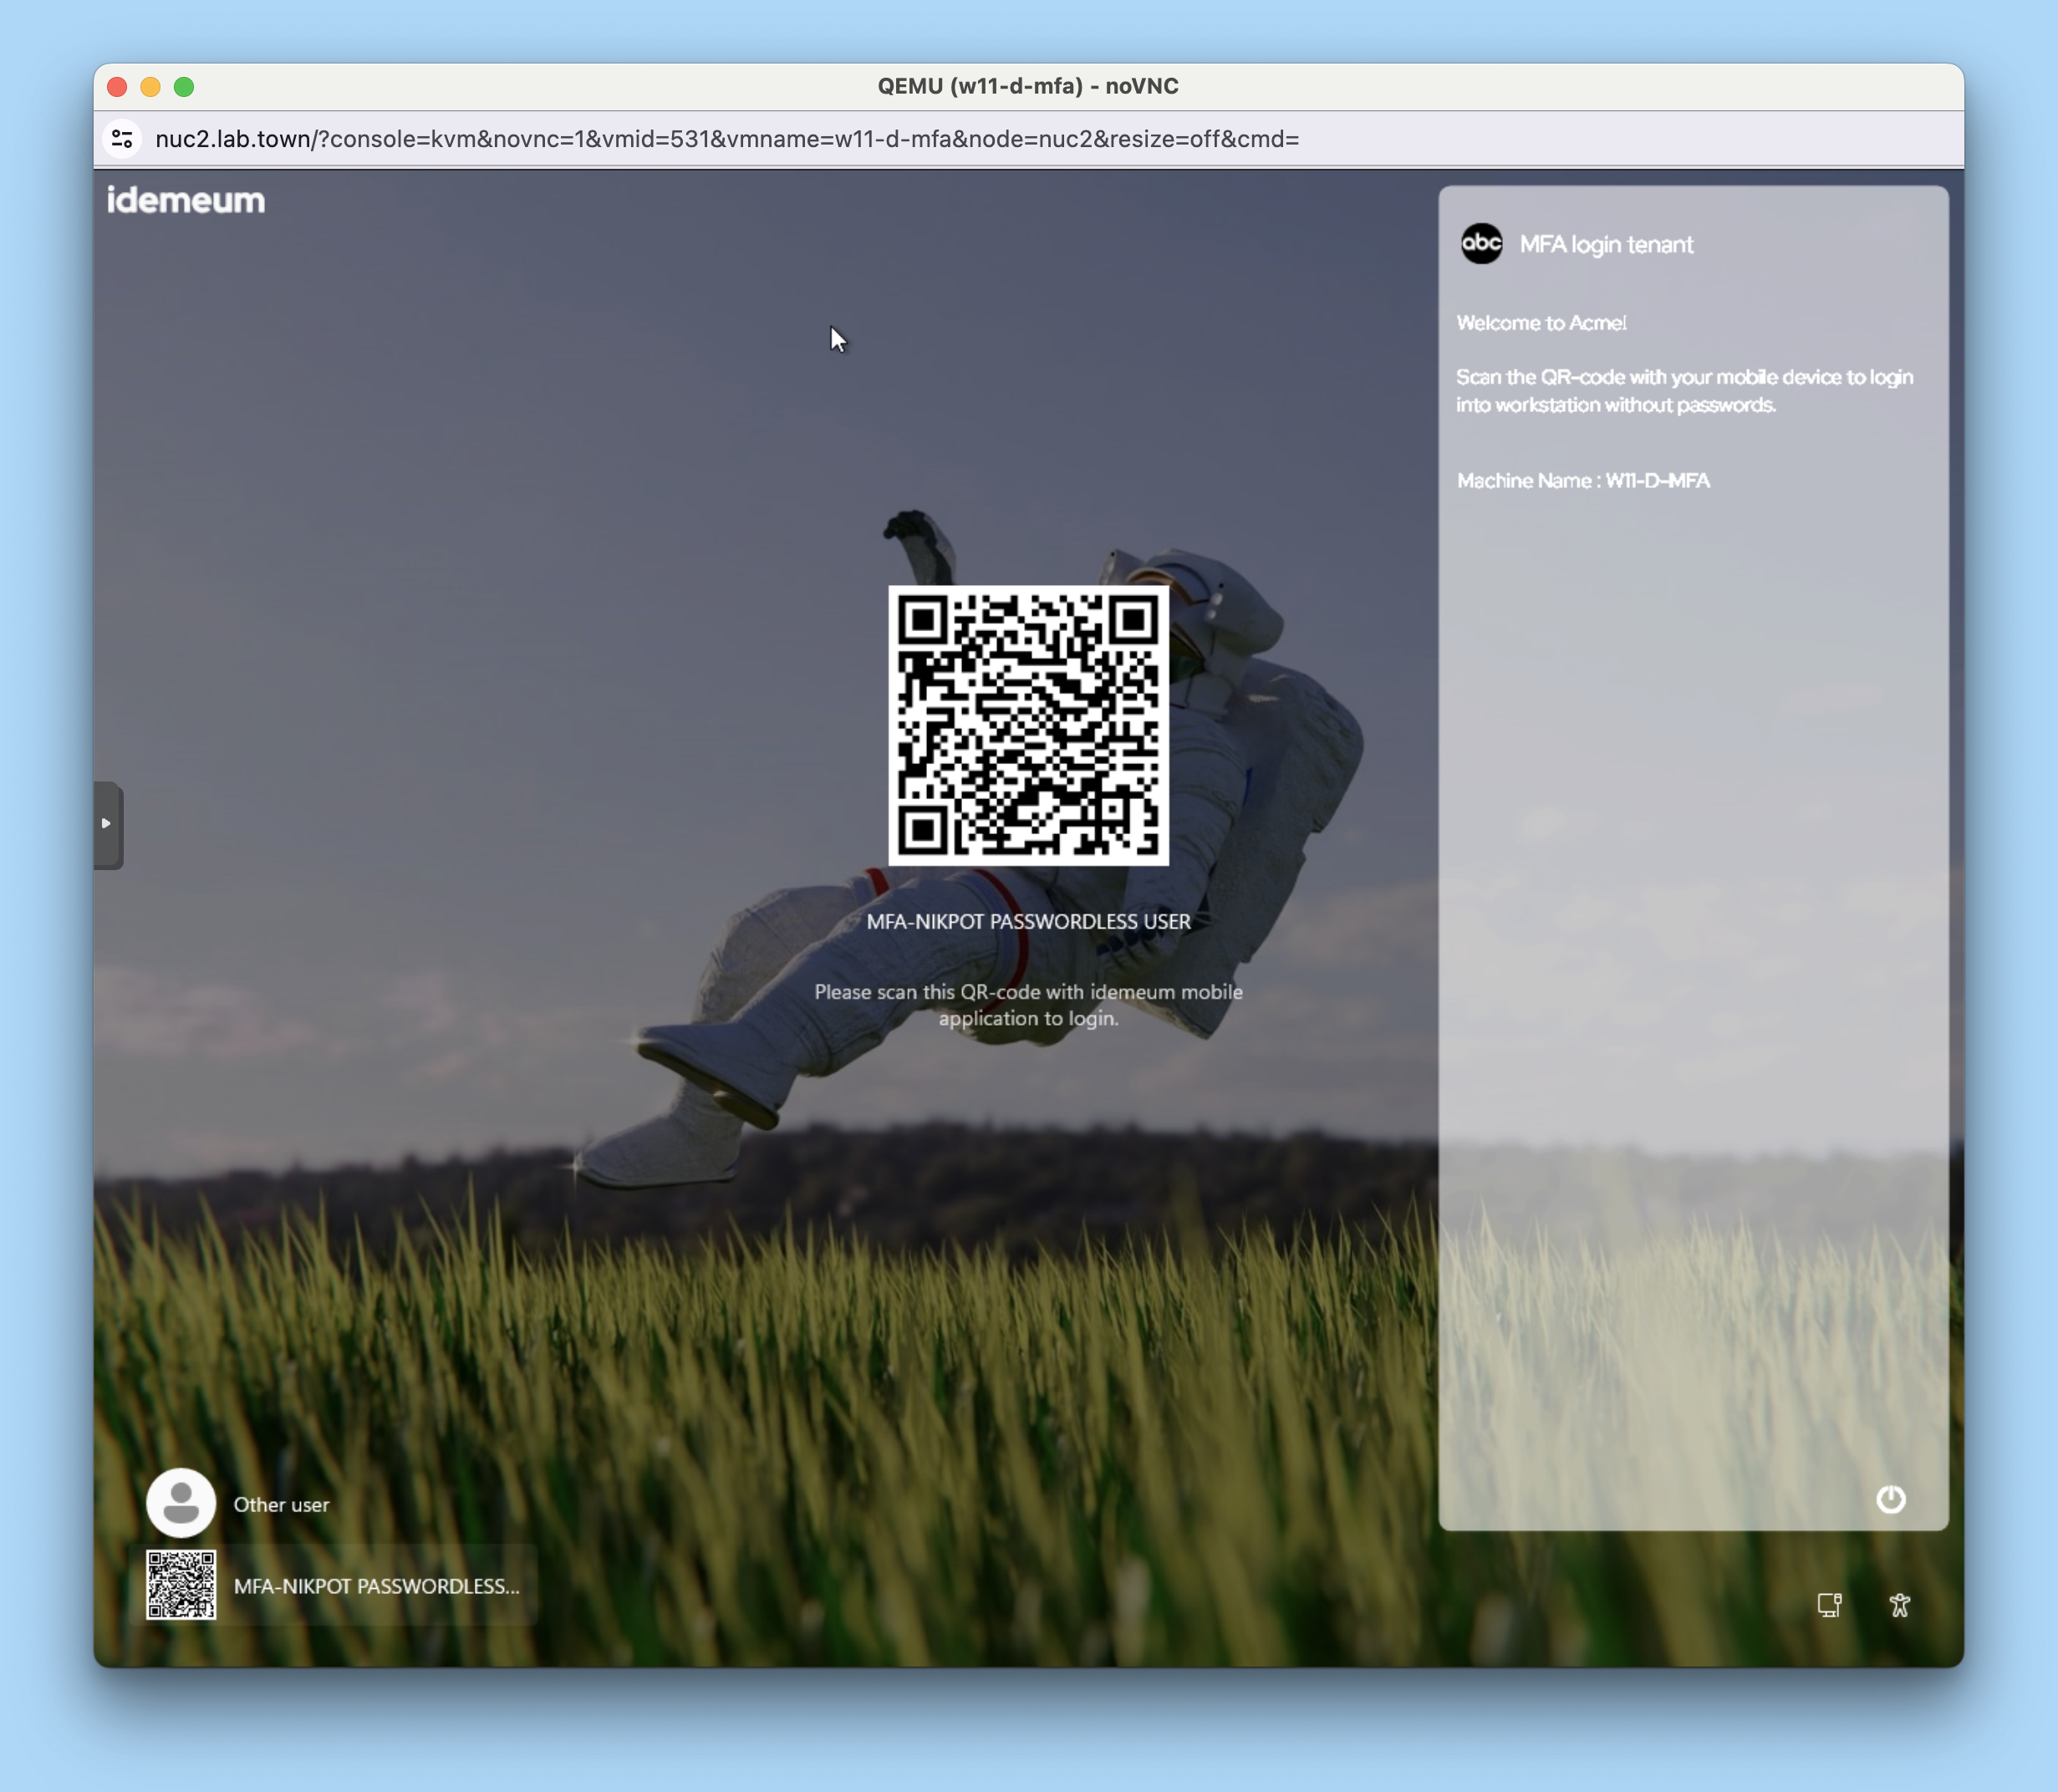
Test user login
Users can now login to their workstations with idemeum Passwordless MFA.
- User scans the QR-code
- Idemeum will prompt the user for domain credentials
- Once successfully authenticated, user can access any domain workstation with a mobile device
Passwordless elevated access for technicians
Your MSP technicians can access customer workstations with a mobile device also. There are no passwords needed, and there is really nothing for you to set up. As long as a technician is onboarded into MSP tenant, she can access any customer workstation with a mobile device.
More about passwordless elevated access below.

Questions?
If you have any questions, join our Discord chat and we can help you.