Command-line installation
Install idemeum agent with a command-line script.
Overview
Unified script installation- obtain the single installation command for all your customers and control the customer deployment with-customerNameargument. If the customer does not exist, idemeum will automatically create the customer tenant. You can use this method for bulk deployments with RMM tools.Customer specific installation- obtain the immutable script specific to a customer tenant and execute it directly on the customer workstations.
Unified script installation
Obtain one command-line script and deploy it for any customer by passing the customer attribute -customerName.
- Navigate to the admin portal of your
Main MSP dashboard - Click on the
Install new agent button
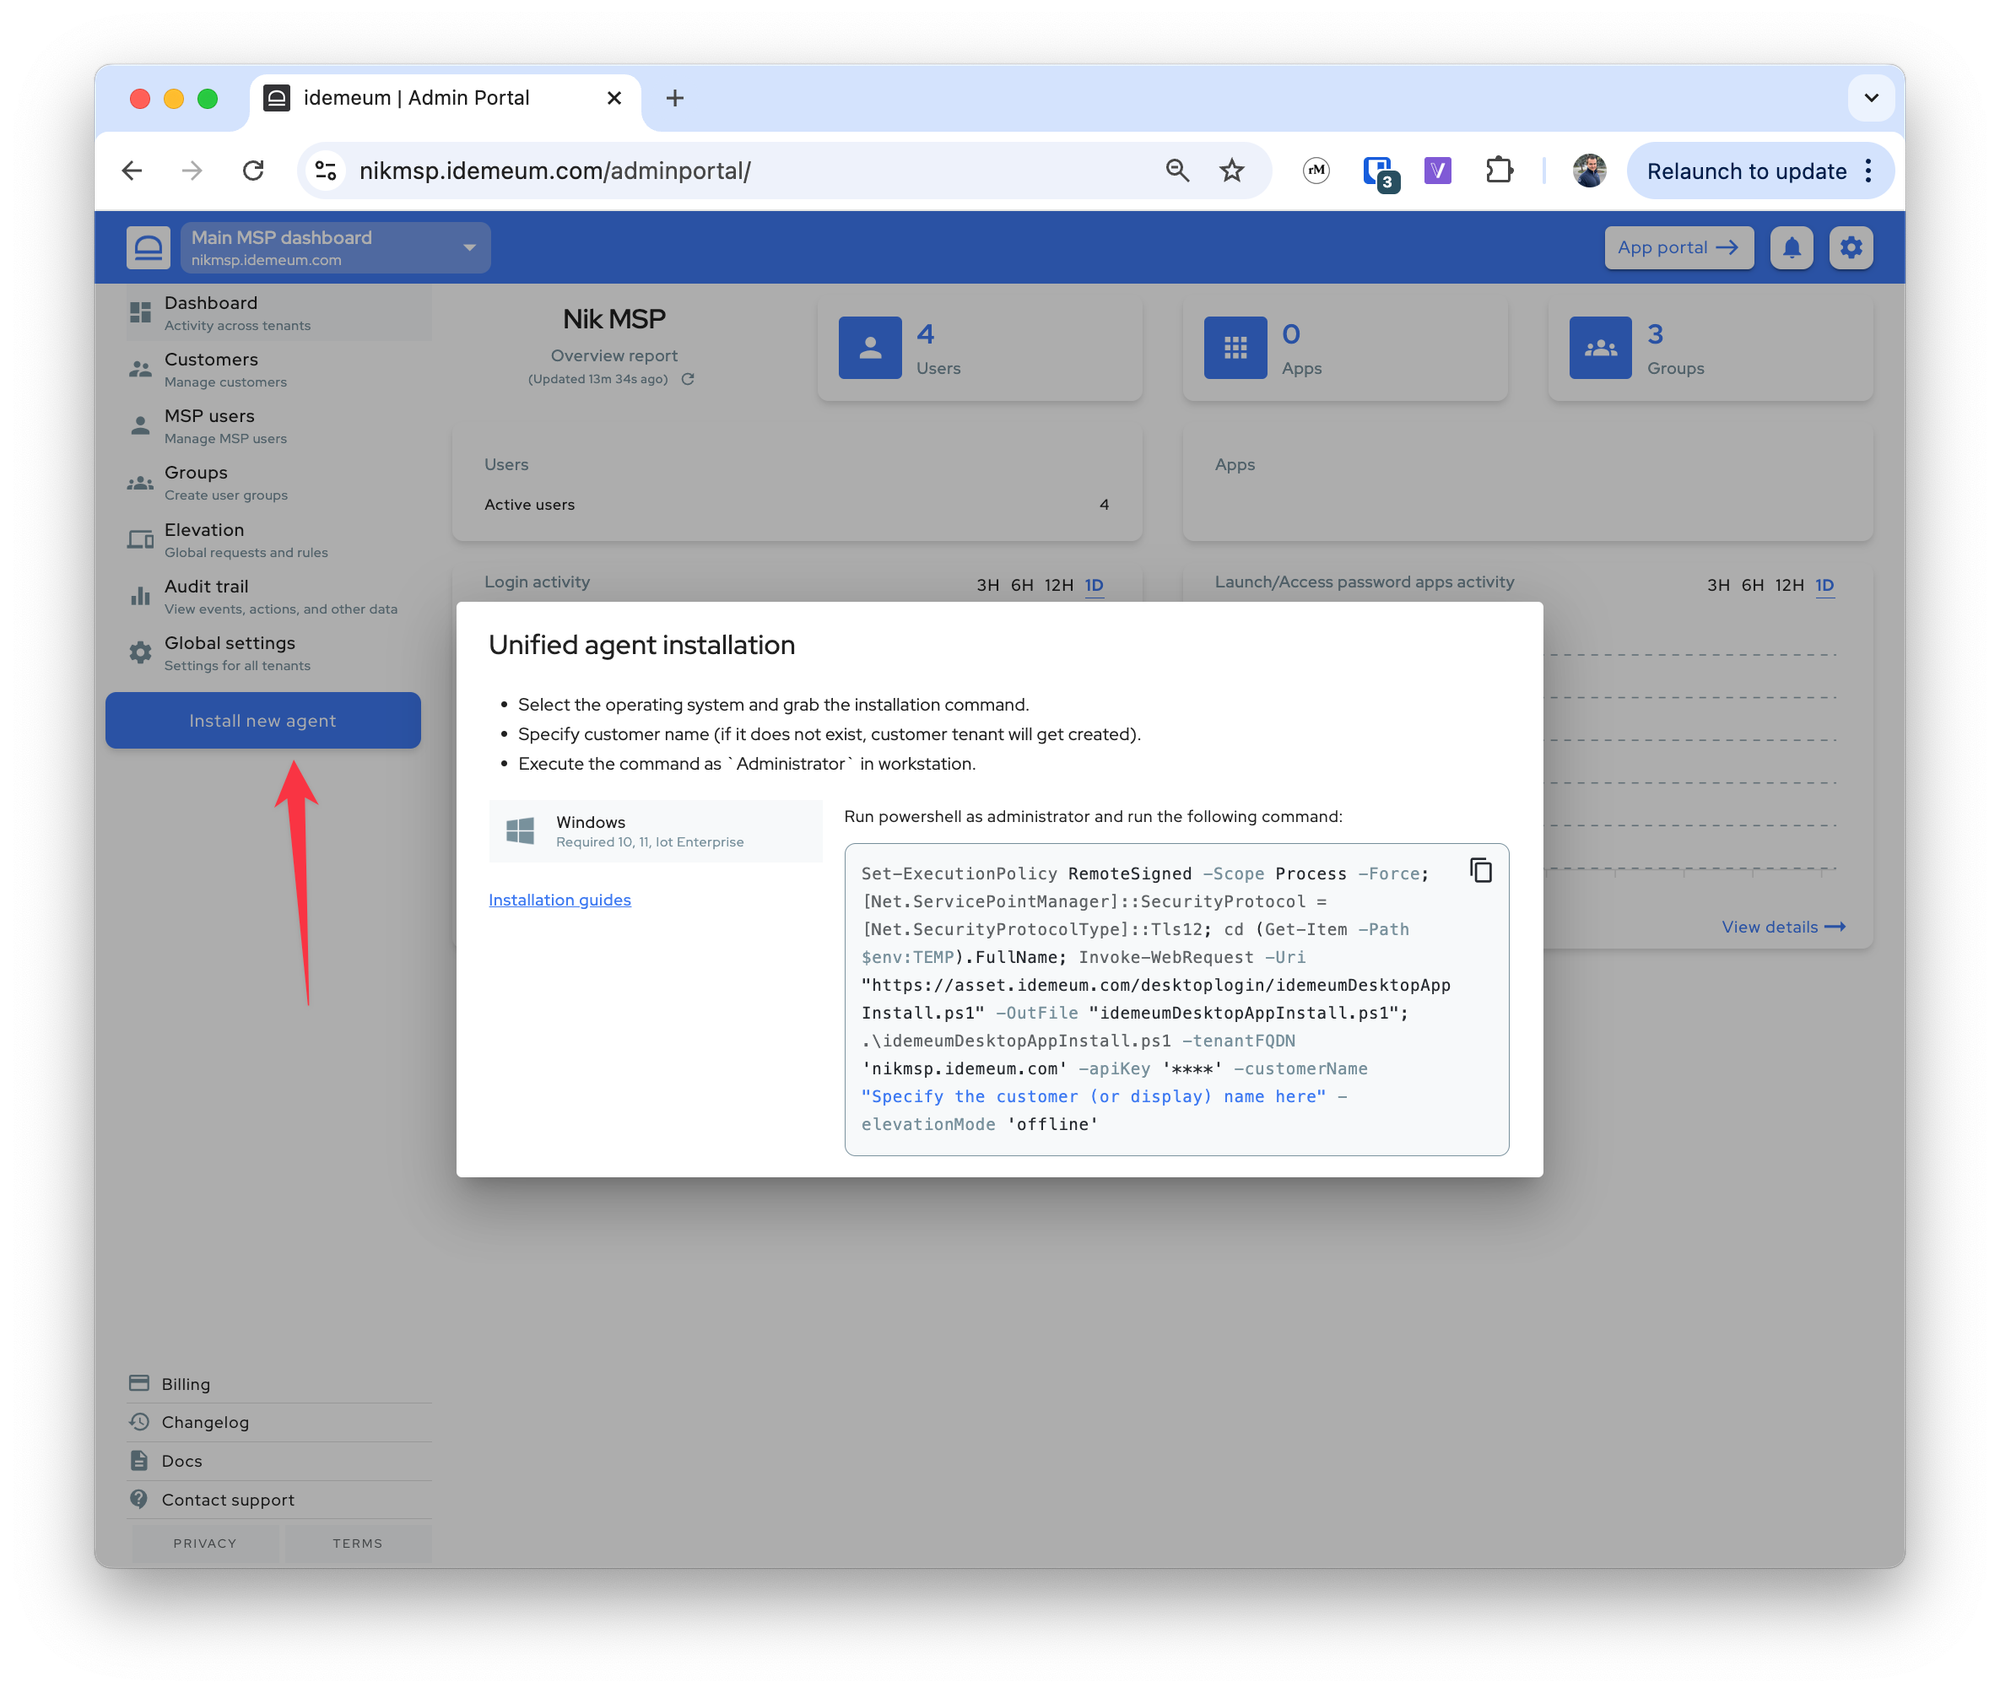
- Choose the operating system you want to use and grab the installation command
- Pass the
-customerNameparameter inside""for your installation command- You can pass the tenant
Display nameor the actualsubdomain - For
Demo tenant→demo-tenant-<msp domain>.idemeum.comI can either passDemo tenantordemo-tenant
- You can pass the tenant
- Open
PowerShellorTerminaland execute the installation command asAdministrator
❗
Make sure you run PowerShell or Terminal with admin permissions.
❗
For idemeum to function properly on MacOS, you will need to enable permissions for Accessibility and Full Disk Access. For a completely silent MacOS deployment you need to first deploy the MDM idemeum profile and then execute the script. We provide the MacOS deployment instructions in the integrations portal.
Customer specific installation
Obtain the command that is specific for each customer tenant.
- Navigate to the admin portal of your
Main MSP dashboard - From the tenant switcher at the top left access desired customer tenant
- Click on the
Install new agent button

- Choose the operating system you want to use and grab the installation command
- Open
PowerShellorTerminaland execute the installation command asAdministrator
❗
Make sure you run PowerShell or Terminal with admin permissions.
Command-line arguments
Windows
-restartAfterInstall- restart is not required after the agent installation. However, you can still passtrueif you prefer to restart after installation.-autofillEnabled- this setting is for desktop agents that are handling user authentication with RFID cards. If you want to enable autofill service for desktop and web applications passtrueflag. The default value isfalse-credentialProviderEnabled- passtrueorfalsedepending on whether you want to install idemeum credential provider. This flag is helpful when you only want to use LAPS on the workstation. Keep in mind that credential provider is required for JIT logins and EPM. The default value istrue.-elevationMode- you can enable the default elevation control mode for idemeum desktop agent:offline,audit, orrules. The default value isoffline.-version- pass the desktop version that you want to install. By default the latest version will be installed. You need to pass the version with'', for instance1.7.9. The selector for version is supported from desktop agent 1.7.9 onward.- To configure proxy setting for desktop agent you can use the following parameters at initial installation time:
-proxyHost- (required) pass the proxy hostname to use. We support web proxies. You can pass the following valueshttps://proxy.com,http://proxy.com, orhttps://1.2.3.4.-proxyPort- (required) pass the port that needs to used with proxy connection, i.e.8080.-
-proxyUsername- (optional) if the proxy requires authentication you can pass the username and password. Basic authentication is usedbase64(username:password). -proxyPassword(optional) - if the proxy requires authentication you can pass the username and password. Basic authentication is usedbase64(username:password).
MacOS
-elevationMode- you can enable the default elevation control mode for idemeum desktop agent:offline,audit, orrules. The default value isoffline.
Uninstall idemeum agent
Windows
- Open PowerShell as
Administratorand execute the following commands
Start-Process -FilePath "msiexec.exe" -ArgumentList "/x {93B9CC98-6004-411E-A8BF-88F7C3BC5541} /qn /norestart" -Wait
Start-Process -FilePath "msiexec.exe" -ArgumentList "/x {71216D26-573B-402B-A3F5-A7CB9F950CFF} /qn /norestart" -Wait
Below is the same script that you can download and execute.
MacOS
- Open terminal as
Administratorand execute the following commandd
curl -LO https://asset.idemeum.com/desktoplogin/macos/idemeumMacDesktopUninstall.sh && sudo chmod +x idemeumMacDesktopUninstall.sh && ./idemeumMacDesktopUninstall.sh