How to configure power settings in Windows
In this post we will take a look at the recommended power settings in Windows for the RFID reader to maintain consistent connection without disruptions.
Set power settings to never sleep
idemeum desktop software constantly communicates with RFID reader, when it is connected to a shared workstation. It is important to maintain consistent connection between the reader and operating system. Therefore, we recommend to configure Windows power settings to not allow computer to go to sleep when plugged in.
- Navigate to
Control Paneland accessPower Options - For the chosen plan click
Change plan settings - Make sure computer is configured to never go to sleep. For example, this workstation is permanently powered, and we configured the settings to never go to sleep and turn off the display when
Plugged in.

Disable USB Selective Suspend
The USB selective suspend feature allows the hub driver to suspend an individual port without affecting the operation of the other ports on the hub.
It is clear that USB selective suspend has immense benefits on your PC’s battery life. However, there are instances when the setting causes some USB devices to freeze or become unresponsive—mainly when your PC stays idle for too long. USB selective suspend is enabled by default on all Windows devices. Disabling USB selective suspend is an effective troubleshooting solution that can resolve RFID reader disconnects.
As a result, we recommend disabling USB selective suspend on your workstaions where RFID readers are connected to.
Disable with command prompt
- Open the Start Menu, type
Command Promptin the search bar, and chooseRun as administratorfrom the right pane - Type the following commands in the elevated command prompt window and press
Enter
powercfg /SETDCVALUEINDEX SCHEME_CURRENT 2a737441-1930-4402-8d77-b2bebba308a3 48e6b7a6-50f5-4782-a5d4-53bb8f07e226 0powercfg /SETACVALUEINDEX SCHEME_CURRENT 2a737441-1930-4402-8d77-b2bebba308a3 48e6b7a6-50f5-4782-a5d4-53bb8f07e226 0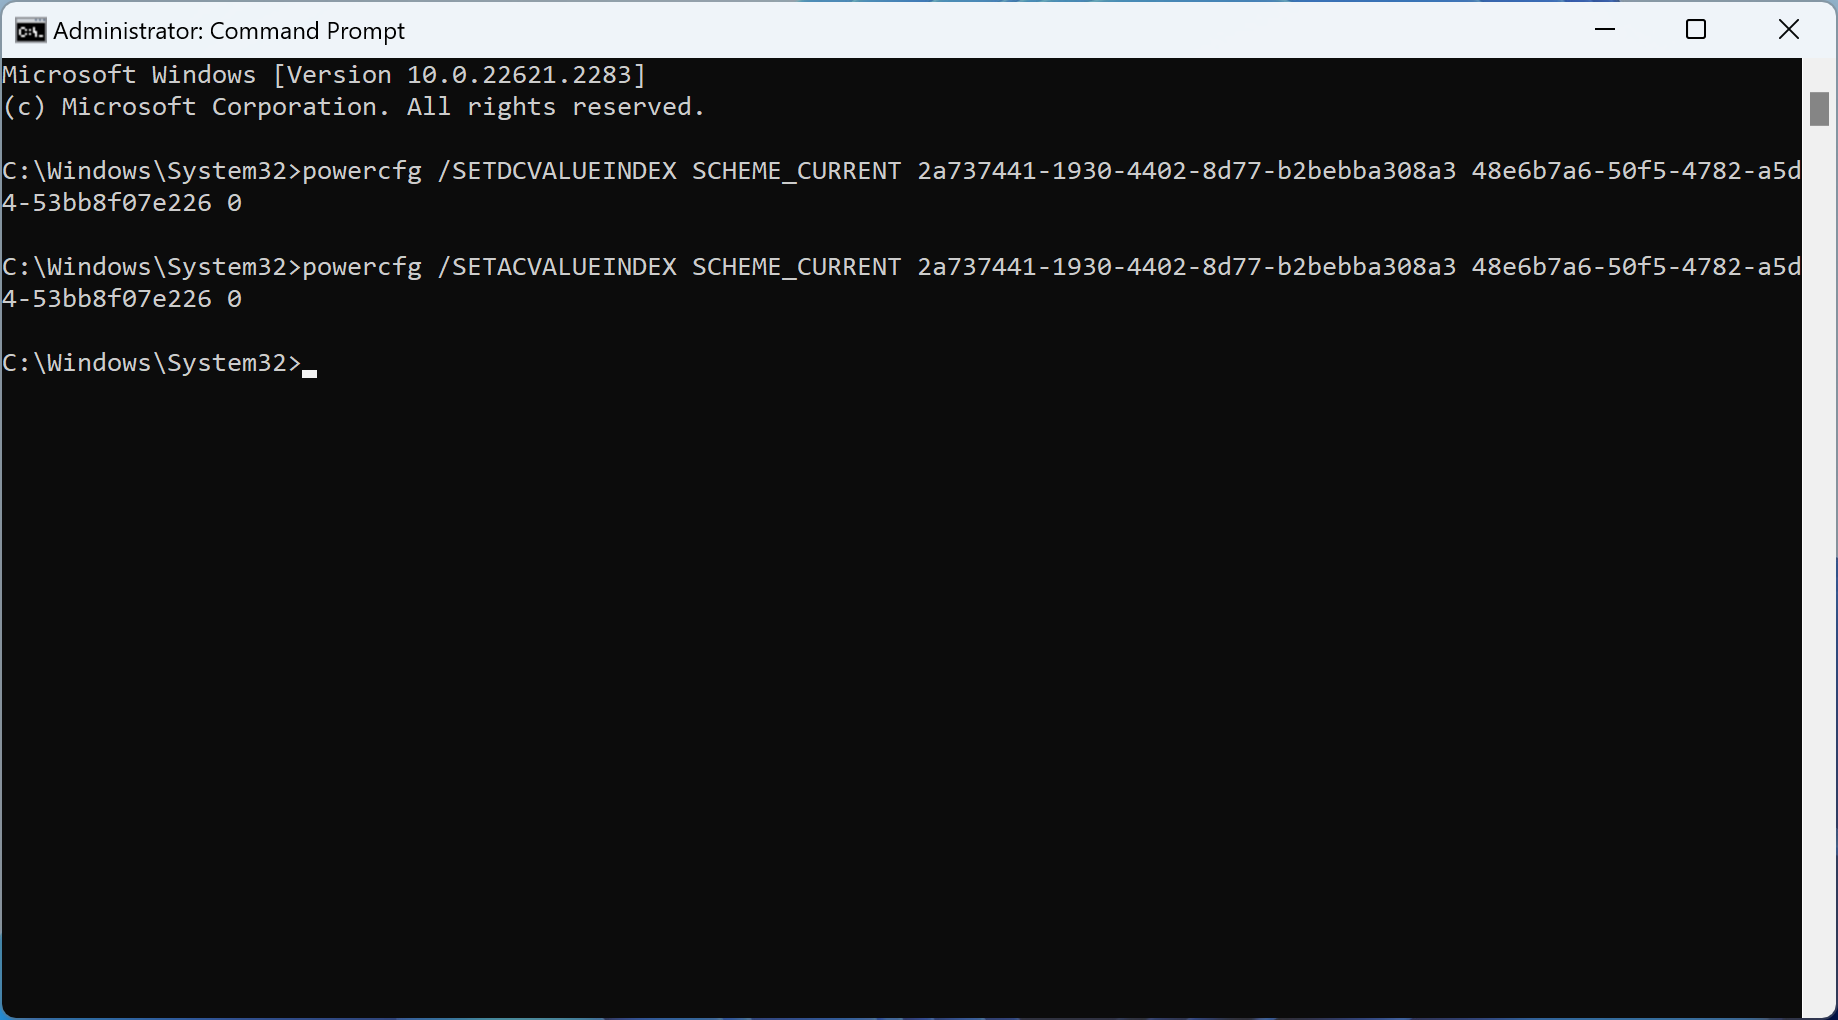
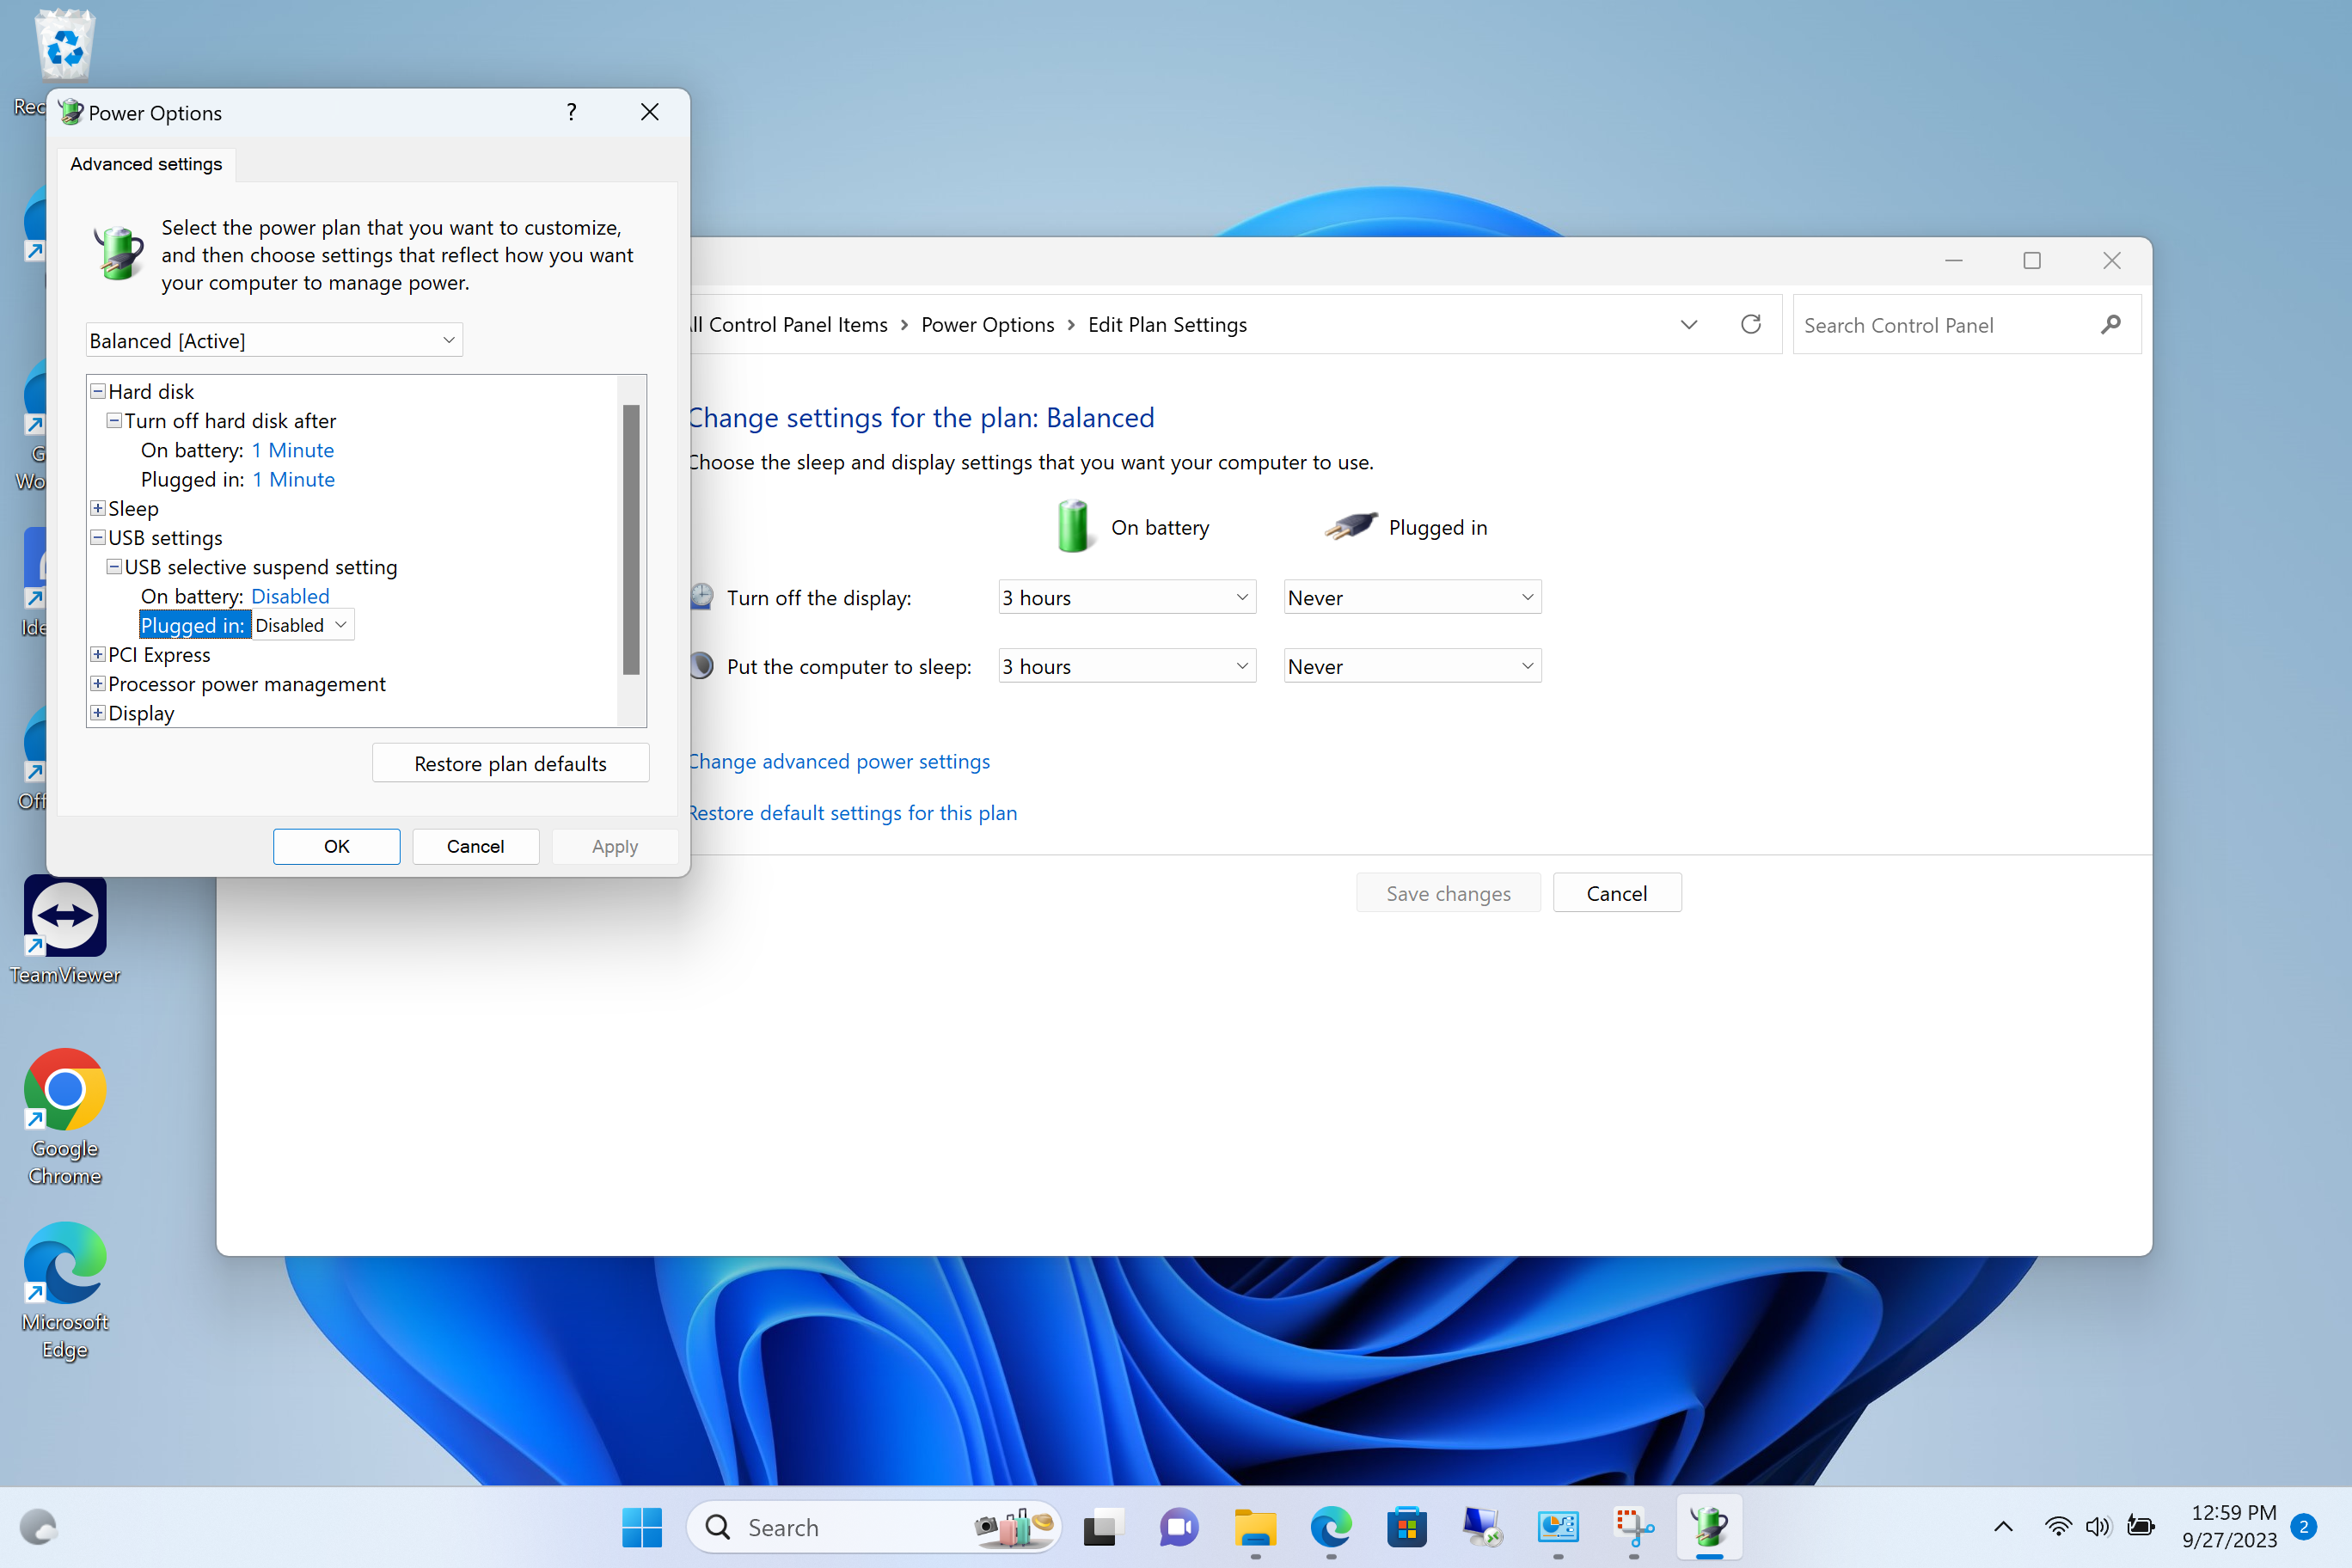
Disable with UI
- Navigate to
Control Paneland accessPower Options - For the chosen plan click
Change plan settings - Click
Change advanced power settings - Expand
USB settingsand make sure uSB selective suspend isDisabled
USB power settings missing
It is possible that when you access your power plan settings, the USB Selective Suspend settings might be missing. You can enable this setting in the Windows registry.
- Press
Windows key + R. This will openRun. Alternatively, you can go to Start and search forRun. - In Run dialog box, type
regeditand hitEnter. - On the left hand pane navigate to the following registry location
HKEY_LOCAL_MACHINE\SYSTEM\CurrentControlSet\Control\Power\PowerSettings\2a737441-1930-4402-8d77-b2bebba308a3\48e6b7a6-50f5-4782-a5d4-53bb8f07e226- Now on the right hand pane right click on empty space and click on
Newand selectDWORD (32-bit) Value - Rename the
DWORDfile asAttributes Double-clickon the file and change theValue Datato2- Restart the PC
After you create this registry key and restart the computer, you will be able to access USB Selective Suspend settings in the power plan options.