Quick-start - JIT Entra ID accounts
In this guide we will set up Just-in-time (JIT) admin accounts for customer Entra ID tenants.
1. Prepare your MSP tenant
First and foremost sign up for idemeum cloud tenant and make sure you orient yourself with basic set up, such as adding technicians, creating customer tenants for your MSP, setting up branding and more. We have created a basic MSP tenant set up guide.

2. Configure customer tenant
Now access the customer tenant you created with a mobile device. You can directly navigate to a customer tenant URL at customer-<your msp domain>.idemeum.com or navigate to your MSP postal, Customers section and click on the link from there.
Enable cloud directory for customer tenant
- Navigate to your customer tenant admin dashboard and enable cloud directory
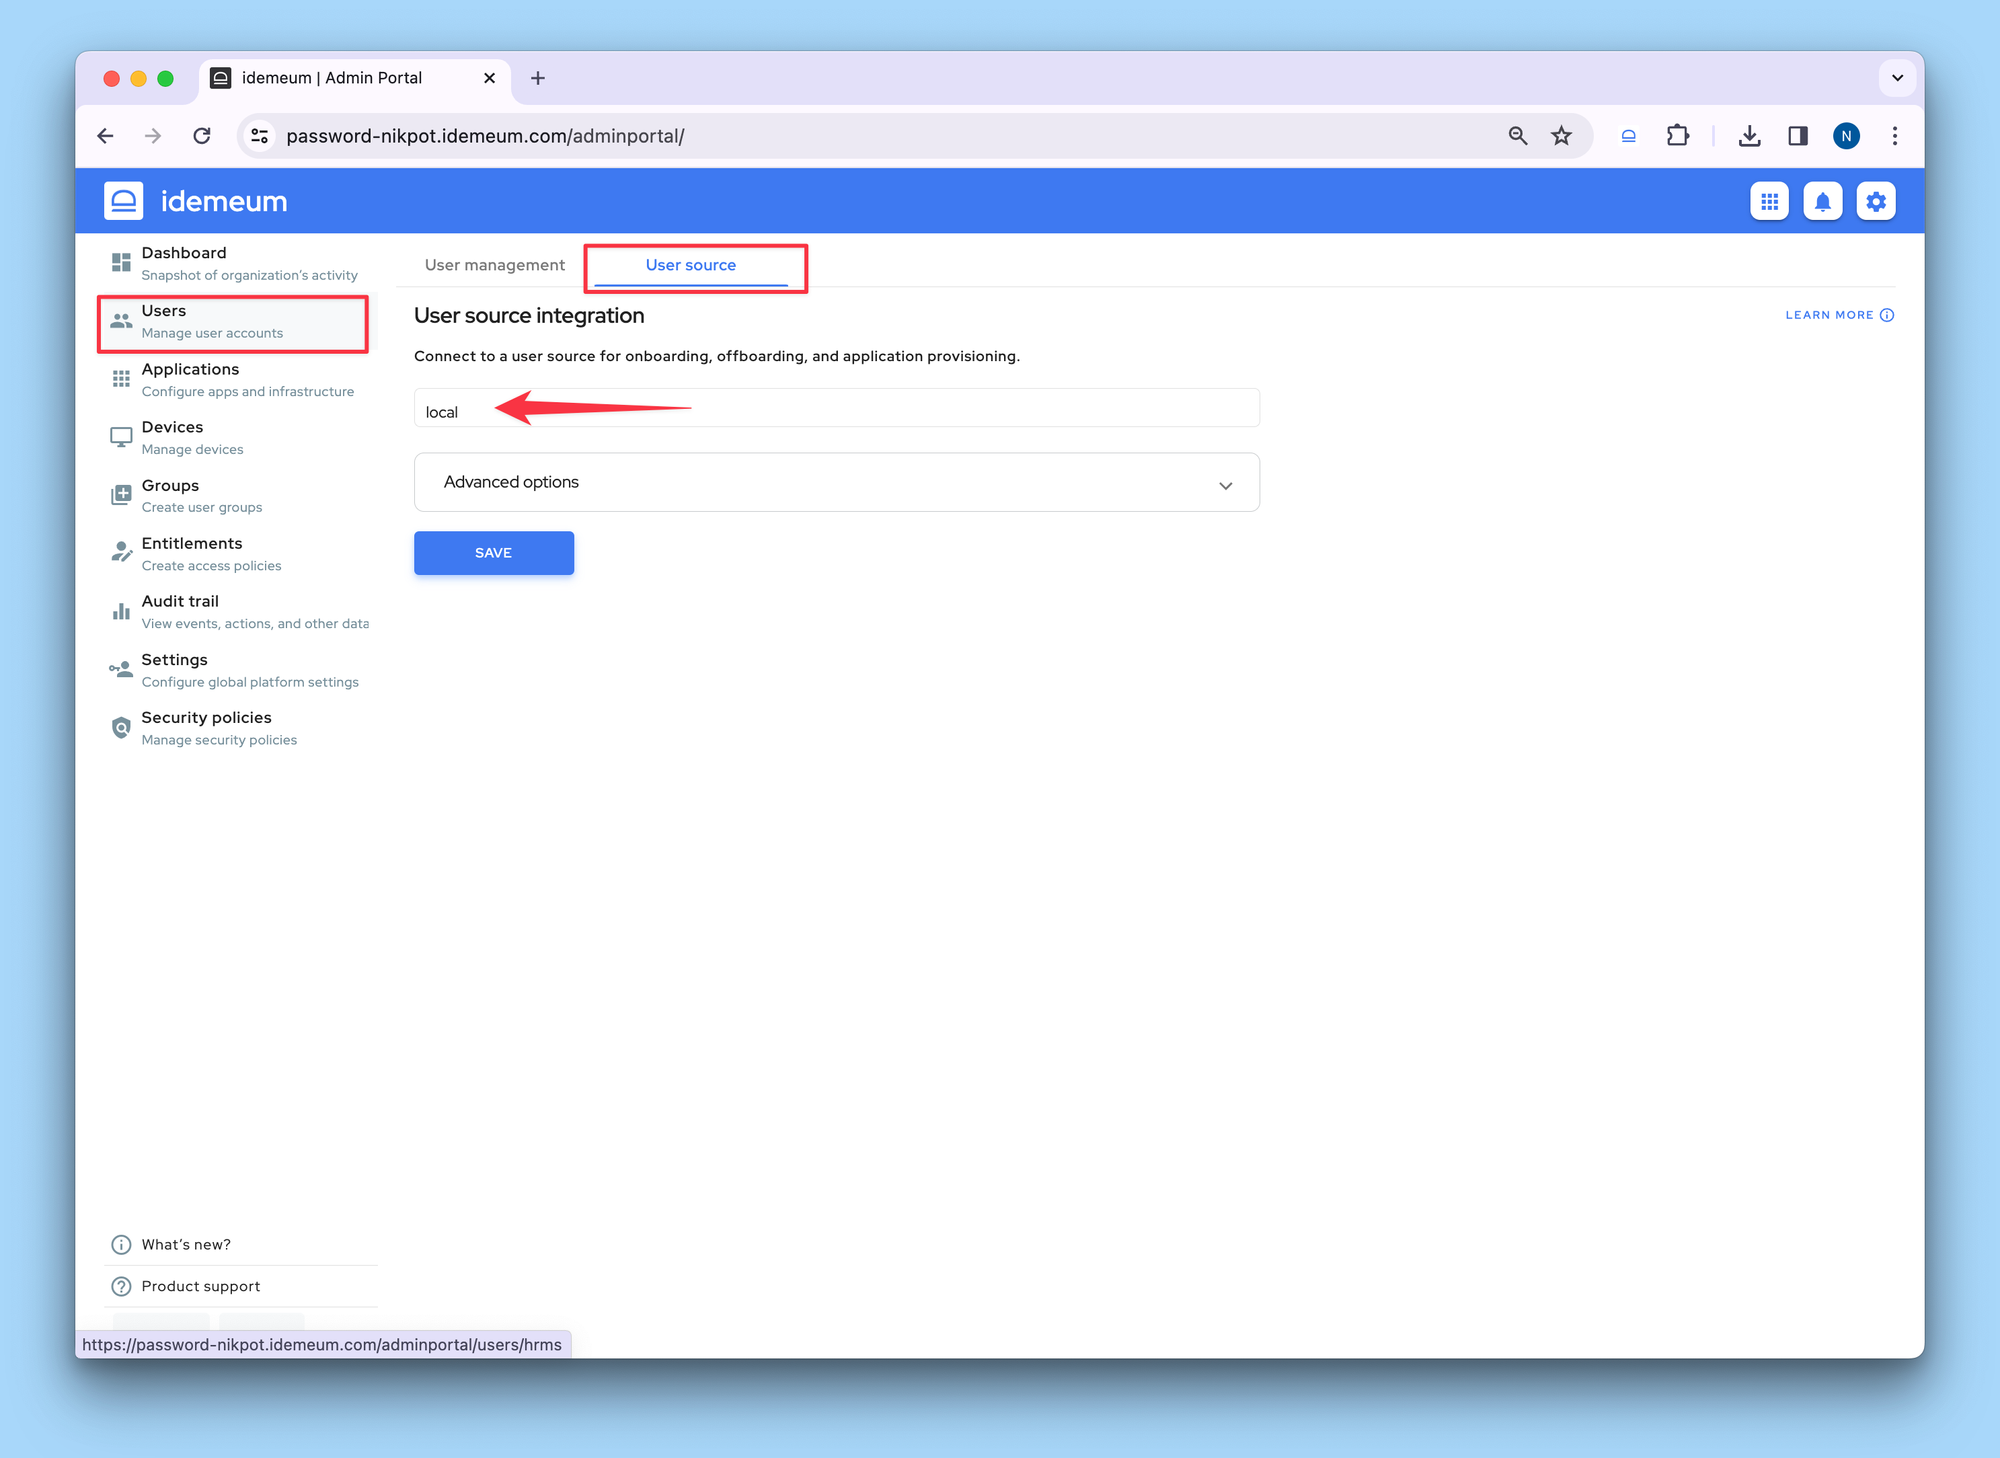
- Access
Users→User sourceand chooseLocal Savethe configuration

Connect Entra ID tenant
We will now connect customer Entra ID tenant with this customer idemeum tenant. Connection is cloud-to-cloud and is done over oAuth protocol. You will need an admin account for customer Entra ID tenant to authenticate and then authorize idemeum cloud to access Entra ID APIs. Detailed steps to connect Entra ID cloud tenant are below.

Create entitlement rule for Entra ID application
After the Entra ID is connected, make sure you create entitlement rule so that technicians can access the Entra ID application. Instructions are below.

3. Install idemeum browser extension (optional)
Idemeum browser extension offers the convenience of automatically filling credentials when accessing Entra ID customer tenants. Technicians can download the extension from the store and install for their browsers.

4. Test technician Entra ID access flow
Now you can test the Entra ID access flow. We documented how the technician access flow looks like step by step. Please check the document below.

Questions?
If you have any questions please join our Discord chat, and we will help.
