Create Entra ID application for idemeum
In order to integrate idemeum with Entra ID, you need to create an application to obtain client credentials. This configuration applies to both user source and Entra JIT accounts setup.
Configure Entra application
Create application
- Login to
portal.azure.comwithGlobal Adminaccount - Navigate to Entra ID directory
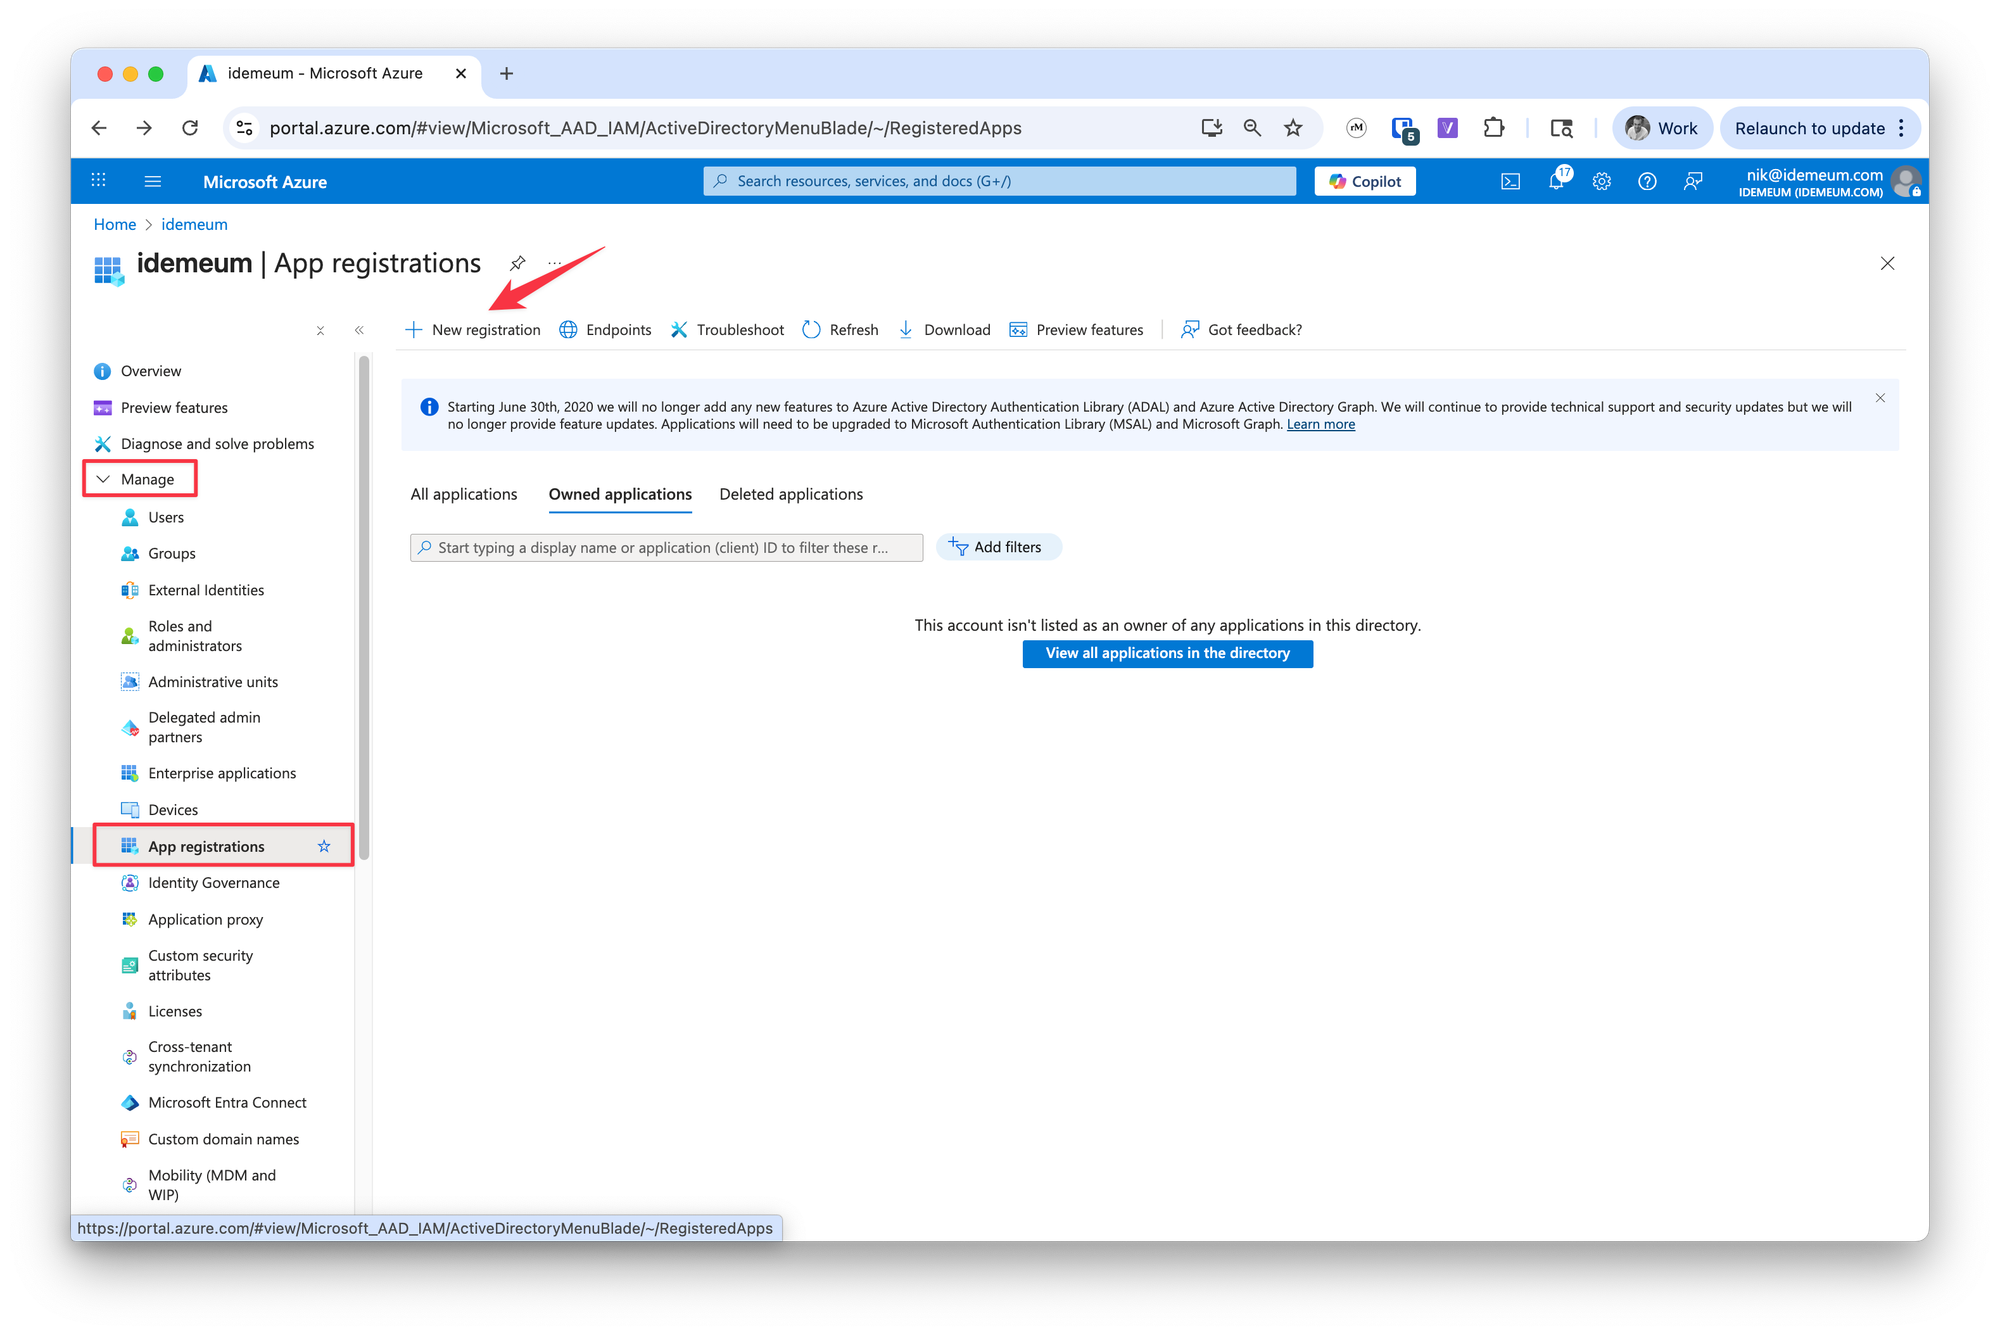
- Go to
Manage→App registrations - Click
New registration
- Provide the application name
- Keep
Accounts in this organizational directory only
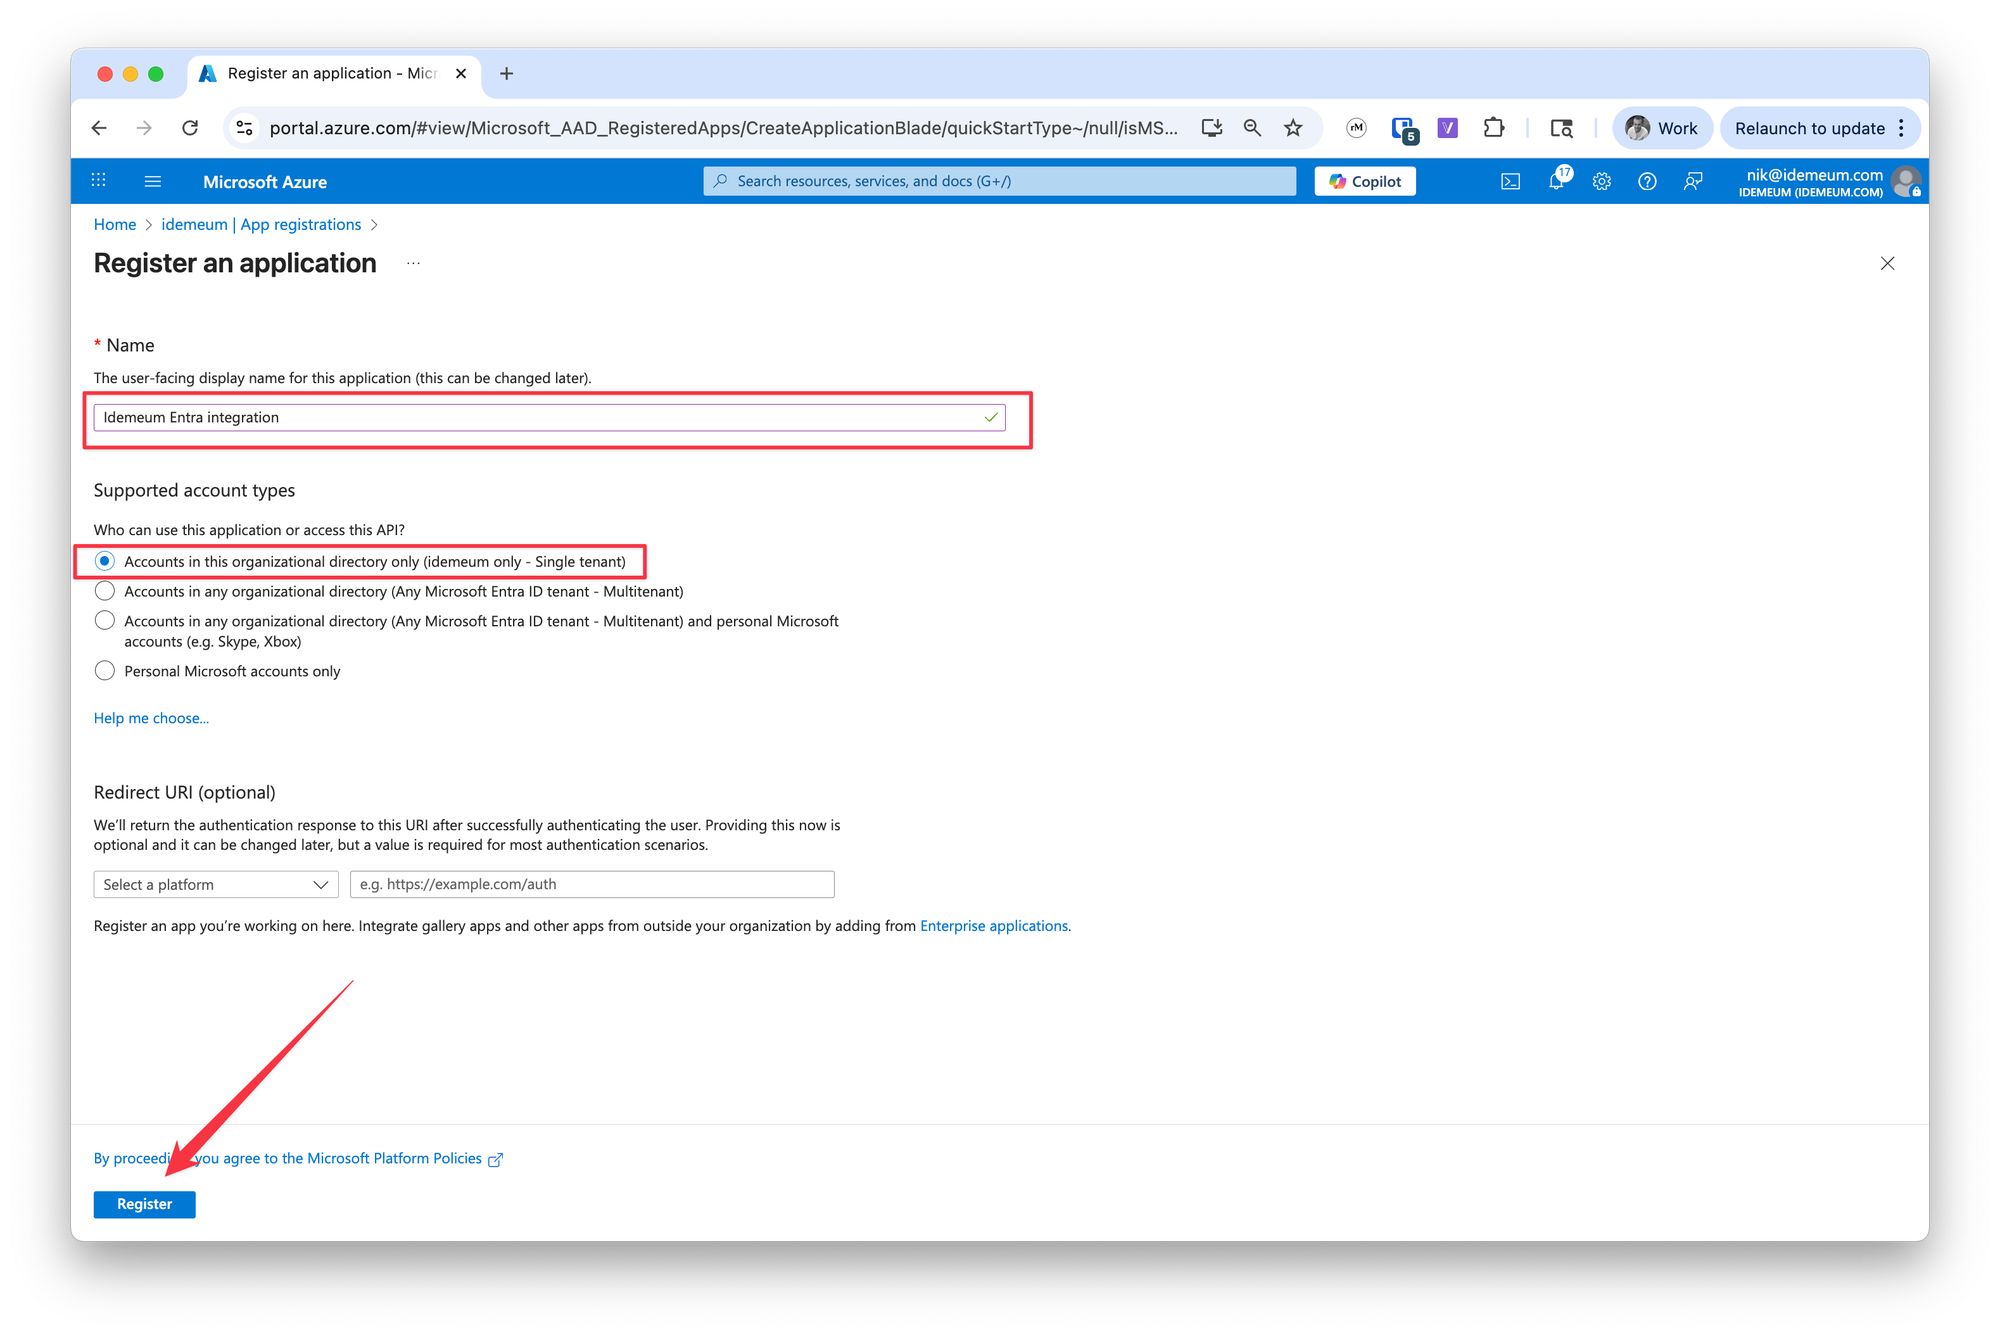
- Click
Register
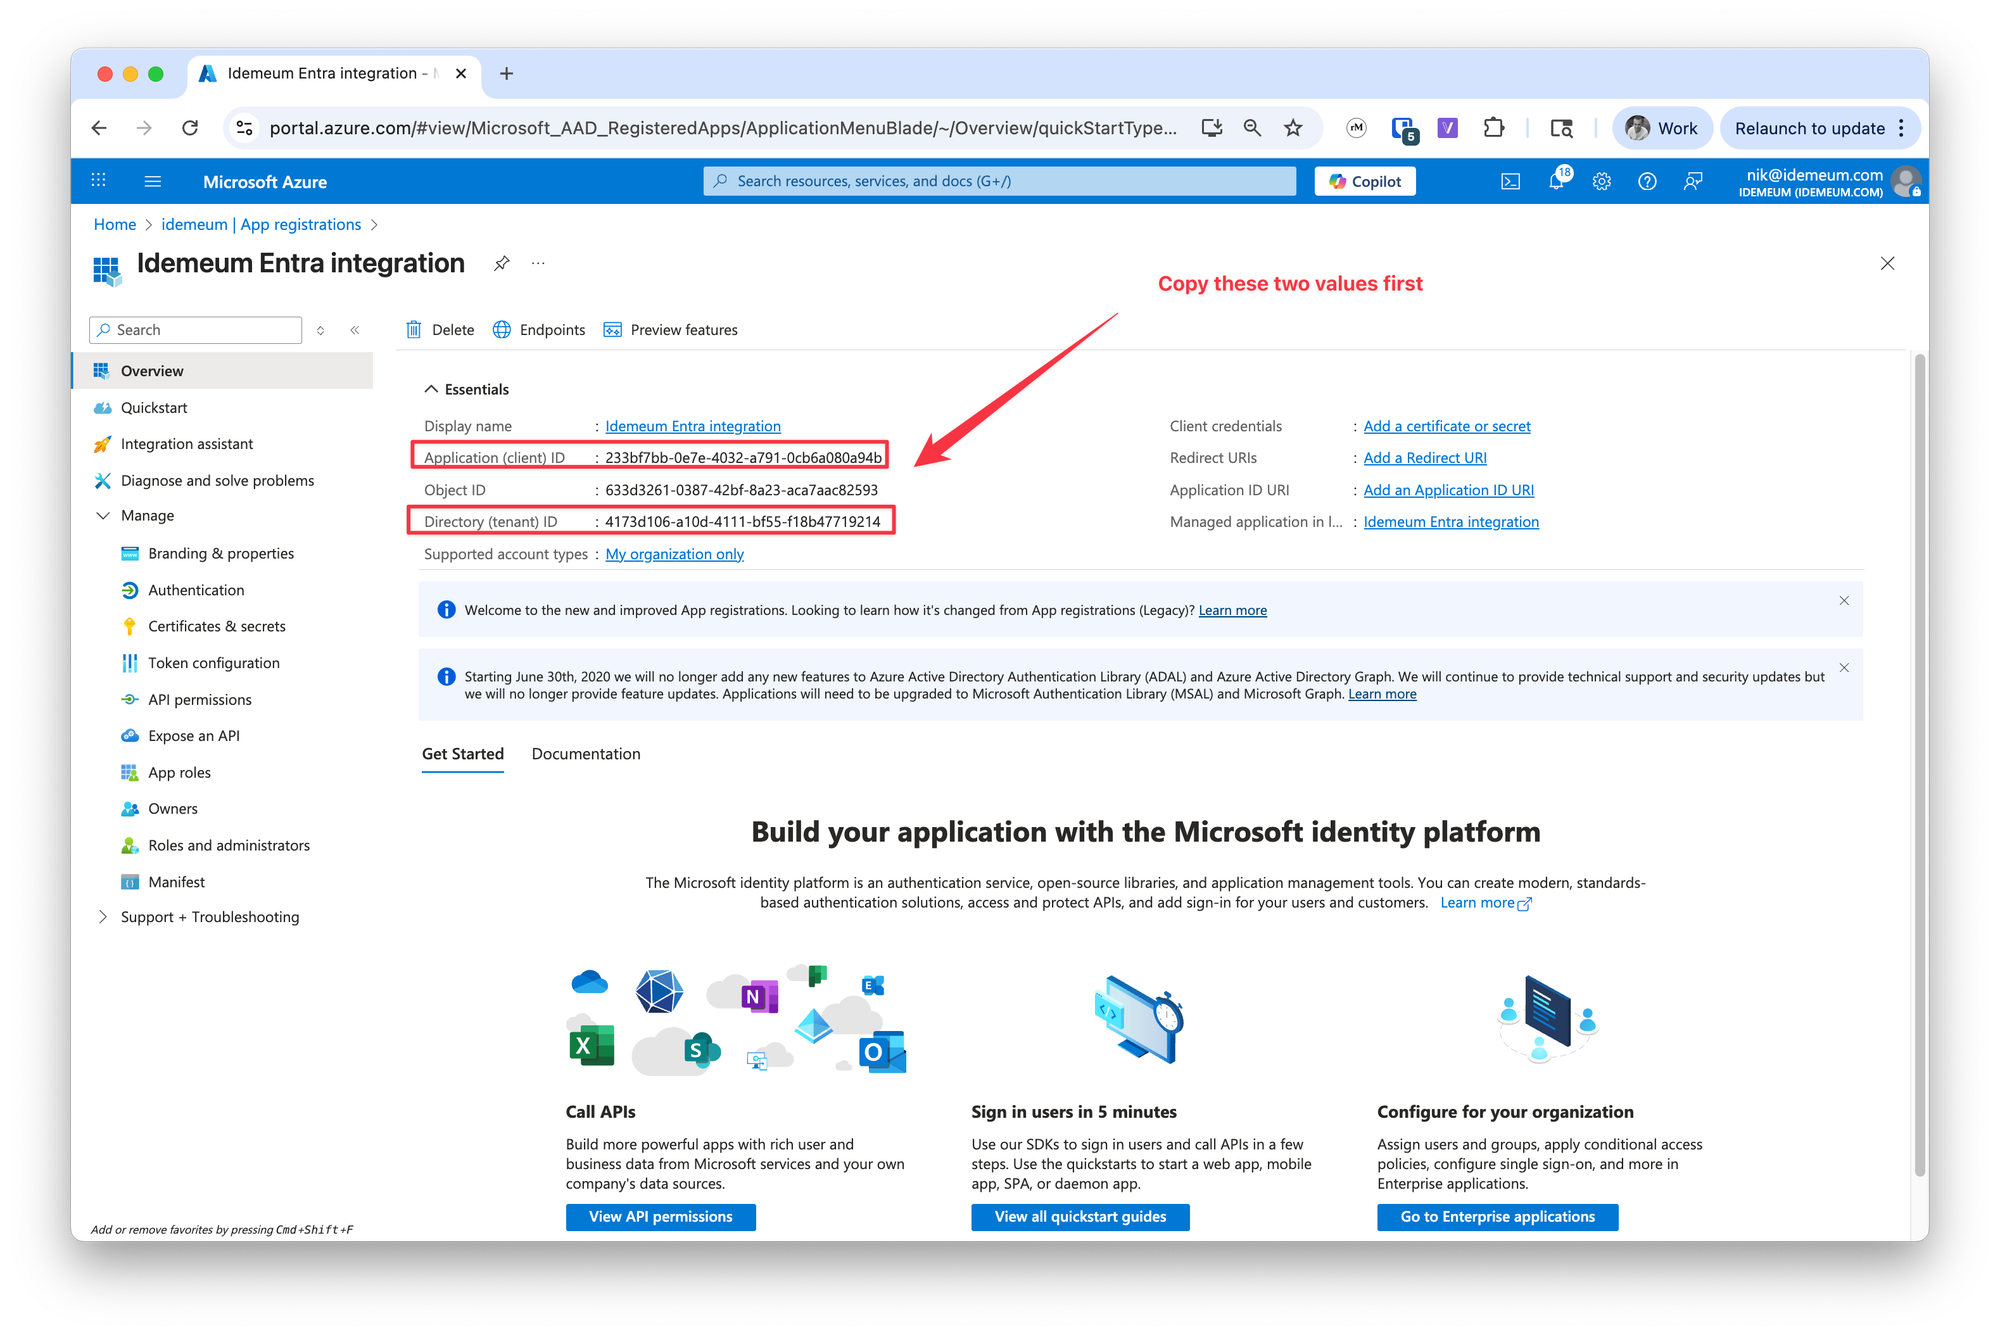
Obtain integration parameters
We will need to obtain 3 things for integration: Application (client) ID, Directory (tenant) ID, and Client secret
- First we will grab
Application (client) IDandDirectory (tenant) ID
- Navigate to
Certificates and secretssection - Click
New client secret
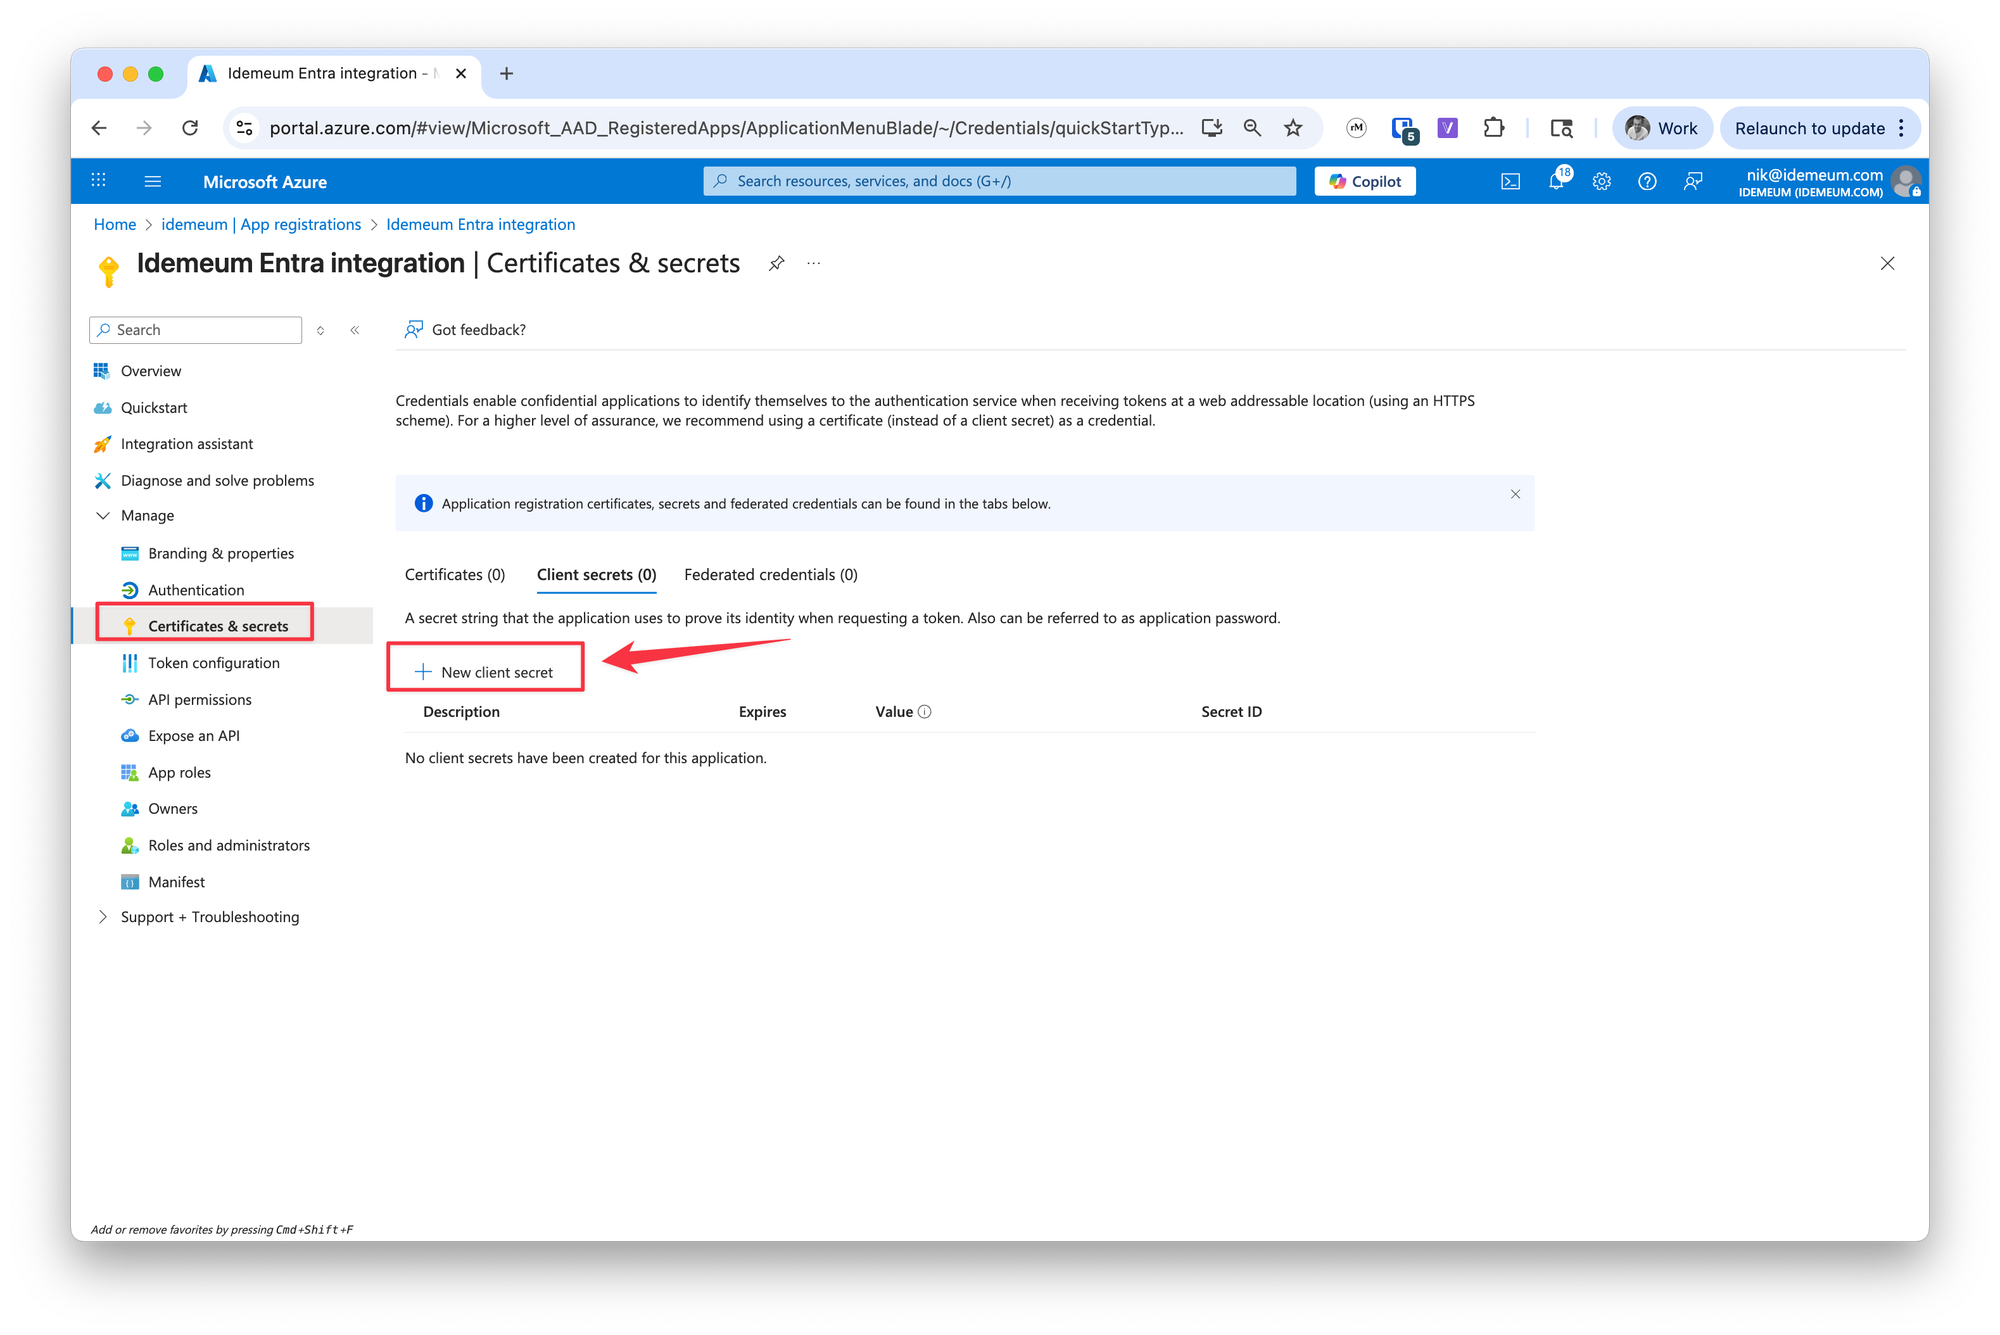
- Give secret a name and set the expiration time of 24 months
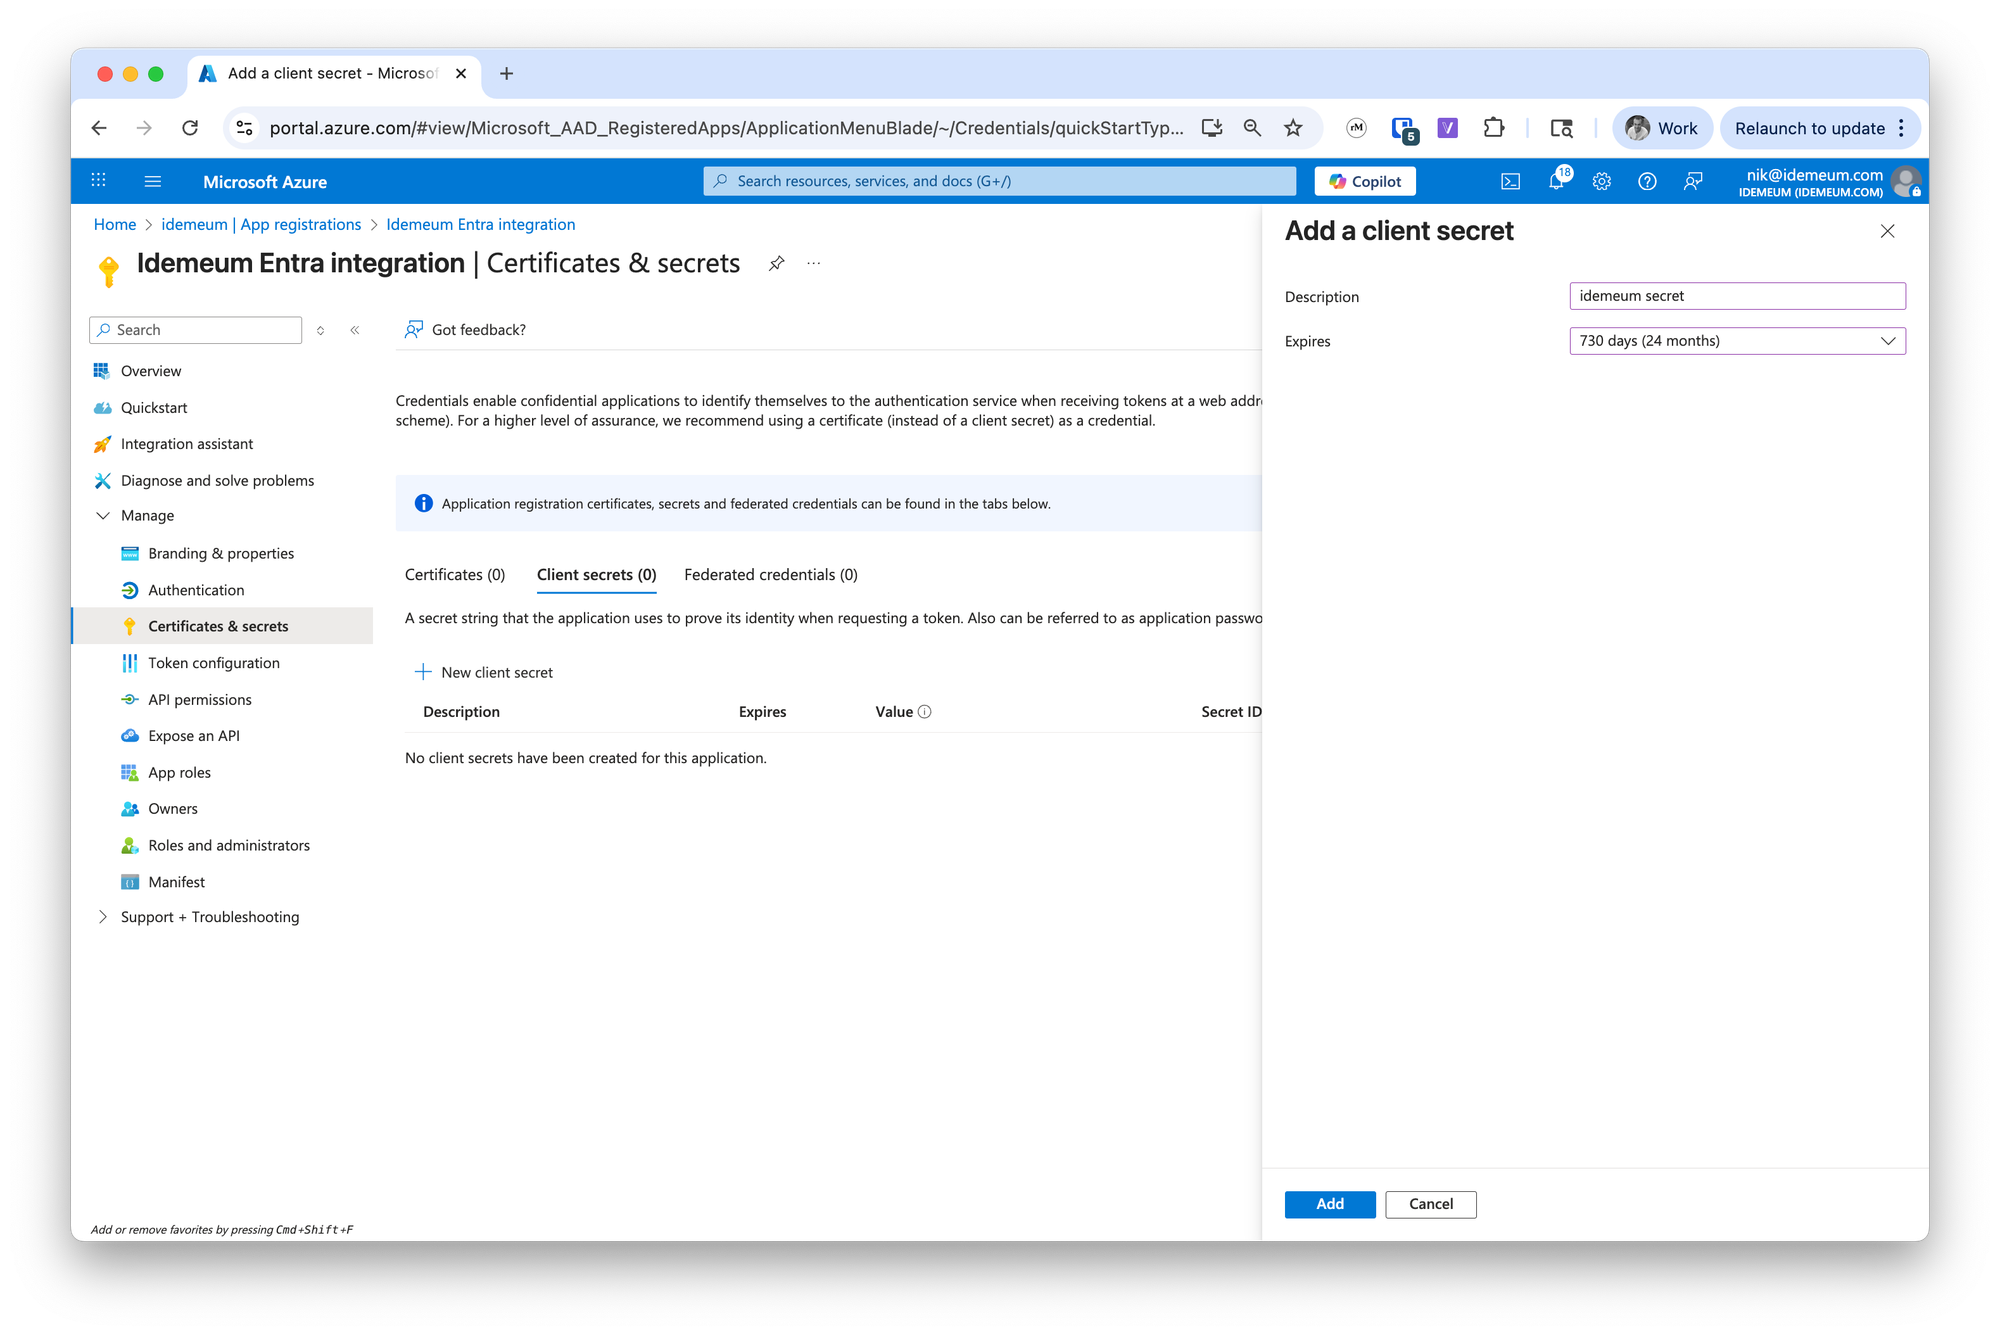
- Now click
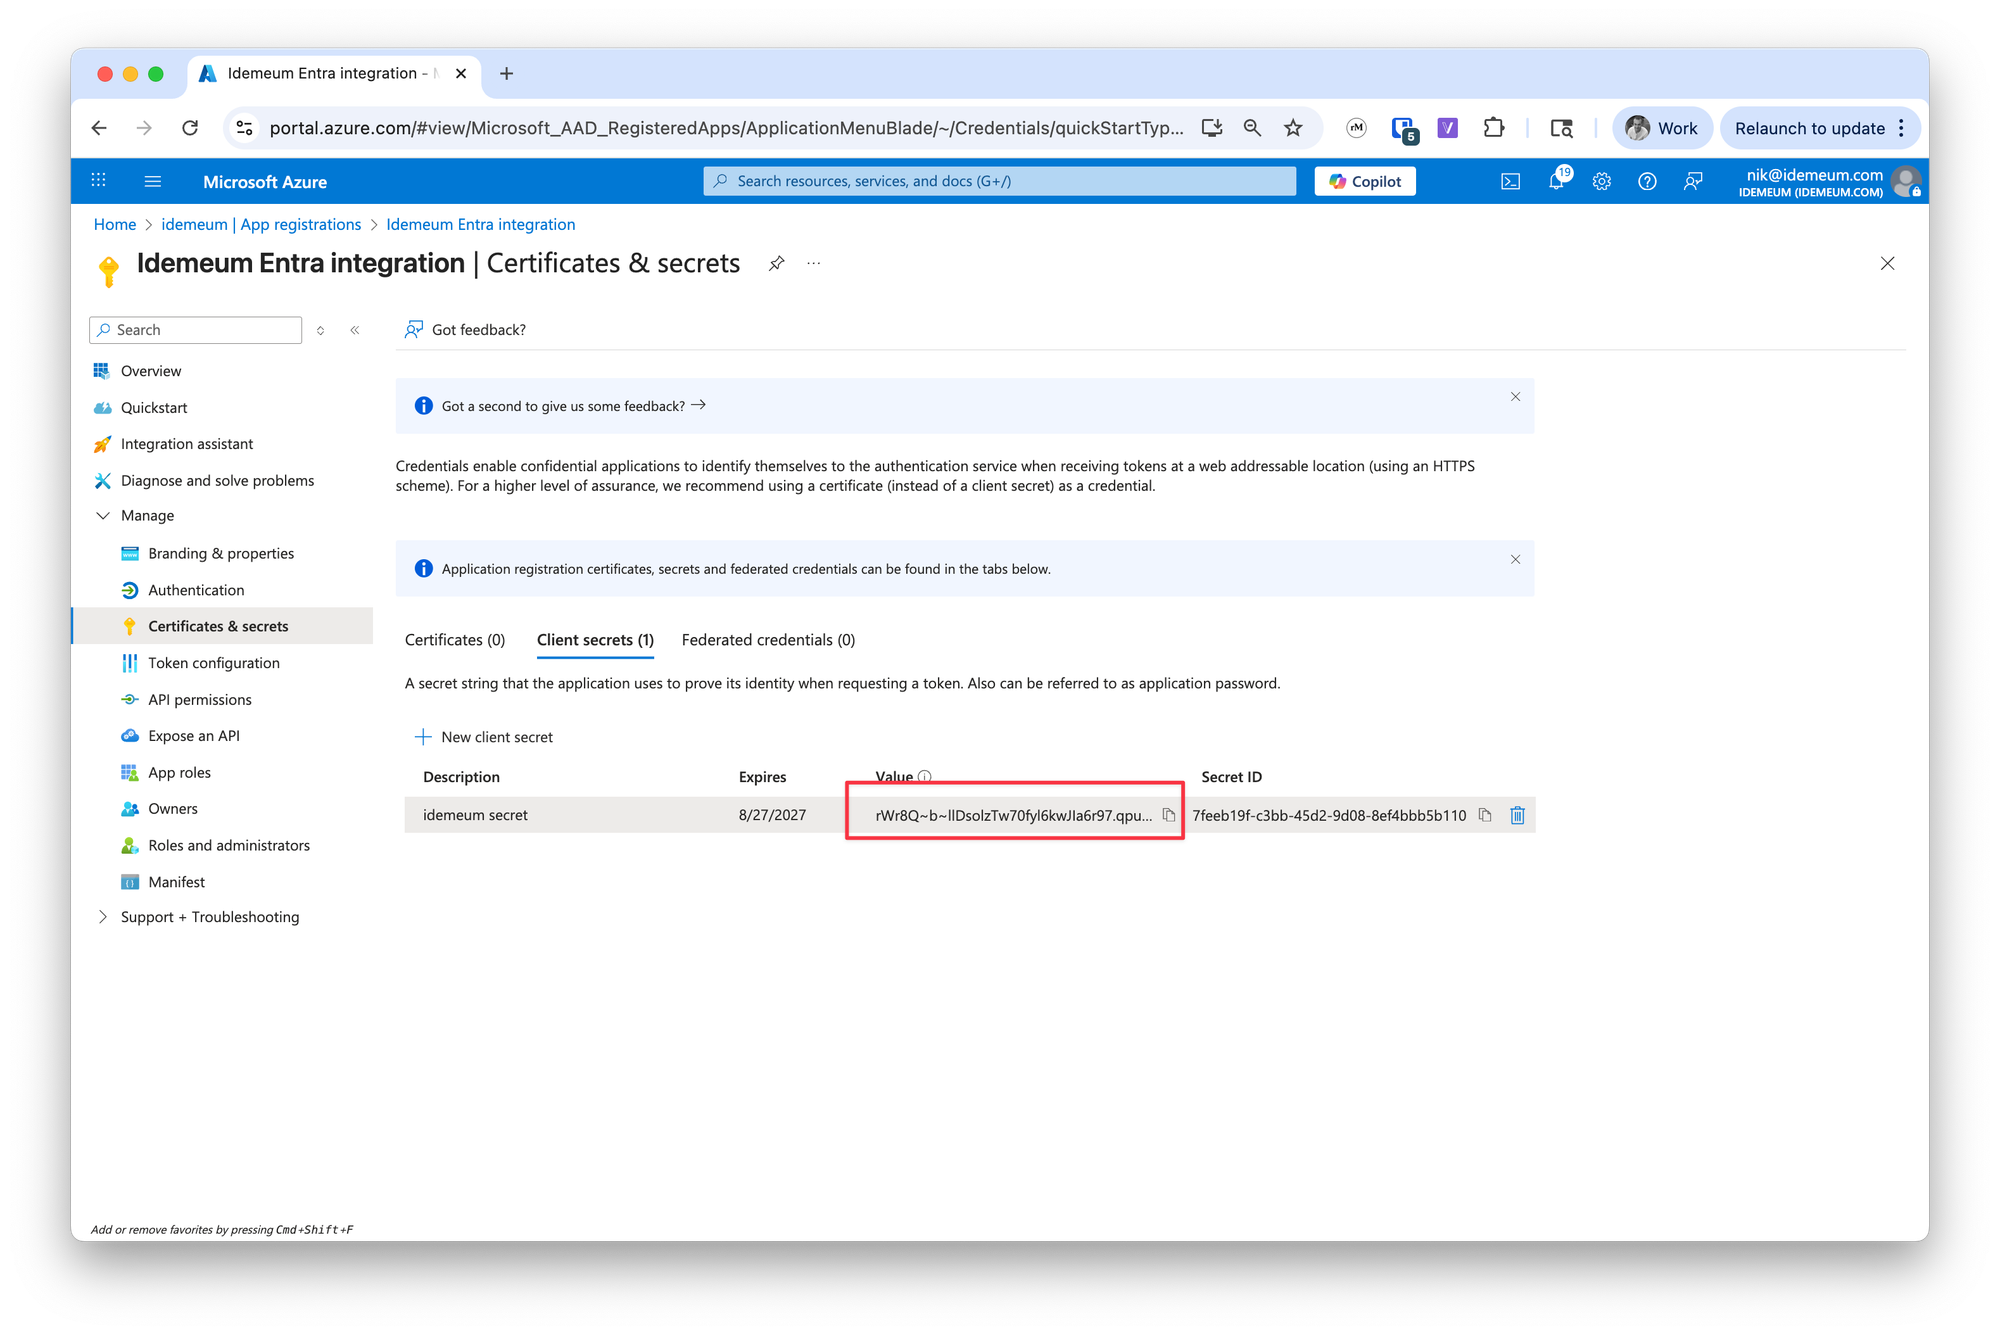
Add - Now you can copy the remaining parameter -
secret value
Create API permissions
Now we will need to assign API permissions to idemeum application.
- Navigate to
API permissionsand clickAdd a permission

- Choose
Microsoft Graphand thenApplication permissions
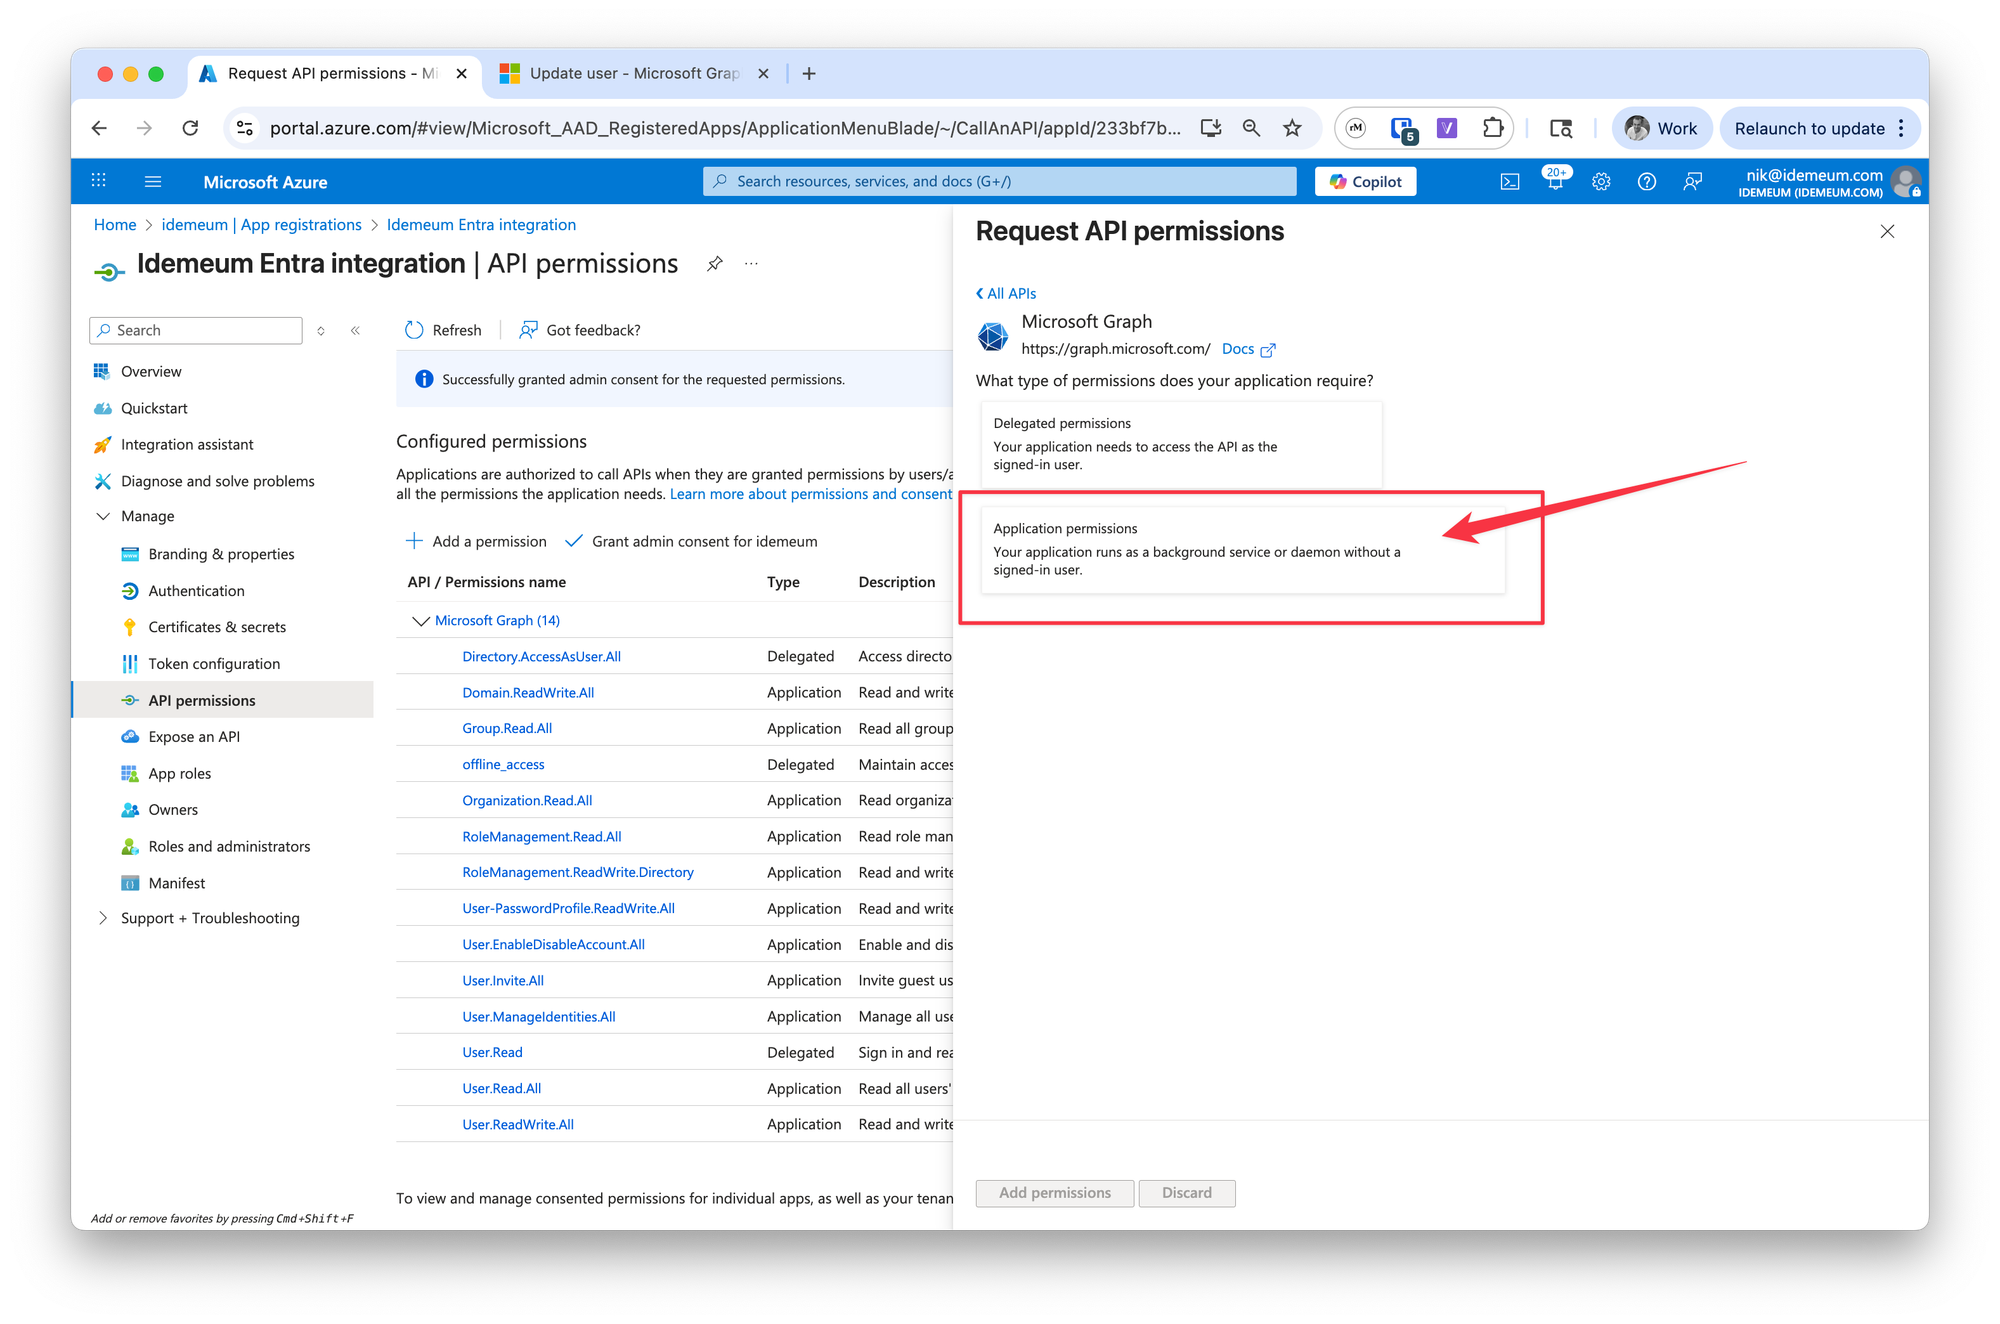
- Now click on
Application permissionsand add the following:Organization.Read.AllUser.Read.AllUser.ReadWrite.AllUser.Invite.AllGroup.Read.AllRoleManagement.Read.AllRoleManagement.ReadWrite.DirectoryUser.EnableDisableAccount.AllUser.ManageIdentities.AllDomain.ReadWrite.AllDirectory.ReadWrite.AllUser-PasswordProfile.ReadWrite.All
❗
Once you add permissions make sure you click
Grant admin consent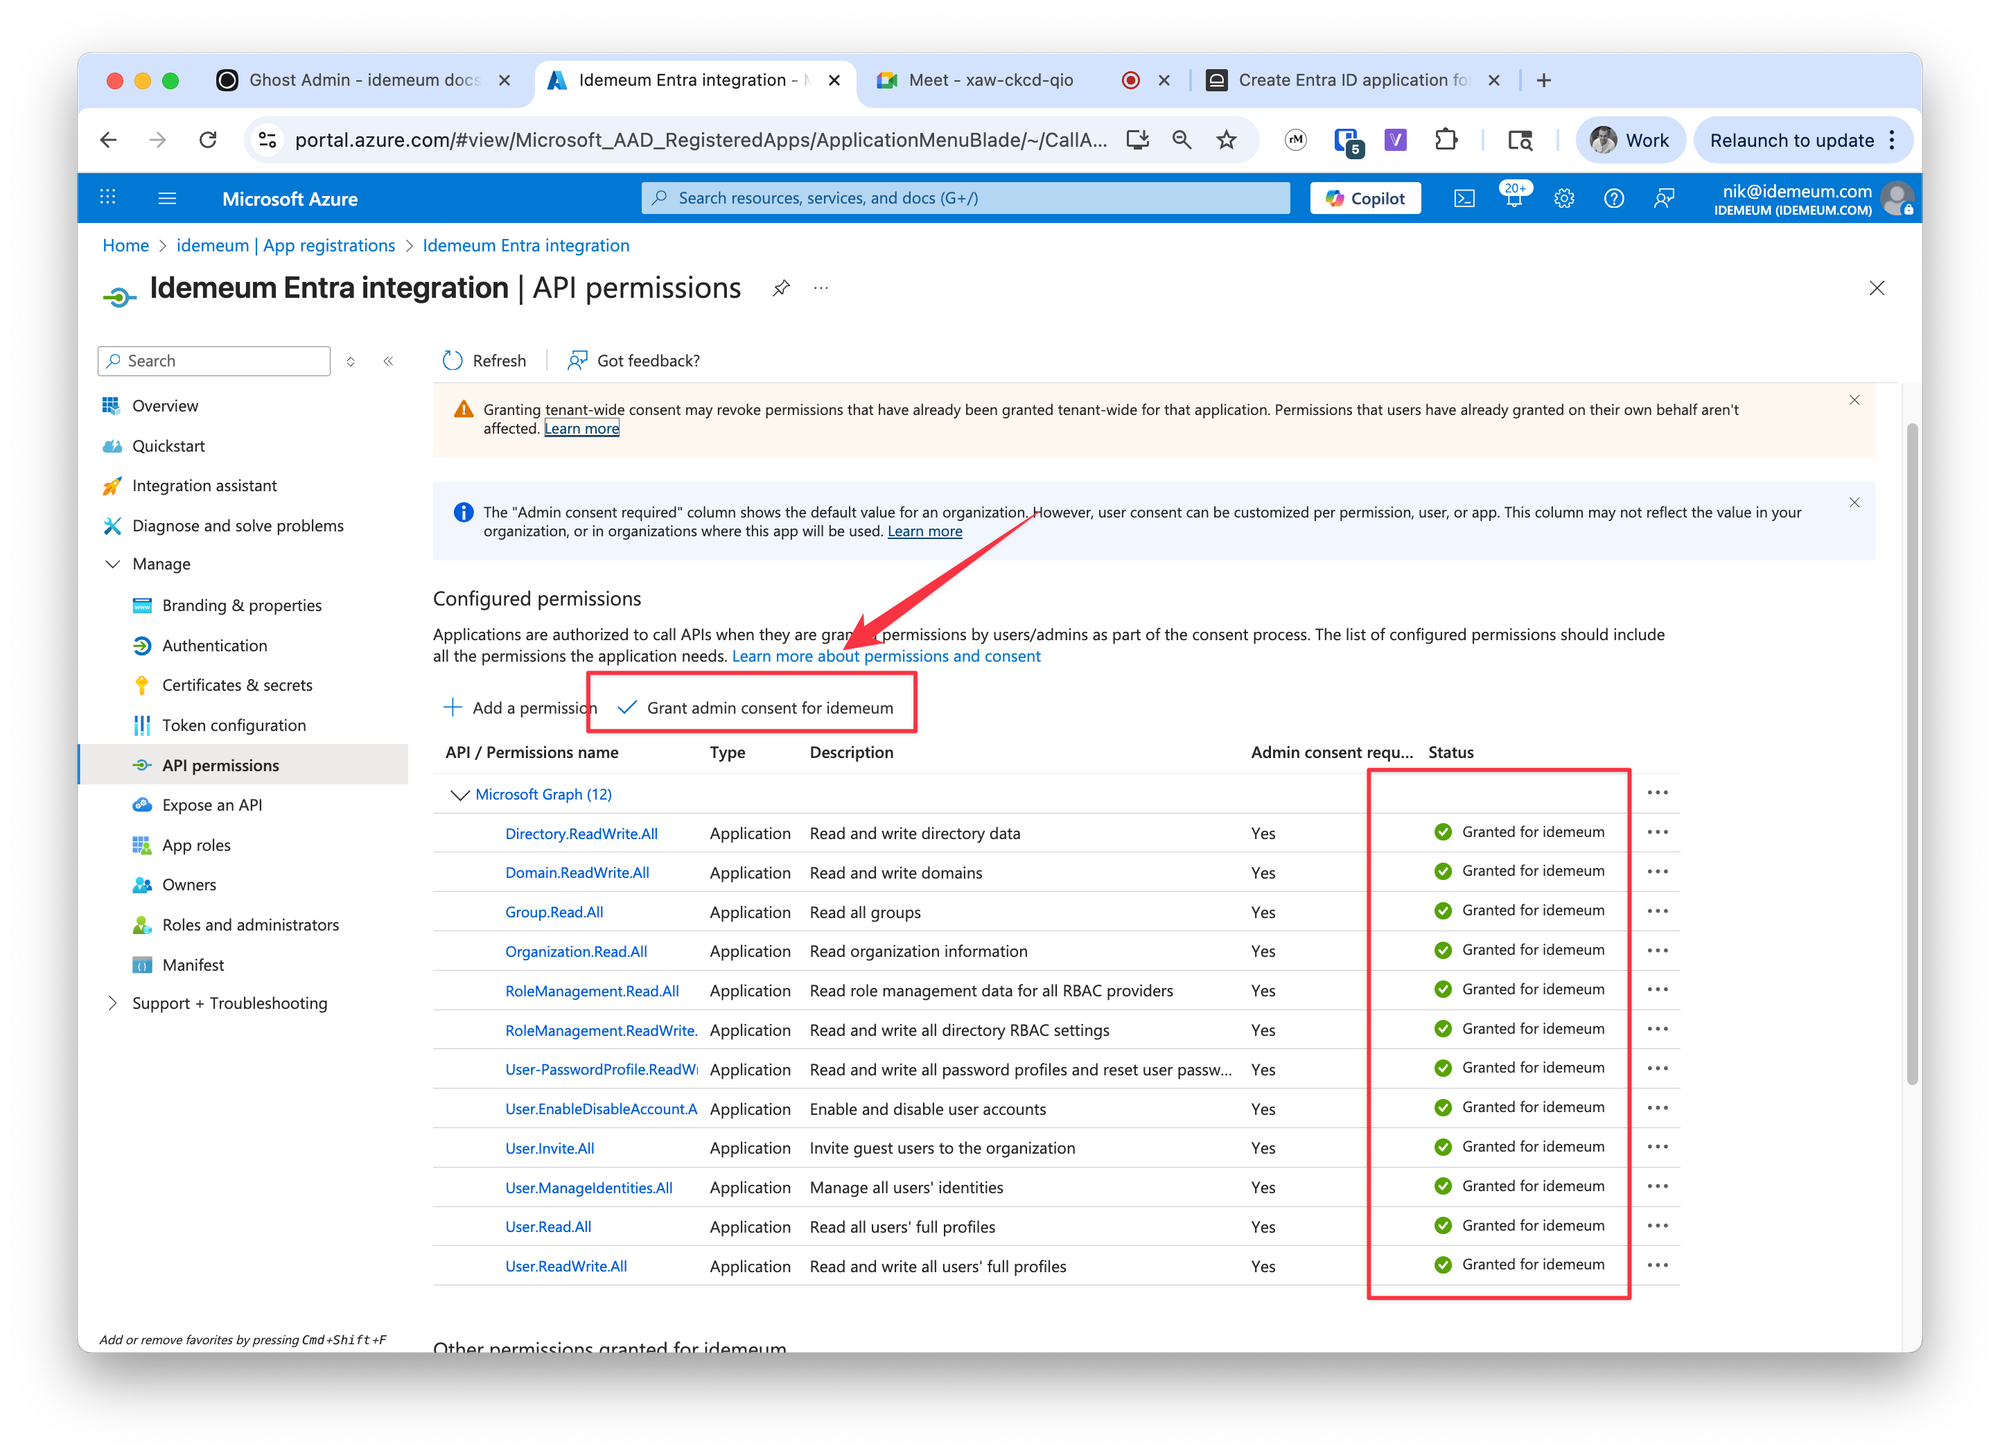
Configure Entra user source
You can now configure idemeum to integrate with Entra.
- Navigate to your parent tenant → access
users→user sourceand then chooseentraid - Enter
Directory (tenant) ID,Application (client) ID, andclient secret valueparameters that we obtained in the previous section - Choose the domain you will be using for user onboarding
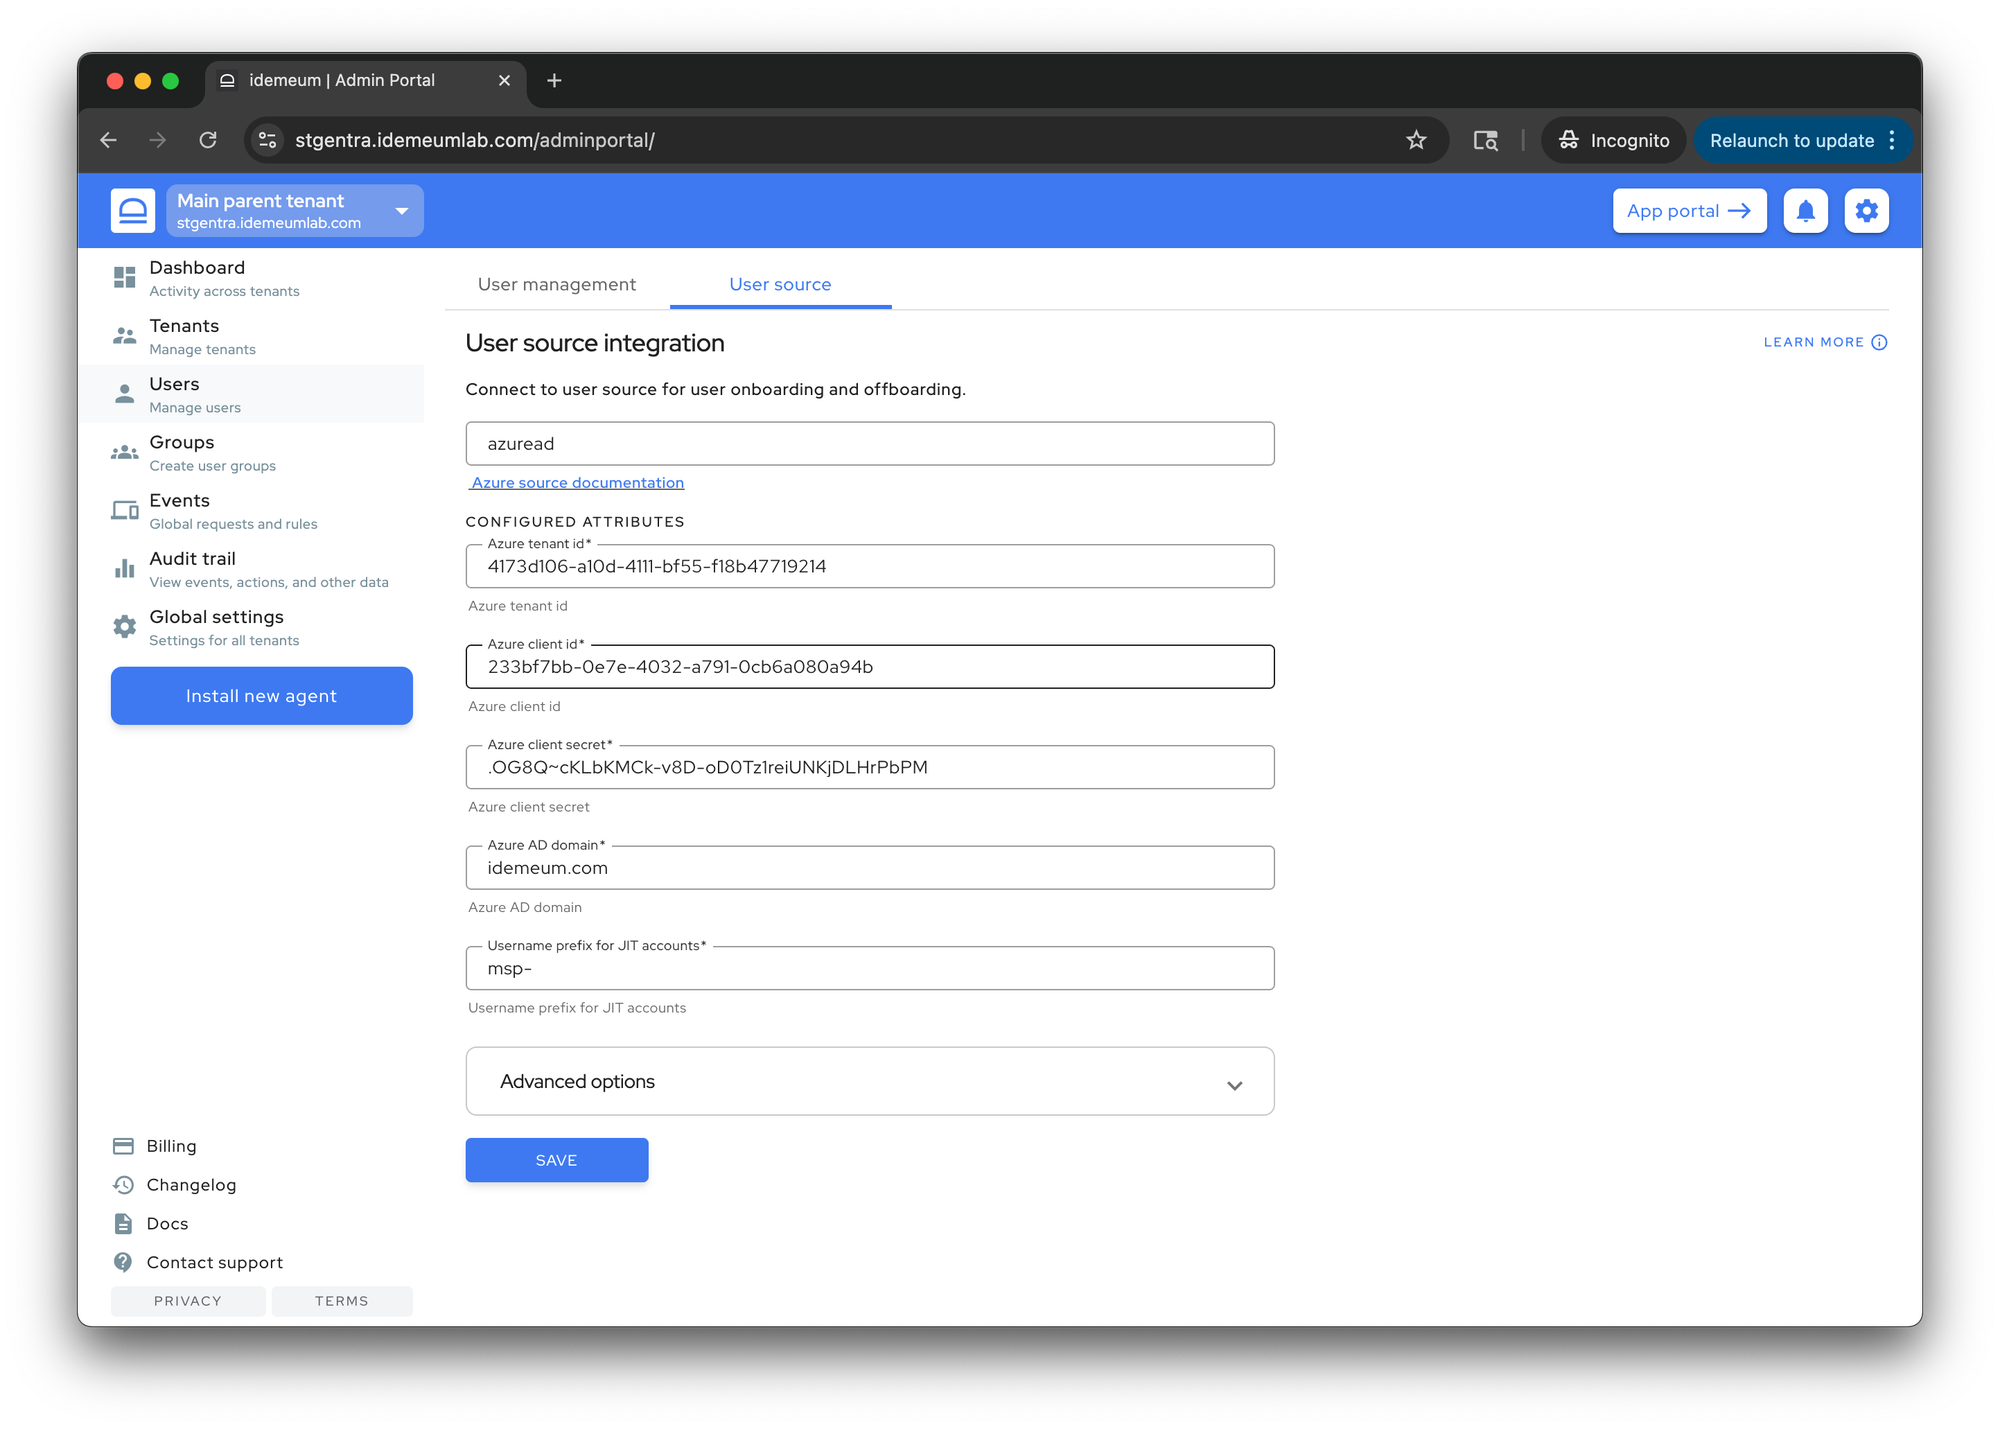
- Save the configuration
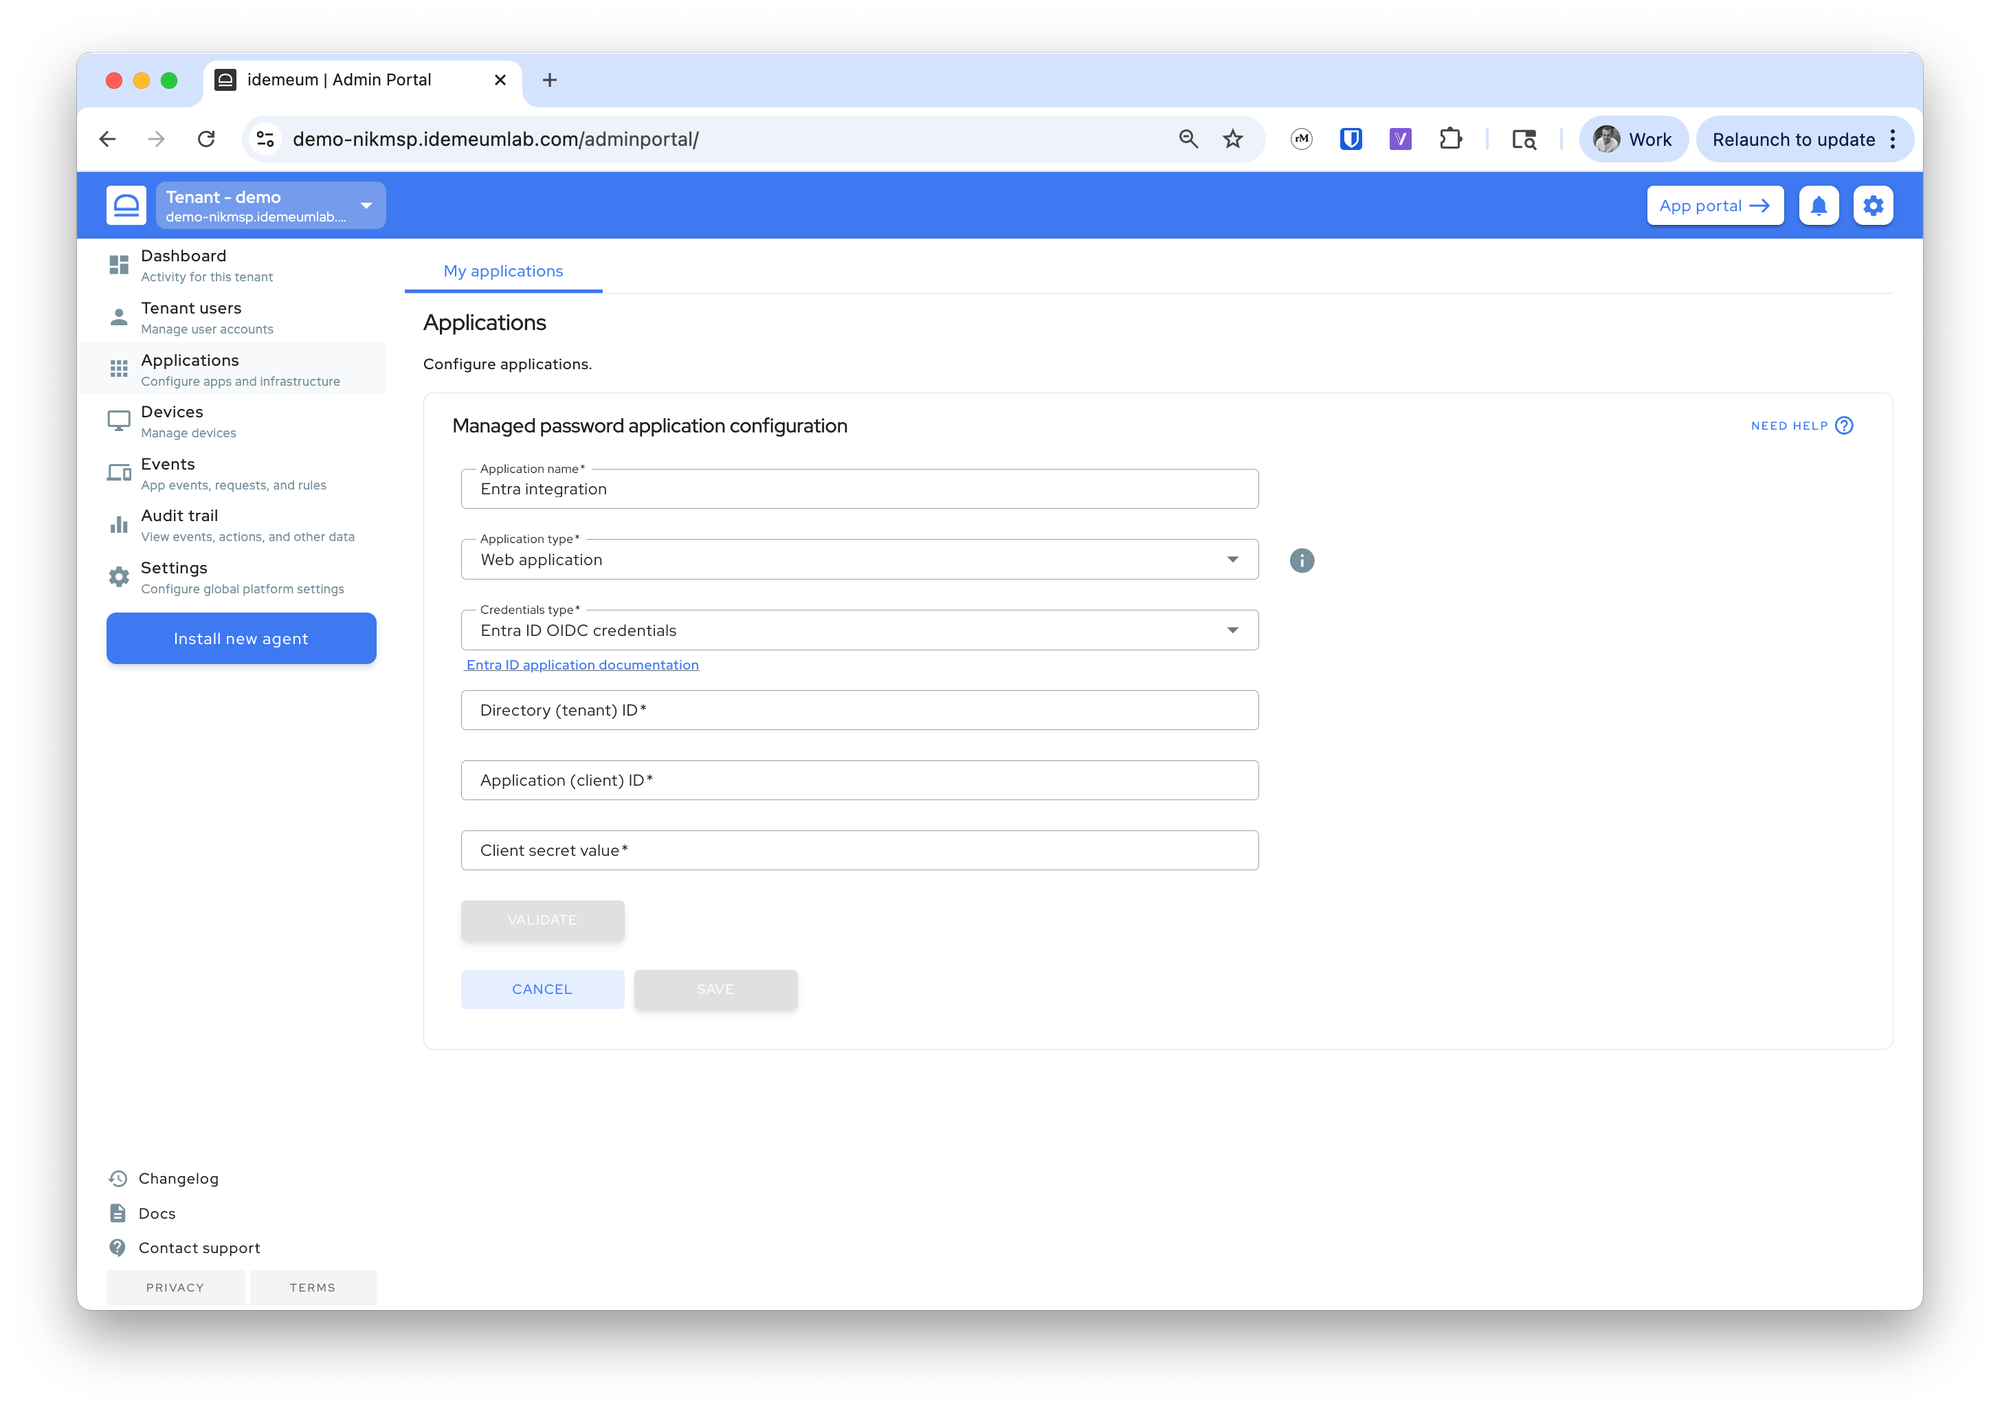
Configure Entra JIT accounts
- Navigate to your customer / organization → choose
Applications - Choose
Managed password app - Provide application name
- For application type choose
Web application - For credentials choose
Entra ID OIDC credentials
- Now we will enter
Directory (tenant) ID,Application (client) ID, andclient secret valueparameters that we obtained in the previous section
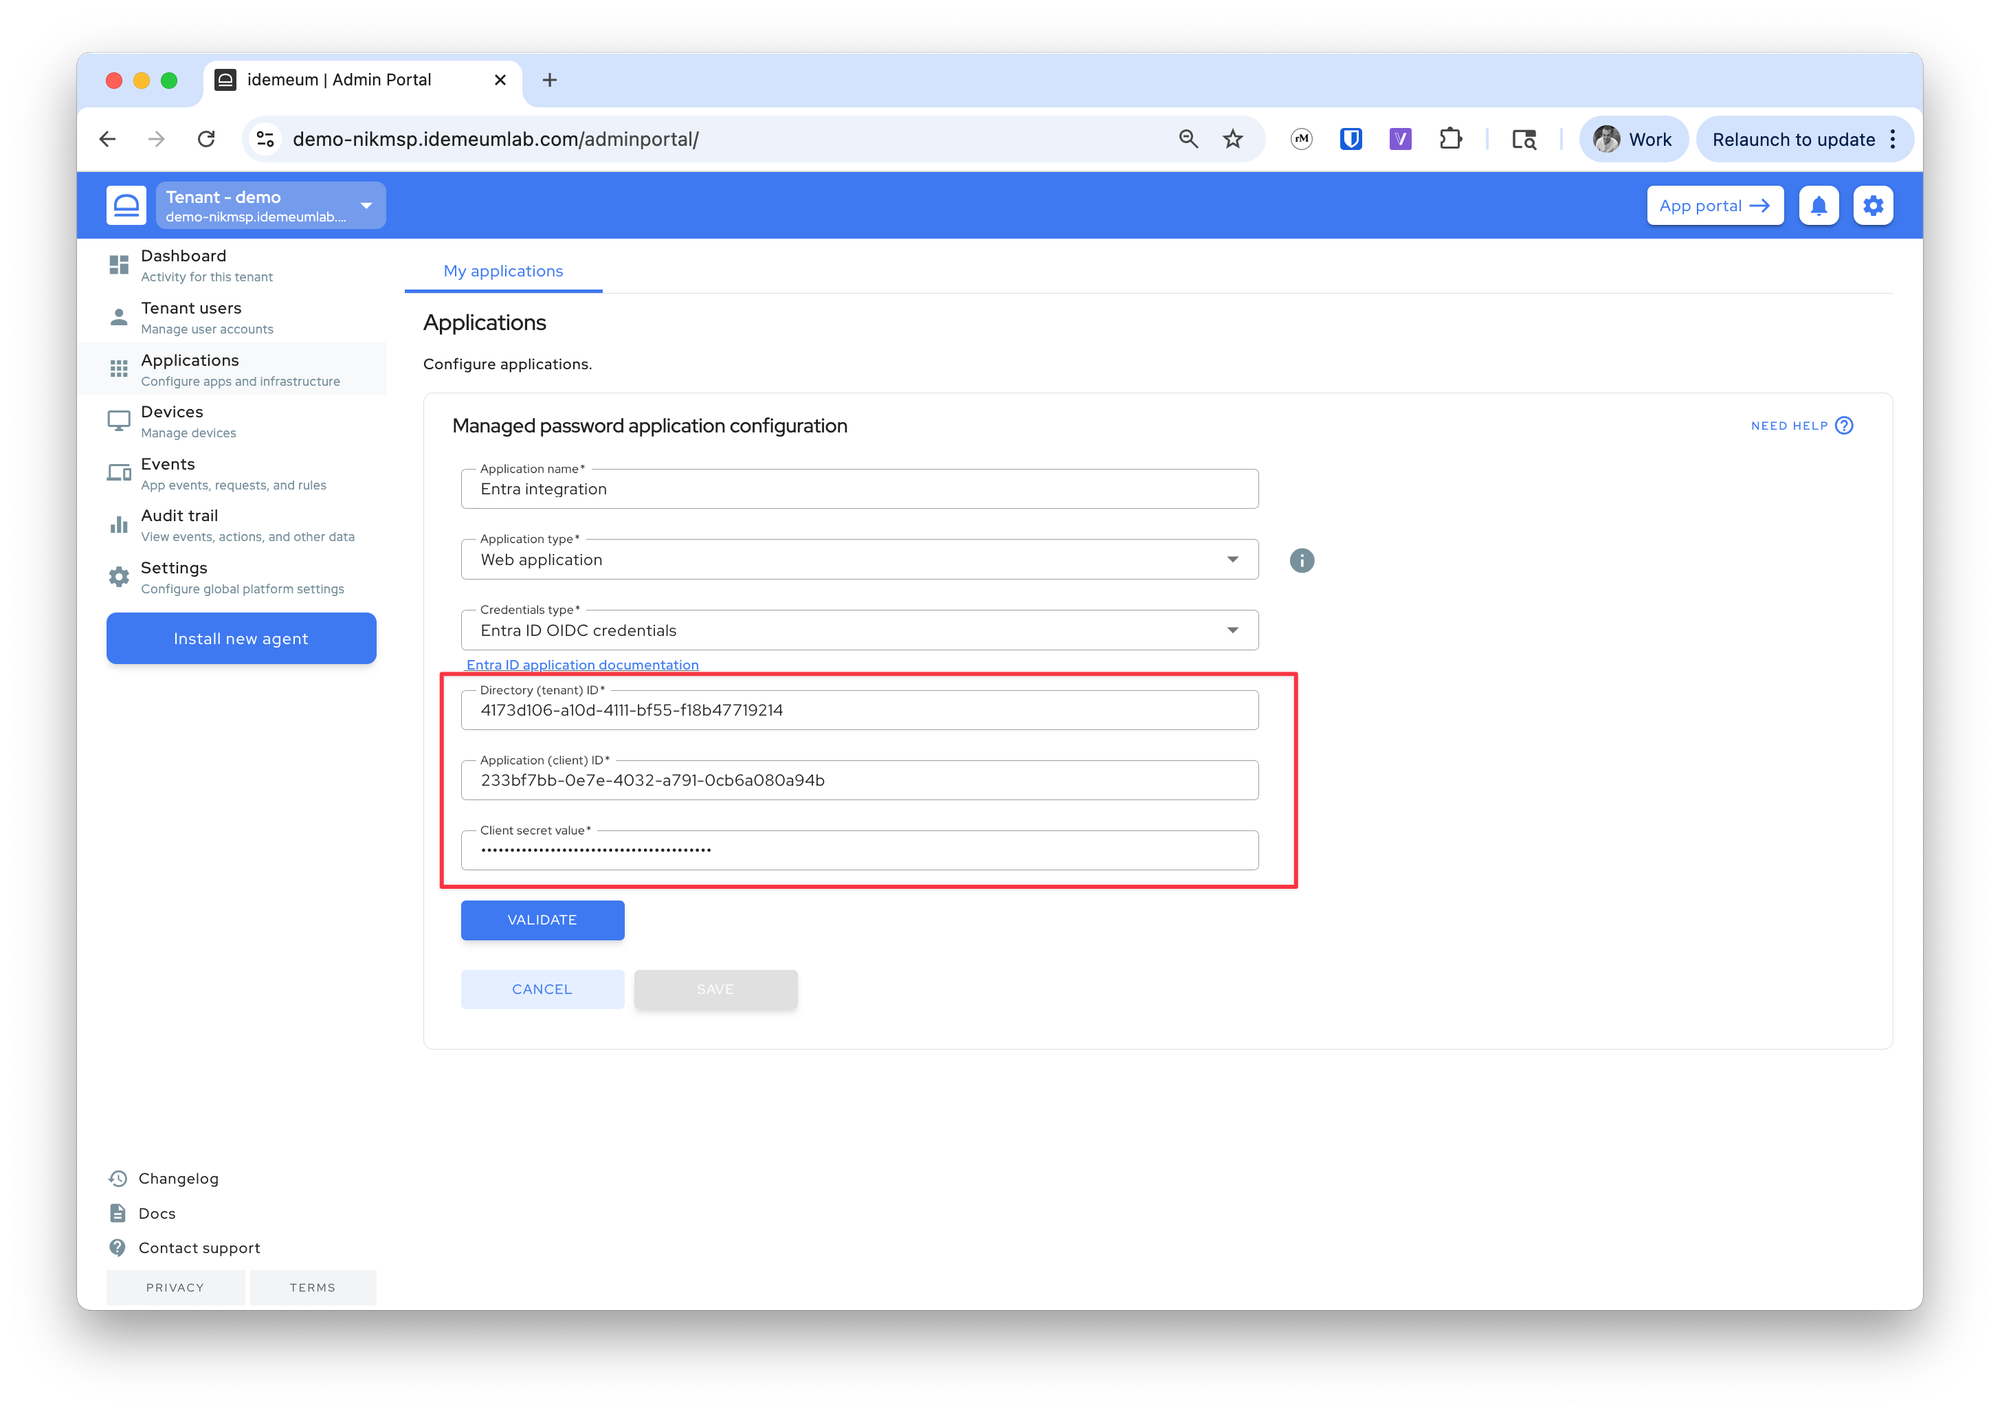
- Now click the
Validatebutton - Once the validation is successful you can configure the additional values below
- Choose how quickly you want Entra JIT account to be disabled
- Choose the domain name where you want to provision Entra accounts
- For group mapping choose what groups you want to assign to JIT accounts
- Also specify LAPS account if you want idemeum to create and manage one for the Entra tenant
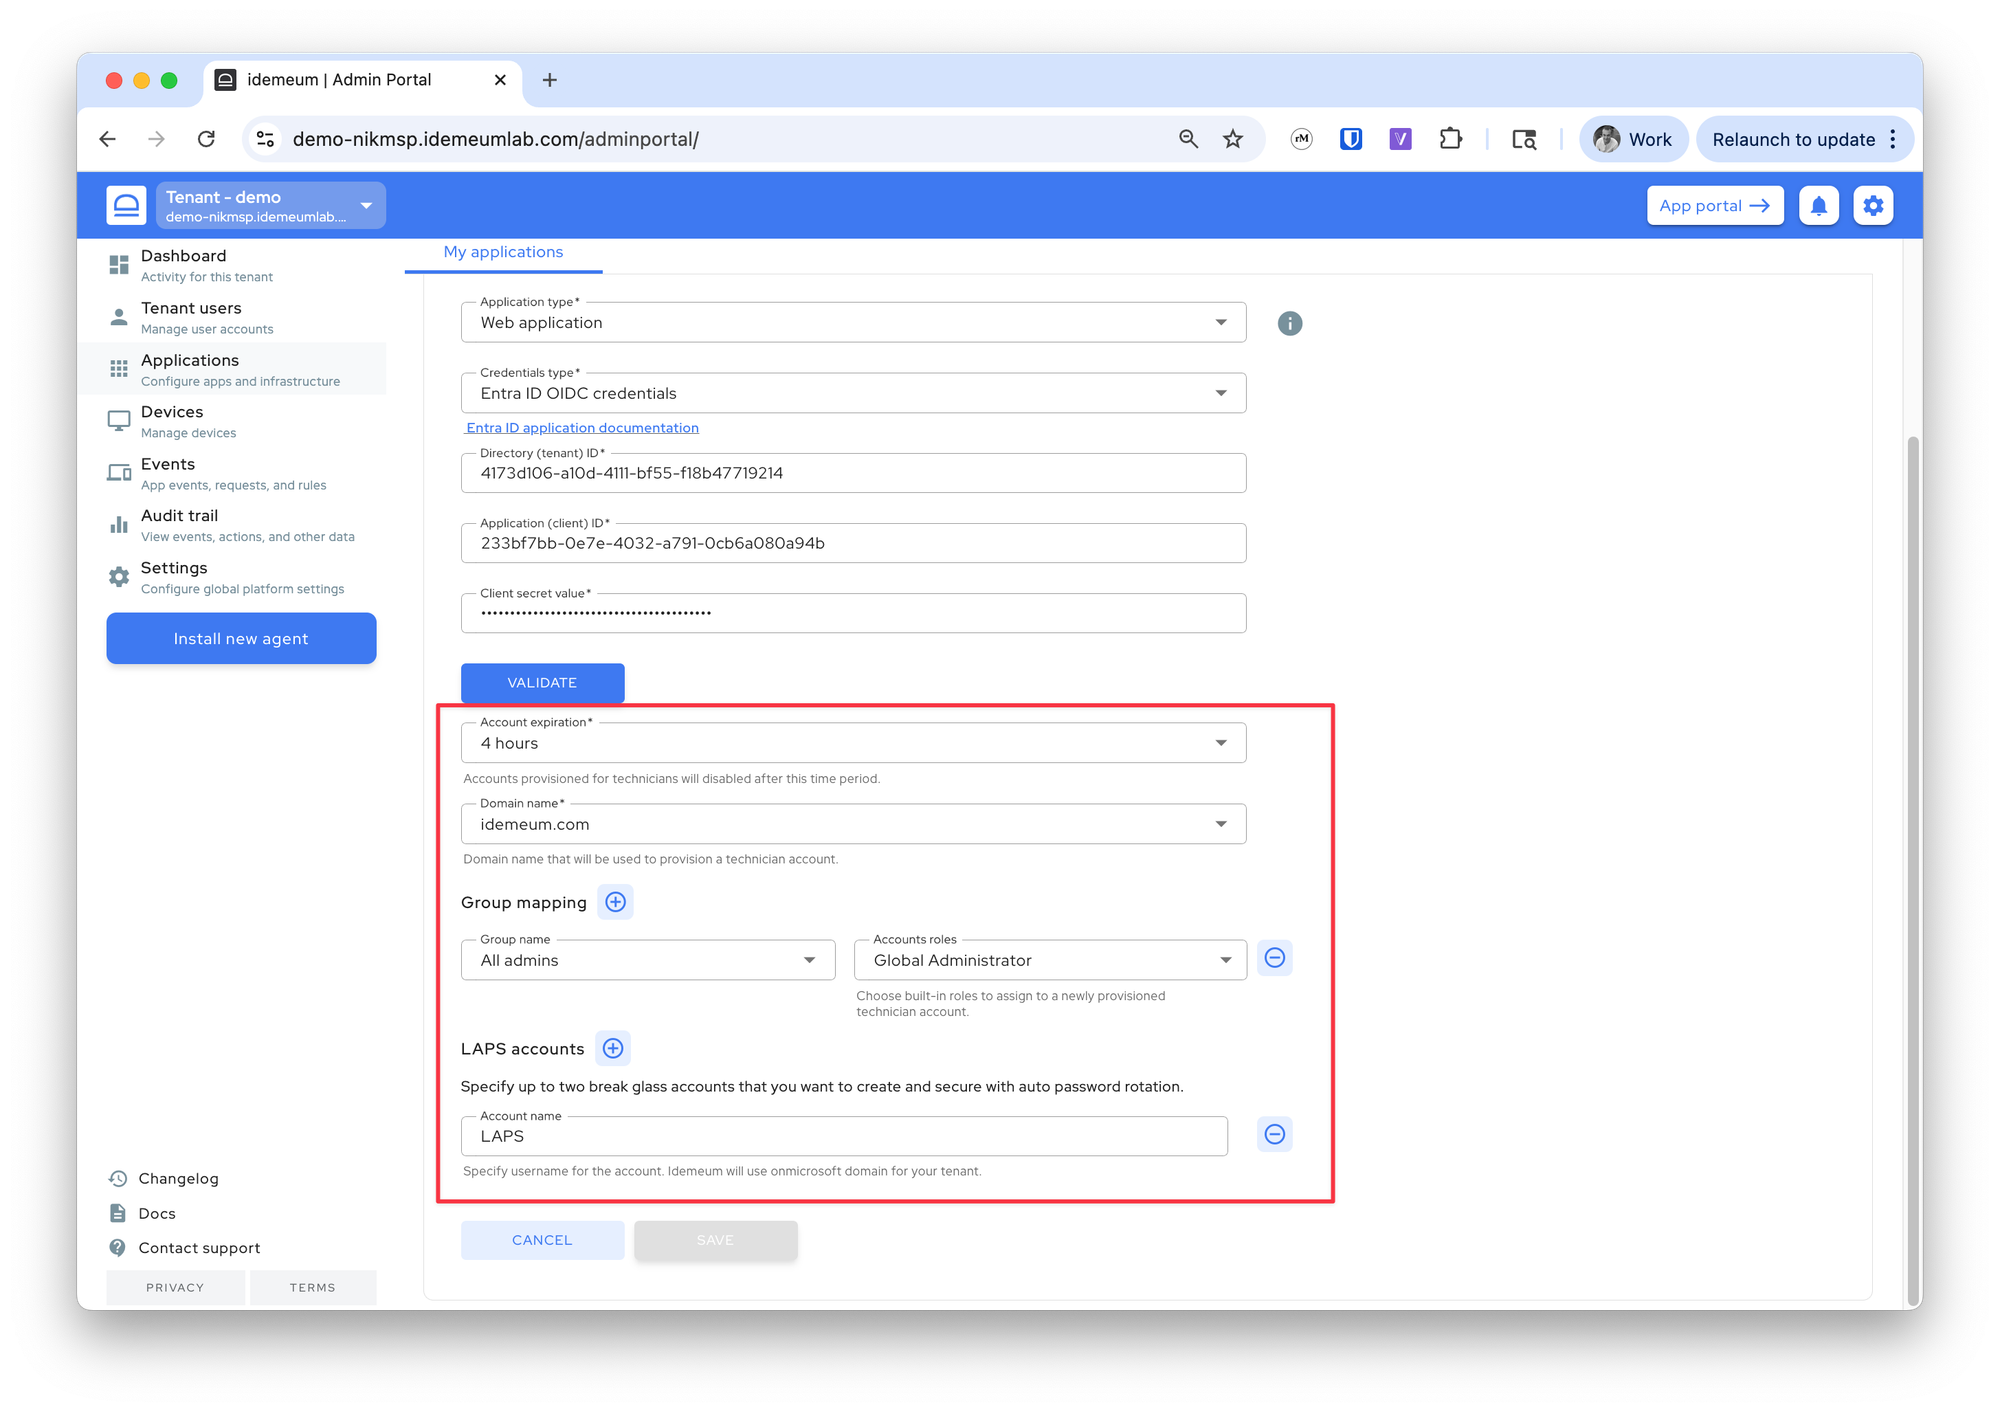
- Save the configuration