Configuration (JIT)
How to configure JIT admin access for your customer / organization tenant.
JIT for computers settings
Navigate to Settings → JIT access to configure how you want JIT accounts to be managed for your customer / organization.
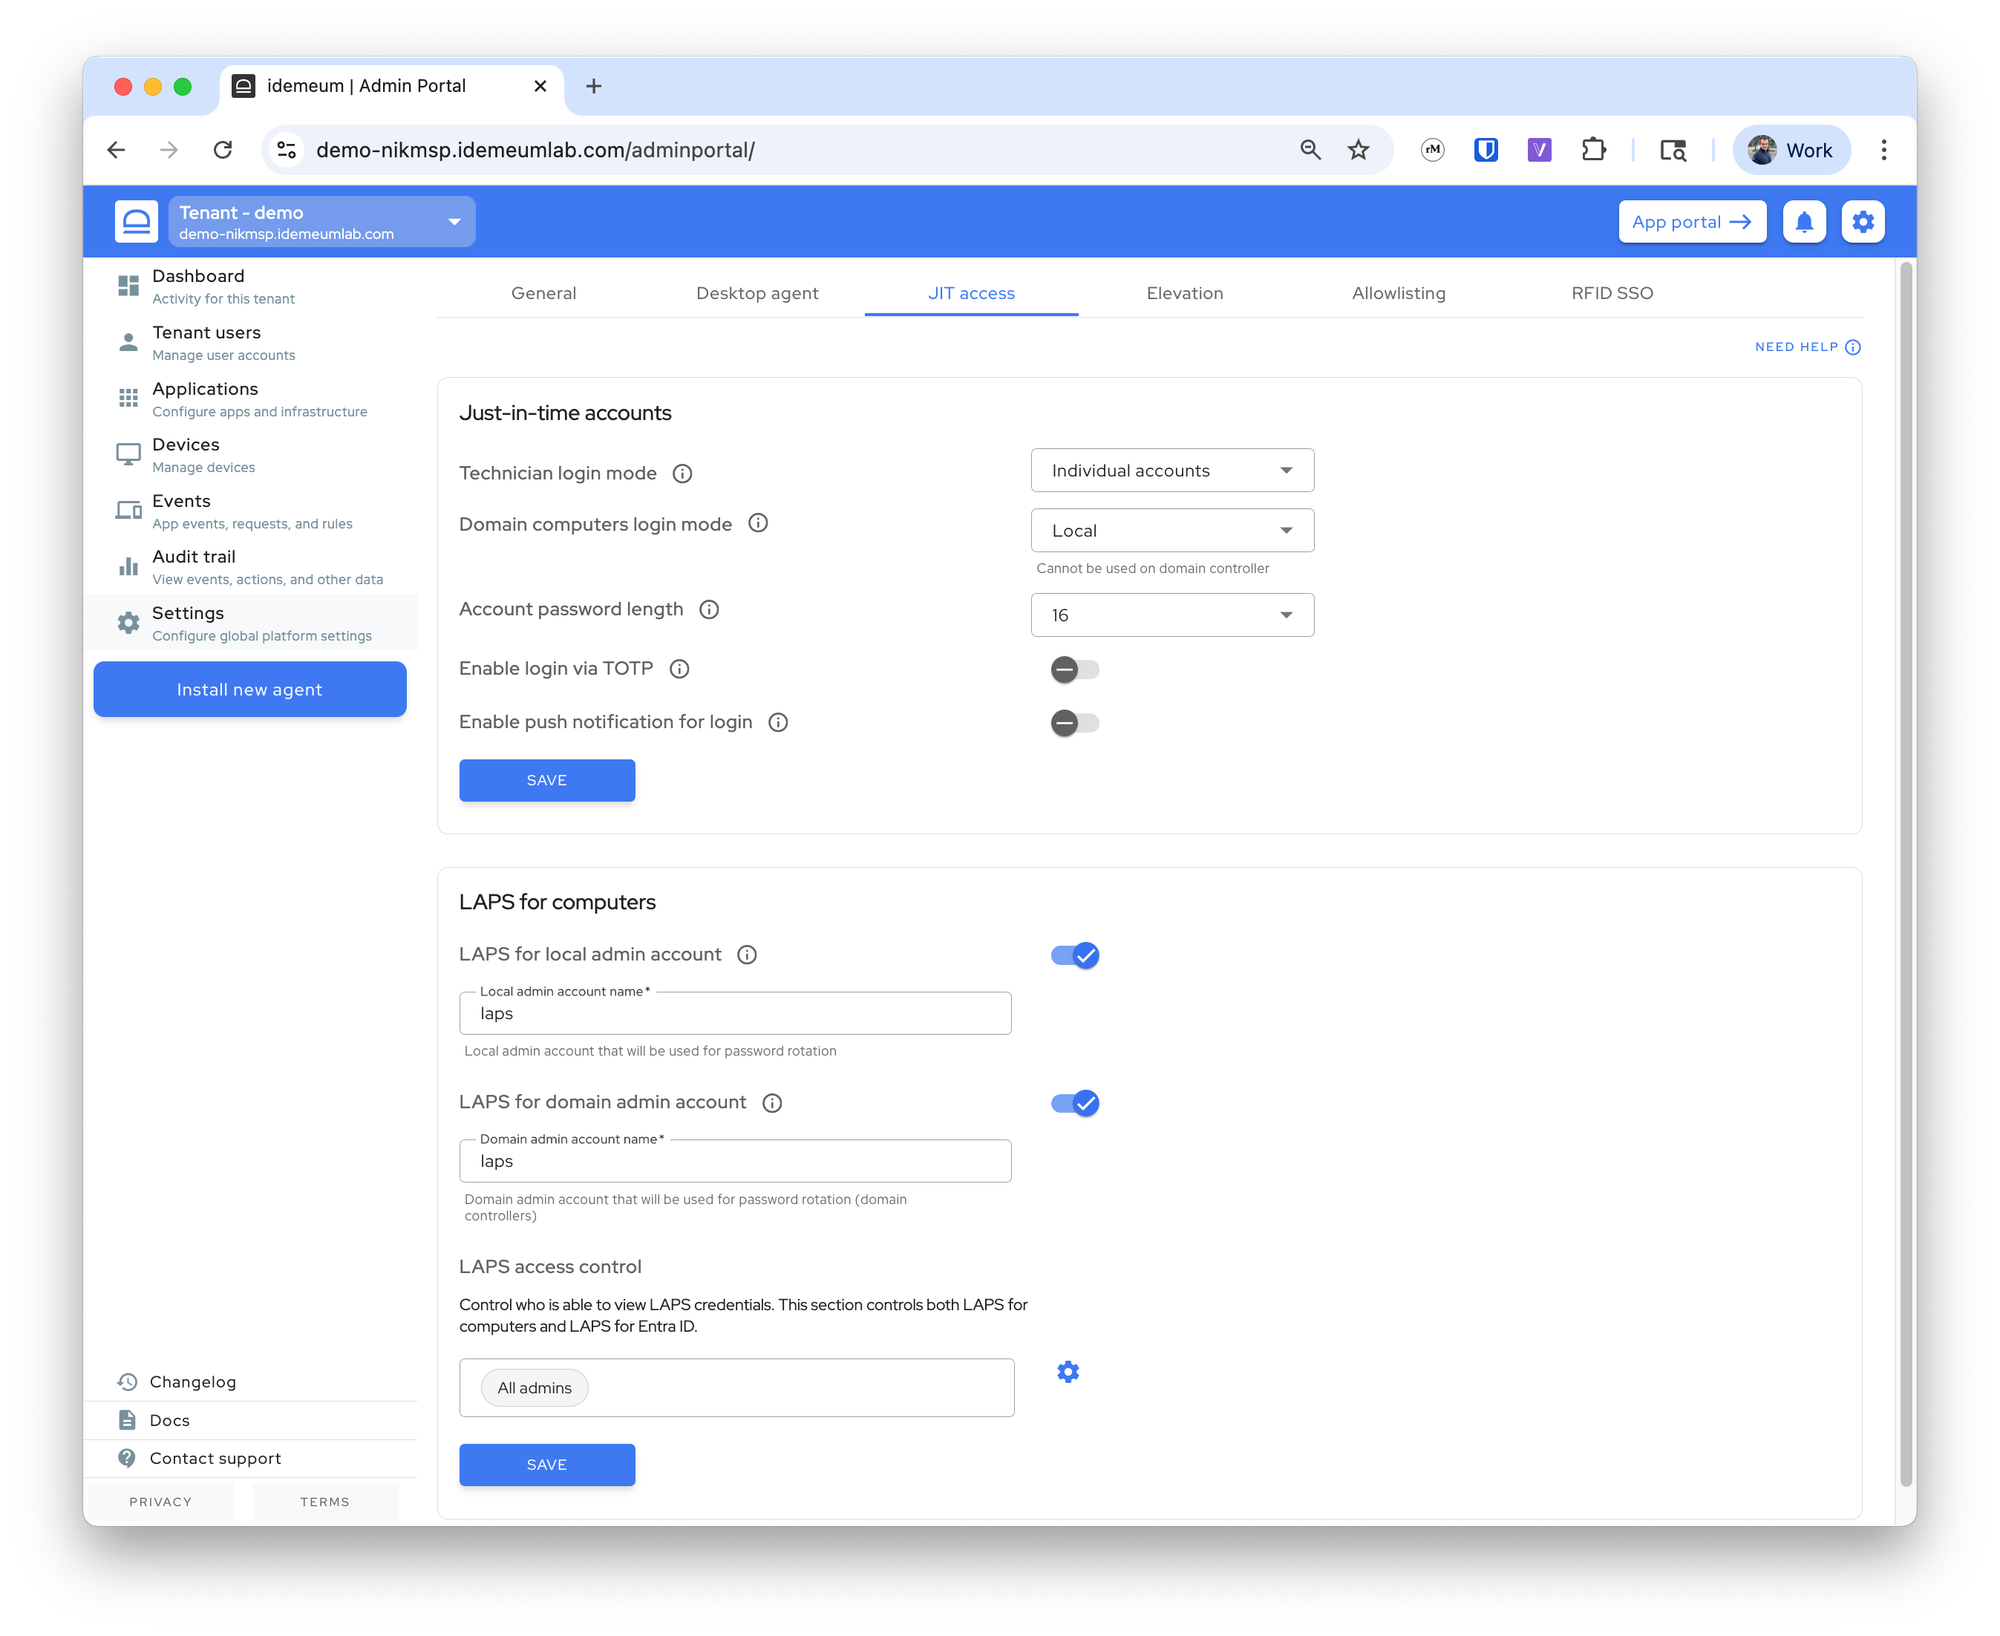
There are the settings you can change:
Technician login mode- choose how you want technicians to login into workstations - with individual accounts or one shared account per organization / customer tenant. Default is individual accounts as that is required by security frameworks.Domain computers login mode- choose how technicians login to domain computers. By default local admin account is used.Local- create local admin account on the workstationDomain- create domain account on DC. For this case you need to install idemeum agent on domain controllerPrompt to choose- when you scan idemeum QR-code you will be presented with option to choose what account to use - domain or local. For this option you need to install idemeum agent on domain controller.
Choose OU for JIT domain accounts- for domain JIT computer accounts you can choose the Organization Unit (OU) container where these accounts will be created.- The default location for each tenant is <your domain>/Users
- You can choose to create any OU or a set of nested OUs for your JIT accounts, i.e <your domain>/JIT accounts or <your domain>/JIT/MSP accounts etc. You just need to specify the path.
- If OU path does not exist, idemeum will create the corresponding OU containers.
- The nested containers under Users are NOT supported. For instance, <your domain>/Users/JIT accounts is not supported
- If you used the path 1 for your JIT accounts and they were already created, and then you change the path to path 2, next time when JIT login is performed, JIT account will be moved to the new location
Account password length- chose the password length for created JIT admin accounts.Enable login via TOTP- by default technicians login by scanning a QR-code with idemeum mobile app. You can also provide on option to login with OTP even when computer is not offline. Technicians retrieve the OTP from mobile app and enter it into the login screen.Enable push notifications for login- enable the option to send a push notification to a mobile app instead of scanning a login QR-code. Technicians enter their email address and then approve a notification on their mobile app.LAPS for local admin account- option to create break-glass accounts on non-domain controller workstations and then rotate passwords every 24 hours. Once enabled, you can specify what account name to use or take over.LAPS for domain admin account- option to create break-glass accounts on domain controllers. Once enabled, you can specify the account name to use or take over.LAPS access control- specify the groups of technicians that can access LAPS accounts.
JIT for Entra ID settings
When setting up just-in-time access to Entra ID tenants you need to connect each customer Entra ID tenant to respective customer / organization in idemeum.
Here is the guide for how to connect Entra ID tenants to idemeum customer tenants.
Create Entra ID application for idemeum
In order to integrate idemeum with Entra ID, you need to create an application to obtain client credentials. This configuration applies to both user source and Entra JIT accounts setup.