MSP guide - Cloud LAPS for desktops
In this guide we will test Cloud LAPS to manage break-glass accounts on computers.
Create customer
As a first step we will create a customer tenant / organization for which we will be testing Cloud LAPS for desktops.
- Login to your MSP idemeum admin portal
- Navigate to
Customers - Click
Add customer→Add manually
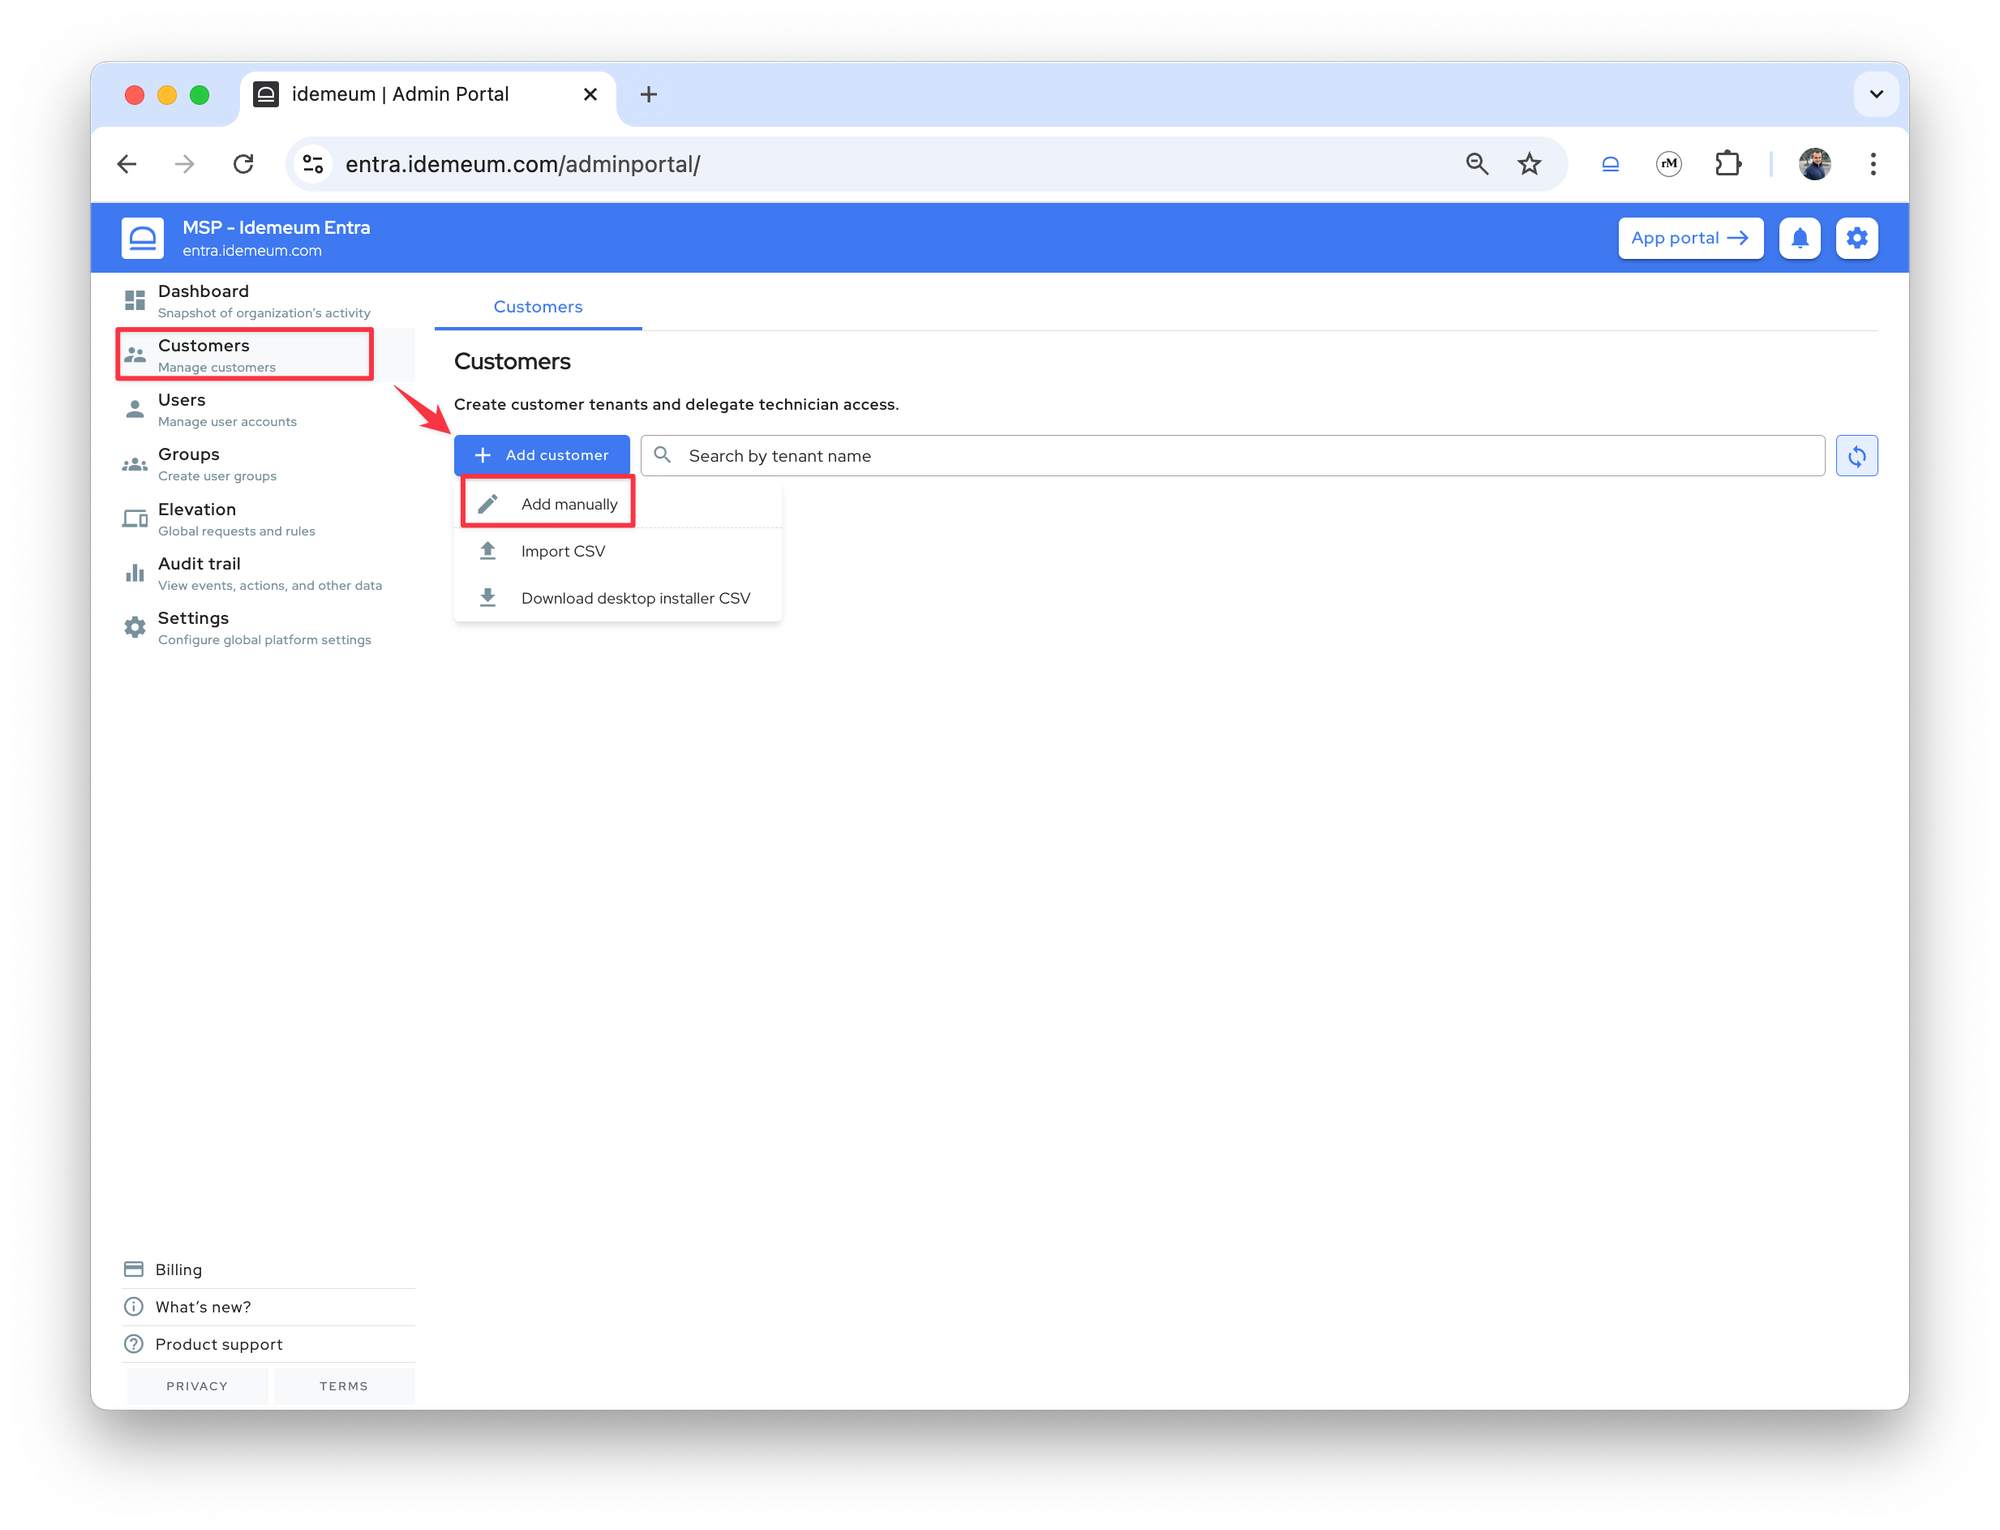
- Provide the customer
name(will be used as a subdomain of your MSP tenant) anddisplay name(the friendly display name of a customer tenant)
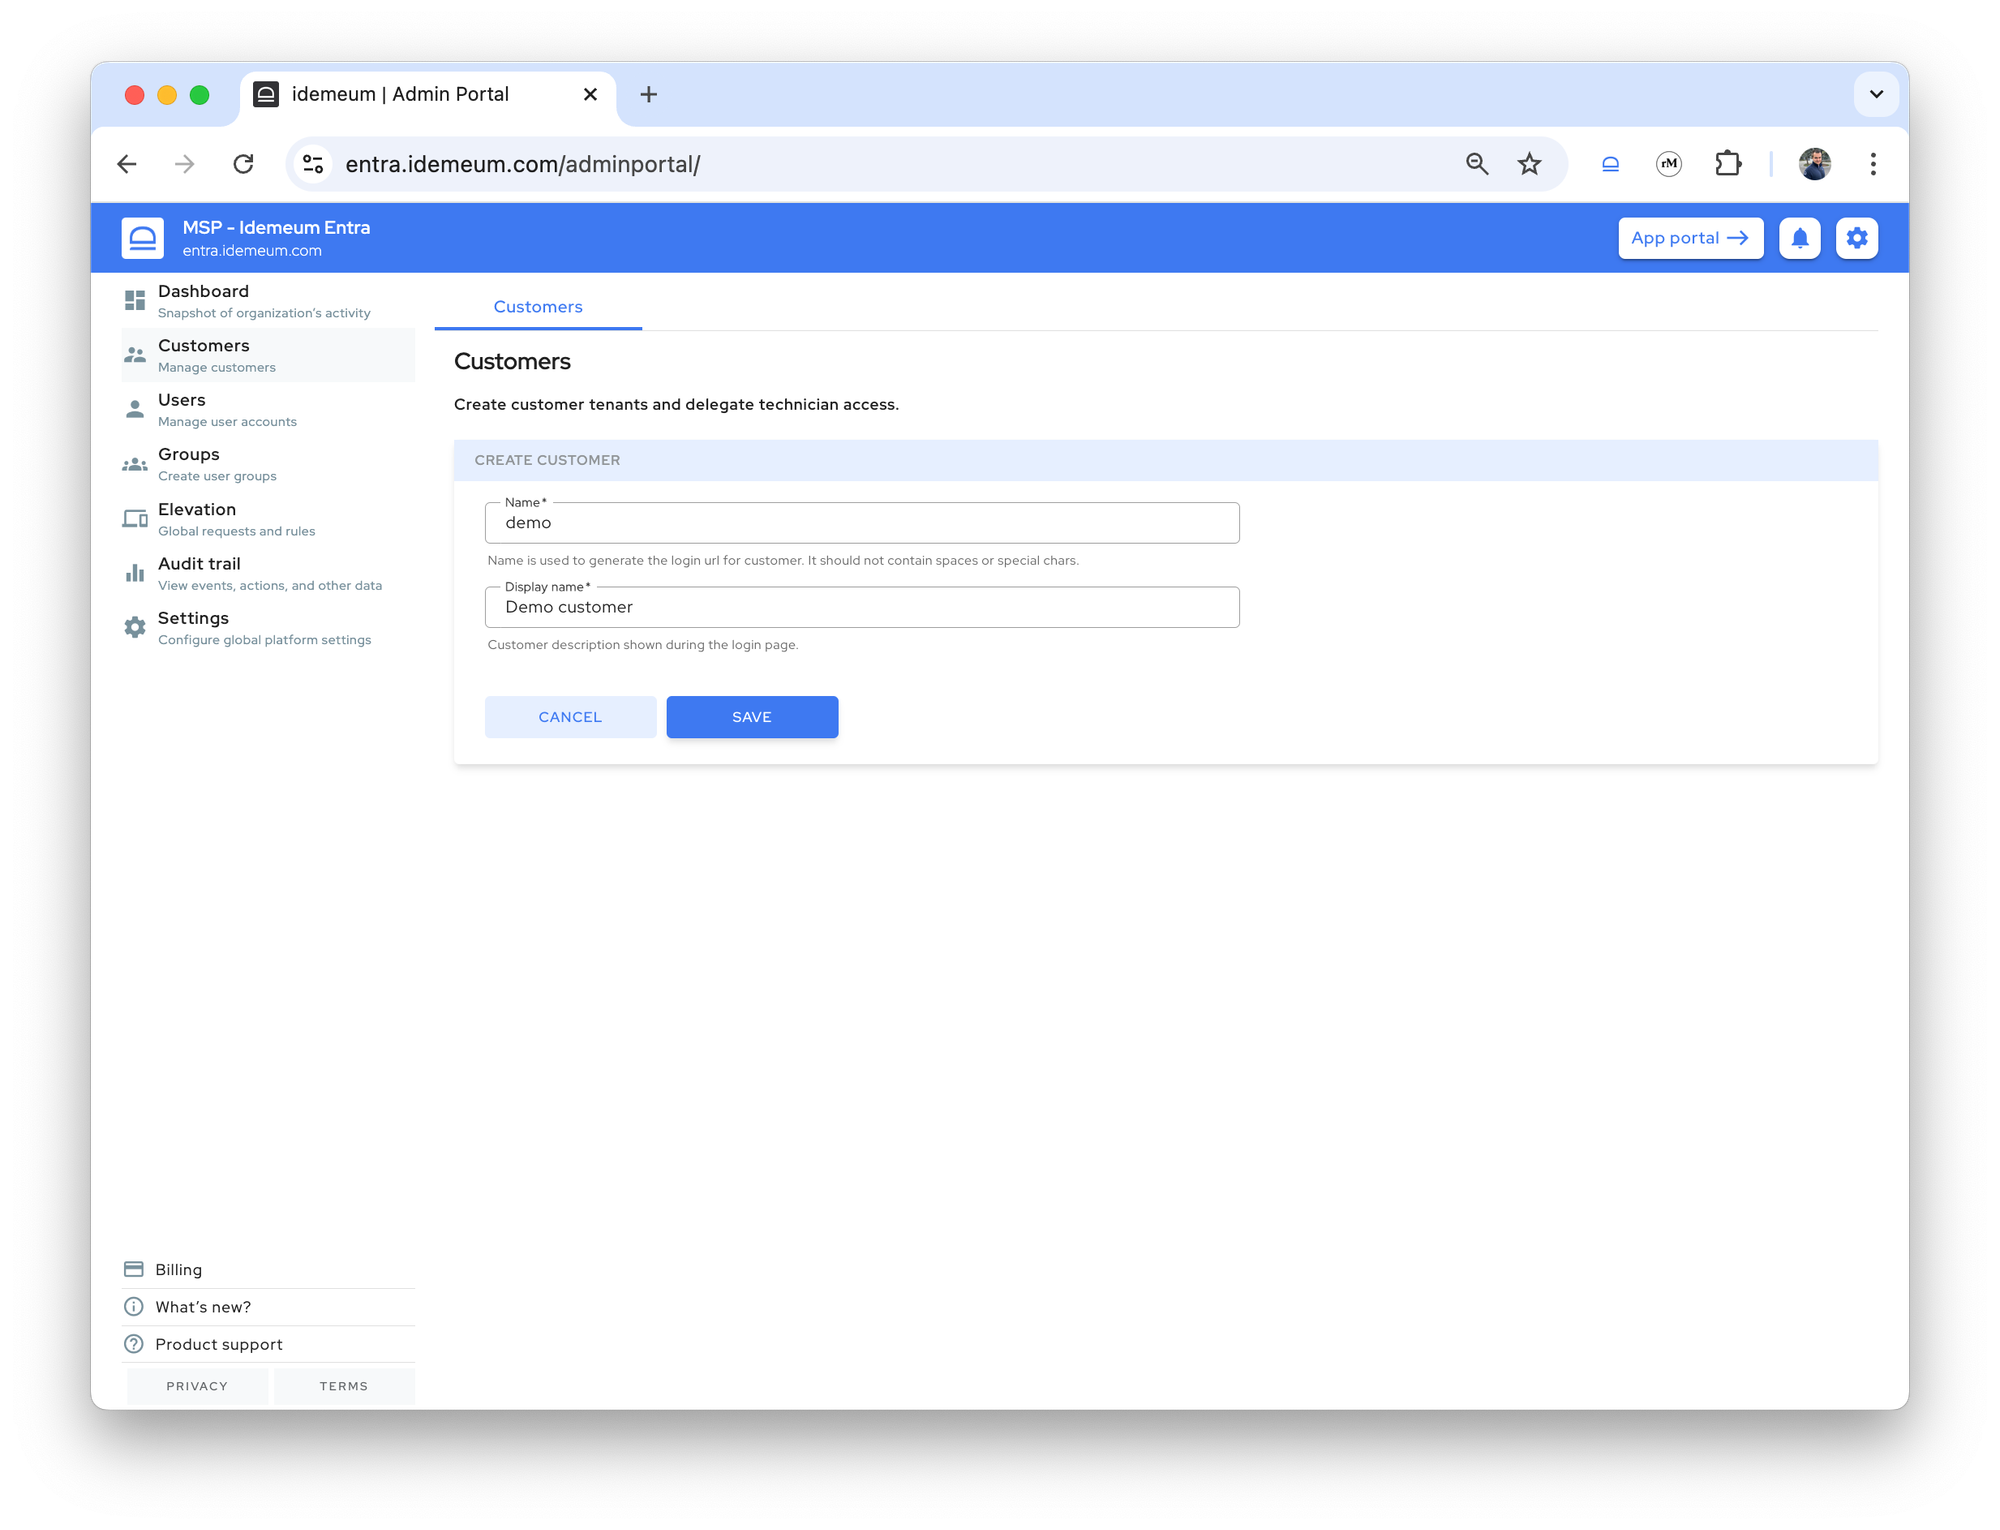
Savethe tenant configuration
Now you can access the customer tenant name by clicking on a link, and you will be automatically logged in.

Enable LAPS for customer tenant
In this step we will enable LAPS for workstations belonging to this customer tenant.
- Access admin portal of customer tenant we created above
- Navigate to
Settings→PAM - Scroll down to
LAPS for computersand enable LAPS- The first option allows you to create break-glass accounts on workstations (local admin accounts) and rotate credentials every 24 hours
- The second option allows you to create break-glass accounts on domain controllers (domain admin accounts) and rotate credentials every 24 hours
- You can provide the account name. If the account name exists, idemeum will take over that account. If the account does not exist, idemeum will create it.
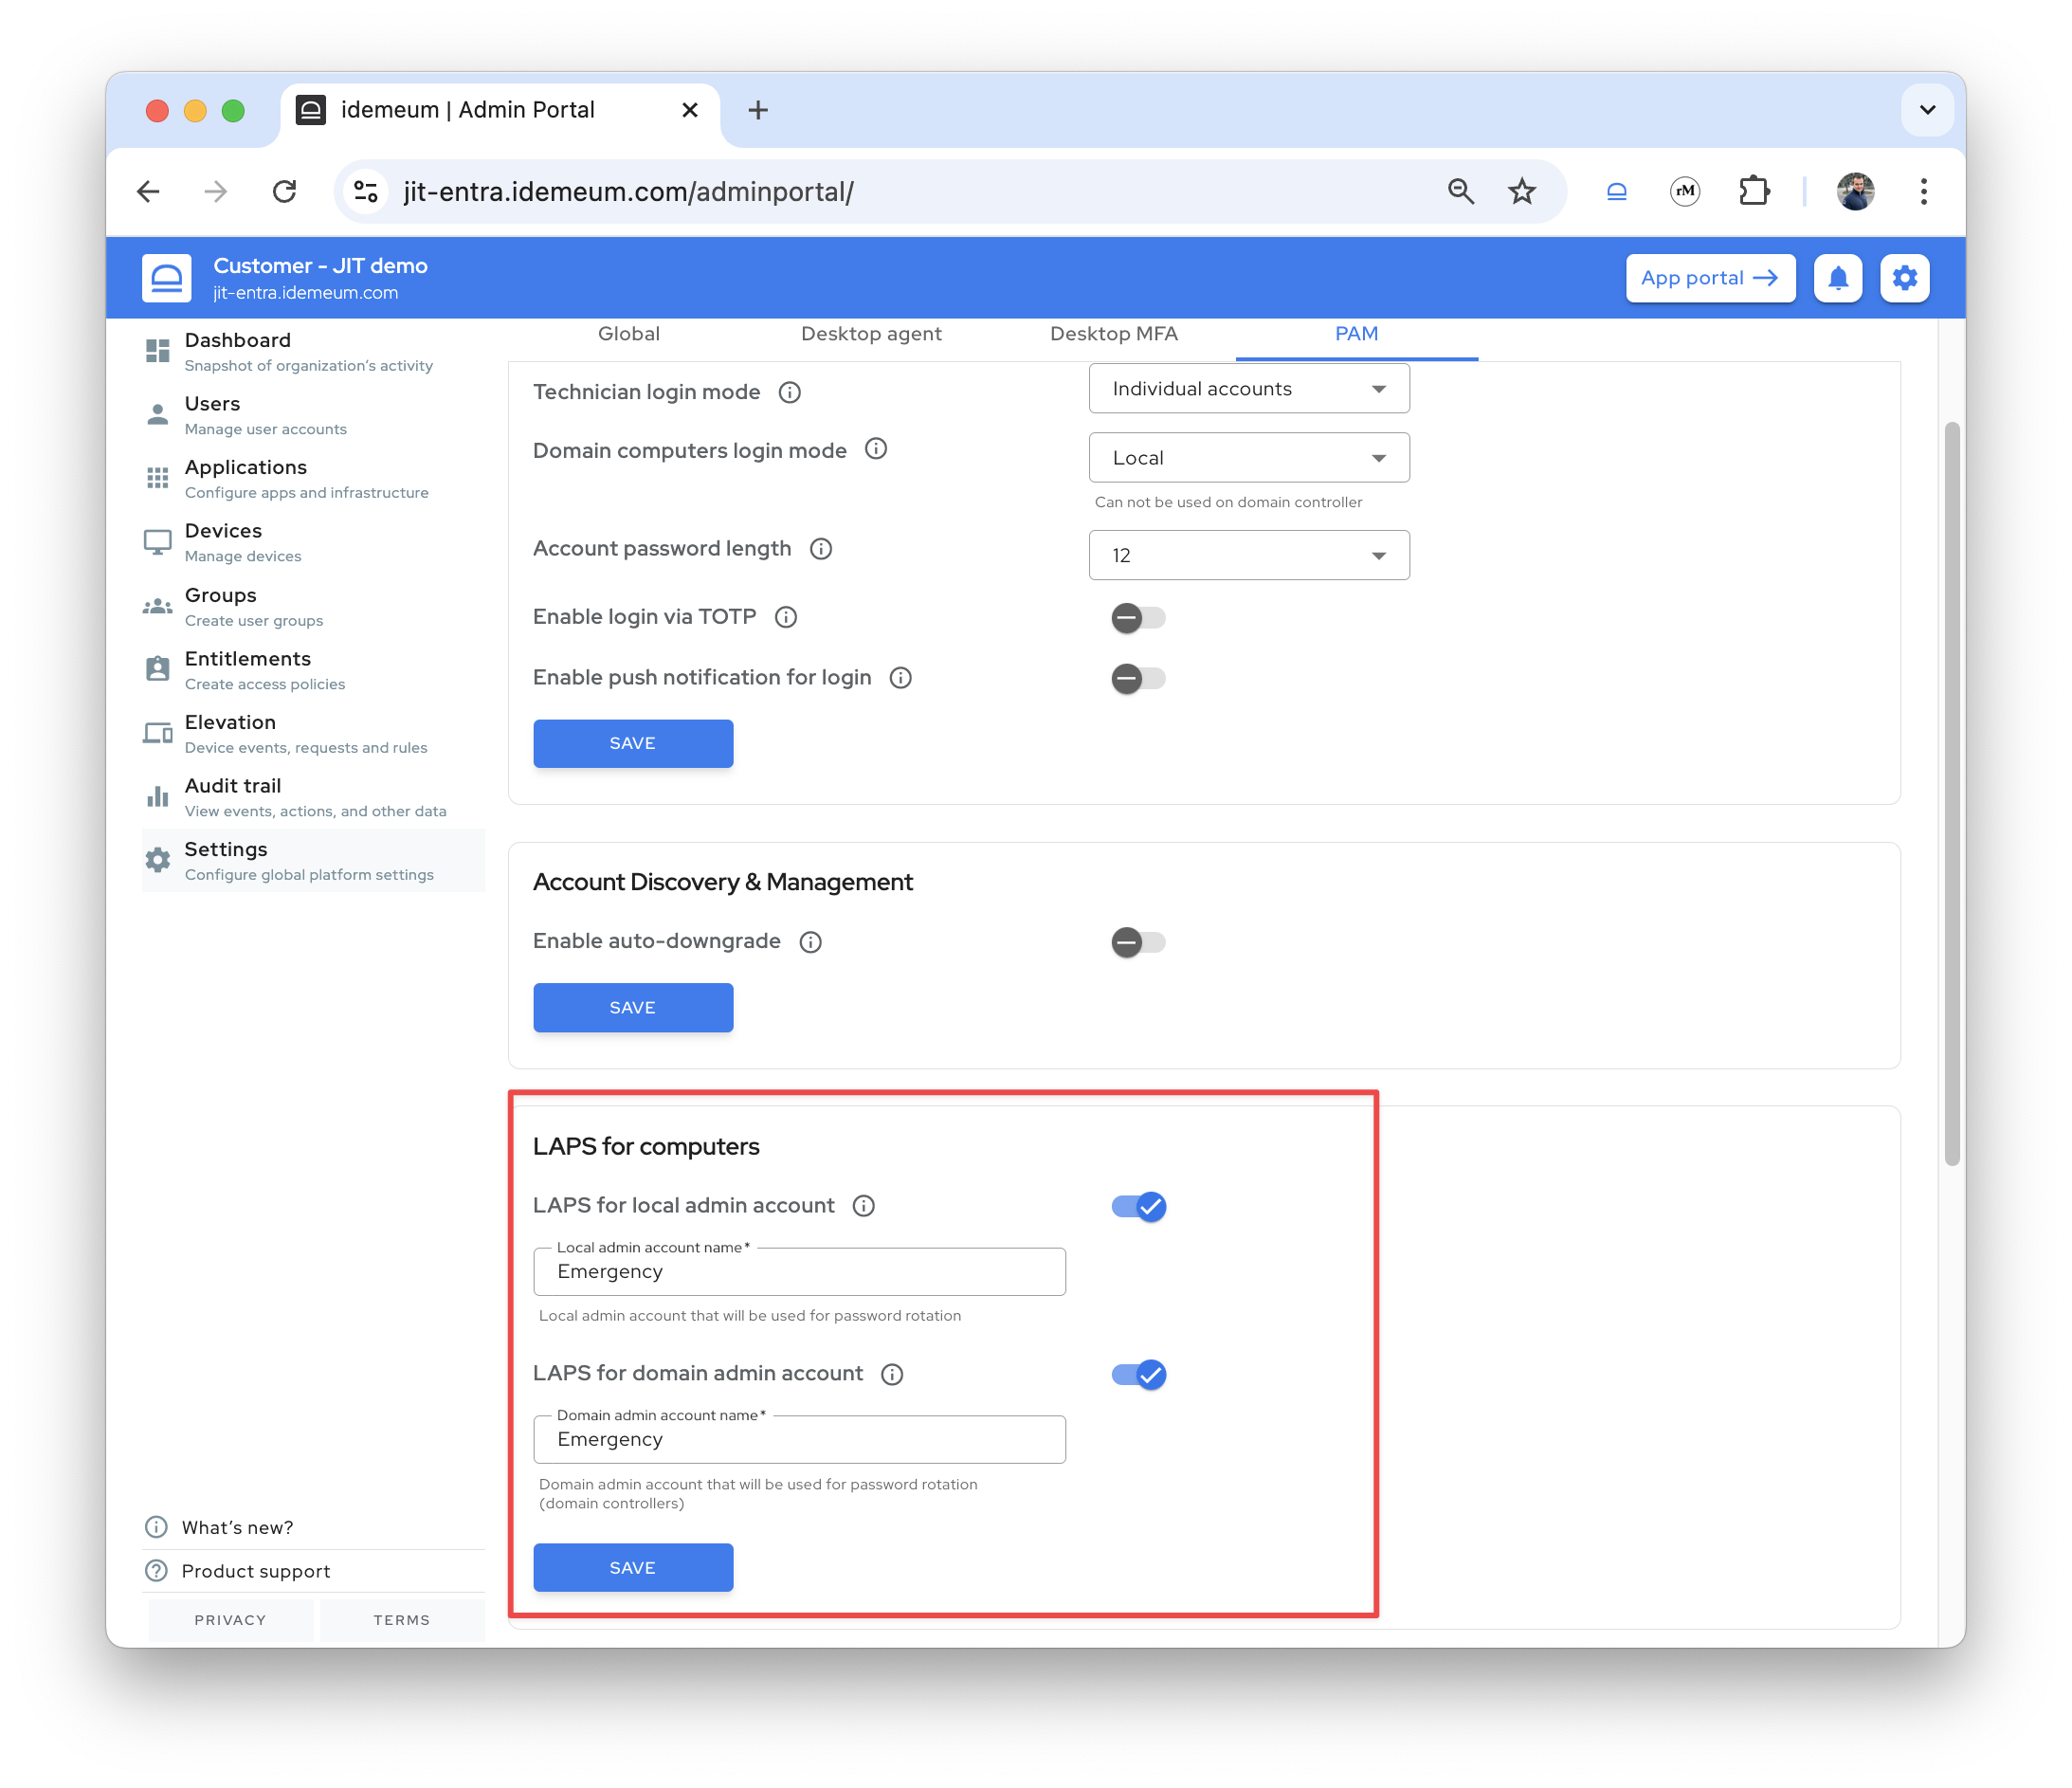
- Save your configuration
Install idemeum agent
- Access admin portal of the customer tenant
- Navigate to
Devices→Installation - Copy the script (MacOS or Windows) and execute it as
adminuser on Windows or MacOS workstation
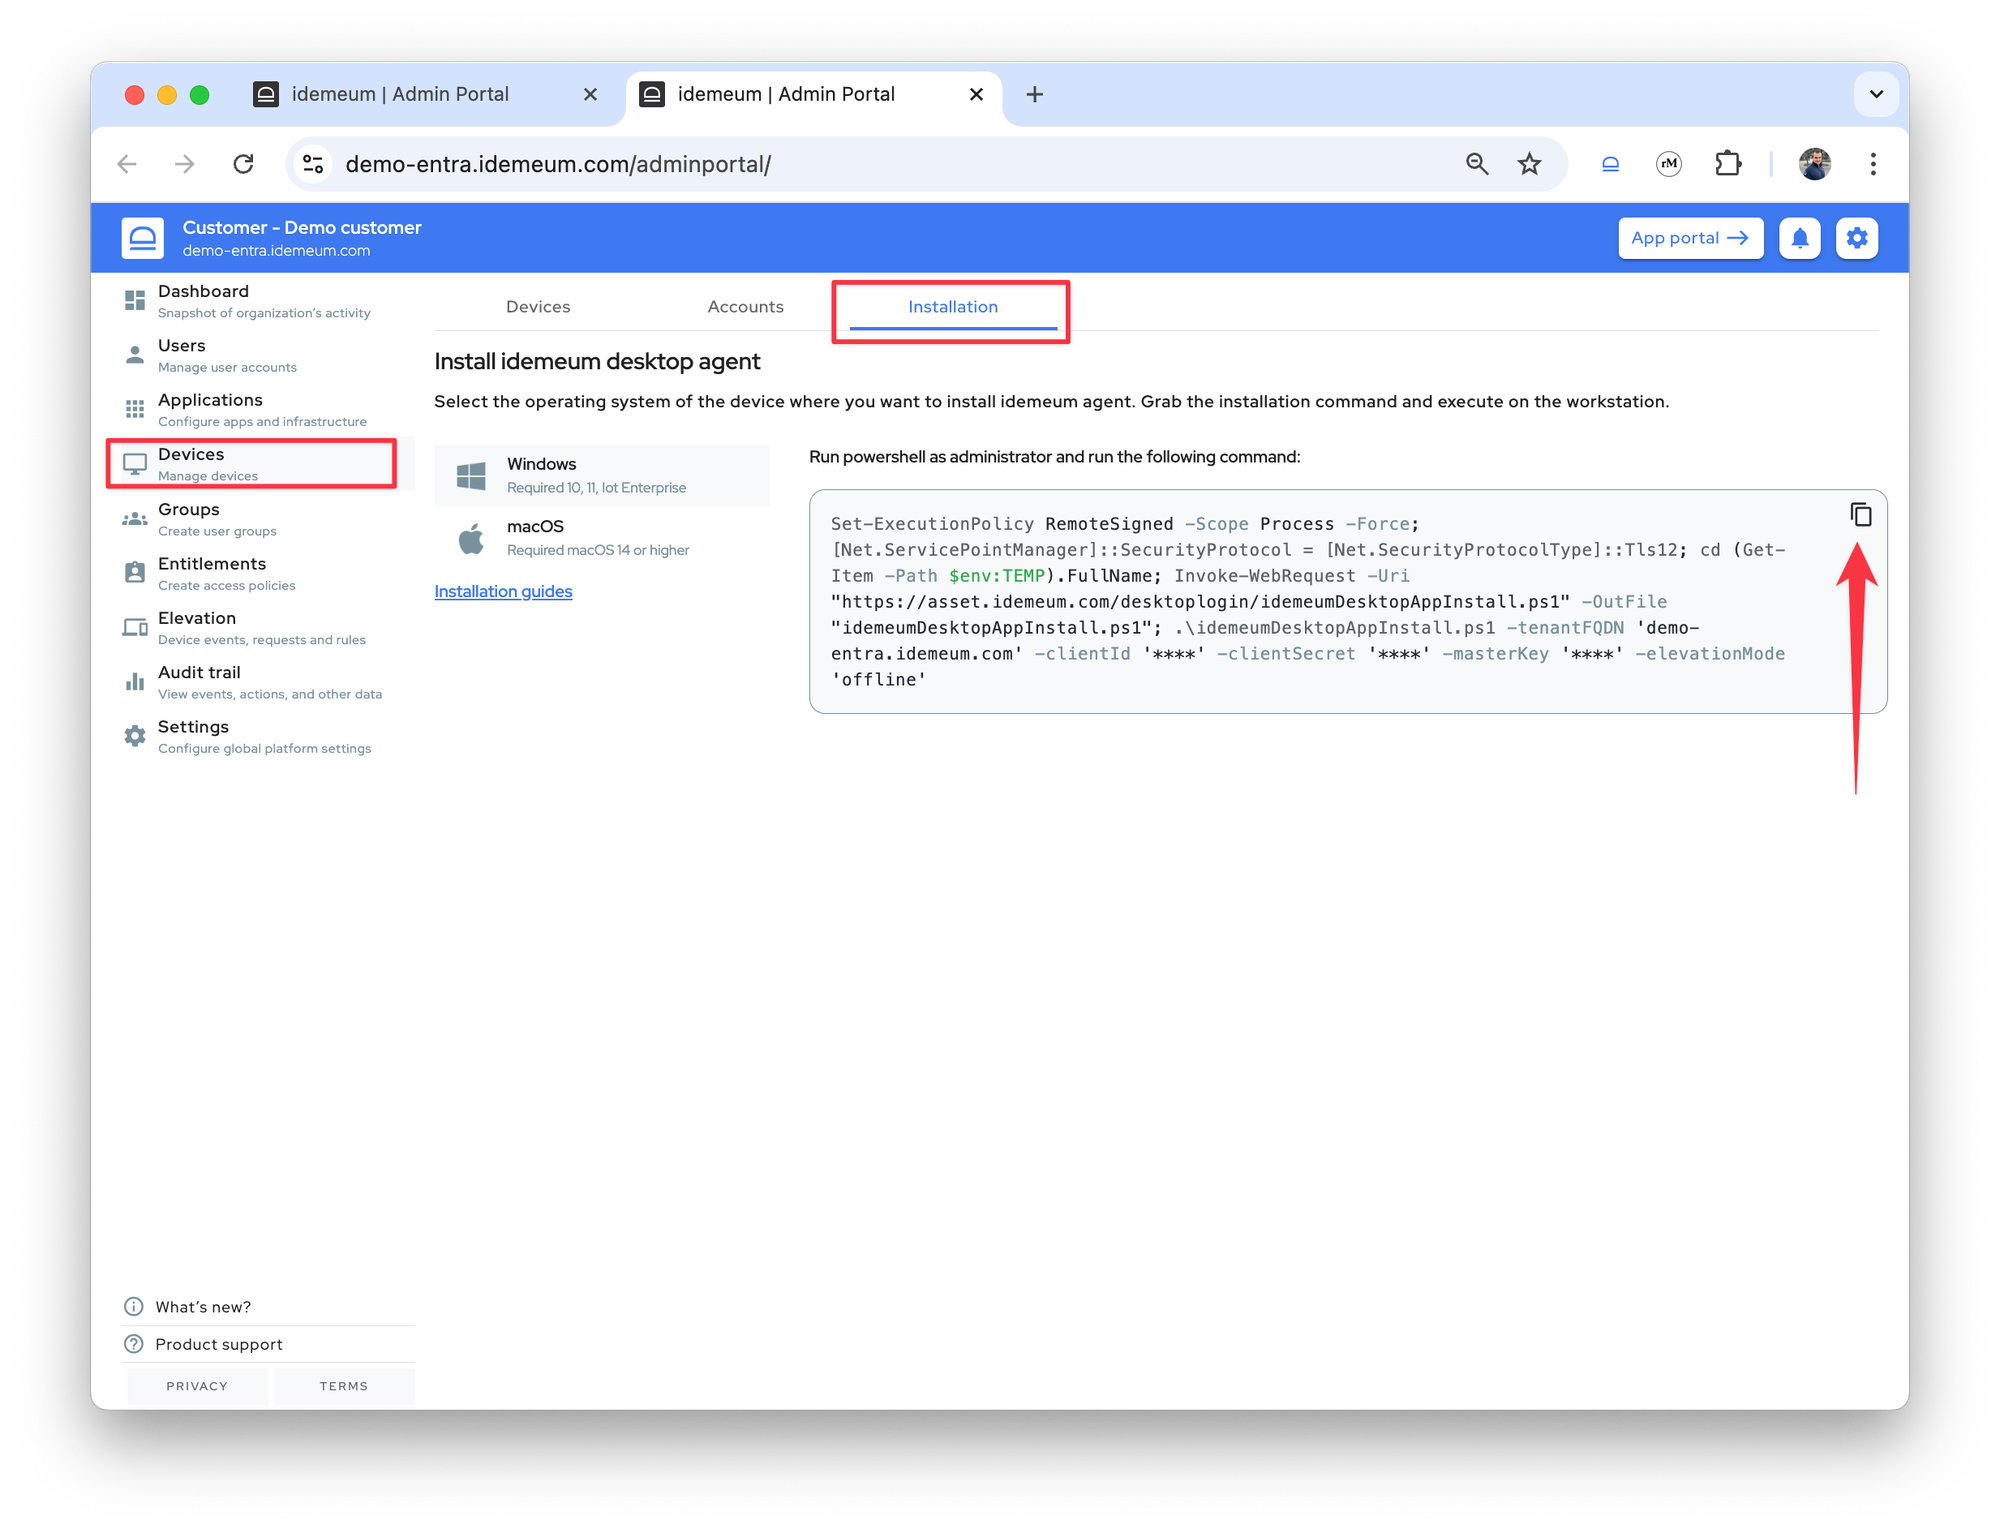
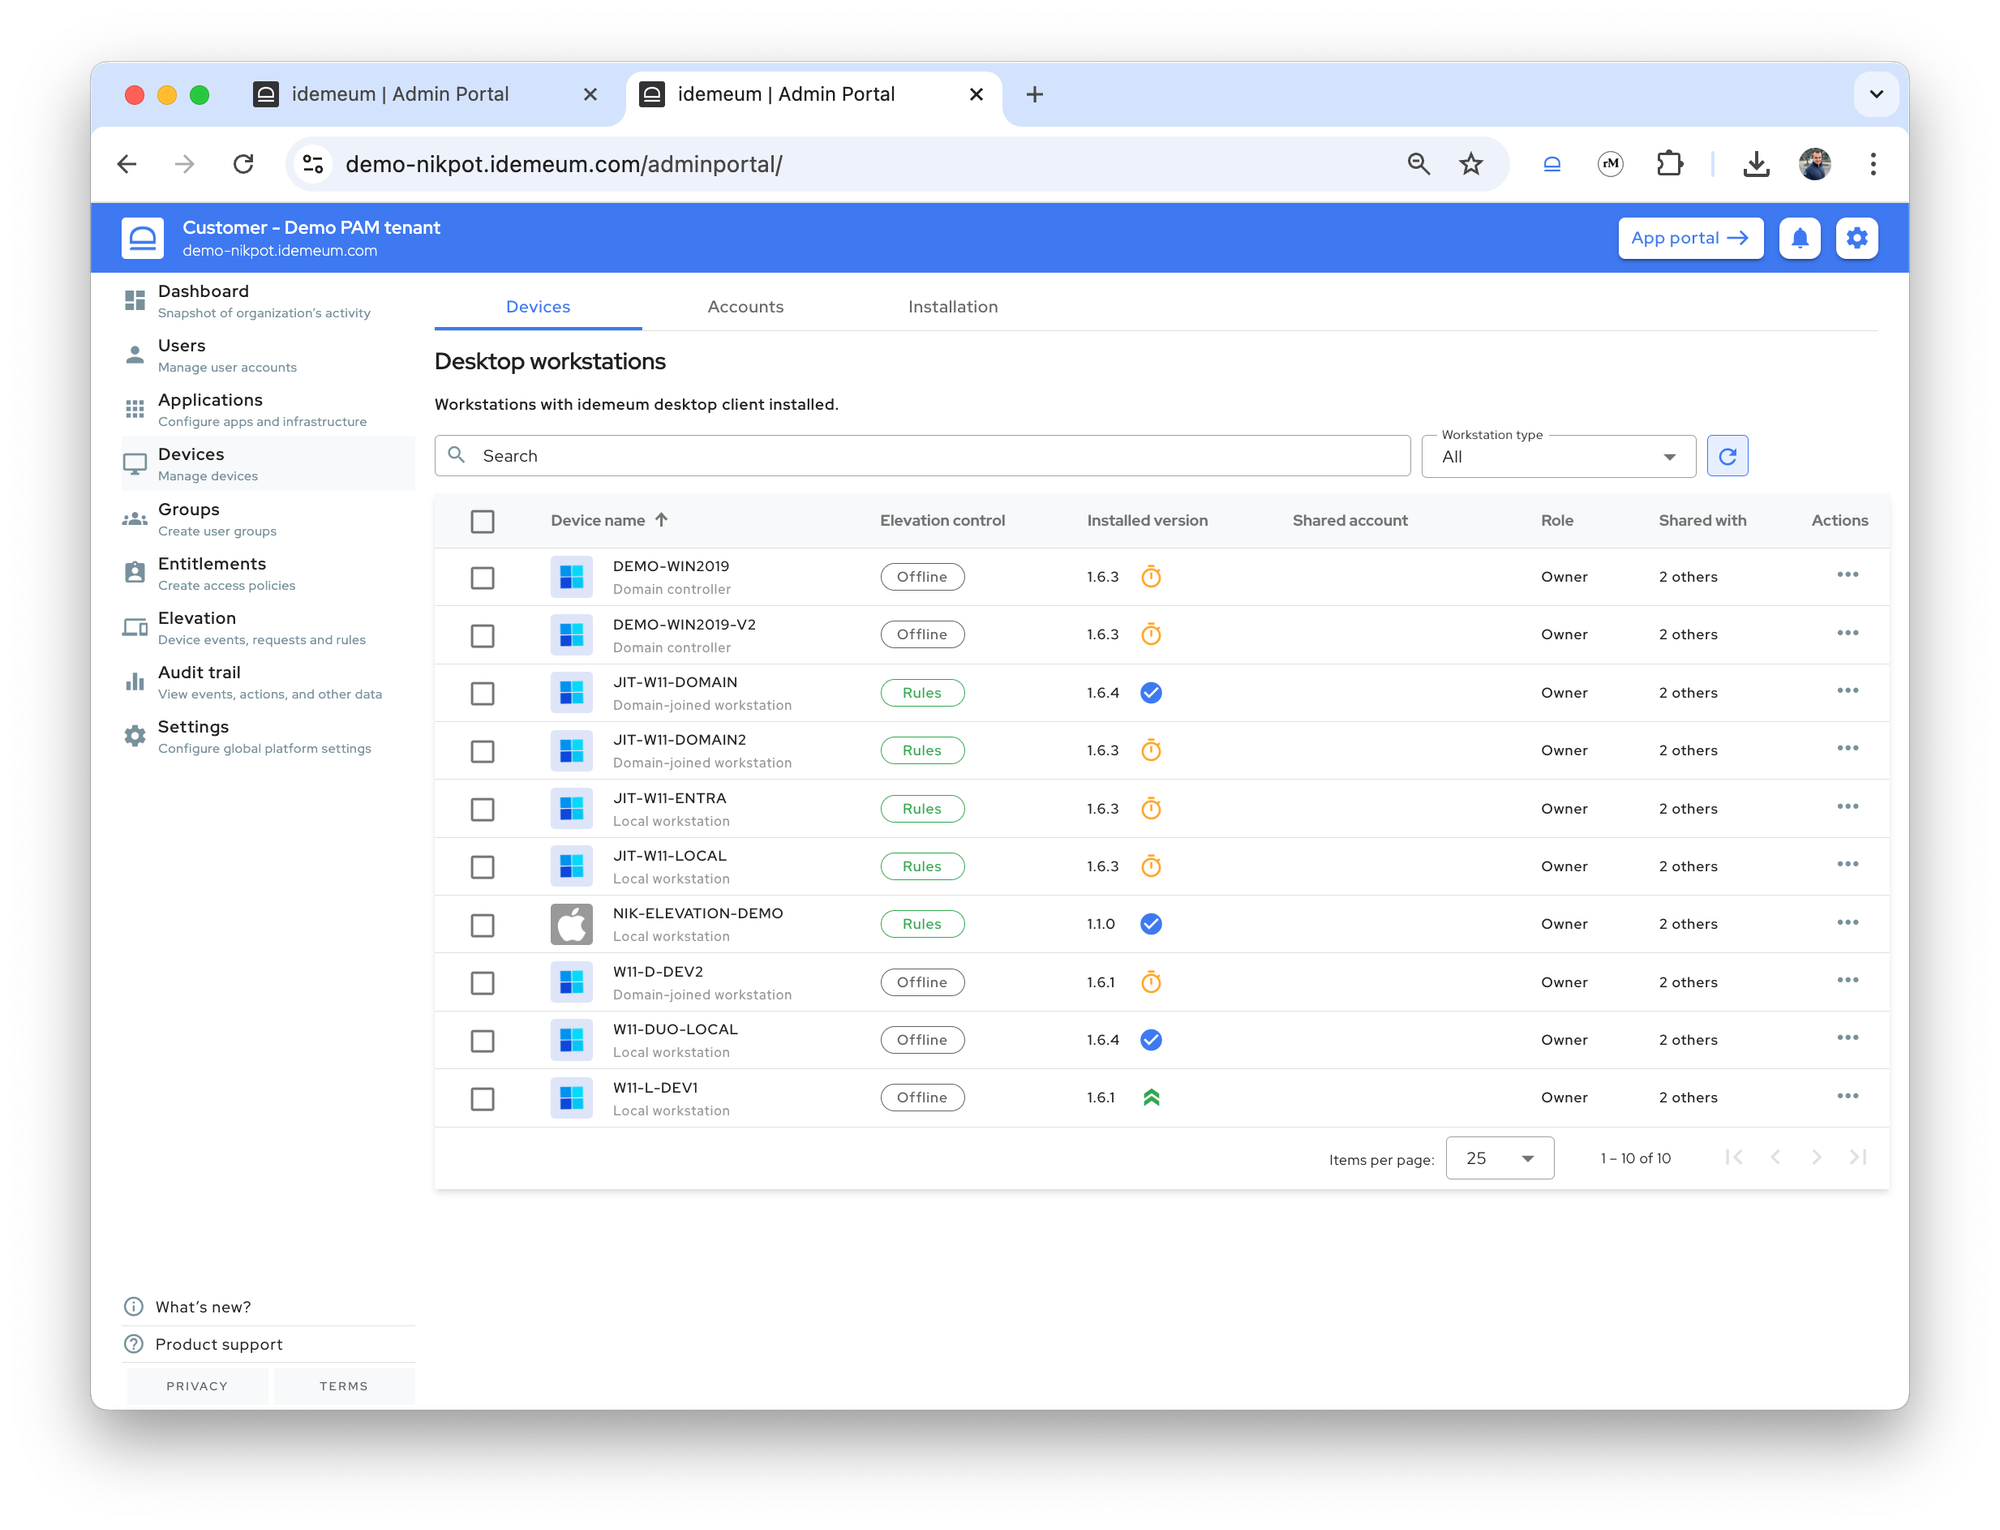
Once the agents are properly installed, they will start showing up in the Devices section.
View LAPS credentials
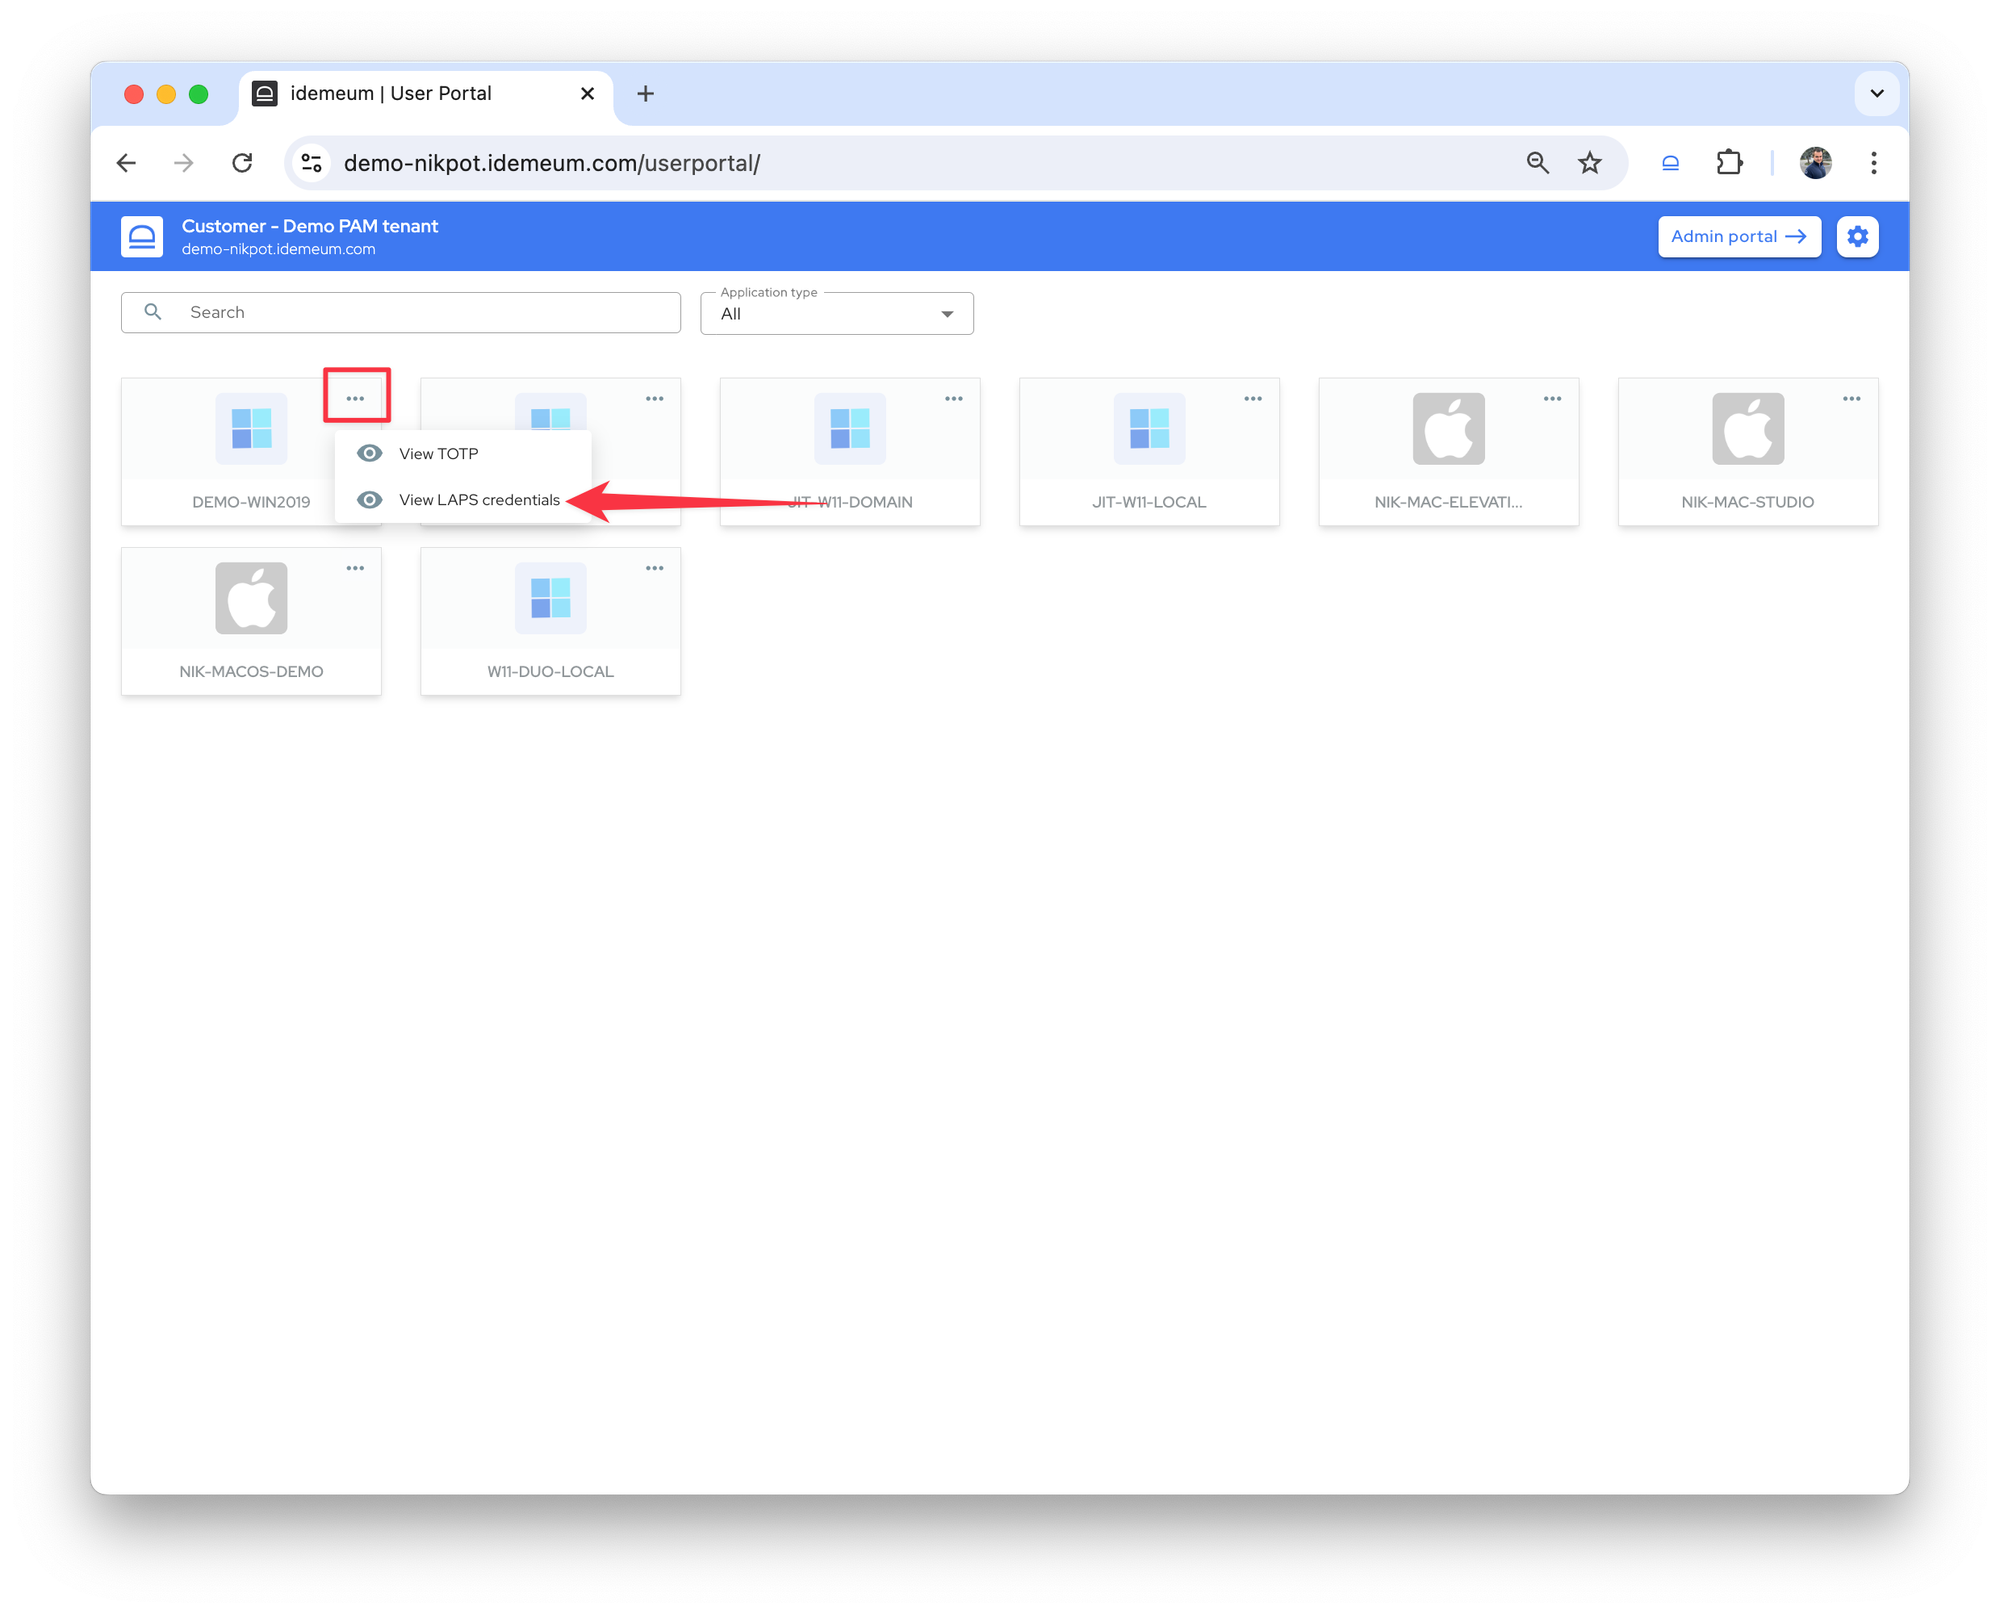
You can now view LAPS credentials for workstations:
- Navigate to customer tenant and access user portal (click on the
App portalbutton at the top right) - Find the device you want to view LAPS credentials for and click on
... - Choose
View LAPS credentials
Questions?
If you have any questions please join our Discord chat, and we will help.