MSP guide - JIT computer access
In this guide we will set up passwordless just-in-time access to computers.
Create customer
As a first step we will create a customer tenant / organization for which we will be testing just-in-time computer access.
- Login to your MSP idemeum admin portal
- Navigate to
Customers - Click
Add customer→Add manually
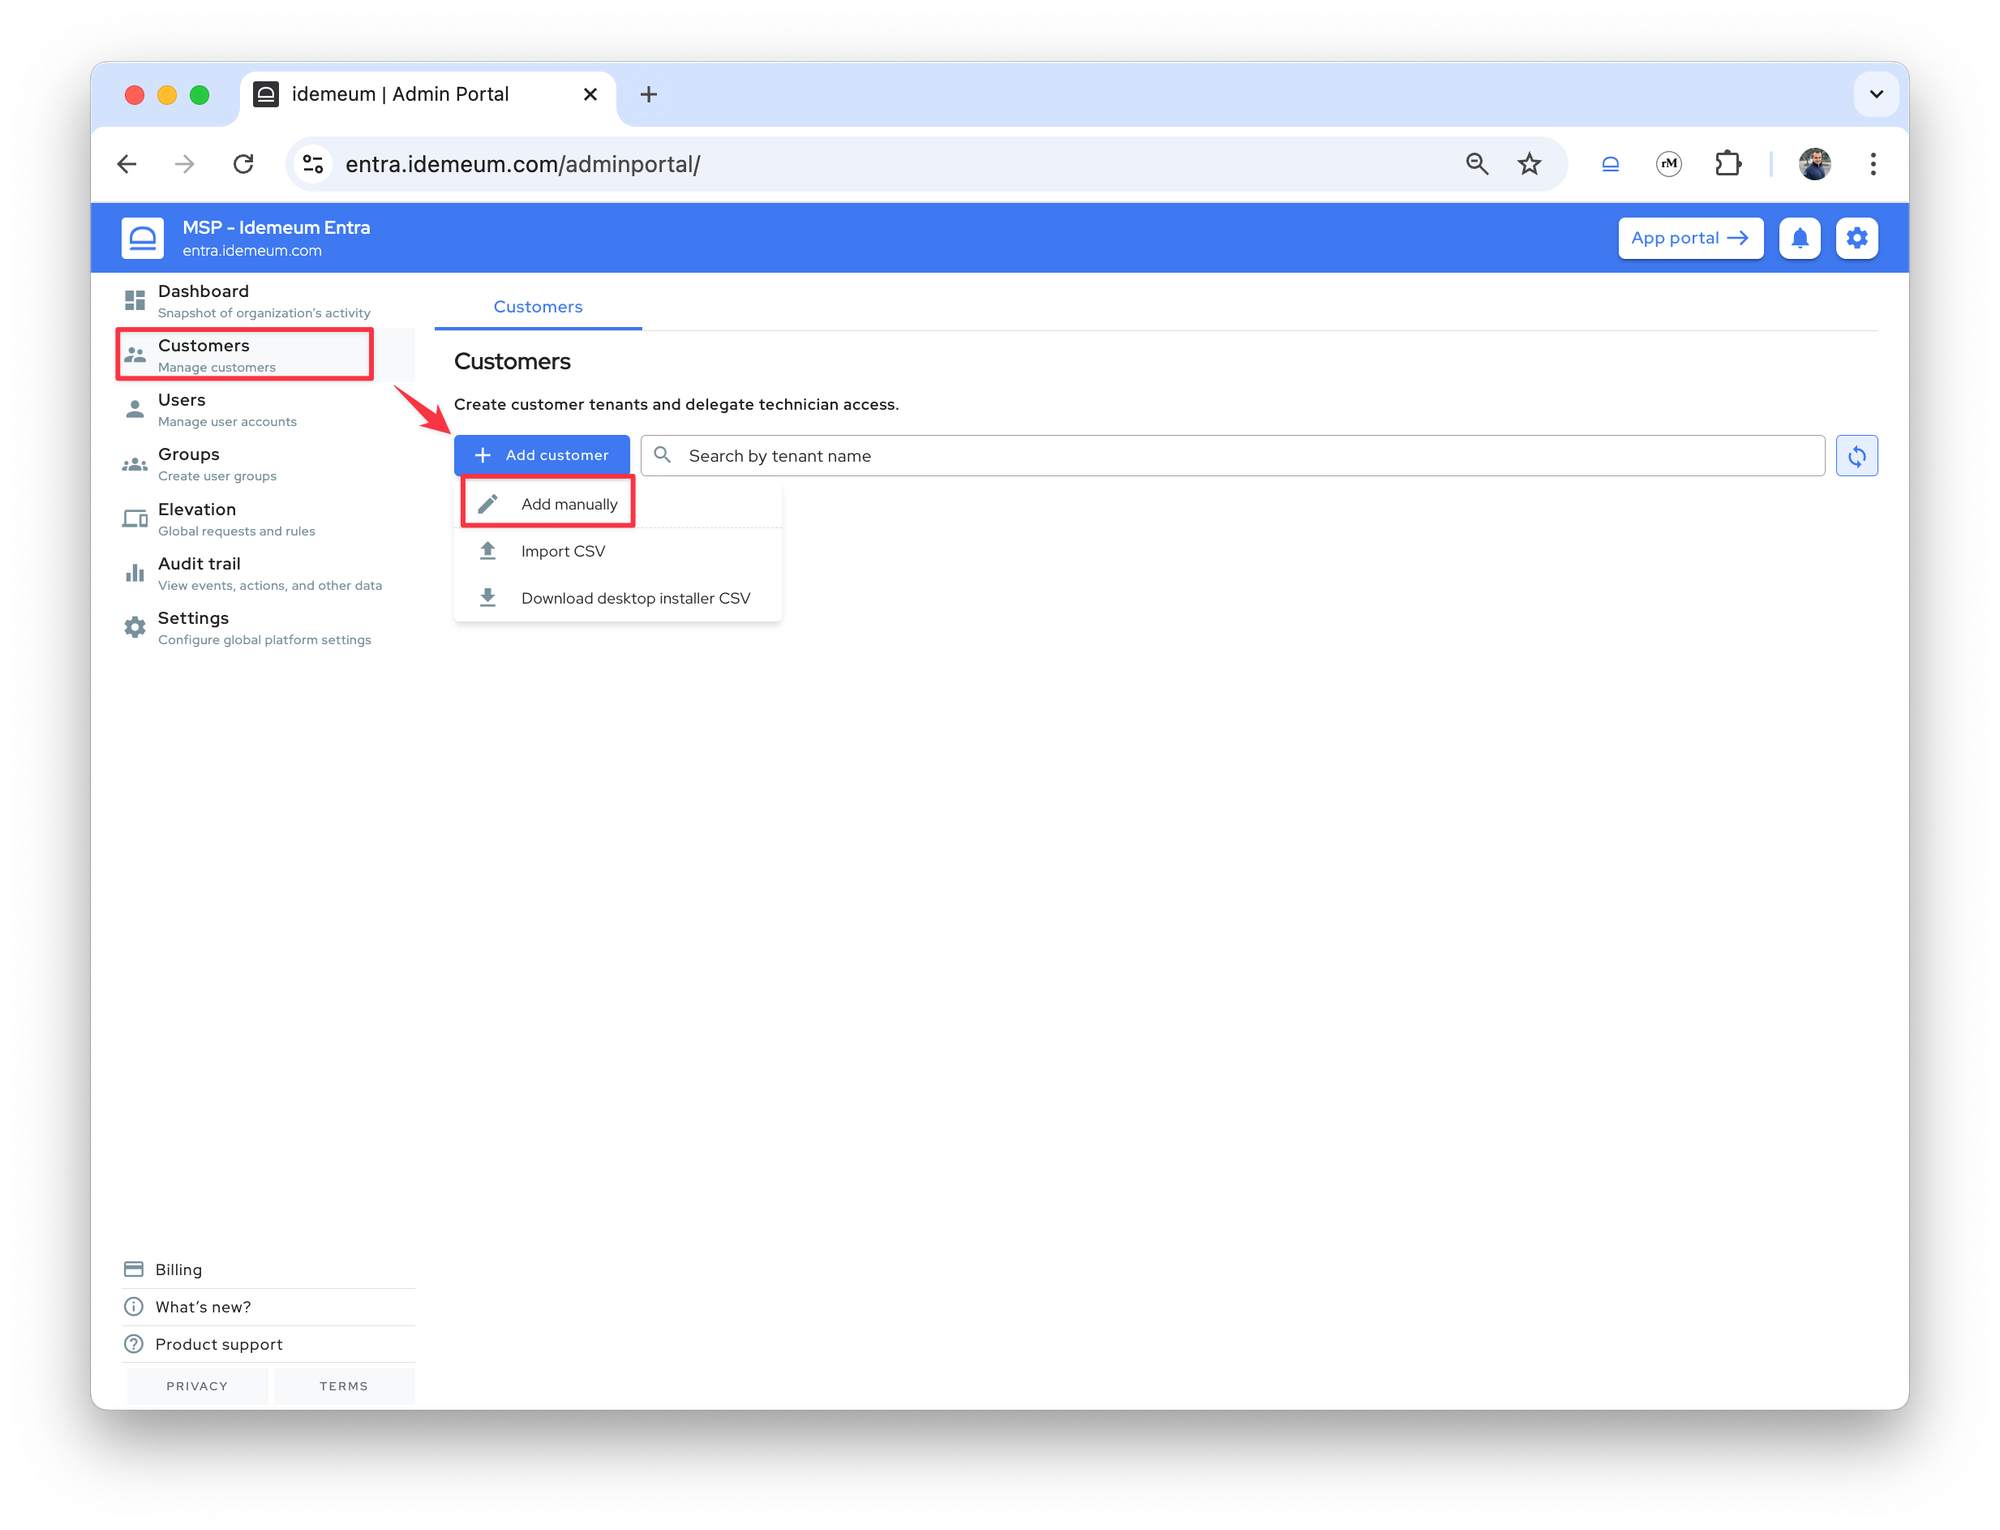
- Provide the customer
name(will be used as a subdomain of your MSP tenant) anddisplay name(the friendly display name of a customer tenant)
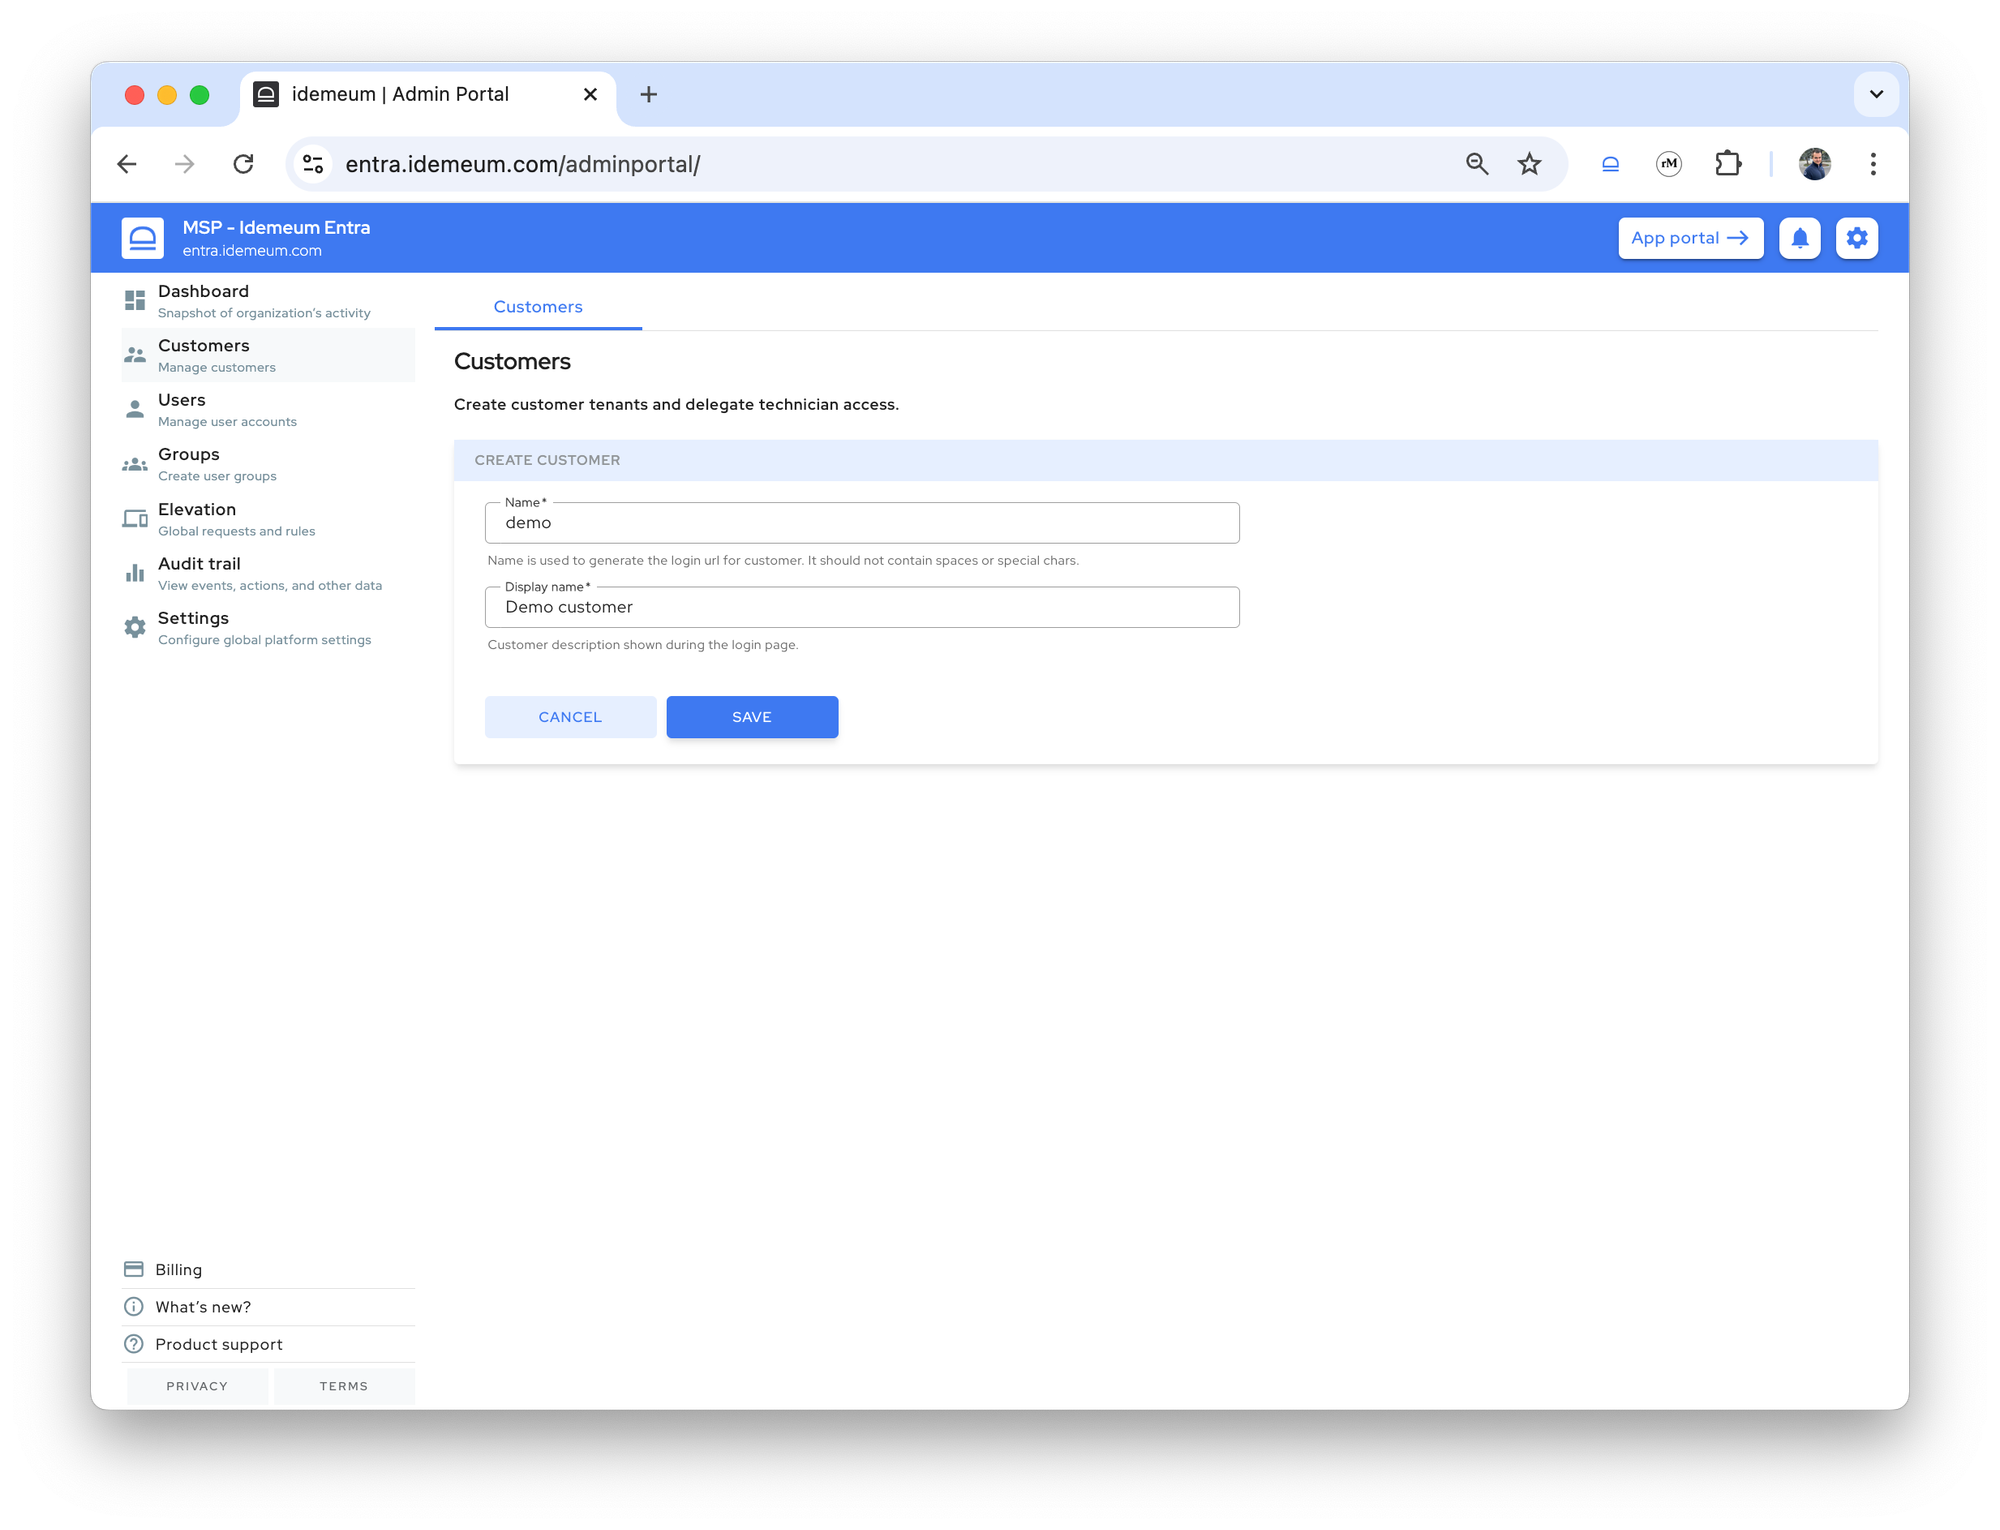
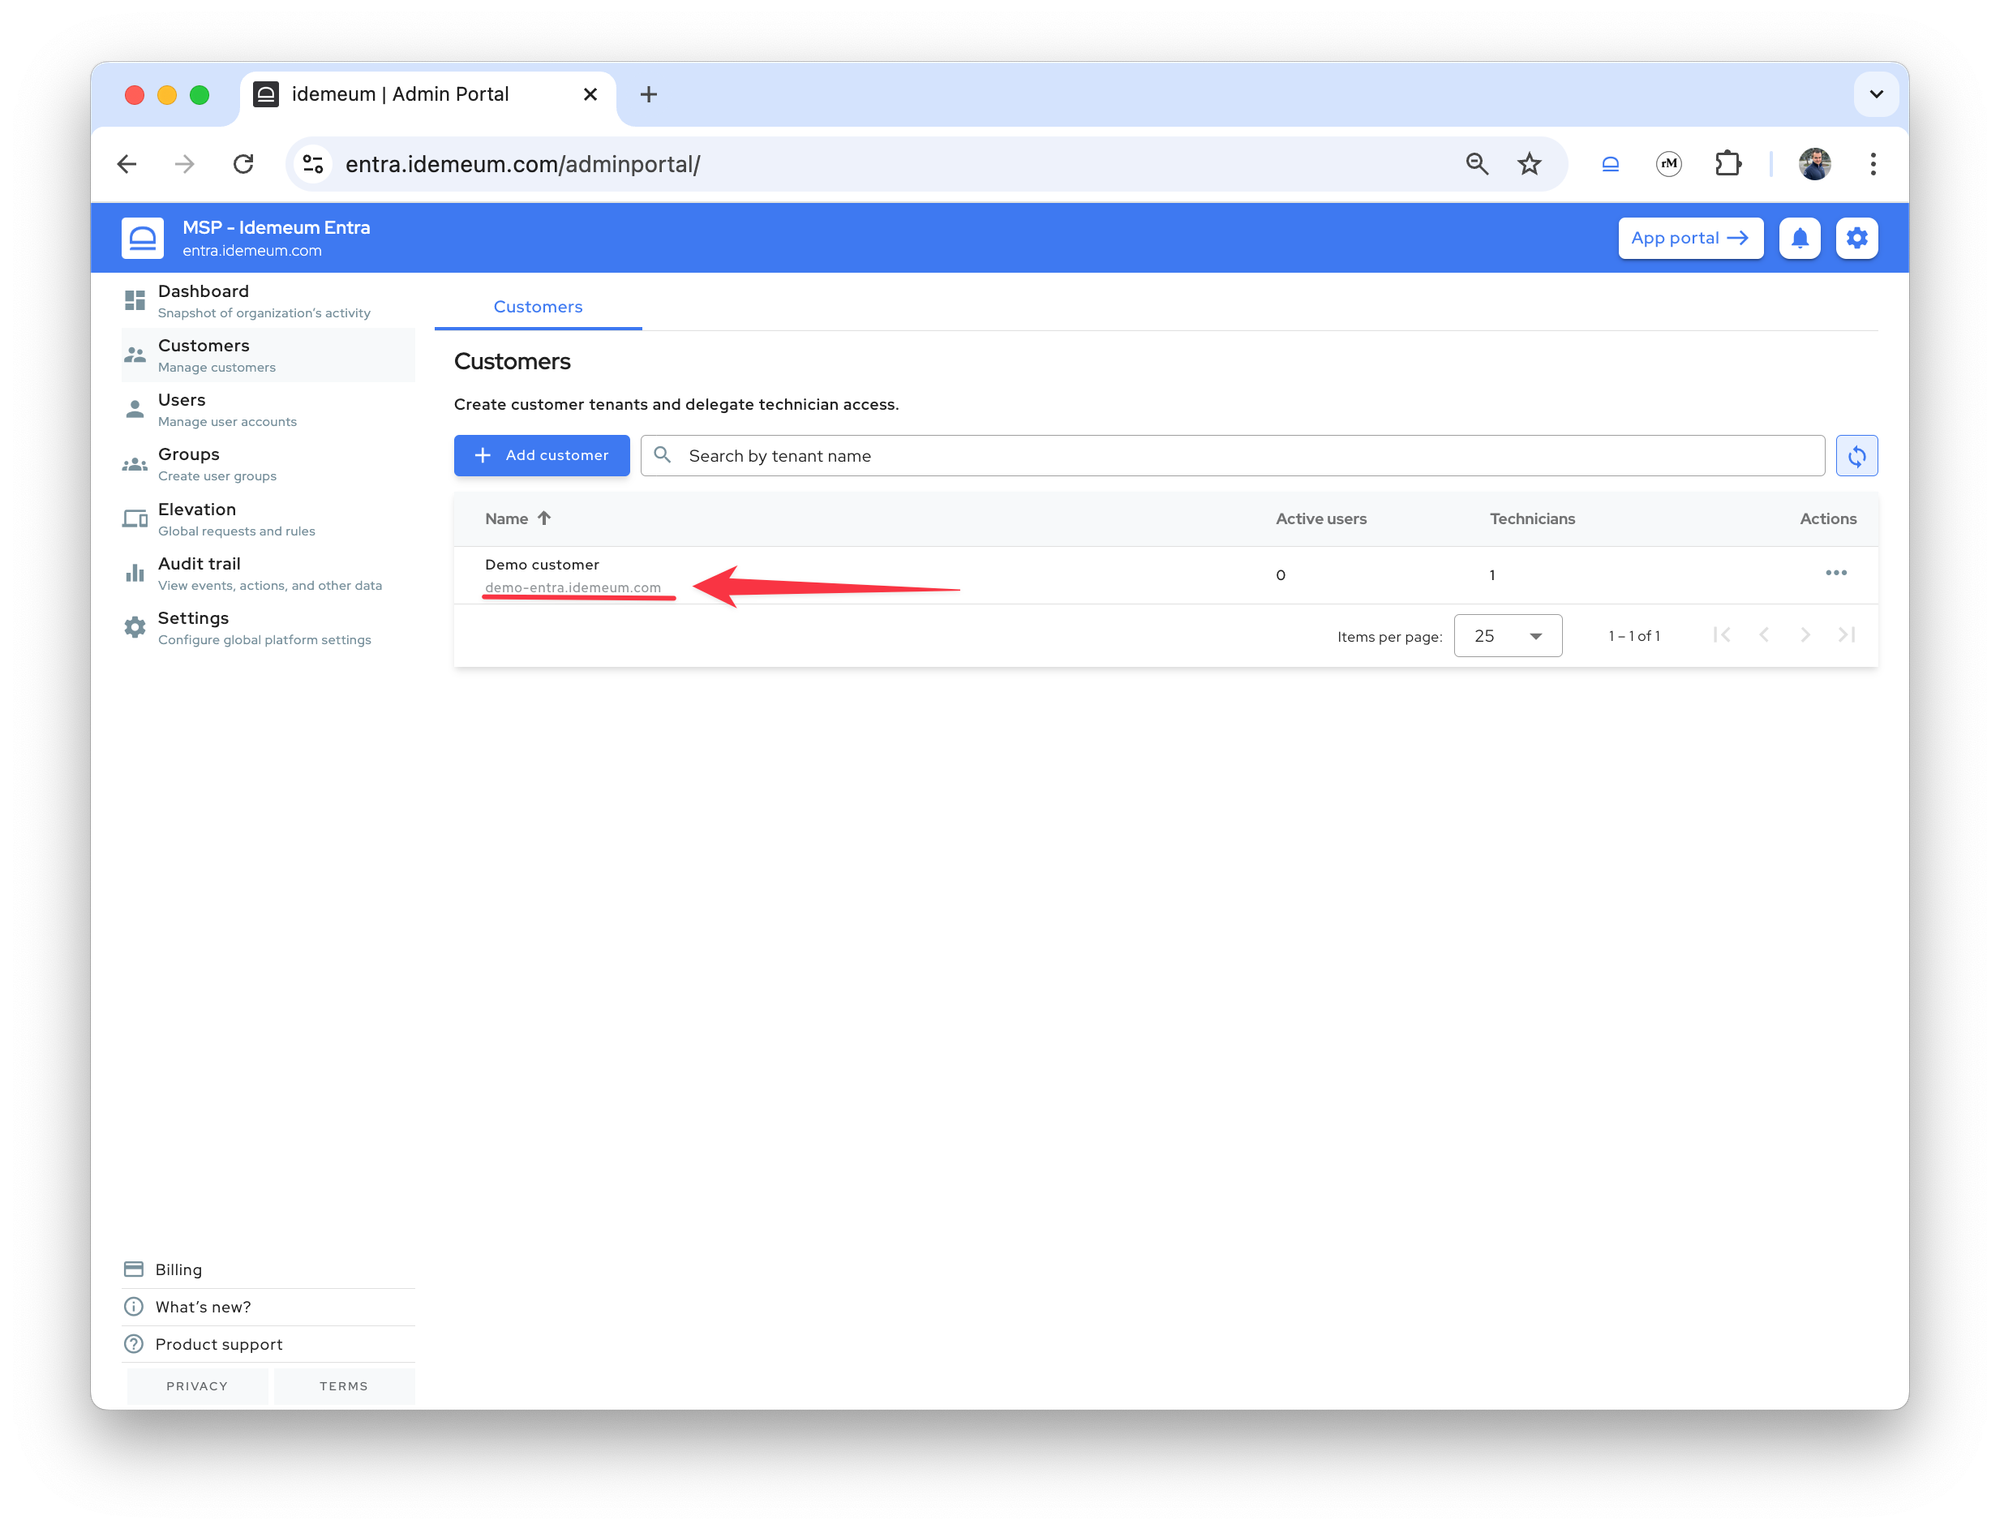
Savethe tenant configuration
Now you can access the customer tenant name by clicking on a link, and you will be automatically logged in.
Configure login settings
In this step we will configure how technicians will access computers with just-in-time accounts.
- The default mode is to use named local admin accounts. If this is what you want, you do not need any changes and can skip this step. You can install idemeum on any Windows workstation (local, domain, or Entra joined, except domain controllers) and login into any workstation with local admin account.
- If you would like to use named domain admin accounts, you need to make additional configuration as described below. In this case you need to install idemeum agent on domain controller and domain workstations.
To enable domain accounts login mode for a customer tenant:
- Access the admin portal of the customer tenant we created above
- Navigate to
Settings→PAM - For
Domain computers login modechooseDomainoption
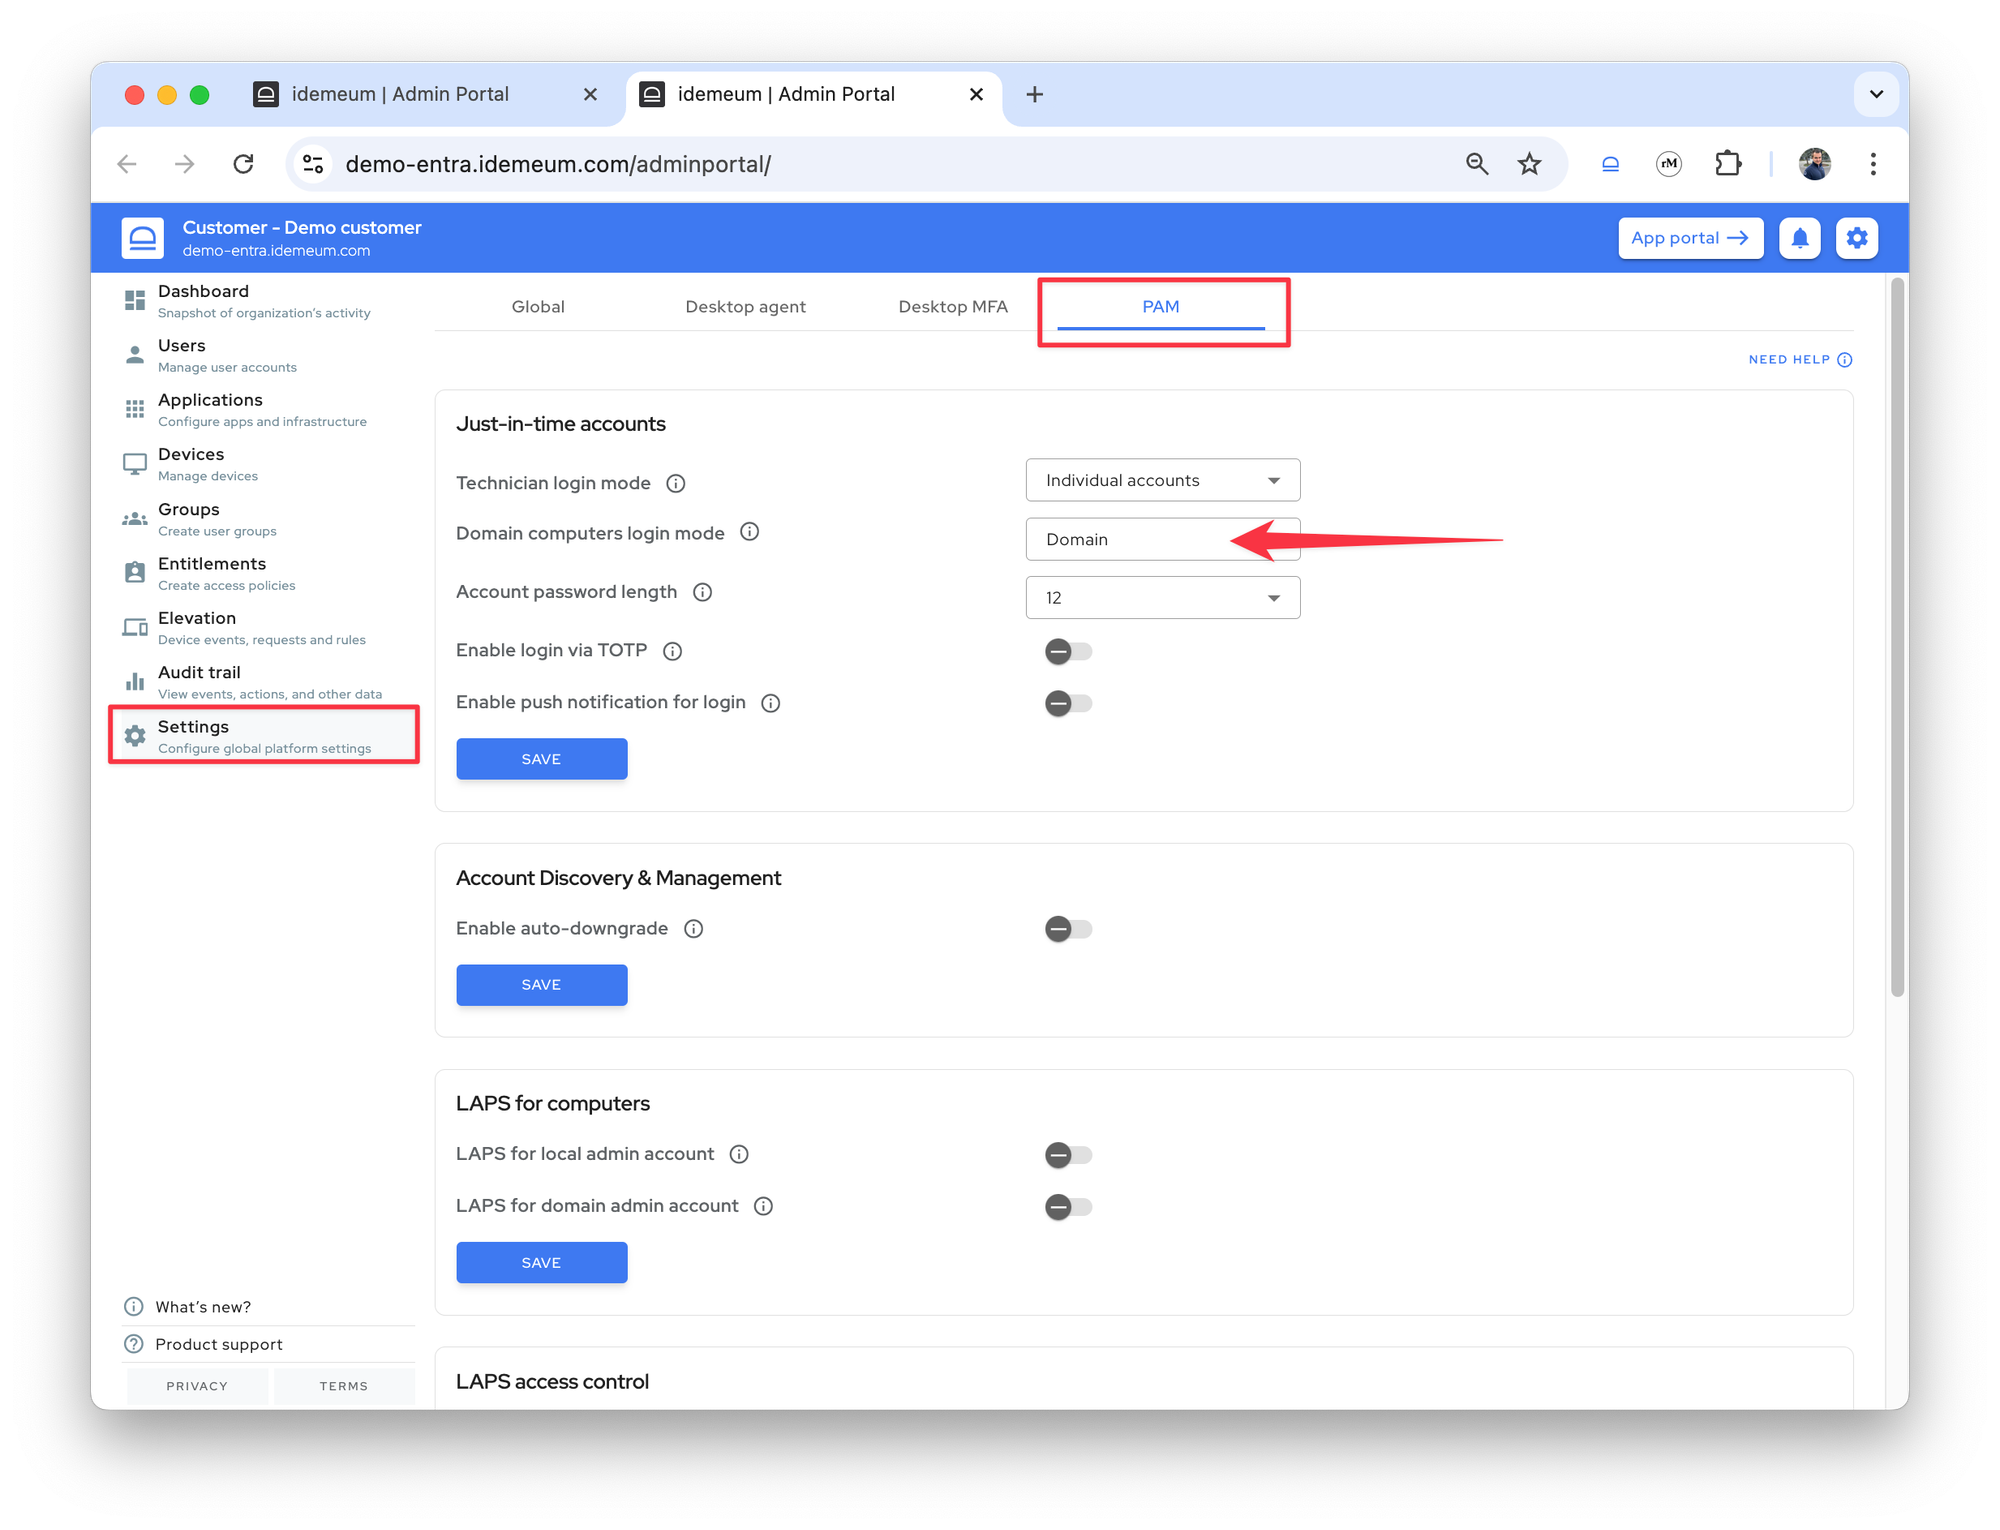
- Save the configuration
Install idemeum agent
If you are using local admin accounts, there is no need to install idemeum agent on a domain controller. If you are planning to use domain admin accounts, please install idemeum agent on domain controller and domain workstations.
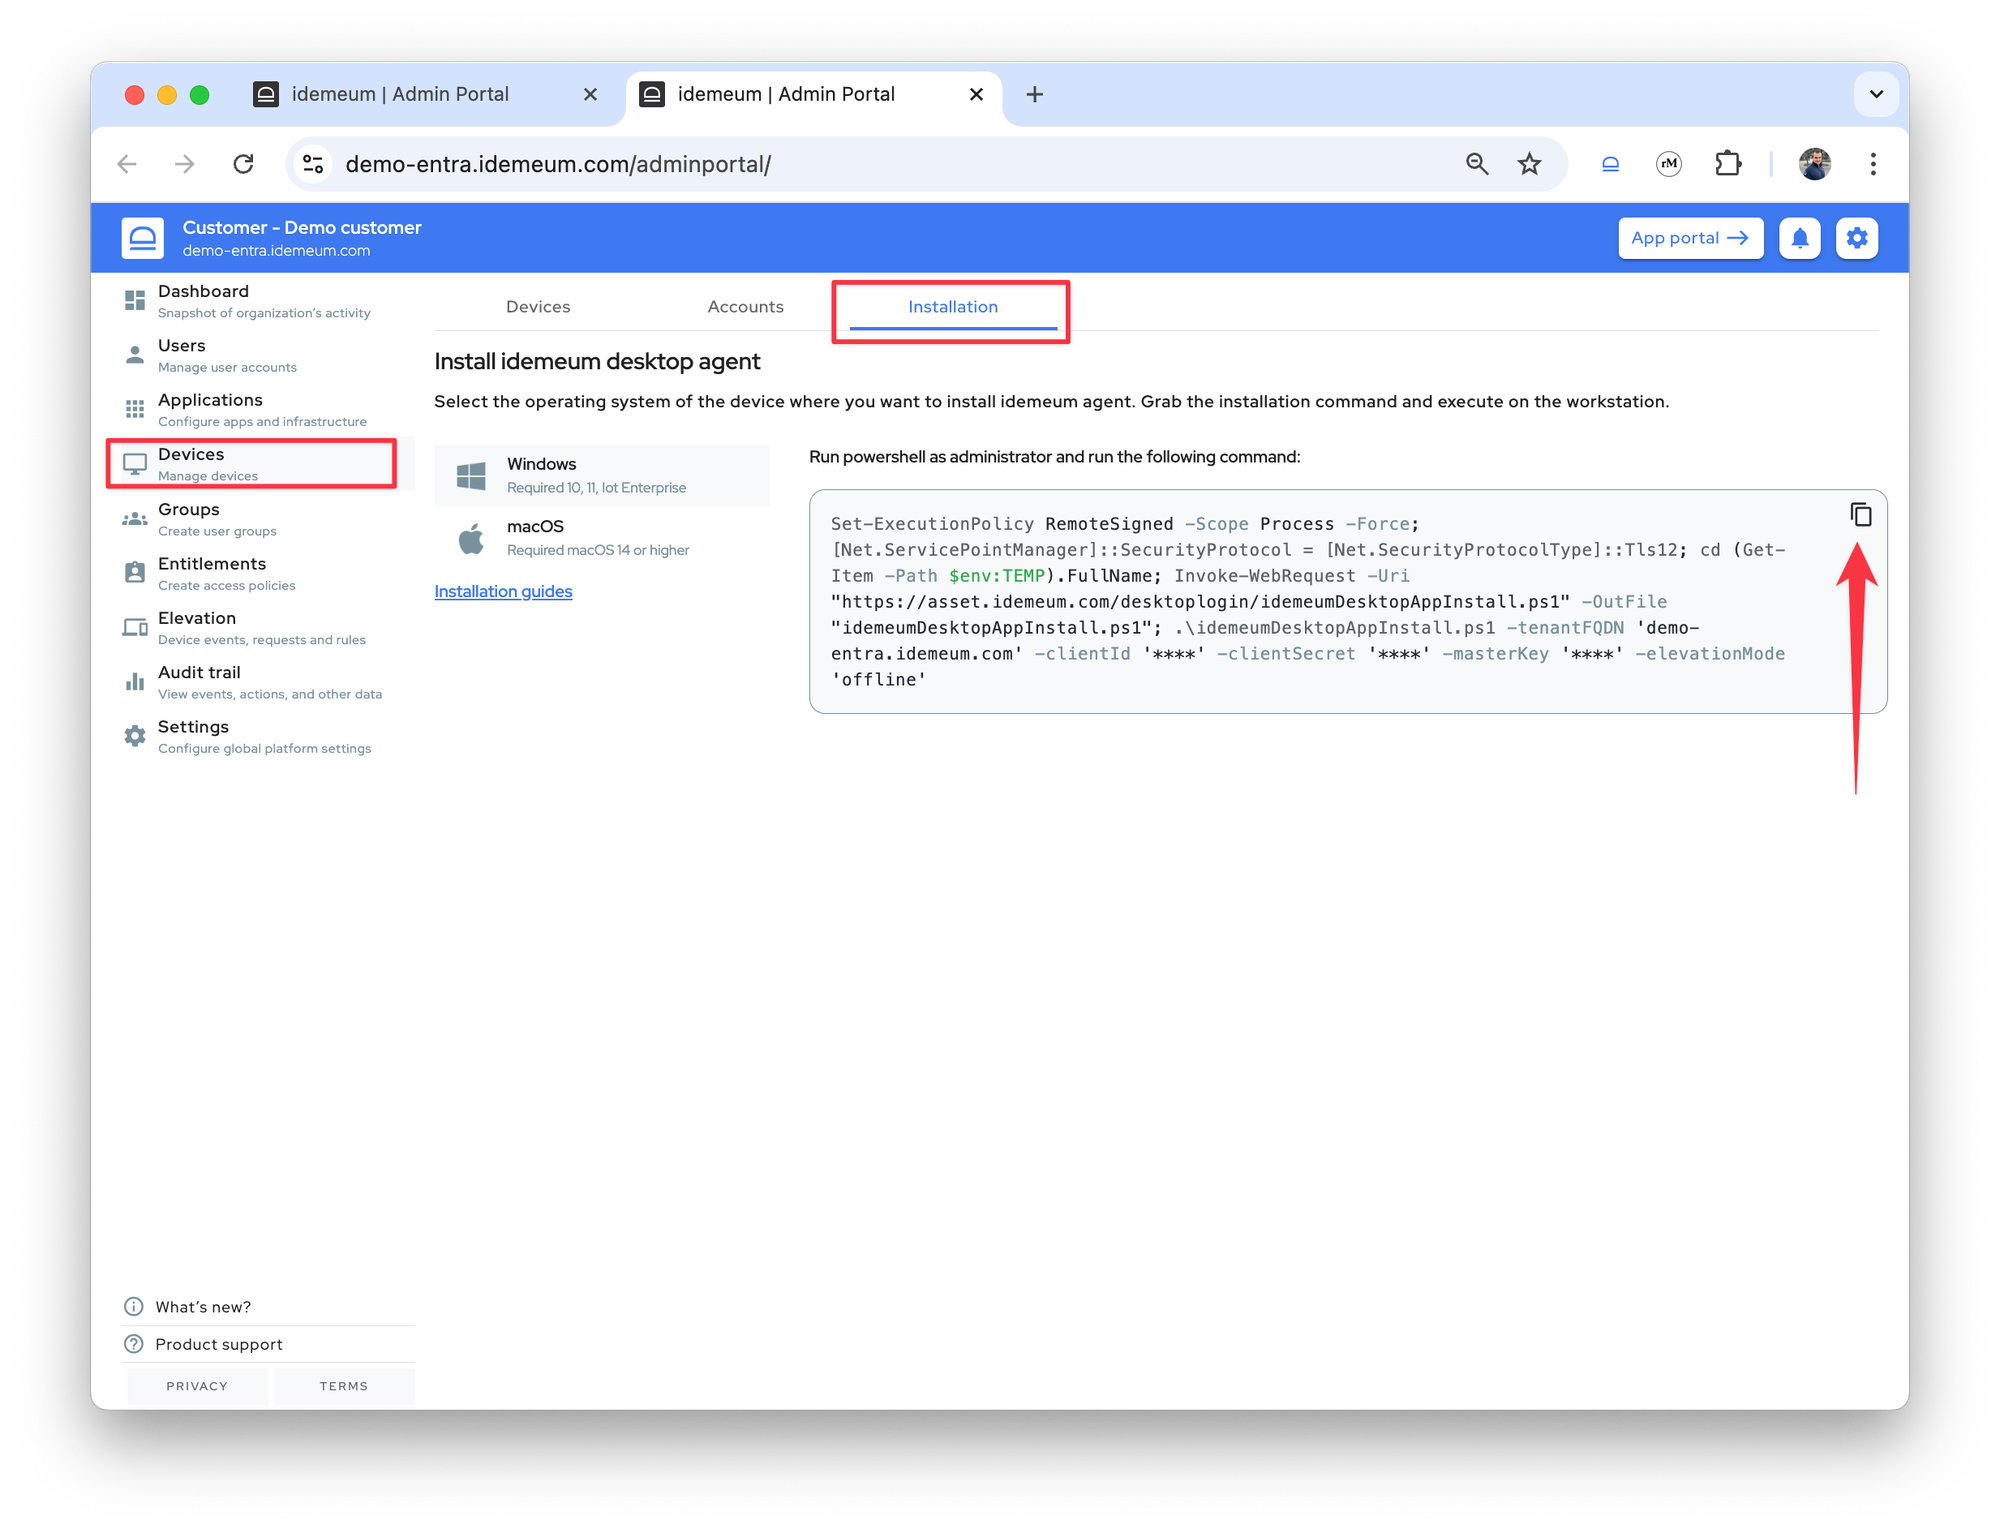
- Access admin portal of the customer tenant
- Navigate to
Devices→Installation - Copy the script (MacOS or Windows) and execute it as
adminuser on Windows or MacOS workstation
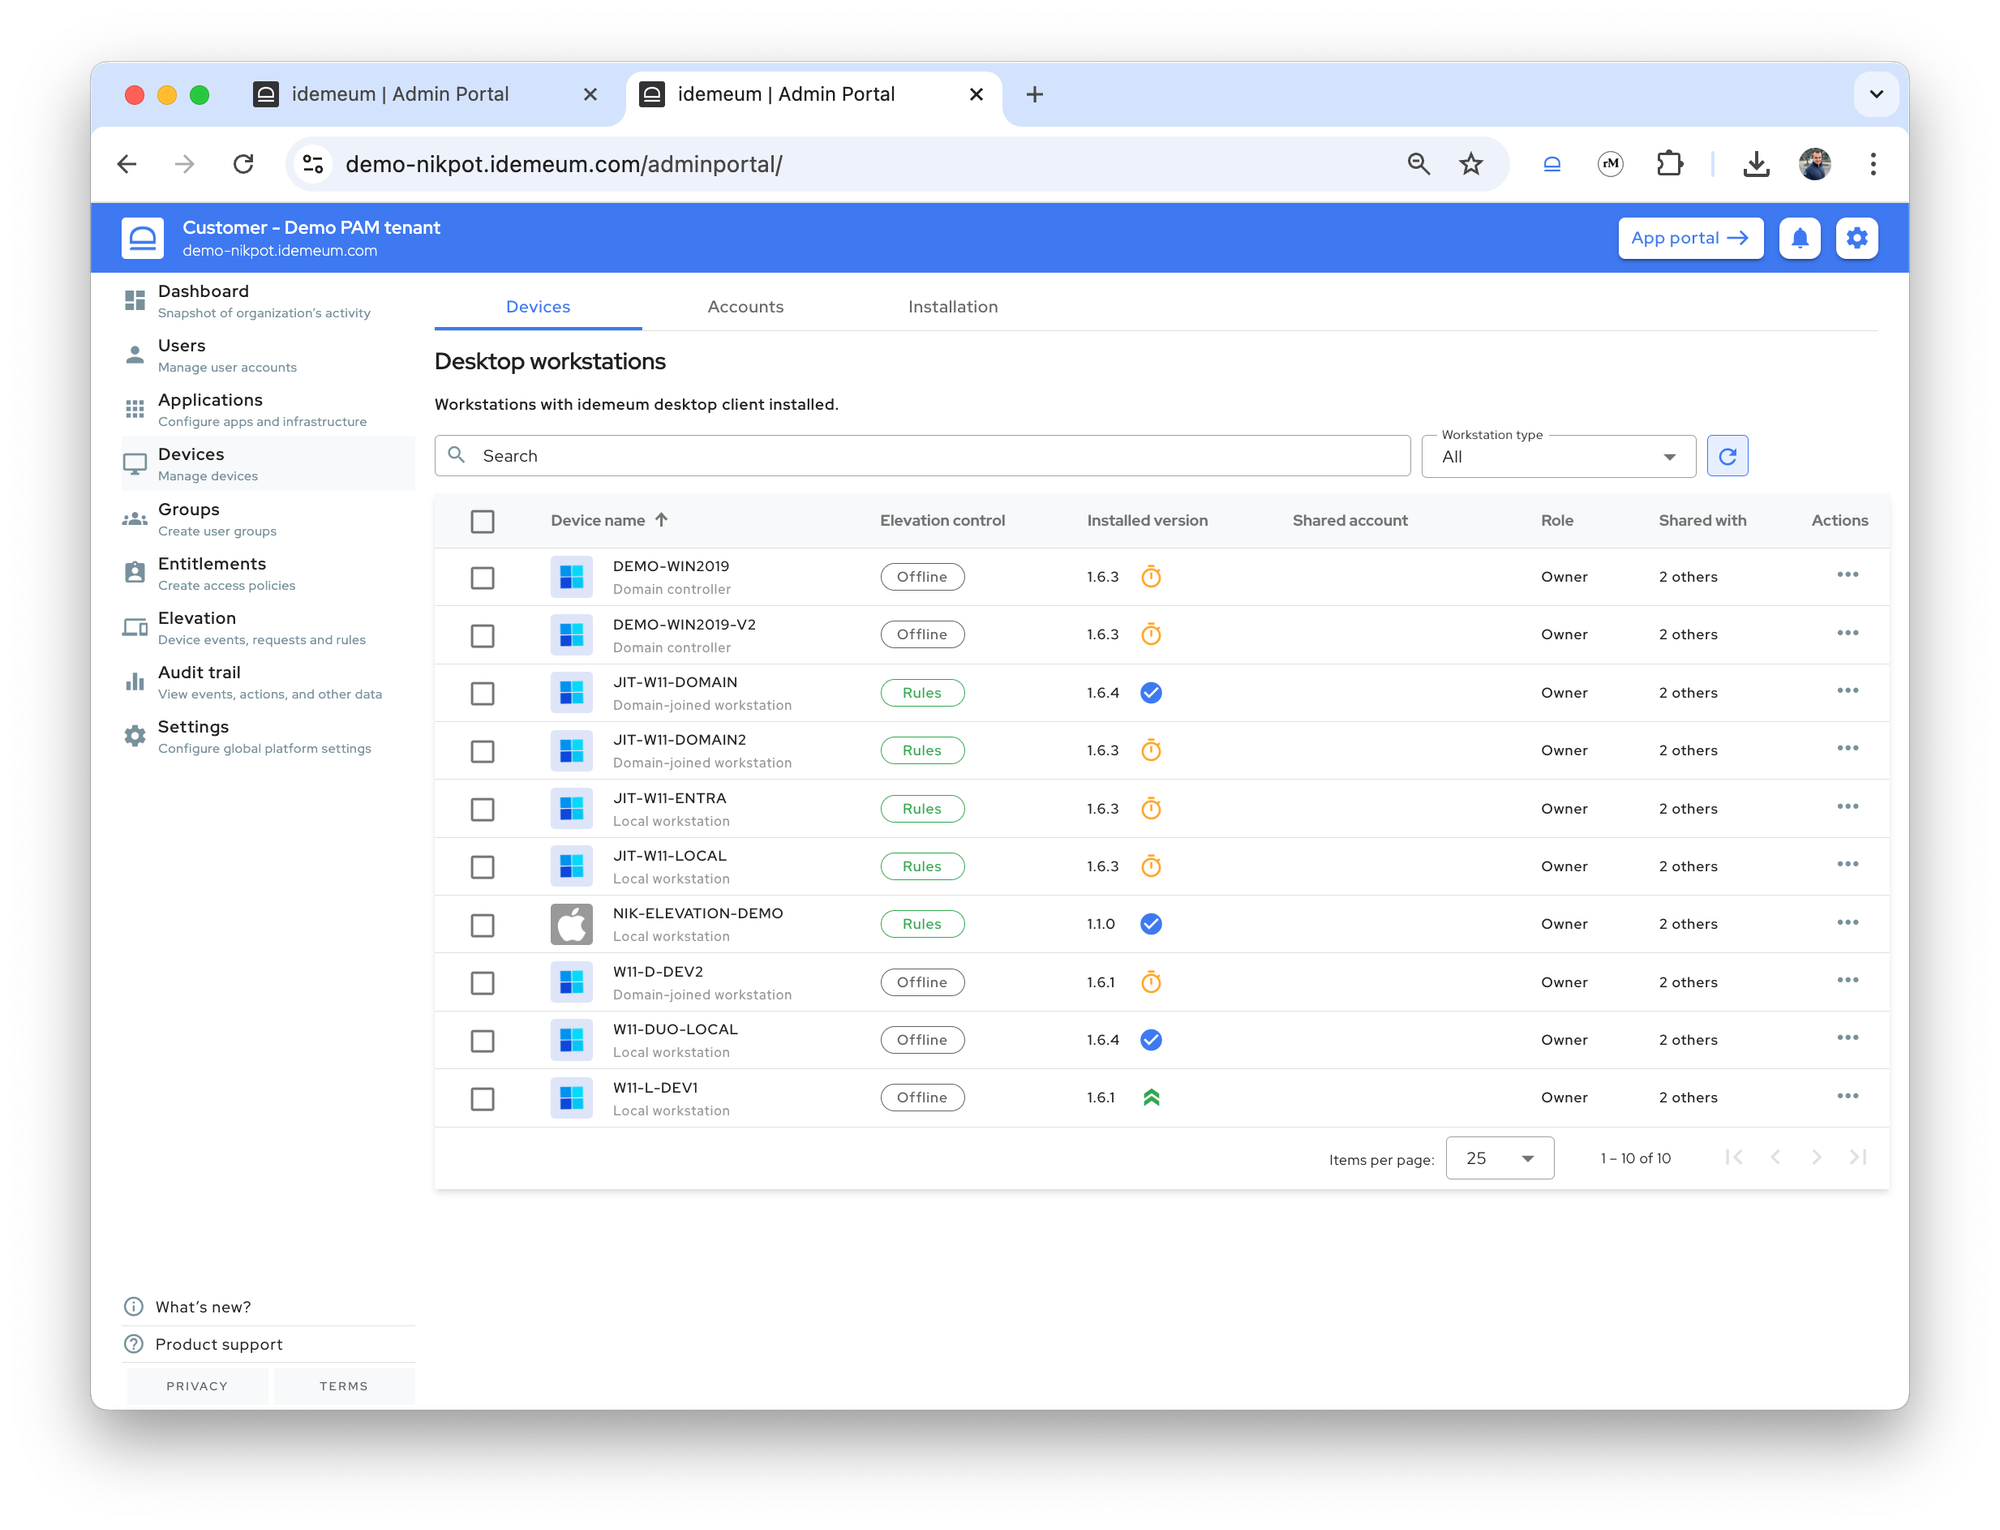
Once the agents are properly installed, they will start showing up in the Devices section.
Login with JIT account
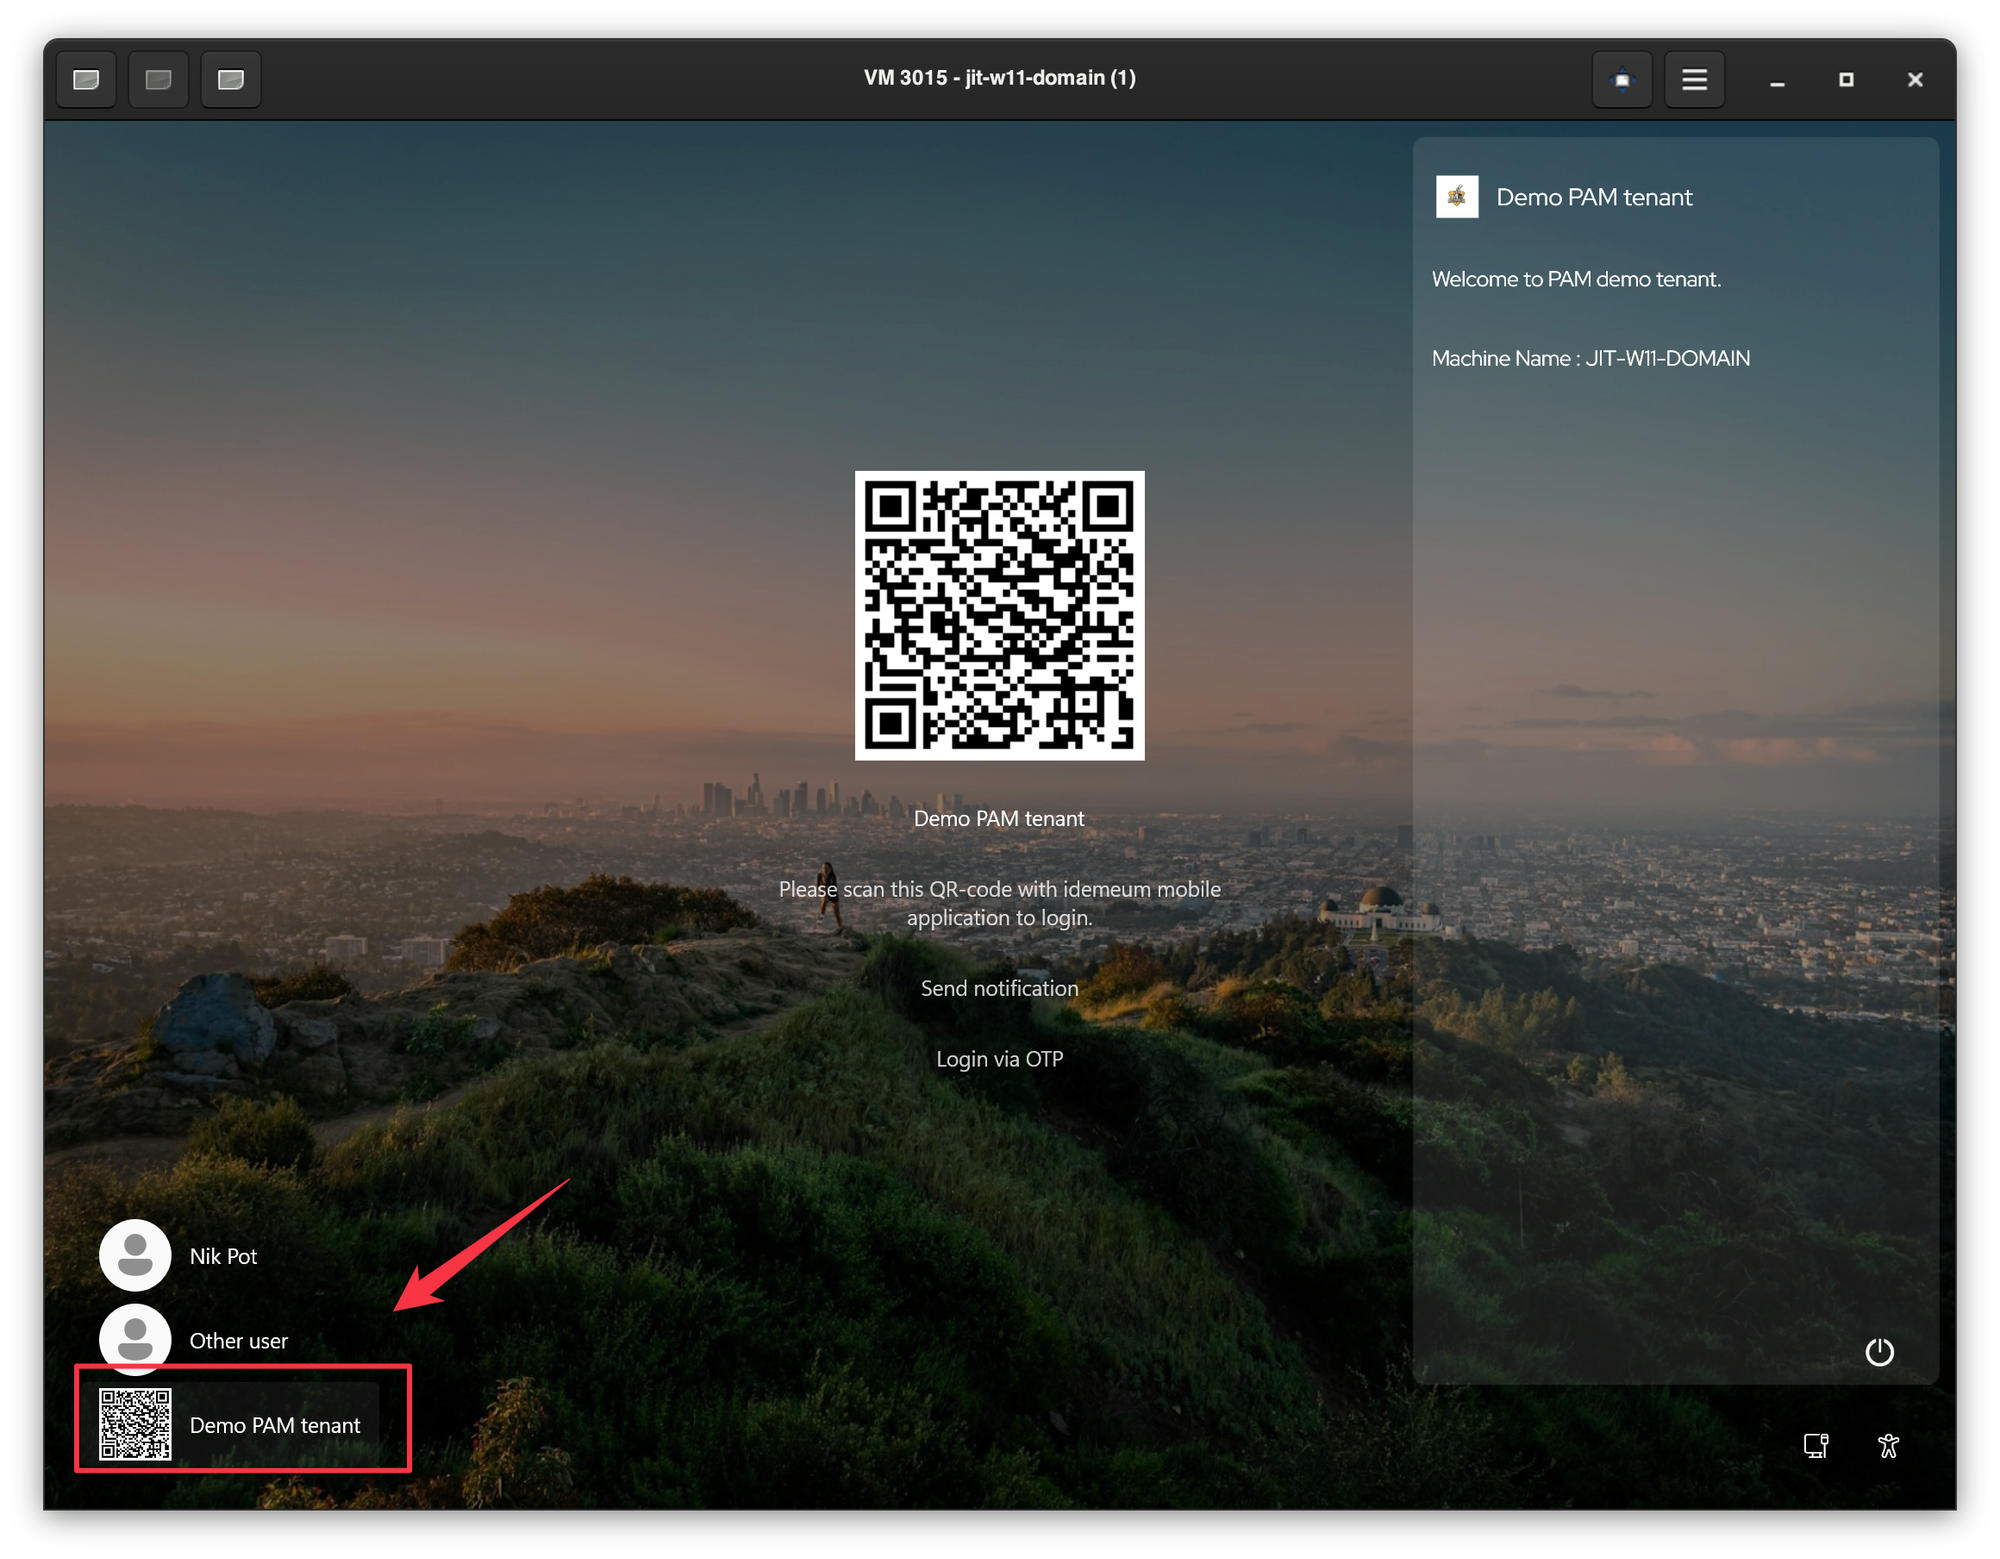
Now you can sign out of the workstation where idemeum agent is installed and test the just-in-time login flow.
- Click at the bottom left of the screen to load the idemeum QR-code
- Scan the QR-code with idemeum app and approve login
- You should be logged into computer with JIT account
Onboard technicians
You can also onboard more technicians so they can also login into computers with JIT accounts.
- Access the admin portal of your MSP tenant
- Navigate to
Users→User management - Click
Add user - Fill out the user information - first name, last name, and email address
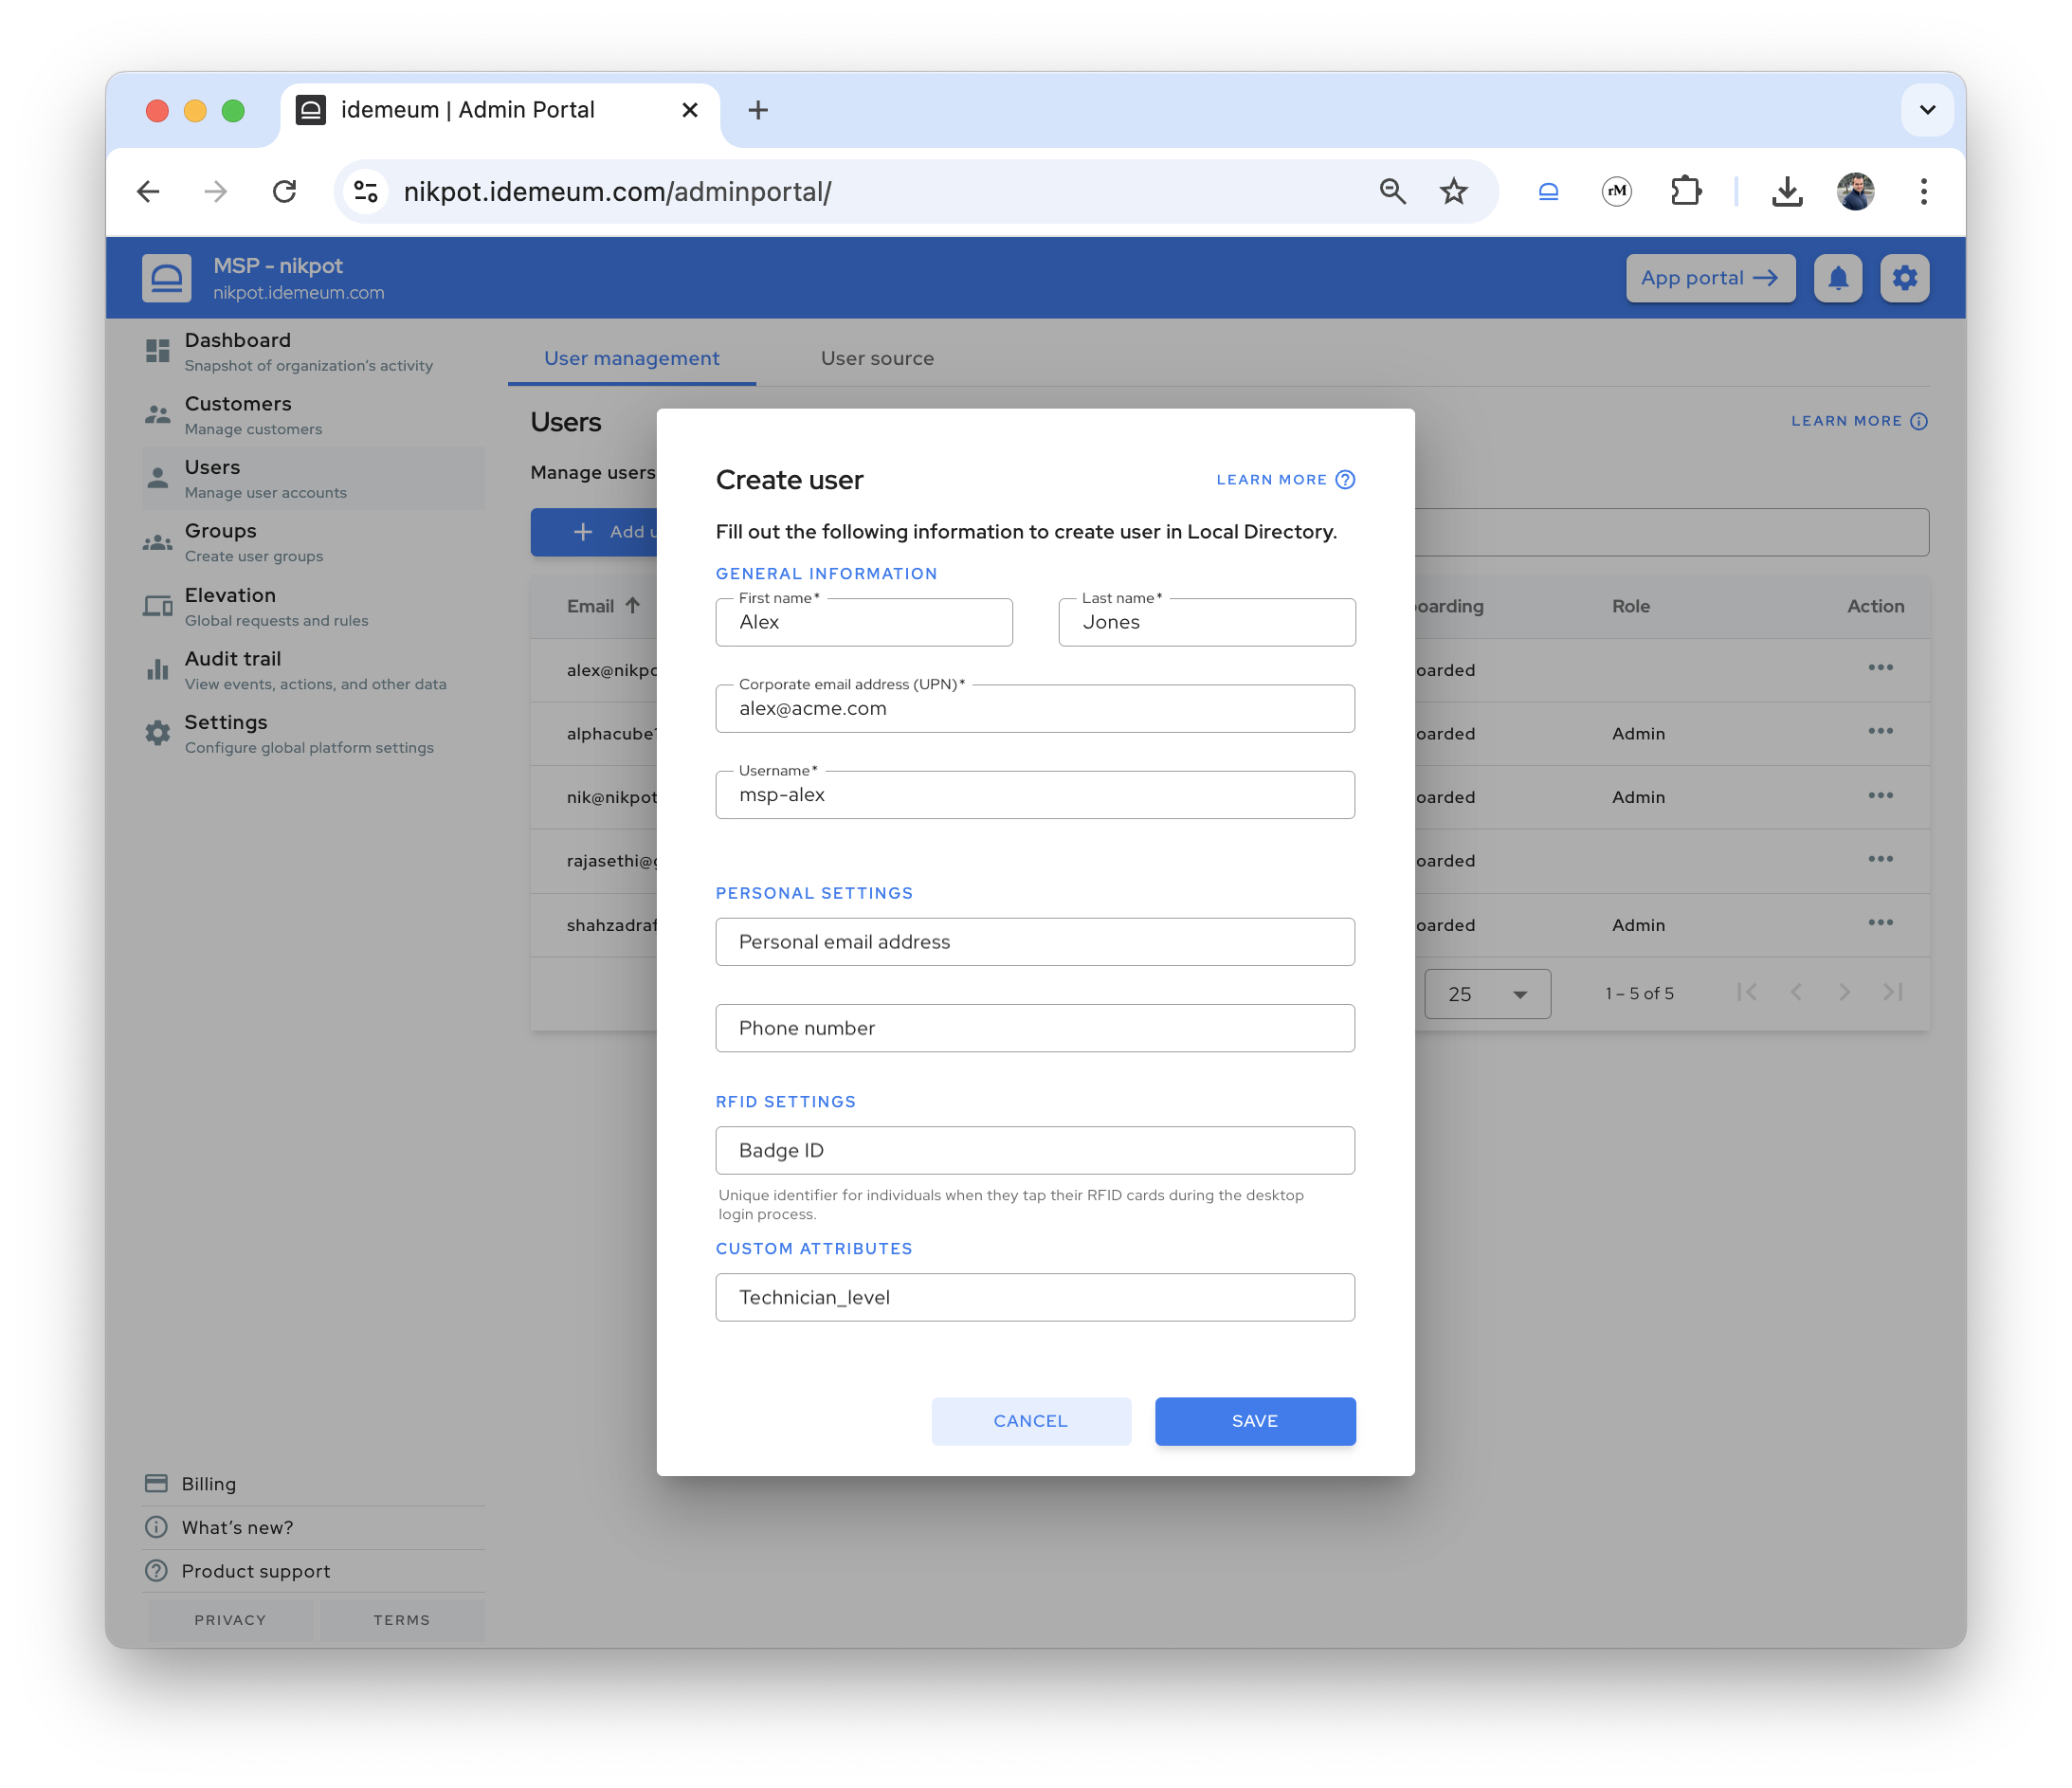
- Save the record
Now the user can onboard into idemeum with a mobile app. User will install idemeum mobile application, verify the same email address in the mobile app, navigate to your MSP tenant URL and scan the QR-code. Then user will be onboarded into your tenant.
Now you need to give the user permissions to access resources.
- You can make a user a global admin (full control of everything)
- Access
User managementmenu, find the user record, click on...and chooseMake admin
- Access
- You can delegate access to only certain customer tenants
- Access
Customersmenu, search for customer tenant, click on...and chooseDelegate admin
- Access
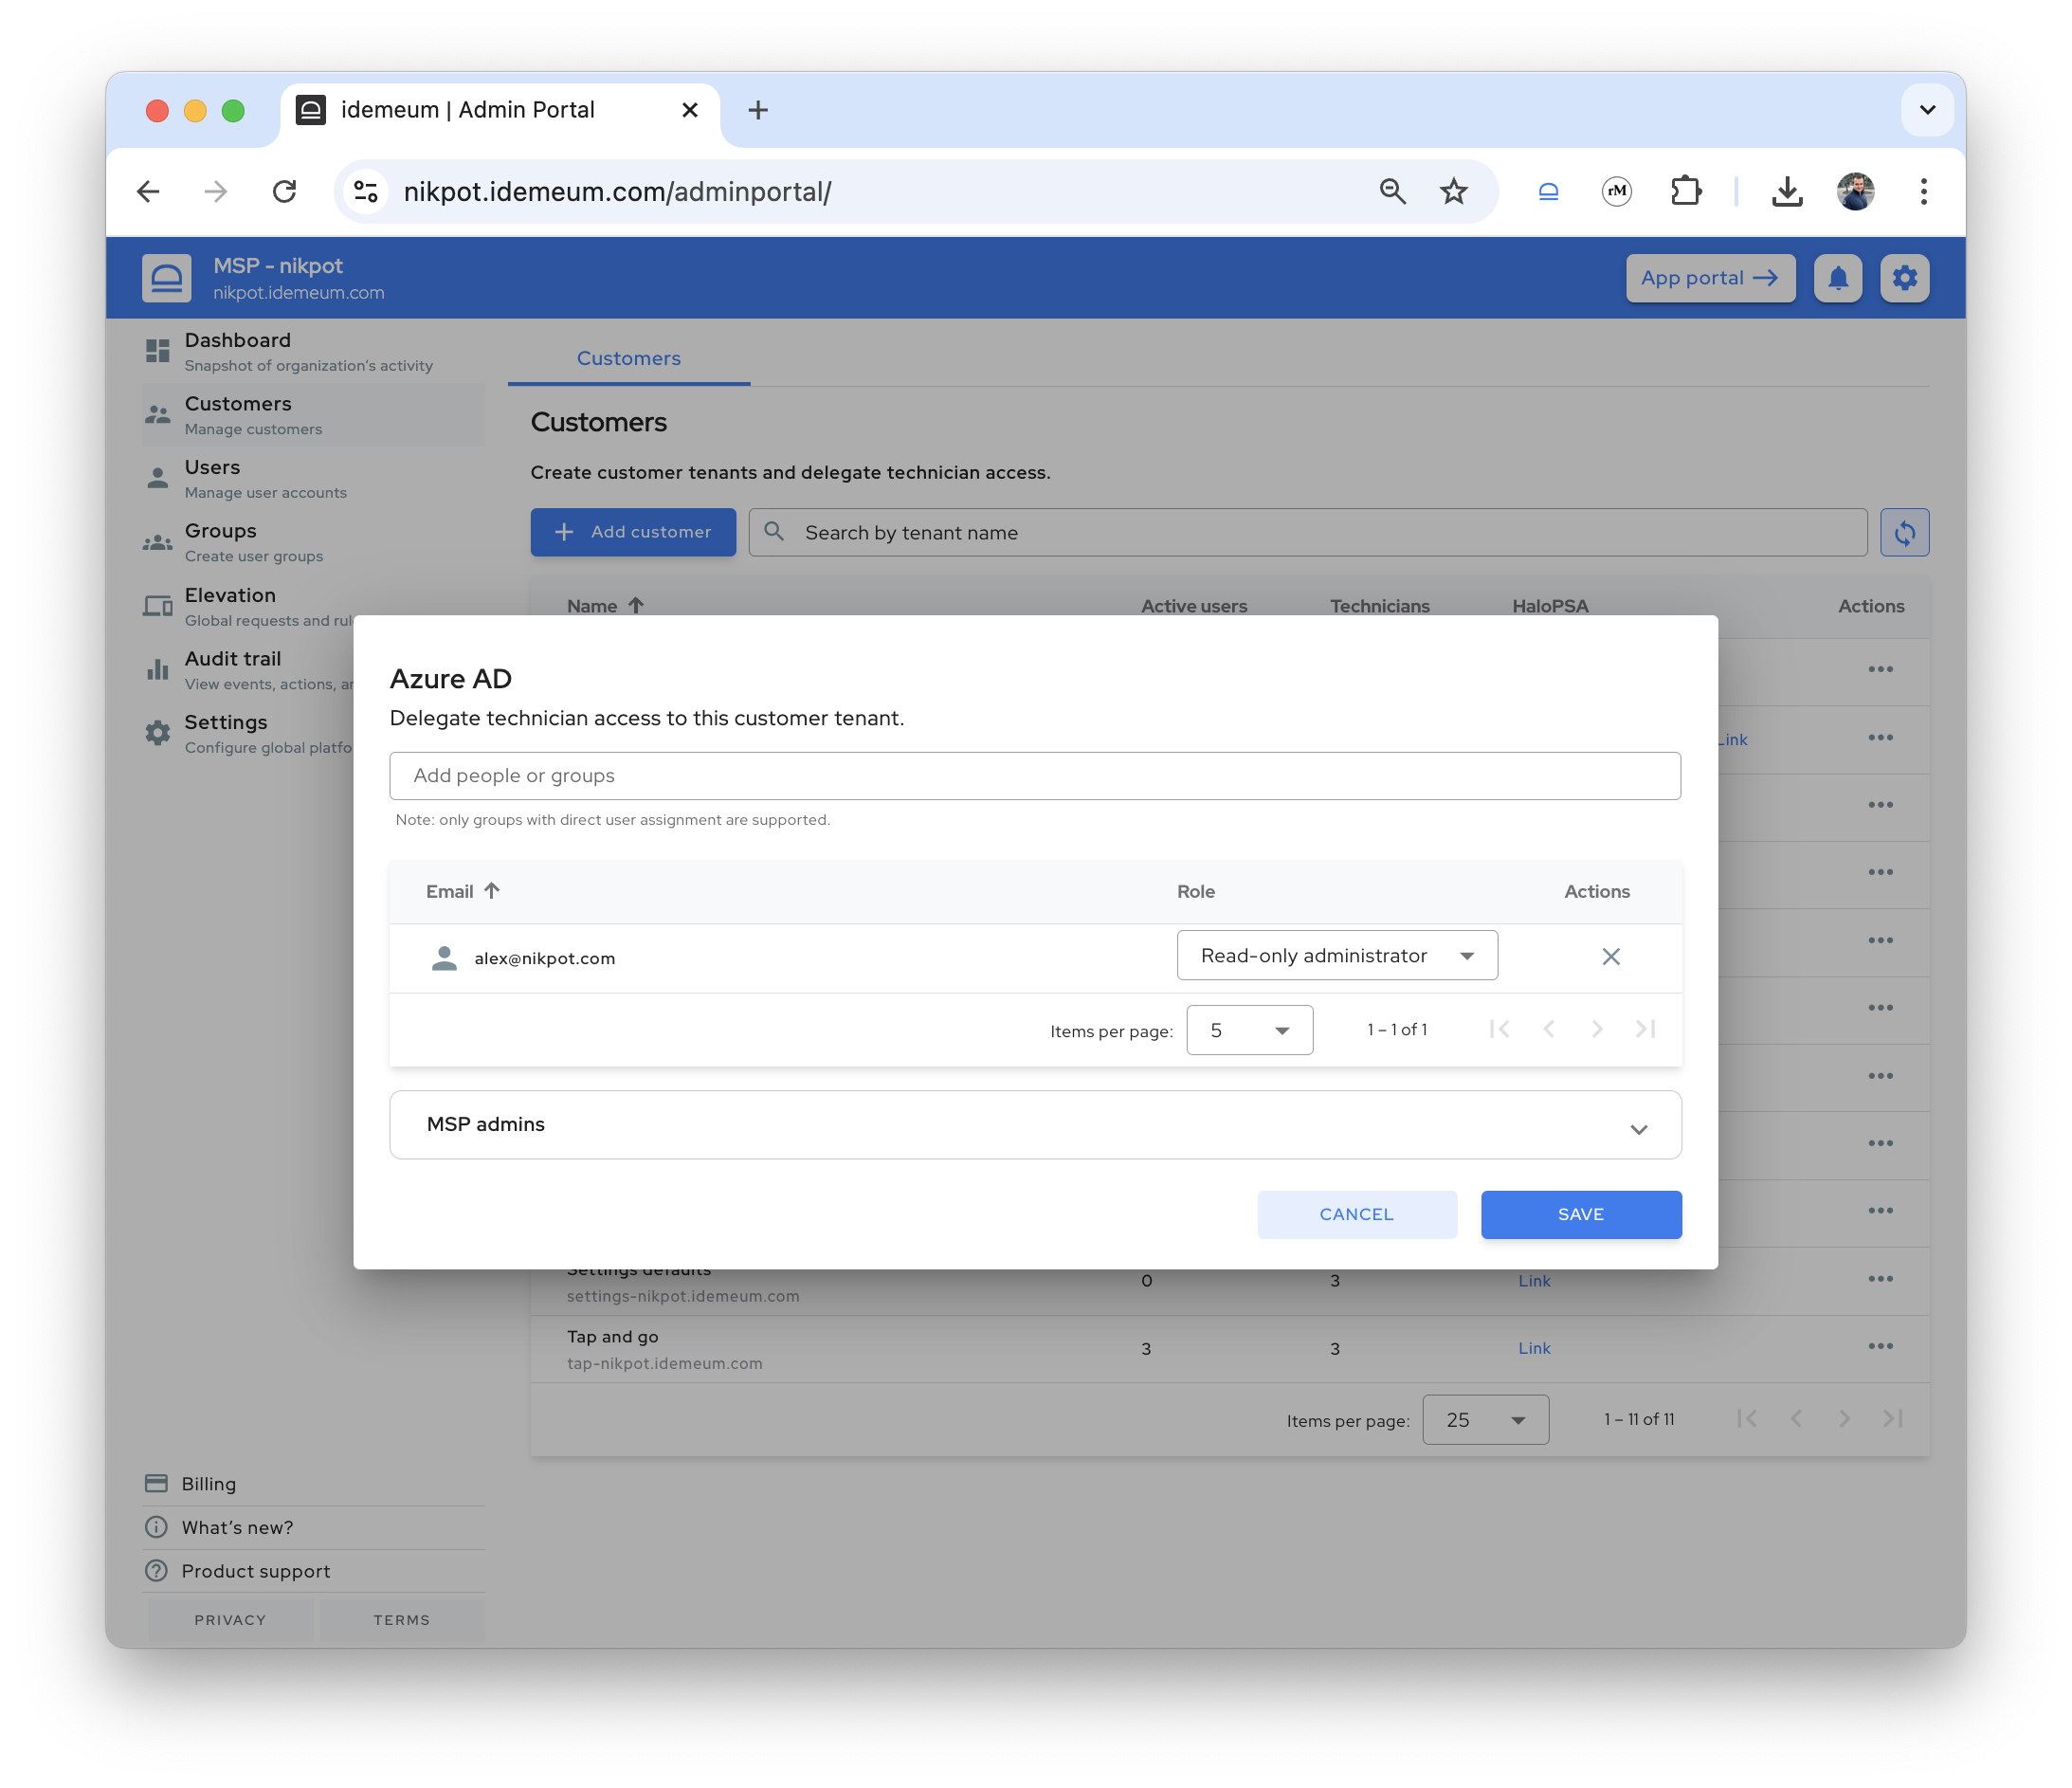
You can learn more about access delegation below.

Questions?
If you have any questions please join our Discord chat, and we will help.
